


For most avid Twitch streamers, one of the most dreaded errors they could bump into is the black screen.
There’s often a combination of causes for this nuisance, but with this guide, you can navigate your way down the list of solutions, until you get to the root of the problem and find the one that works for you.
Table of contents
Fix 1: Restart your network devices
Twitch may go black if it loses its connection. Chances are you have a weak internet connection that doesn’t provide enough bandwidth for Twitch to stream properly. So the first thing we should look into is your network devices, which could become overflooded with cache if you have kept them on for too long a while.
In this fix, you can restart your network devices, allowing them to flush out cached memory and cool off.
Here’s how you go about it:
- Unplug your modem (and your router, if it’s a separate device) from the power socket.
 (a modem)
 (a router)
 - Wait 60 seconds for your modem (and your router) to cool off.
- Plug the network devices back in again and wait until the indicator lights are back to the normal state.
- Restart your computer.
- Start streaming in Twitch and see if the black screen issue is resolved. If yes, then congrats! If the black screen persists, please try Fix 2, below.
Fix 2: Change your DNS settings
DNS, or Domain Name System, is like the phonebook of the internet. It is a network component that matches the user-friendly domain names with the numberical format the computer recognizes (IP address). By default, you’re using the DNS server supplied by your ISP as the gateway to the web, but the server may be slow or ill-configured for caching, which effectively slows your internet connection.
To rule this out as a possible cause, you can change to Google public DNS (8.8.8.8 and 8.8.4.4) to see if it helps with the connection.
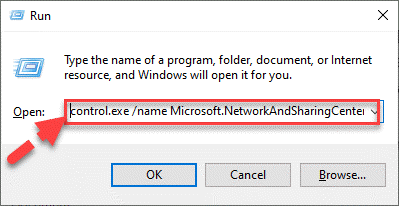
- On your keyboard, press the Windows logo key and R at the same time, then type control.exe /name Microsoft.NetworkAndSharingCenter and press Enter.
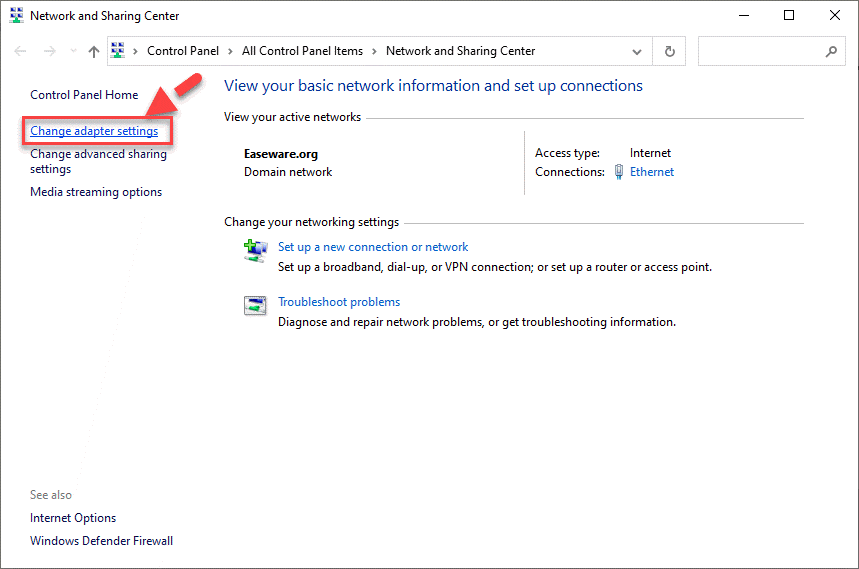
- In the window that pops up, click Change adapter settings.
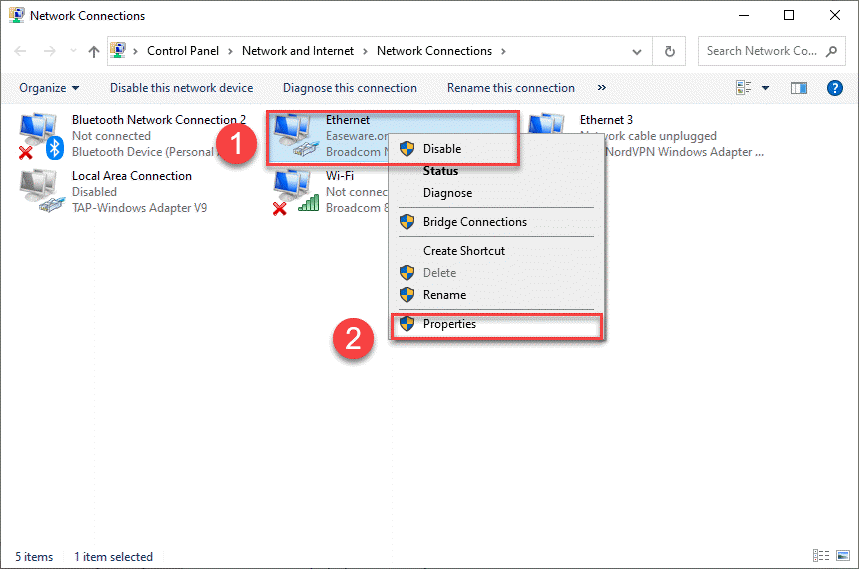
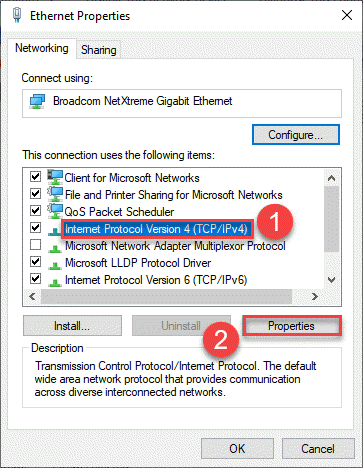
- Right-click on your network adapter, and select Properties.
- Click Internet Protocol Version 4 (TCP/IPv4) > Properties.
- Choose the Use the following DNS server addresses option. For Preferred DNS server, type 8.8.8.8; and for Alternate DNS server, type 8.8.4.4. Click OK to save the changes.
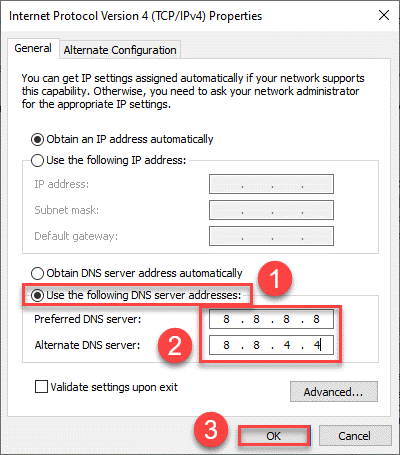
- Close the window.
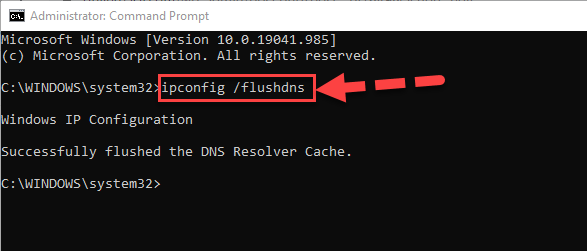
Next up, you can run the ipconfig /flushdns command for the changes to apply. Here’s how:
- On your keyboard, press the Windows Logo Key and type cmd. Then right-click Command Prompt when it comes up as a result and select Run as administrator.
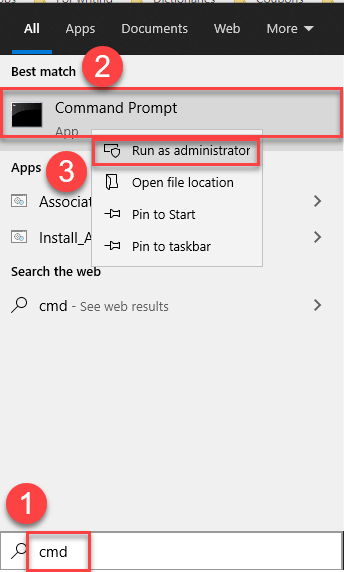
- When prompted for permission, click Yes to run Command Prompt.
- Type ipconfig /flushdns and press Enter on your keyboard.
- Test streaming in Twitch and see if the video is playing properly. If it’s no joy, please move on to Fix 3, below.
Fix 3: Update your graphics driver
A graphics driver is an essential piece of software program that enables your computer to work with your graphics hardware. If the driver is wrong, corrupt or outdated, you may experience a black screen. So you should update your graphics driver to see if it fixes your problem. If you don’t have the time, patience or skills to update the driver manually, you can do it automatically with Driver Easy.
Driver Easy will automatically recognize your system and find the correct drivers for it. You don’t need to know exactly what system your computer is running, you don’t need to be troubled by the wrong driver you would be downloading, and you don’t need to worry about making a mistake when installing. Driver Easy handles it all.
You can update your drivers automatically with either the FREE or the Pro version of Driver Easy. But with the Pro version it takes just 2 steps (and you get full support and a 30-day money back guarantee):
- Download and install Driver Easy.
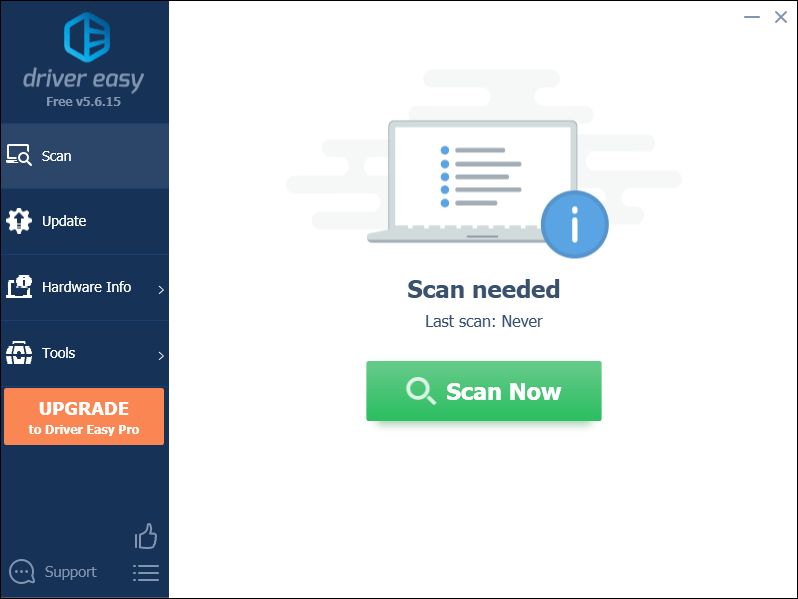
- Run Driver Easy and click the Scan Now button. Driver Easy will then scan your computer and detect any problem drivers.
- Click Update All to automatically download and install the correct version of all the drivers that are missing or out of date on your system (this requires the Pro version– you’ll be prompted to upgrade when you click Update All).
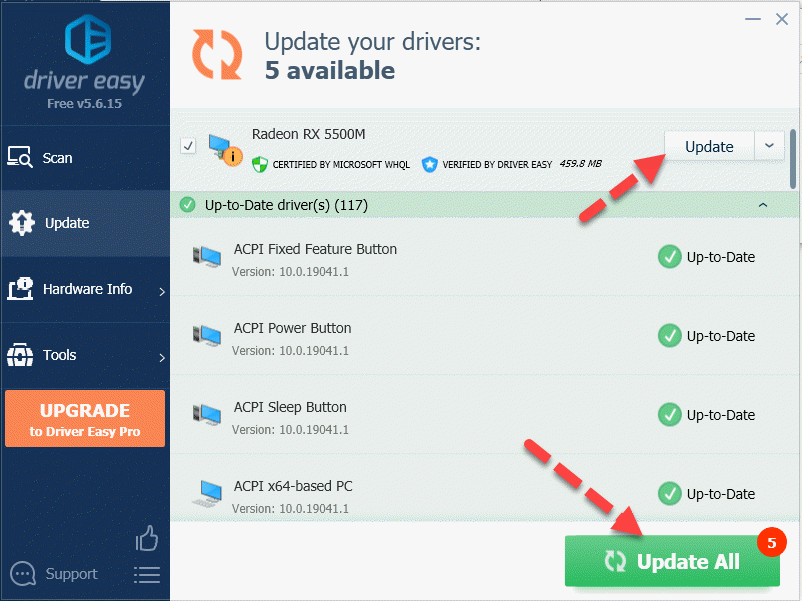
Note: You can do it for free if you like, but it’s partly manual. - Restart your computer for the changes to take effect.
- Open Twitch and check if the black screen issue is solved. If yes, then great. If it still doesn’t cut it, please head on to Fix 4, below.
Fix 4: Clear cache and cookies
Browsers save files and data so that next time the same information can load up faster. However, overtime, the cached data may have gone wrong, corrupt or outdated, causing the video to not load in Twitch. You can try clearing cache and cookie in your web browser and see how it goes.
Clear cache and cookies in Google Chrome:
- Open Google Chrome.
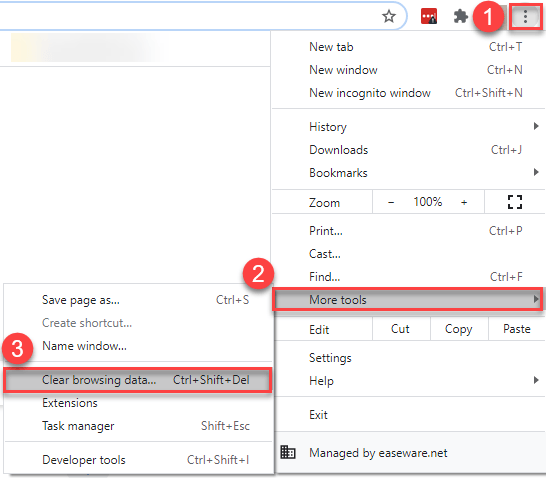
- In the top right corner of your screen, click the three-vertical-dots icon > More tools > Clear browsing data….
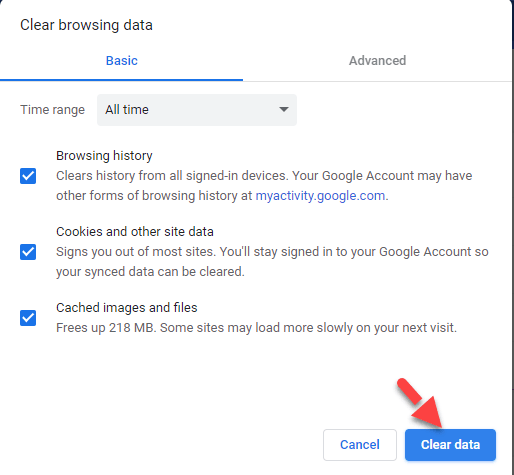
- Click Clear data.
- Restart Google Chrome.
- Open Twitch and see if you can play the streaming content properly. If it still doesn’t do the trick, please continue with Fix 5, below.
Clear cache and cookies in Firefox:
- Open Firefox.
- Click the menu button > Options.

- In the left panel, choose Privacy & Security, then in the right, scroll down to Cookies and Site data section and click Clear Data….

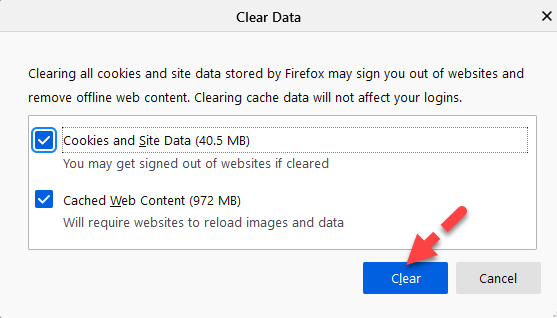
- Make sure both boxes for the data items are checked and click Clear.
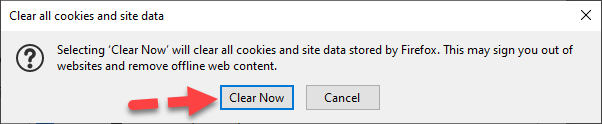
- Click Clear Now to confirm.
- Restart Firefox.
- Open Twitch, and see if you can play the streaming content properly. If it still doesn’t do the trick, please continue with Fix 5, below.
Fix 5: Disable browser extensions
You may encounter black screen in Twitch because of browser add-on conflict. To rule out this as a possible cause, you can disable all browser extensions and check if Twitch streamly normally – if yes, then you can employ the 50% rule – enabling half of the extensions once at a time to isolate the offender.
If disabling browser extensions doesn’t help with the situation, please try the next fix, below.
Fix 6: Switch in or out of hardware acceleration
Hardware acceleration refers to the process where a software program pass off computing tasks to special hardware, allowing greater efficiency for those graphics-demanding tasks than the software running on the CPU alone
It may sound contradictory, but for some computers, the feature has fulfilled the purpose of greater performance but for others, turning it off might be better.
In this fix, you can check whether you have it on or off and switch to the opposite to see if the issue is resolved.
Enable or disable hardware acceleration in Google Chrome:
- Open Google Chrome.
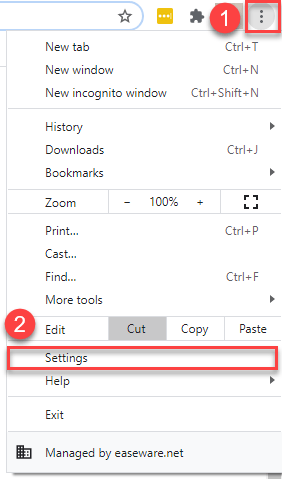
- Click the three-vertical-dots icon, then select Settings.
- Scroll down to the bottom and click on Advanced to expand the advanced settings section.
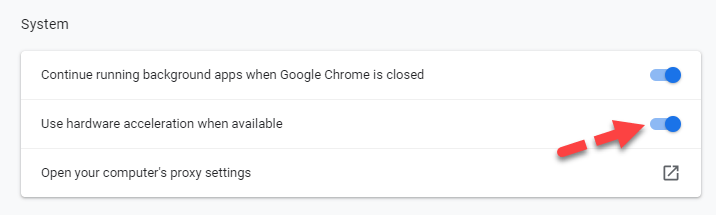
- In System, switch the toggle for Use hardware acceleration when available.
- Exit Chrome.
- Launch Chrome, then test if Twitch can stream the content properly. If yes, then great. If it’s still giving black screen, please try Fix 7, below.
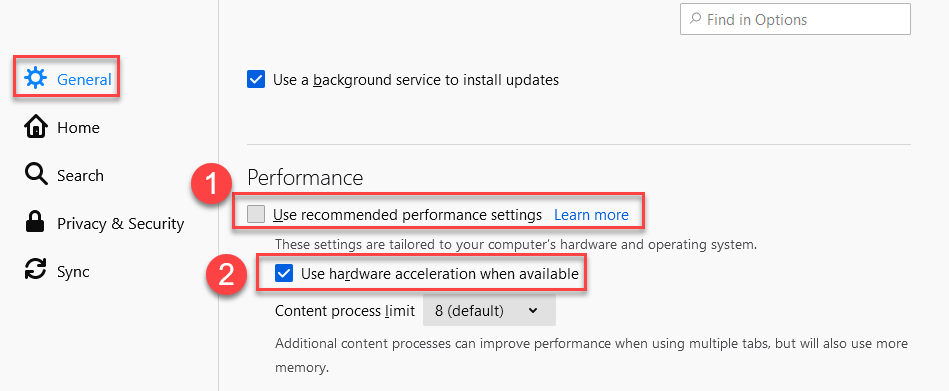
Enable or disable hardware acceleration in Firefox:
- Open Firefox.
- Click the menu button > Options.
- In General, uncheck the Use recommended performance settings box to expand the section, then for the Use hardware acceleration when available box, choose the opposite.
- Exit Firefox.
- Launch Firefox, then test if Twitch can stream the content properly. If yes, then great. If it’s still giving black screen, please try Fix 7, below.
Fix 7: Is it a server issue?
If you’ve exhausted all the fixes above but Twitch is still showing black screen, perhaps it’s time to check the server status for Twitch. It is possibe that the servers have been taken down for performance maintenance or bug patches. If this is indeed the case, then there is not much you can do but wait for the developer staff to do their thing and restore the servers.
That’s the end of this post. Hopefully it has pointed you in the right direction in fixing the black screen in Twitch issue. If you have any questions, ideas or suggestions, you’re more than welcome to leave us a comment below.