


Twitch is the world’s leading live-streaming platform. But users report that the error 4000 resource format not supported appears while watching a stream. If you happened to be one of them, don’t worry. Here are some simple fixes for you.
Try these fixes:
You might not need to try them all; simply work your way down the list until you find the one that works for you.
- Use the Twitch popout player
- Clear cache and cookies
- Flush the DNS cache
- Disable browser extensions
- Use the incognito mode
- Close other active media players
- Set your audio device as the default device
- Update your audio and graphics drivers
- Remove audio hardware
- Switch to the Twitch desktop app
Before getting started
Before taking any attempts to fix Twitch Error 4000, you should try refreshing the stream. Sometimes the computer might be disconnected from the Internet and a simple page refreshing could fix the issue.
To refresh the stream, you can simply click on the Reload this page icon on the top left of the window by the address bar.

Fix 1: Use the Twitch popout player
Twitch popout player is a feature set to meet the players’ multitasking heart desires. While for error 4000, using the popout player can be a temporary quick fix.
To enable the feature, you can
1) In the bottom right corner of the video player, click on the cog icon.

2) Select Popout Player.

Till then, you’re supposed to be able to watch the streaming with the popout player. If this doesn’t work for you, try the next fix.
Fix 2: Clear cache and cookies
There are times that cache and cookies become corrupt, which may prevent you from loading the pages. So clearing them can fix the issue.
To clear cache and cookies, simply click on the internal links based on the browser you’re using to access Twitch and follow the instructions.
Google Chrome
Firefox
Microsoft Edge
Internet Explorer
In Chrome
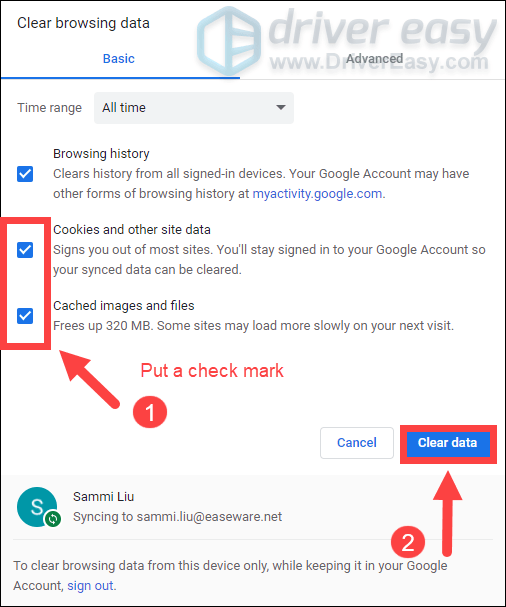
1) Open Chrome and press Ctrl + Shift + Delete together on your keyboard.
2) When the Clear browsing data window appears, make sure that options Cookies and other site data & Cached images and files are checked. After that, click Clear data.
After clearing the data, reload your streaming page and check if it fixes the issue. If not, move on to the next fix.
In Firefox
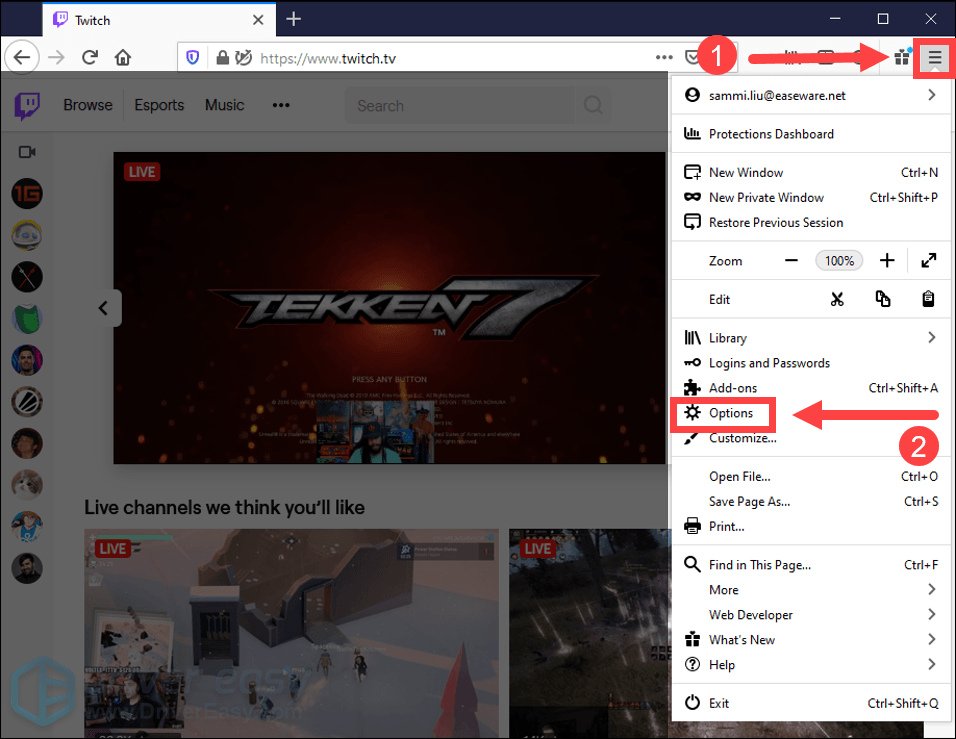
1) In the top right corner, click on the Open menu button (three lines) and select Options.
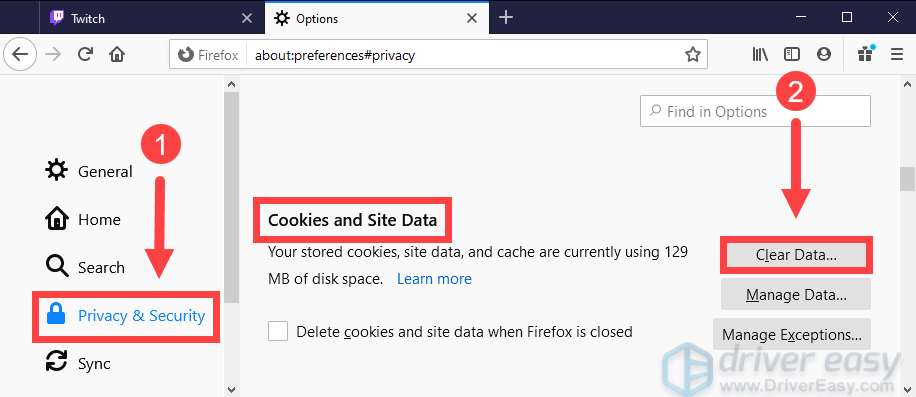
2) Select Privacy & Security on the left panel. Scroll down to the Cookies and Site Data section, click Clear Data….
After clearing the data, reload your streaming page and check if it fixes the issue. If not, move on to the next fix.
In Edge
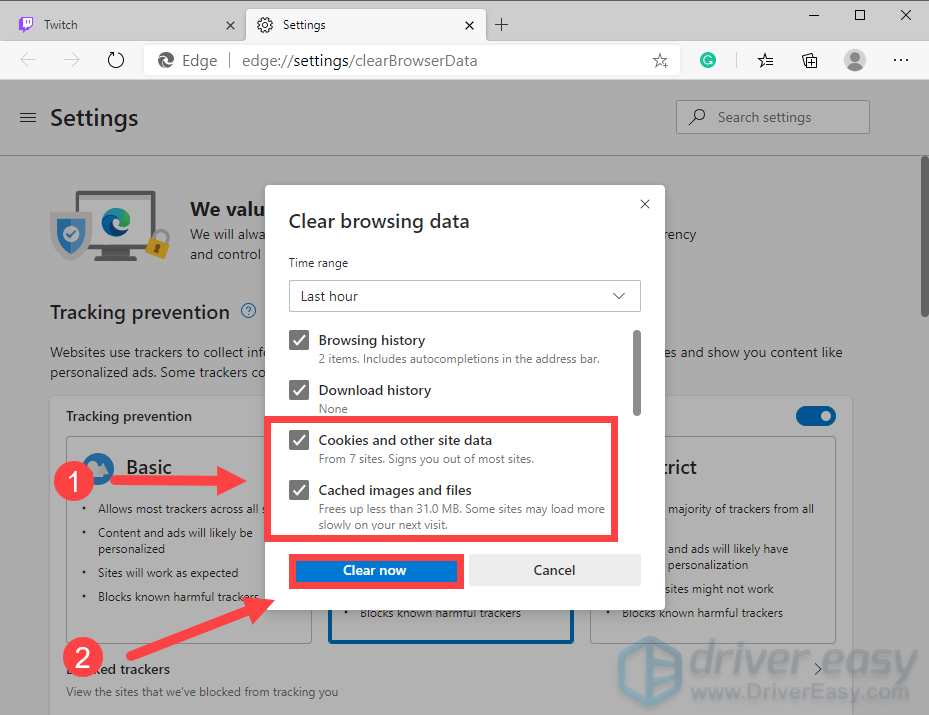
1) Open Edge and press Ctrl + Shift + Delete together on your keyboard.
2) When the Clear browsing data window appears, make sure options Cookies and other site data & Cached images and files are checked. Then click Clear now.
(For the Time range, you can choose All time or whatever you want. You can do this by clicking the drop-down menu.)
After clearing the data, reload your streaming page and check if it fixes the issue. If not, move on to the next fix.
In Internet Explorer
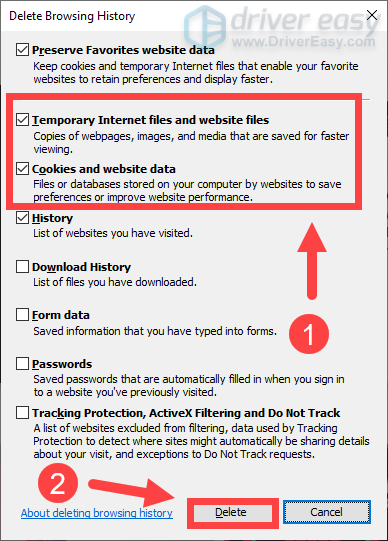
1) Open Internet Explorer and press Ctrl + Shift + Delete together on your keyboard.
2) When the Delete Browsing History window appears, make sure options Temporary Internet files and website files are checked. Then click Delete.
After clearing the data, reload your streaming page and check if it fixes the issue. If not, move on to the next fix.
Fix 3: Flush the DNS cache
If clearing the cache and cookies doesn’t fix the issue, clearing your DNS may help.
To do this, simply follow the instructions below:
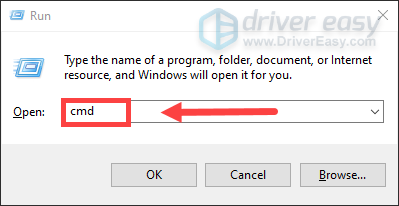
1) Press Windows logo key + R together on your keyboard. Type cmd and press Shift + Ctrl + Enter at the same time.
2) When the window Do you want to allow this app to make changes to your device appears, click Yes.
3) Type the command ipconfig /flushdns and hit Enter.
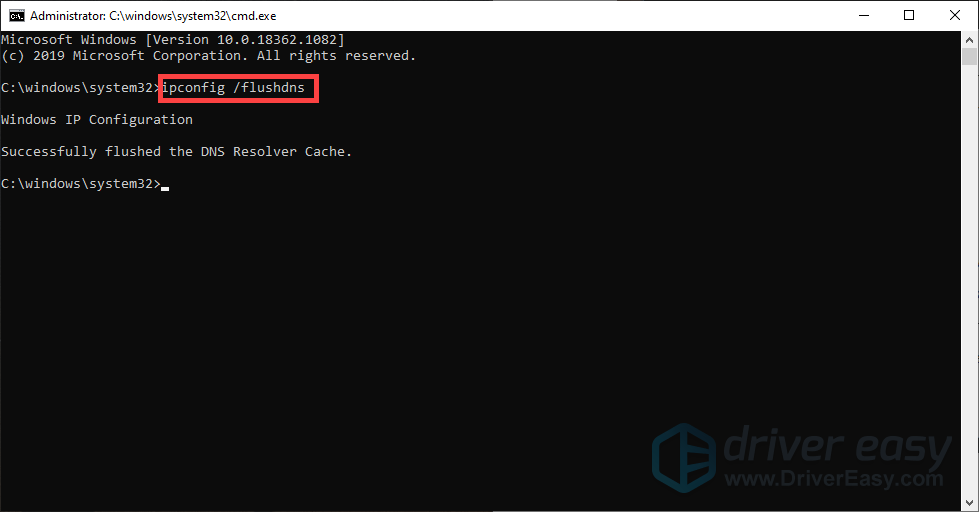
After successfully clearing your DNS cache, try visiting the website again and see if that solves the problem.
Fix 4: Disable browser extensions
Extensions or add-ons might be interfering with your player. So you’re supposed to disable them if you have the error code appearing on the screen.
To disable the extensions on your browser, click the link below based on the browser you’re using and follow the steps.
Google Chrome
Firefox
Microsoft Edge
Internet Explorer
In Chrome
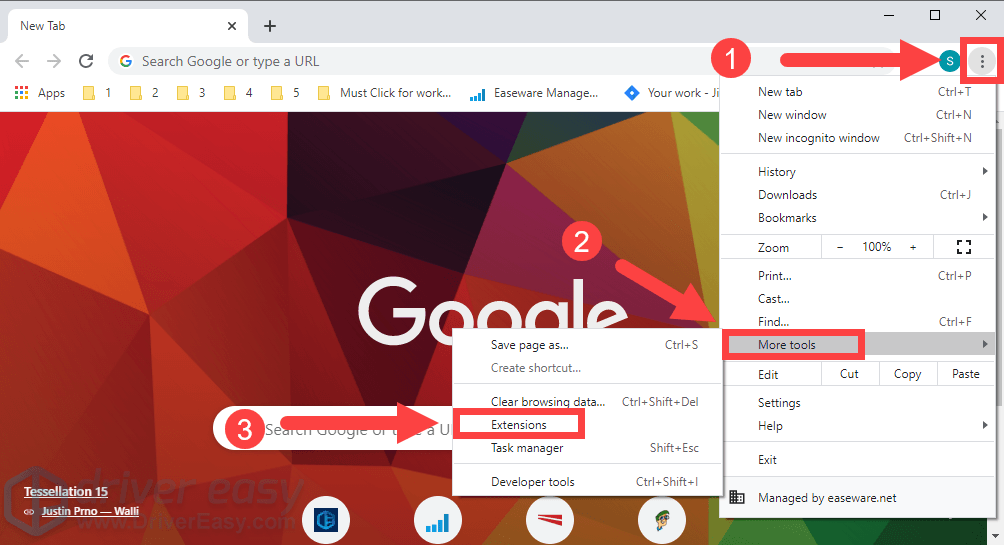
1) In the upper right corner of the window, click on the three dots icon and select More tools > Extensions.
2) To disable an extension, click the blue toggle switch so that it will turn gray.
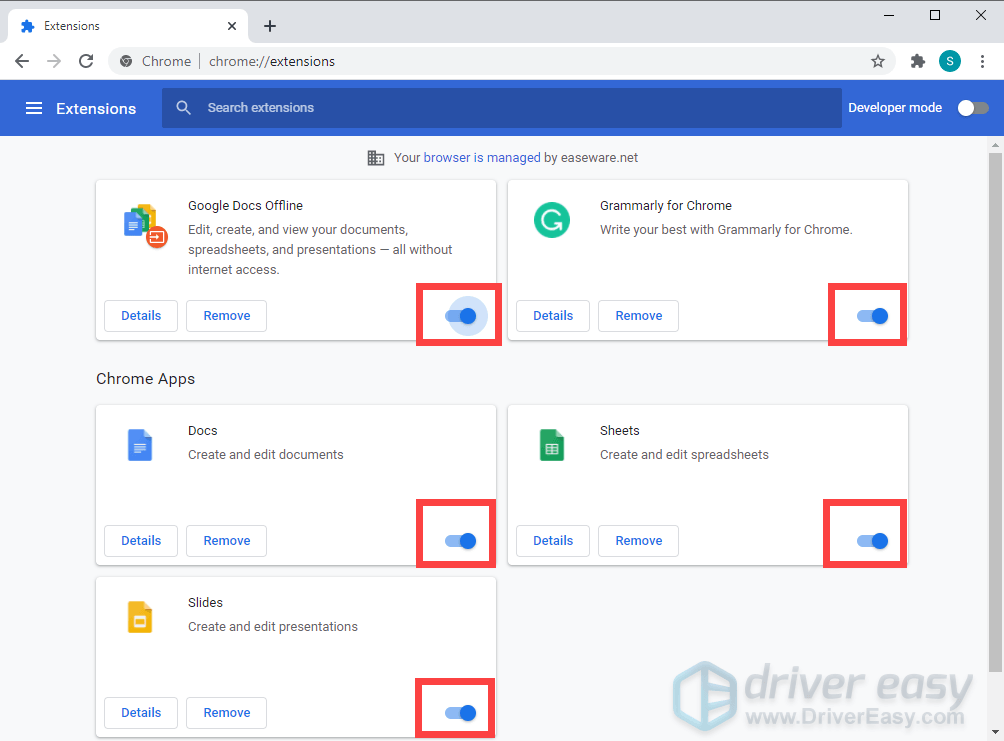
After that, go back to your streaming and refresh the page to see if it solves the problem. If not, try the next fix.
In Firefox
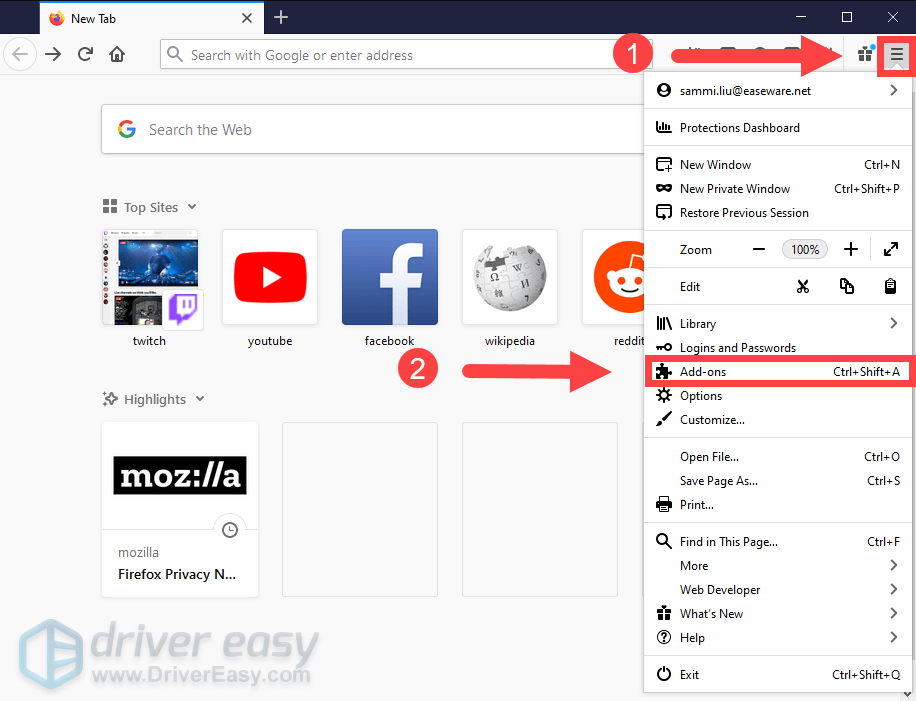
1) In the upper right corner, click on the Open menu button (three lines) and select Add-ons.
2) On the left pane, click Extensions. Under the Manage Your Extensions section, click the blue toggle switch so that it will turn gray.
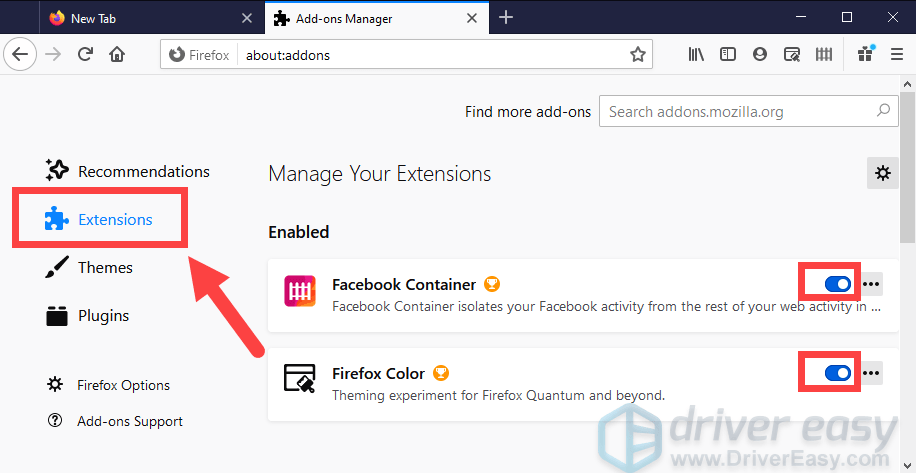
After that, go back to your streaming and refresh the page to see if it solves the problem. If not, try the next fix.
In Edge
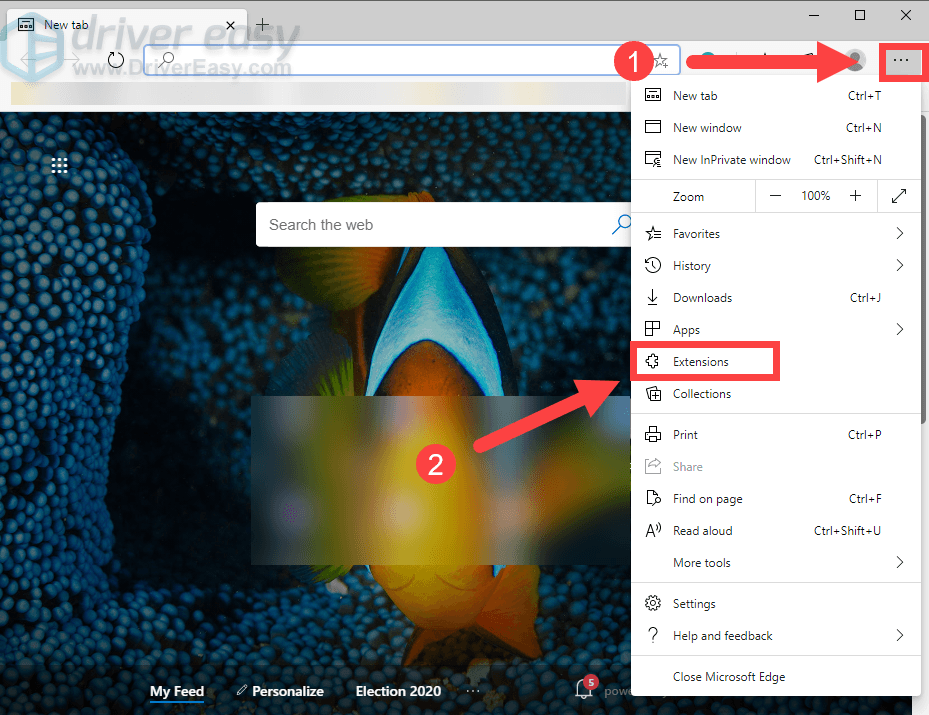
1) In the upper right corner, click on the three dots icon and select Extensions.
2) Under the Installed extensions section, click the blue toggle switch so that it turns gray.
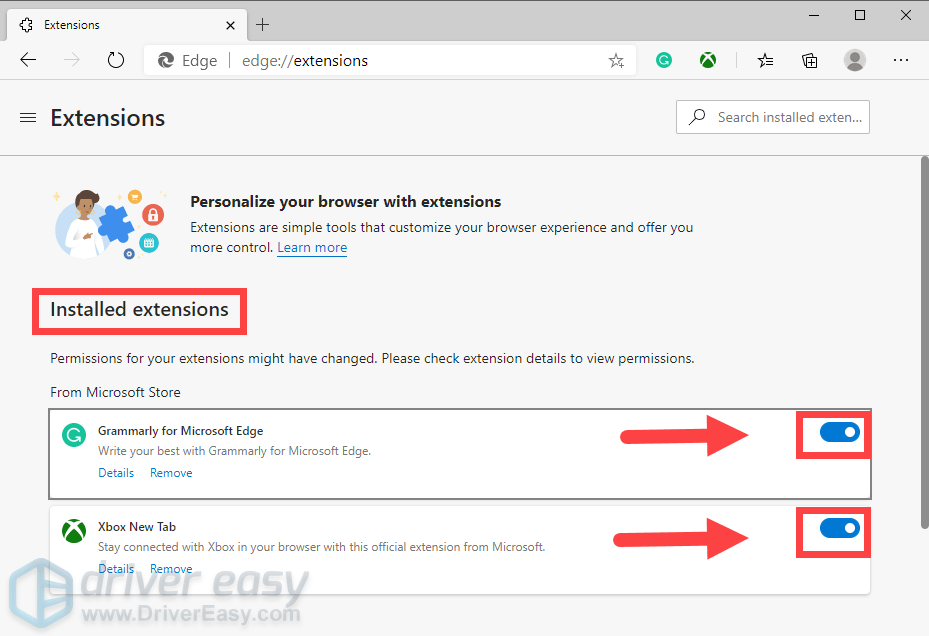
After that, go back to your streaming and refresh the page to see if it solves the problem. If not, try the next fix.
In Internet Explorer
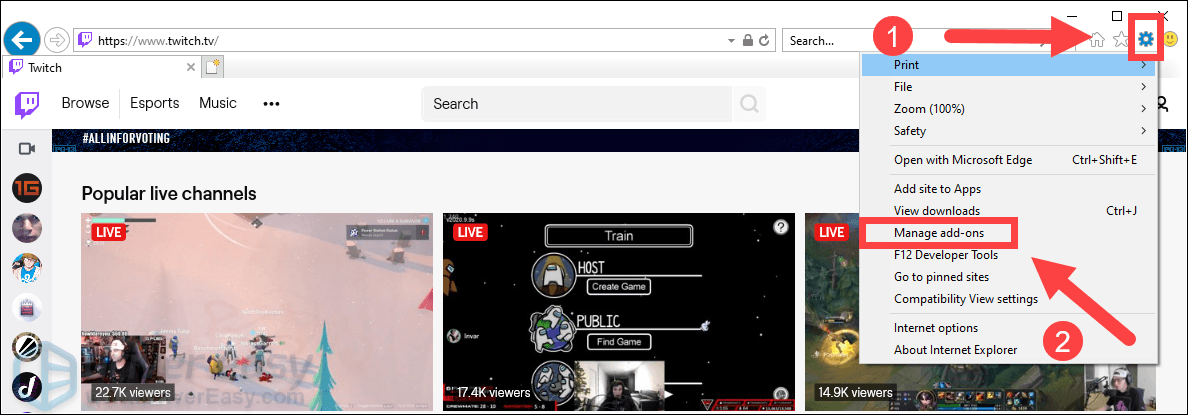
1) Click on the Tools icon and select Manage add-ons.
2) Under the Toolbars and Extensions section, click on the add-on you want to disable and click Disable.
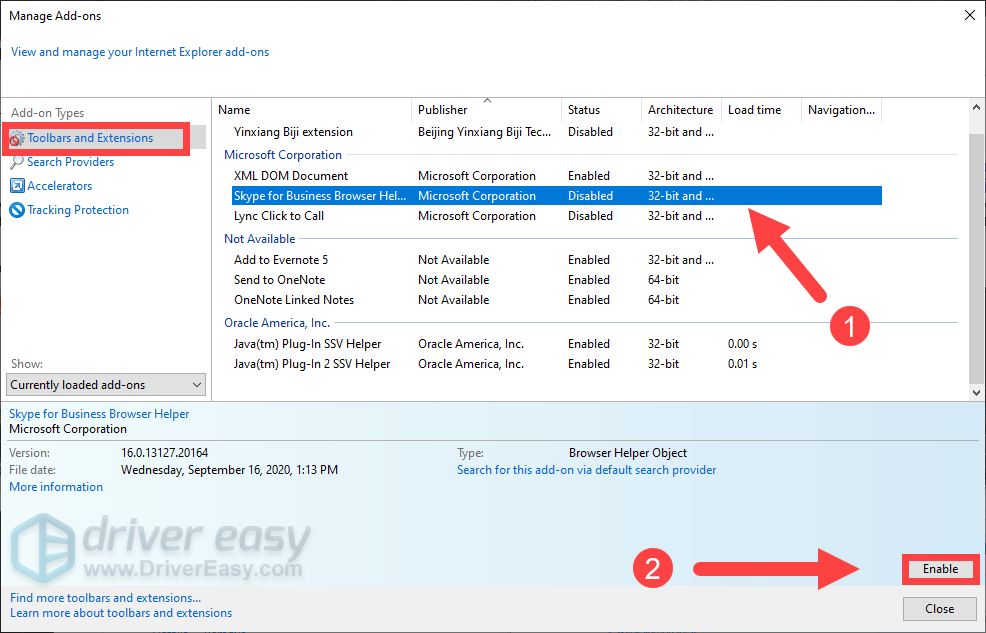
After that, go back to your streaming and refresh the page to see if it solves the problem. If not, try the next fix.
Fix 5: Use the Incognito mode
Private browsing can let you surf the internet without the browser tracking your activities. And this might fix the error 4000.
To do this, you can click on the link below based on the browser you’re using to watch the streaming.
Google Chrome
Firefox
Microsoft Edge
Internet Explorer
In Chrome
In the upper right corner, click on the three dots icon > New incognito Window.
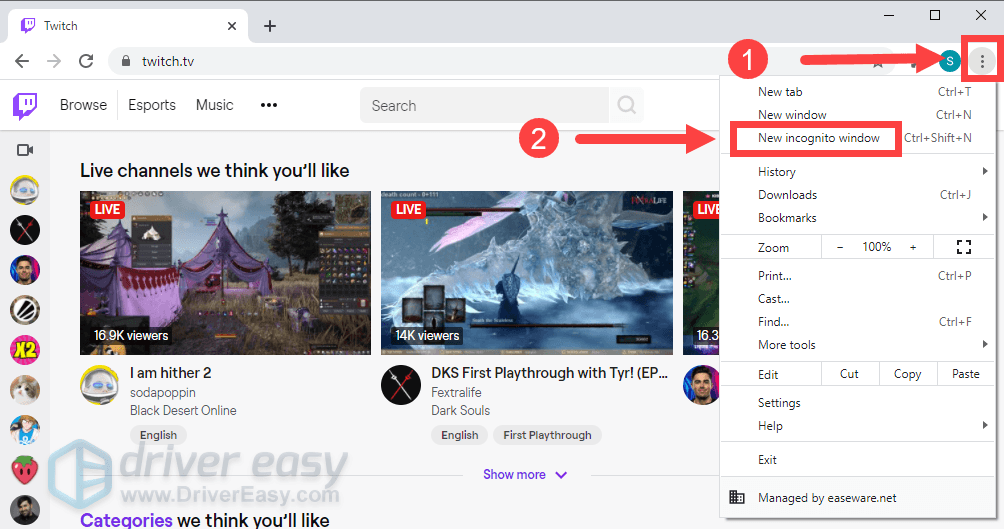
If you still can’t get rid of the error code after using the incognito mode, move on to the next fix.
In Firefox
In the upper right corner, click on the Open menu button (three lines) and then select New Private Window.
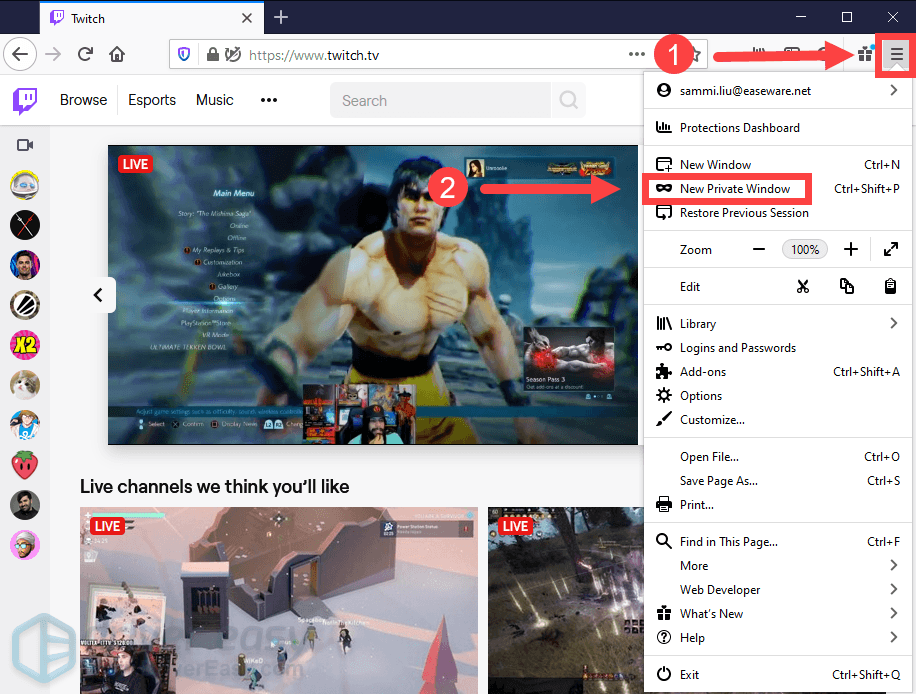
If you still can’t get rid of the error code after doing private browsing, move on to the next fix.
In Edge
In Microsoft Edge, click on the three dots icon and select New InPrivate window.
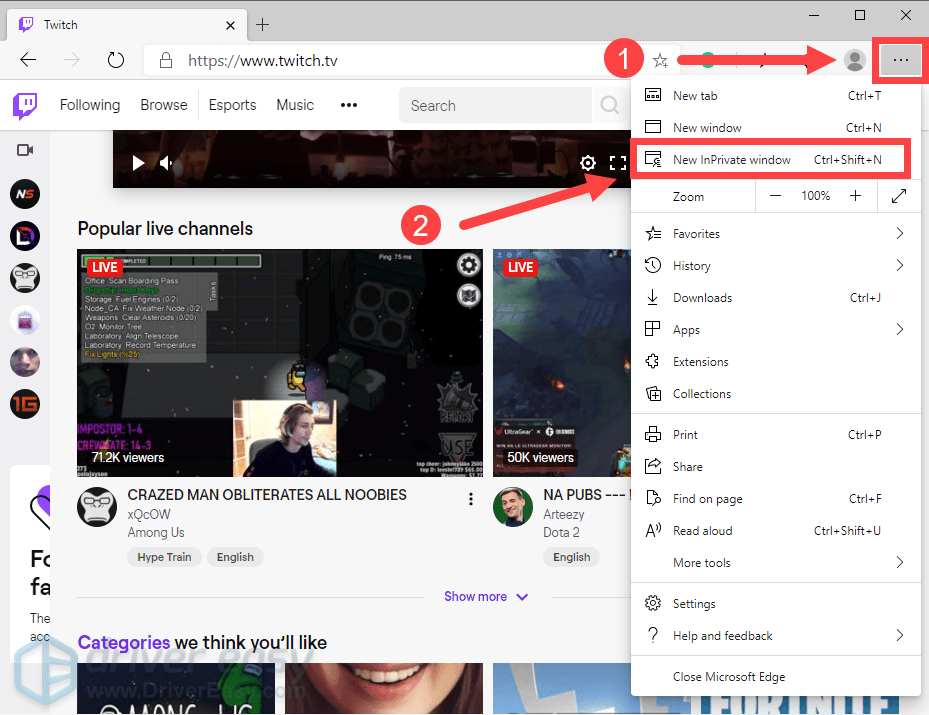
If you still can’t get rid of the error code after doing private browsing, move on to the next fix.
In Internet Explorer
Before you take any steps, please note that InPrivate Browsing is only available on IE8 and later.
Here’s how you can do an InPrivate Browsing:
1) In the upper right corner, click on the Tools icon and then select Safety > InPrivate Browsing.
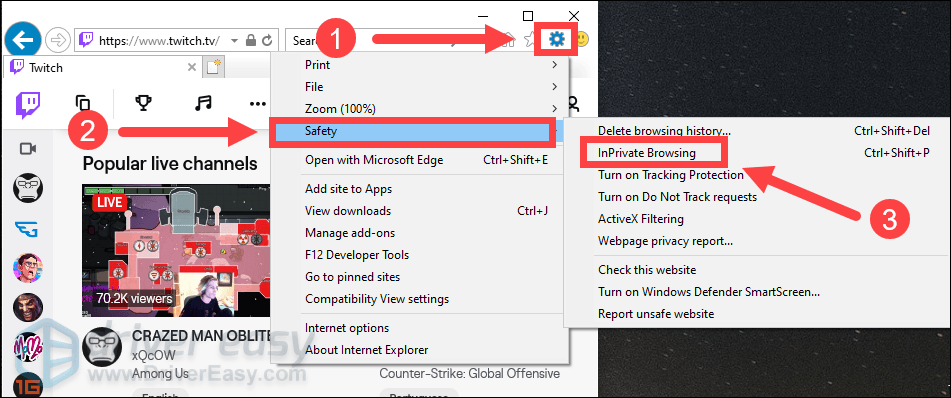
If you still can’t get rid of the error code after doing private browsing, move on to the next fix.
Fix 6: Close other active media players
When other media players are active, Twitch might not be able to load. If this is your case, try to close them.
To do so, you can:
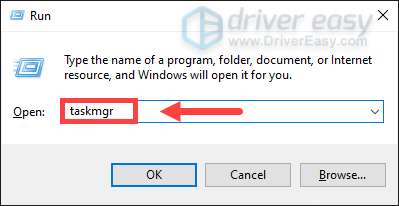
1) Press the Windows logo key + R together on your keyboard to open the Run box.
2) Type taskmgr and press Enter.
3) Right-click on the running player and select End task.
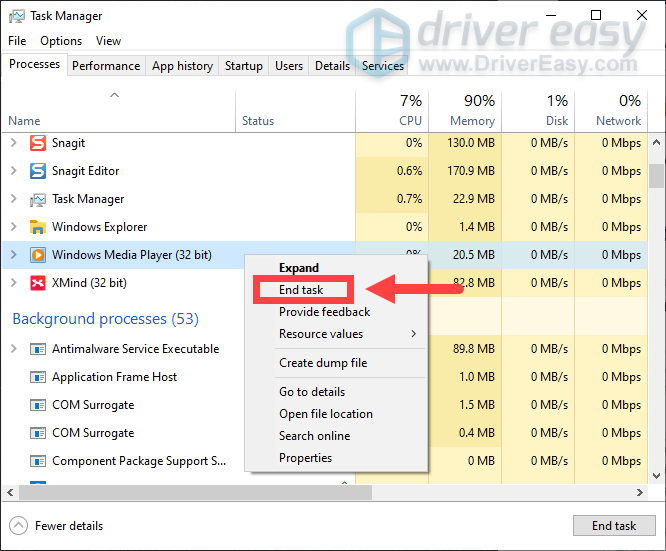
After closing those media players, reload your streaming page and check if the error still appears. If it does, try the next fix.
Fix 7: Set your audio device as the default device
If you’re connecting to an audio device such as headphones or speakers, you need to set that device as default.
Here’s how to do this:
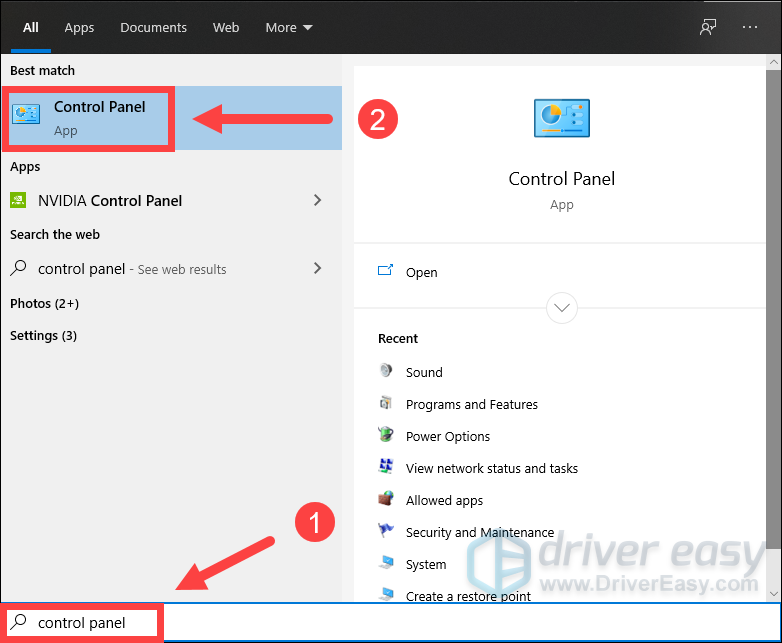
1) In the search box on the taskbar, type control panel and select it from the results
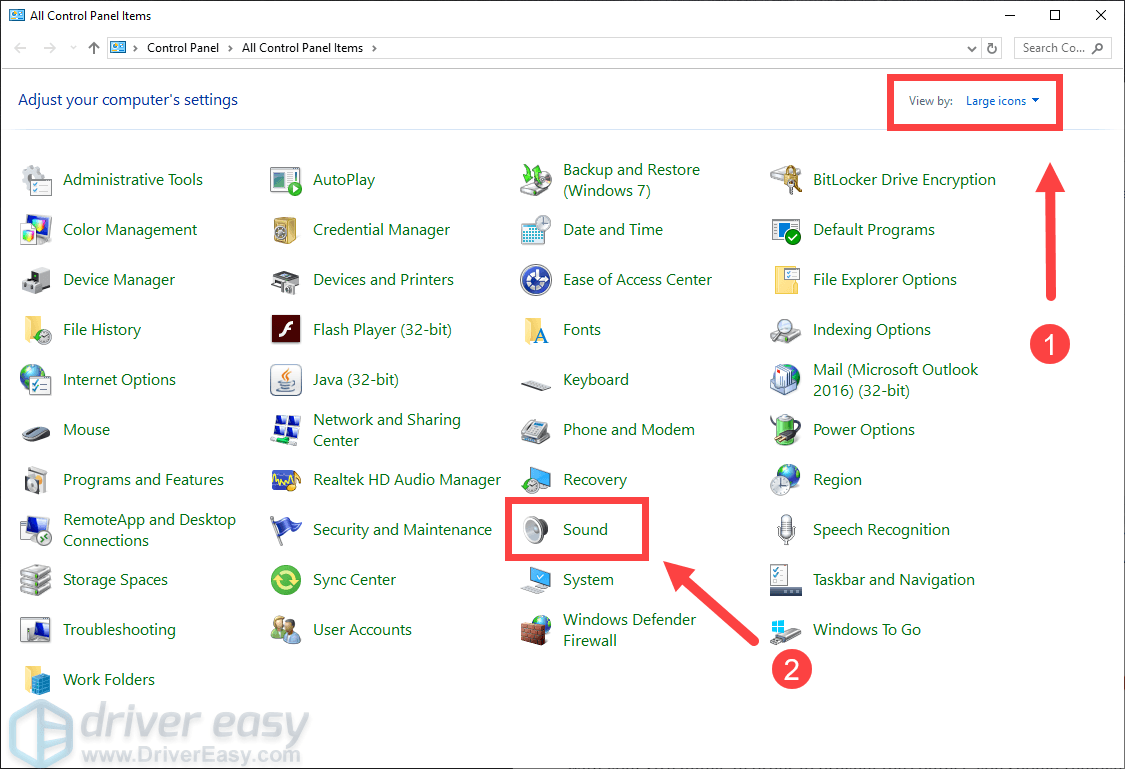
2) Make sure you’ve chosen Large icons as the View by option. Then select Sound.
3) Under the Playback tab, right-click on your audio device and select Set as Default Device. Then click OK.
After applying the changes, reload the streaming page and check if the issue persists.
Fix 8: Update your audio and graphics drivers
If you’ve set your audio device as the default device but the error code still appears, you should try updating your drivers, especially audio and graphics drivers. There is a possibility that some of your installation files for the device drivers get corrupted.
Here are two options you can take to update your drivers: manually or automatically.
Option 1: Manually update your drivers
To manually update your audio and graphics drivers, you need to navigate to the official websites and download the correct drivers compatible with your system.
Here are some main manufacturers of audio and graphics drivers. Simply click on the links based on your own need and follow the on-screen instructions to download and install the correct drivers.
Audio drivers
Graphics drivers
Option 2: Automatically update your drivers (recommended)
If you update the drivers on your own, you might risk downloading the wrong versions. So if you don’t feel like doing it, we recommend you use Driver Easy. It’s a useful tool that detects, downloads and installs the correct drivers for your computer. With Driver Easy, updating drivers becomes quite easy.
You can follow the steps below:
1) Download and install Driver Easy.
2) Run Driver Easy and click the Scan Now button. Driver Easy will then scan your computer and detect any problem drivers.
3) Click the Update button next to the video driver to automatically download the correct version of that driver, then you can manually install it (you can do this with the FREE version).
OR
Click Update All to automatically download and install the correct version of all the drivers that are missing or out of date on your system. (This requires the Pro version with full support and a 30-day money-back guarantee and You’ll be prompted to upgrade when you click Update All.)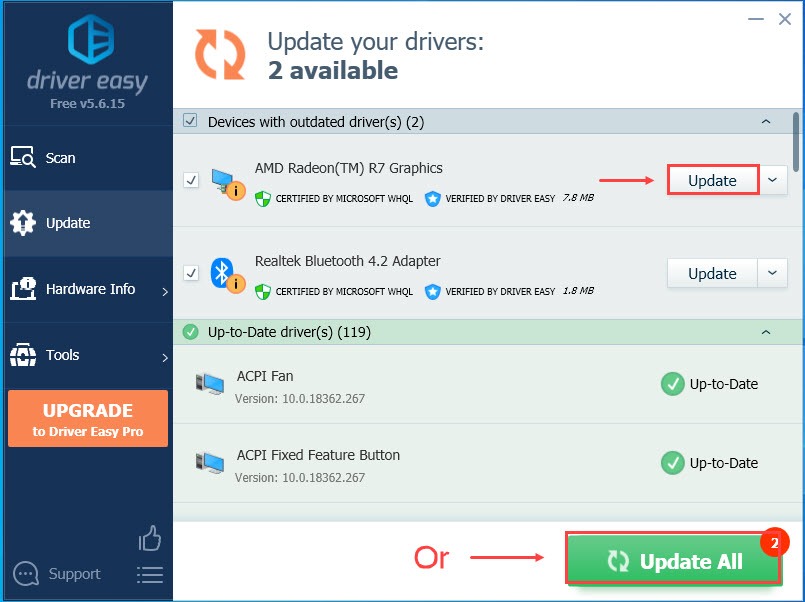
4) Restart your computer and load the streaming to check if the error still appears. If updating the drivers doesn’t resolve the issue, move on to the next fix.
Fix 9: Remove audio hardware
If neither setting your audio device as the default device nor updating drivers help solve the problem, you should remove your audio hardware. Hardware such as headphones or external speakers could be interfering with your streaming. In order to prevent the conflict, you should remove the audio hardware and try loading the stream again. If the error disappears, you can plug it back.
Fix 10: Switch to the Twitch desktop app
If none of the methods listed above work for you, then you should use the Twitch desktop app. Compared to the web version, the Twitch desktop app has proved to have better performance and it brings better responsiveness.
So these are the fixes for Twitch error 4000. Hopefully, they work for you. If you have any ideas or questions, do not hesitate to leave us a comment. 😊