


Since their release, the AirPods series have become the top seller in wireless earbuds. As popular as they are, they were never perfect — especially when it comes to Windows compatibility. Many Windows users are reporting an AirPods not connecting to PC issue. If you’re one of them, don’t worry. Here’re some fixes that helped many Windows users. Try them and get your AirPods working right away.
Before you start
Your AirPods issue might just be a glitch of the Windows system. So before trying anything more complicated, make sure you’ve done these basic troubleshooting:
- Reconnect AirPods to Windows (Remove the device and pair it again)
- Restart your computer
If the issue remains, continue to the advanced fixes below.
Try these fixes
You might not need to try them all. Simply work your way down until you hit the one that does the trick.
Fix 1: Reinstall your Bluetooth driver
In most cases, the AirPods not connecting issue indicates that you’re using a broken or outdated Bluetooth driver. To fix this, the easiest and quickest way is to reinstall the Bluetooth driver on your PC.
To do so, first you need to uninstall the Bluetooth driver:
- On your keyboard, press Win+R (the Windows logo key and the R key) at the same time to invoke the Run box. Type or paste devmgmt.msc and click OK.

- In the pop-up window, double-click Bluetooth to expand the category. Then right-click your Bluetooth adapter and select Uninstall device. (If you don’t see a Bluetooth adapter, try using Driver Easy to scan for missing drivers.)
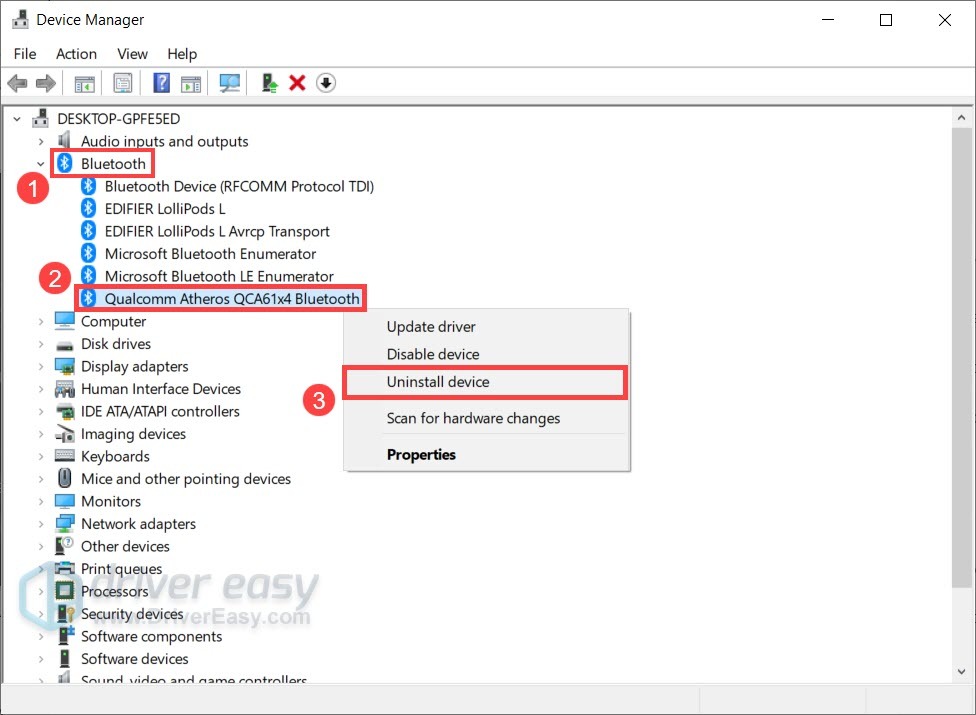 To identify the Bluetooth adapter, one common method is to look for the name that starts with a manufacturer(e.g. Intel, Qualcomm or Realtek) and ends with a “Bluetooth”.
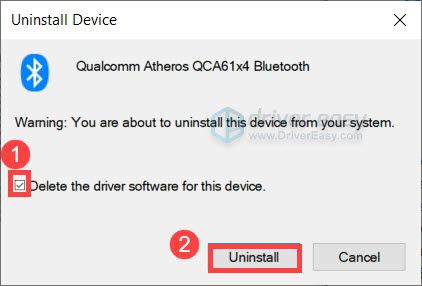
 - In the pop-up window, check the box next to Delete the driver software for this device. Then click Uninstall.
- Once you’ve uninstalled your Bluetooth driver, restart your PC for the changes to apply.
To address Bluetooth issues and maximize the performance of your AirPods, you need the latest Bluetooth driver for your computer.
Normally Windows will install the Bluetooth driver automatically after a reboot. But that’s not always the case. And you also need to make sure the Bluetooth driver is the latest.
Generally, there’re 2 ways you can install the latest Bluetooth driver: manually or automatically.
Option 1: Install the latest Bluetooth driver manually
If you’re familiar with your computer hardware, you can try to install the latest Bluetooth driver manually. First you can visit the official website of your motherboard manufacturer, then search for your exact model. Usually you’ll find the drivers in the support page. Be sure to download the latest installer that’s compatible with your operating system.
Option 2: Install the latest Bluetooth driver automatically (Recommended)
If you’re not comfortable playing with device drivers, we recommend using Driver Easy. It’s a tool that can detect, download and install any driver updates your computer needs.
You’ll need an active subscription to update drivers automatically. Driver Easy also offers a 7-day free trial where you can access all the Pro features.
- Download and install Driver Easy.
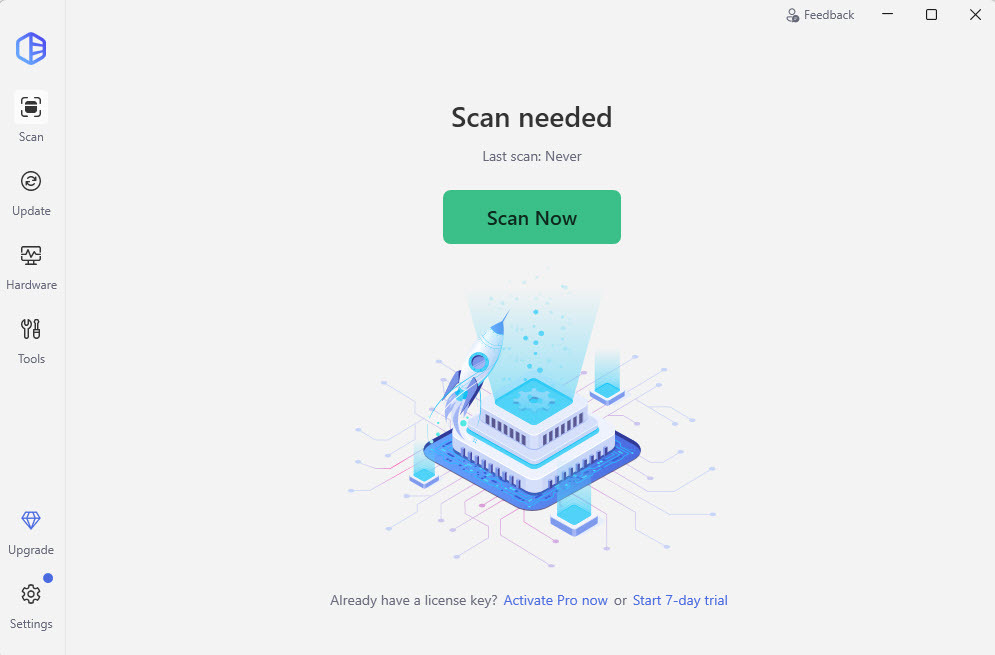
- Run Driver Easy and click the Scan Now button. Driver Easy will then scan your computer and detect any problem drivers.
- Click Update All to automatically download and install the correct version of all the drivers that are missing or out of date on your system. (This requires the Pro version – you’ll be prompted to upgrade when you click Update All. Driver Easy also provides a 7-day free trial where you can test out all the Pro features. You won’t be charged until your trial ends, and you can cancel anytime.)

Once you’ve updated your Bluetooth driver, restart your PC and check if you can now connect AirPods to Windows.
If the latest driver doesn’t give you luck, take a look at the next fix below.
Fix 2: Install all Windows updates
Microsoft rolls out Windows updates on a regular basis, tackling compatibility issues and offering new features. Normally the update happens automatically, but you can also make sure manually that all the updates have been installed.
You can use the guide below to check for system updates on Windows 10 or 11.
Check for system updates on Windows 11
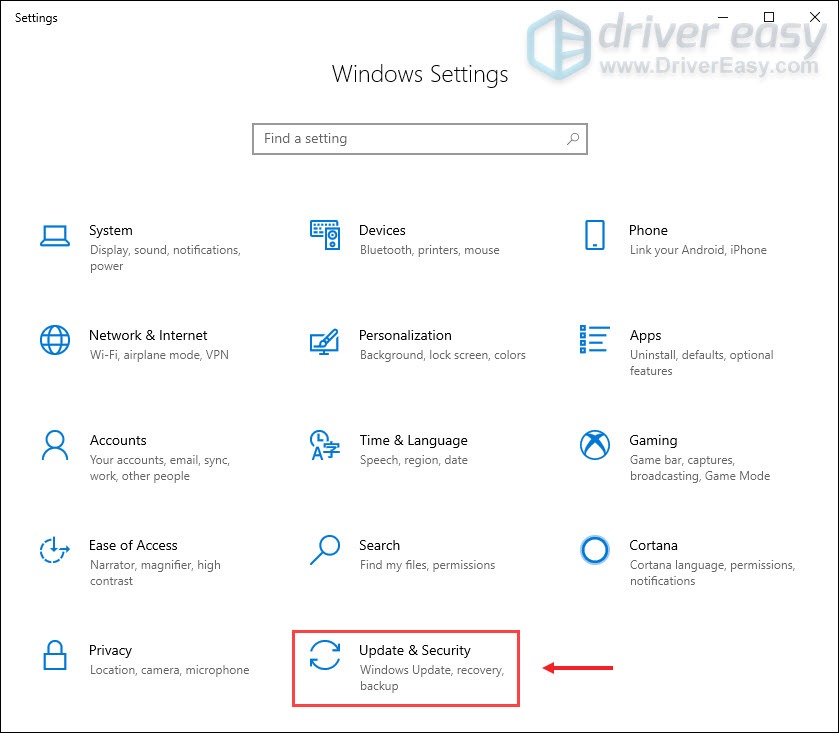
- On your keyboard, press Win+I (the Windows logo key and the i key) to open the Windows Settings app. Click Update & Security.
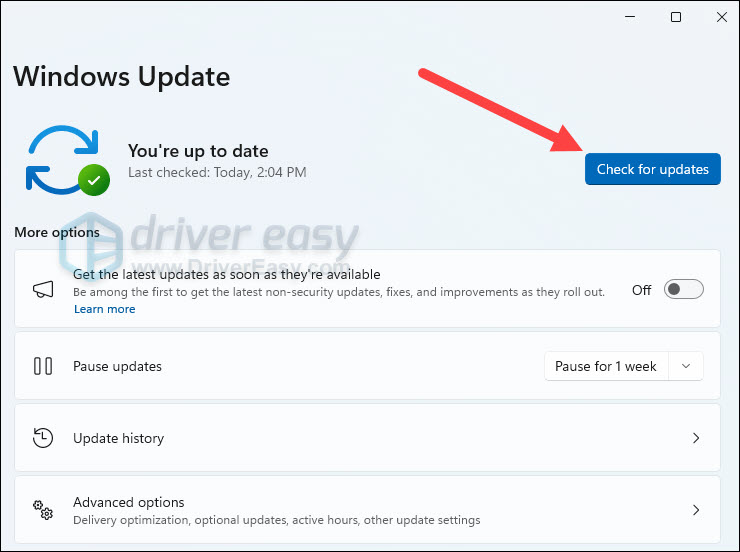
- Click Check for updates. Windows will then download and install the available patches. It might take some time (up to 30 mins).
Check for system updates on Windows 10
- On your keyboard, press the Windows Logo key
 and the I key (Win+I) to open the Windows Settings app.
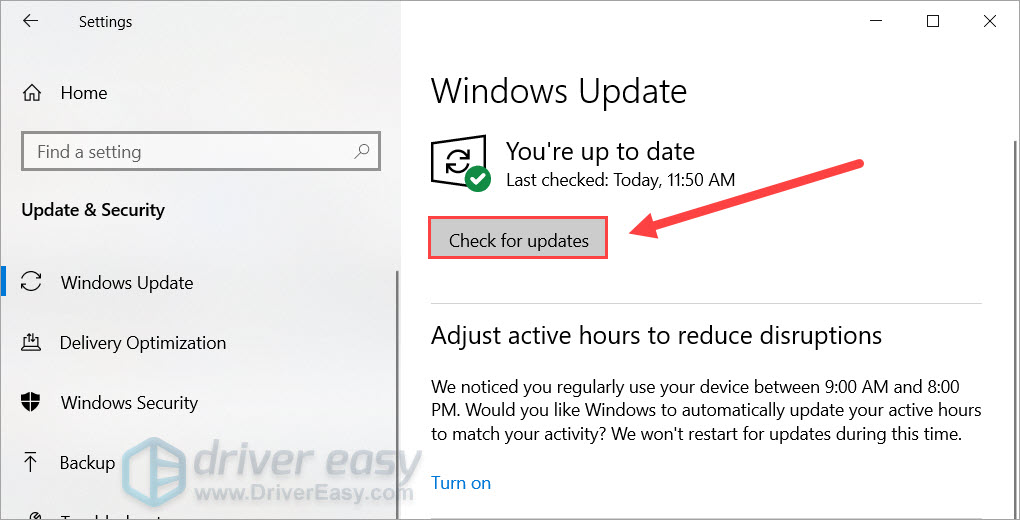
 - Click Windows Update on the right.

- Then click Check for updates. Windows will then check if there are any newly released updates. If so, it will automatically download and install the updates for you. It might take some time.
- You may repeat these steps until it prompts You’re up to date when you click Check for updates to make sure you have all the updates installed. Restart your computer when it’s done.
Once you’ve installed all the system updates, restart your PC and check if the issue persists.
If this method doesn’t do the trick, simply check out the next fix below.
Fix 3: Modify the Windows Registry
Some users managed to solve the connection issue by modifying the Windows Registry, and according to feedback, this is a promising solution for AirPods issues on Windows. After some digging, we learn that this will prevent Windows from turning off the Bluetooth adapter. You can try this and see if it helps.
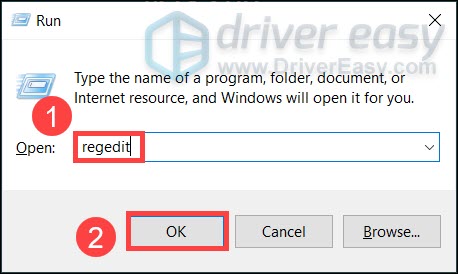
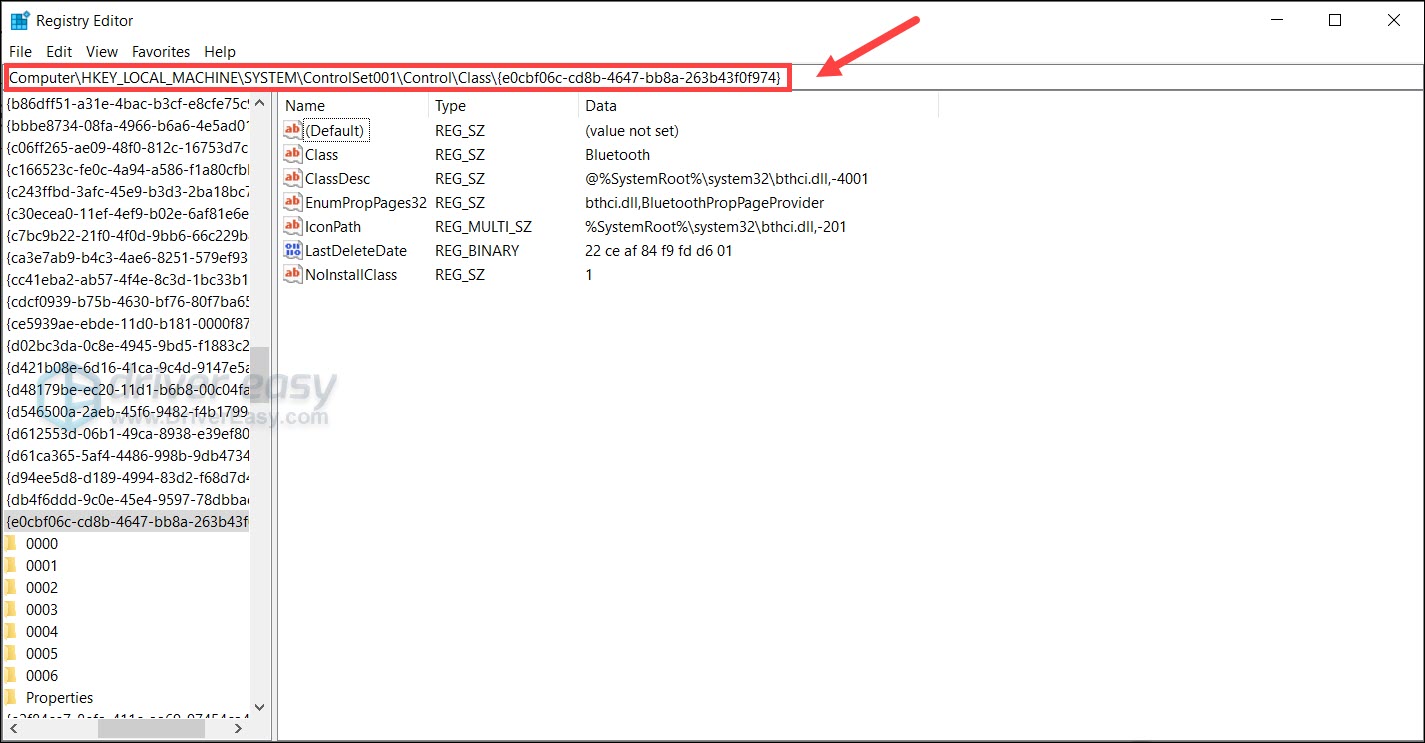
- On your keyboard, press Win+R (the Windows logo key and the R key) to invoke the Run box. Type regedit and click OK.
- In address bar of the pop-up window, type or paste Computer\HKEY_LOCAL_MACHINE\SYSTEM\ControlSet001\Control\Class{e0cbf06c-cd8b-4647-bb8a-263b43f0f974} and press Enter.
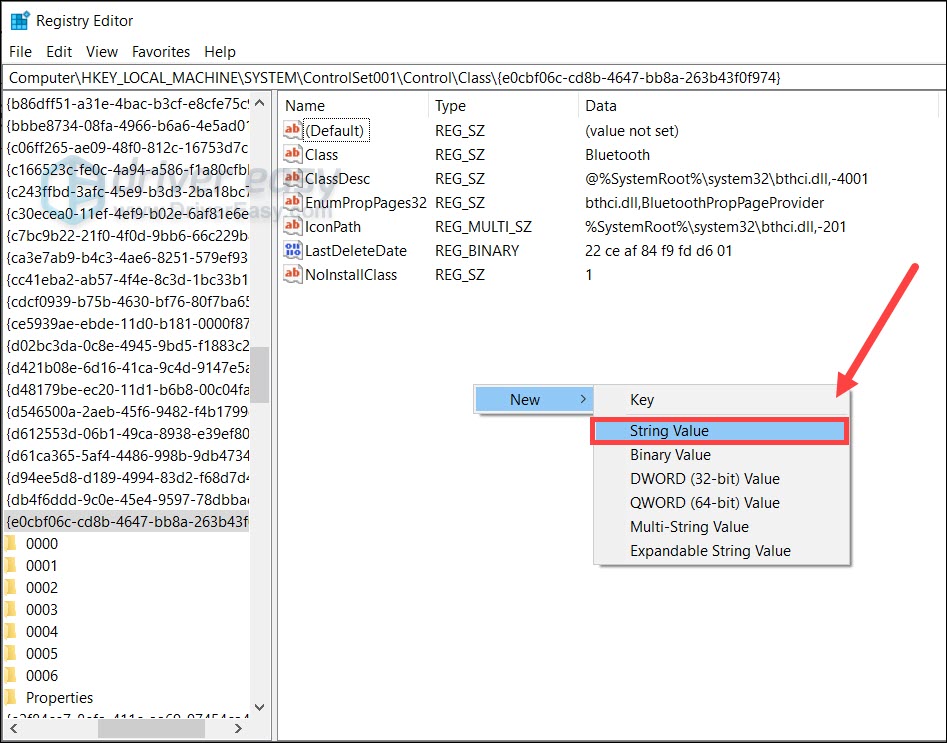
- At the empty area, right-click and move your cursor to New to expand the list. Select String Value.
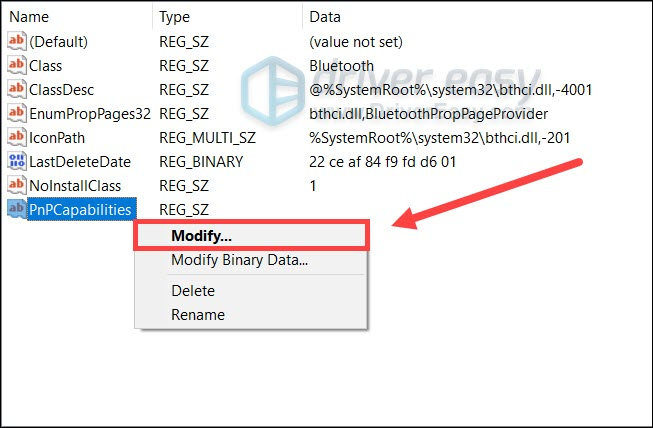
- Rename the new entry to PnPCapabilities. Right click it and select Modify…
- In the pop-up window, click the input area under Value data:, then type or paste 24 and click OK.
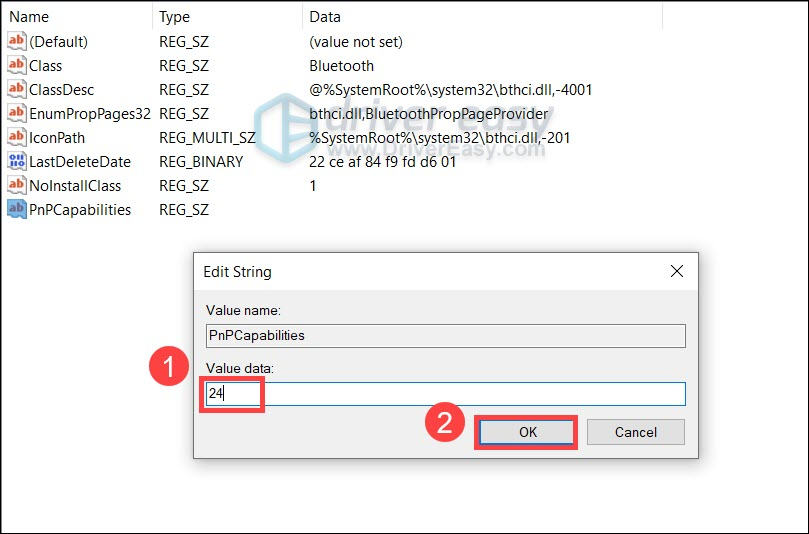
- Now restart your computer and test your AirPods.
Hopefully this post gets your AirPods working properly on Windows. If you have any questions or ideas, just jot them down and we’ll get back to you.