


If you’re constantly bothered by the game stuttering with FPS drops while playing games, you’re not alone. Thousands of users have reported the same.
But don’t worry – check out the 6 tips below and your computer will be running faster and smoother in no time!
Try these tips
All the screenshots below work in Windows 10, but the tips also work in Windows 8 and 7. (The recommended OS would be Windows 10 though). Just work your way down the list to increase FPS on your rig:
- Change the power option
- Adjust your PC for best performance
- Update your graphics driver
- Do a disk clean-up
- Defrag your hard drive
- Install the latest patch
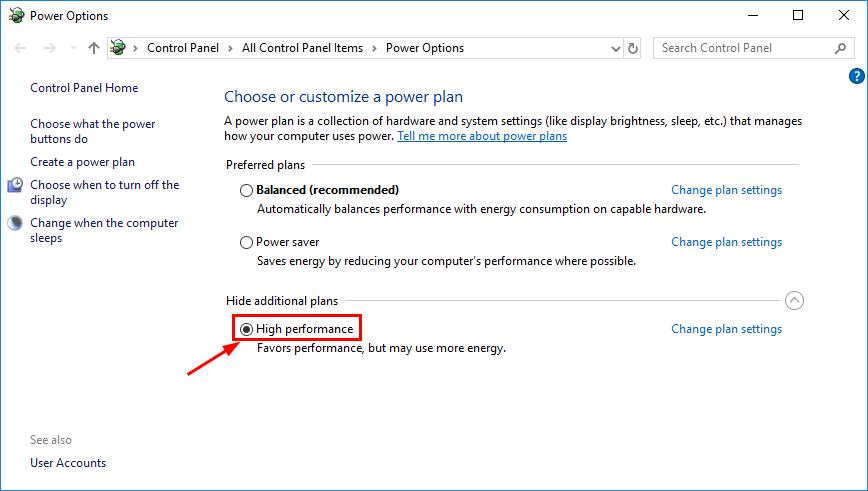
Tip 1: Change the power option
By default, the power plan on our computer is often configured to Balanced or Power saver to conserve battery, which largely compromises the operating capacity of your graphics card and CPU. To adjust the power option to improve FPS:
- On your keyboard, press the Windows logo key
 and R at the same time, then copy & paste powercfg.cpl into the box and press Enter.
- Choose the High performance option.
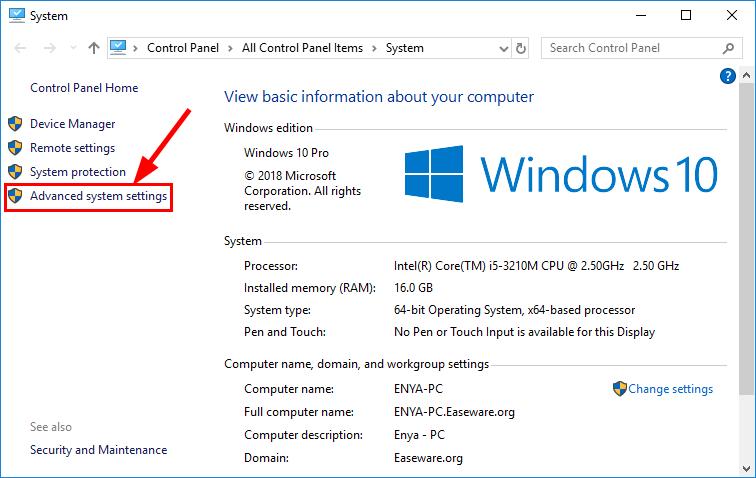
Tip 2: Adjust your PC for best performance
Also the system performance on our computer may also be undermined for the advanced graphics features. So to tweak the settings:
- On your keyboard, press the Windows logo key and Pause at the same time and click Advanced system settings.
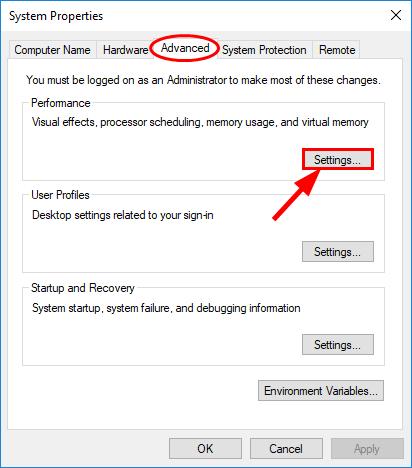
In Advanced, click Settings.
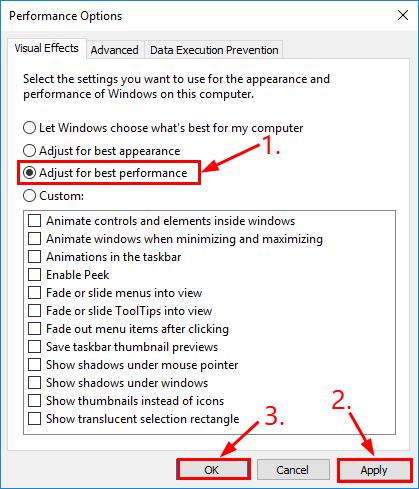
Click Adjust for best performance > Apply > OK.
Tip 3: Update your graphics driver
Updating our graphics driver is also an important step in getting the best performance out of our graphics card (sometimes by a whopping 30%!). There’re two ways you can update your device drivers — manually or automatically:
Update your drivers manually – You can update your device drivers manually by going to the manufacturer’s website, and searching for the most recent correct driver for the exact device. Be sure to choose only drivers that are compatible with your variant of Windows system versions.
OR
Update your drivers automatically – If you don’t have the time, patience or computer skills to update your drivers manually, you can, instead, do it automatically with Driver Easy. You don’t need to know exactly what system your computer is running, you don’t need to risk downloading and installing the wrong driver, and you don’t need to worry about making a mistake when installing.
You can update your drivers automatically with either the FREE or the Pro version of Driver Easy. But with the Pro version it takes just 2 clicks (and you get full support and a 30-day money back guarantee):
- Download and install Driver Easy.
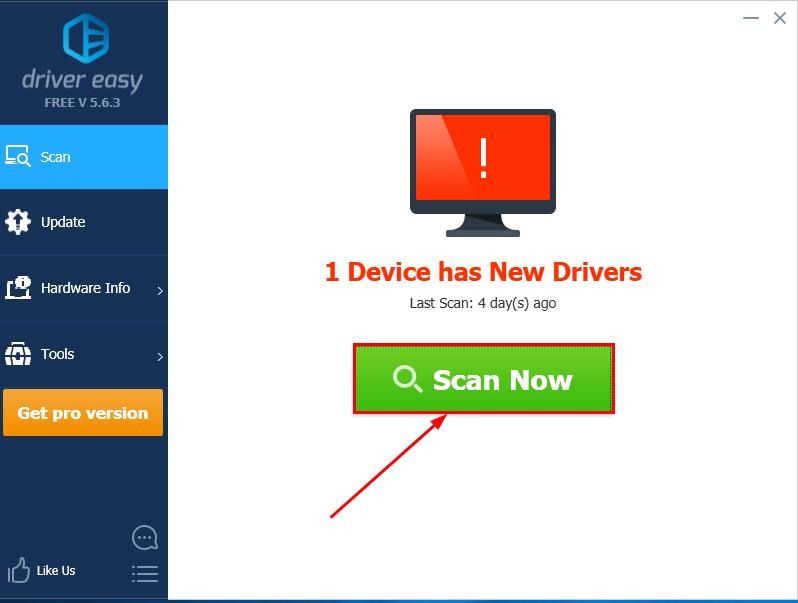
- Run Driver Easy and click the Scan Now button. Driver Easy will then scan your computer and detect any problem drivers.
- You can upgrade to the Pro version and click Update All to automatically download and install the correct version of ALL the drivers that are missing or out of date on your system.
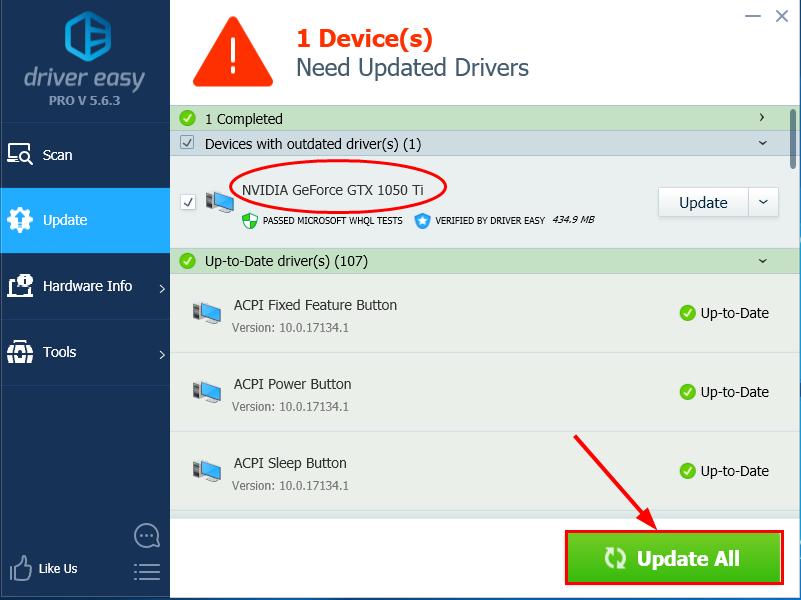 You can also click Update to do it for free if you like, but it’s partly manual.
 - Restart your computer for the changes to take effect.
Tip 4: Do a disk clean-up
Disk Clean-up is a built-in tool in Windows that helps us delete unimportant and junk files. To run Disk Clean-up:
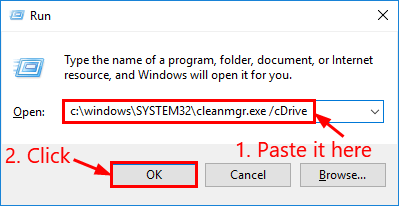
- On your keyboard, press the Windows logo key and R at the same time. Then copy & paste c:\windows\SYSTEM32\cleanmgr.exe /cDrive into the box and click OK.
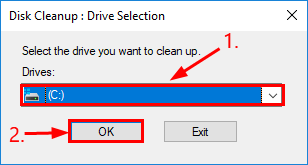
- Choose the drive you want to free up storage and click OK.
- Technically, you can tick all the boxes. You might also need to check out Recycle Bin and see if there’s anything to be restored first. Then click OK.
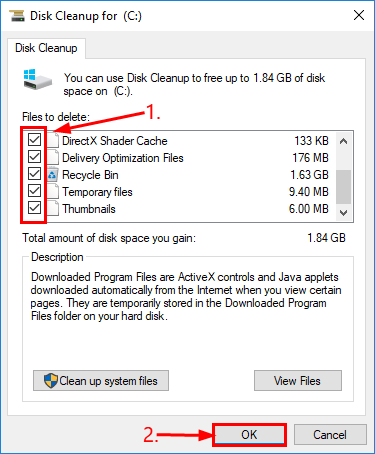
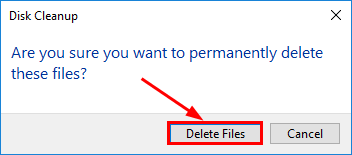
- Make sure the ticked files are the ones you no longer want and click Delete Files to confirm.
Tip 5: Defrag your hard drive
As we constantly add and remove files on our hard drives, small packets of information can end up in random places. This may result in our computer having to check multiple places for those pieces, hence the longer file opening/loading time, boot-up time etc. So we might have to defrag our hard drive to solve this and give our computer performance a boost. Here’s how:
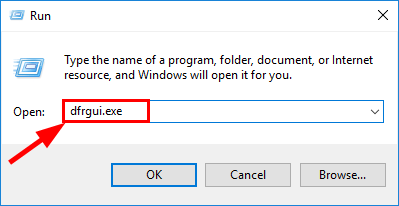
- On your keyboard, press the Windows logo key and R at the same time. Then type dfrgui.exe in the box and press Enter.
- Click to select a drive and click Analyze.
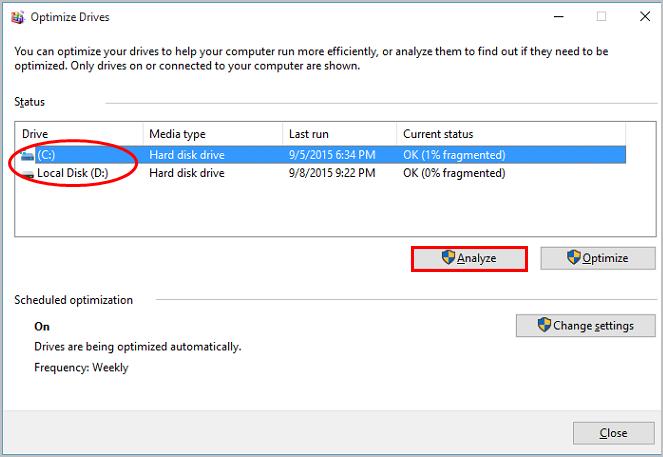 Note that the Analyze button for an SSD (Solid State Drive) is grayed out simply because the drive doesn’t need/have spinning parts to find all the pieces of information, hence no time lag.Wait until the analysis completes and the fragmentation percentage of the selected drive will be displayed on Current status.
 - Click Optimize if Windows tell you to optimize the drive. Usually the recommended percentage is 5% or higher.
Wait until the Windows defragments the drive successfully and restart your computer.
Tip 6: Install the latest patch
Game developers are constantly trying to optimize their gaming by releasing game patches to help fix bugs/errors and improve overall gaming experience. So it’s always worth a try to install the latest patch and see if it gets this dropping FPS issue fixed.
Don’t forget to restart your PC to check the results.
That’s all there’s to it – 6 easy tips to boost your FPS on your PC. Happy gaming! And feel free to drop us a comment if you have any further questions or ideas to share with us! 😉