


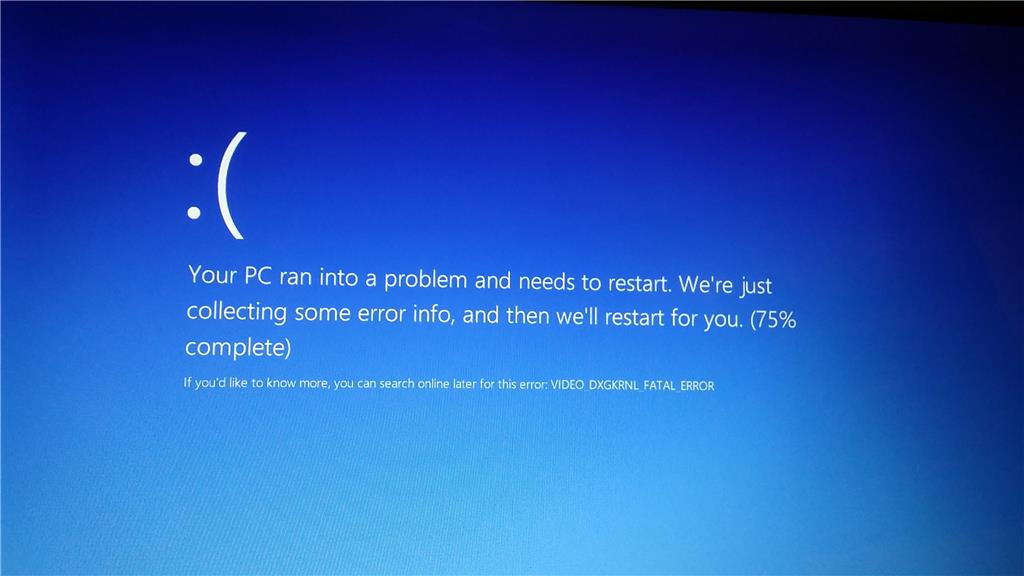
Windows users wouldn’t feel stunned when receiving any variety of error messages. What’s plaguing them is that they don’t know how to troubleshoot the issues. And that’s the case for users who received the VIDEO_DXGKRNL_FATAL_ERROR, which is a violation detected by the DirectX graphics kernel subsystem. If you’re on the same boat, no worries! We’re here to help. Try the methods below and hopefully you could get rid of this error.
- Run the Hardware and Devices troubleshooter
- Download & install all Windows updates
- Update your graphics driver
- Perform a clean boot
- Turn off fast startup
- Repair corrupt system files
1. Run the Hardware and Devices troubleshooter
Windows come with several troubleshooters, among which is the Hardware and Devices troubleshooter. Since your issue may be hardware-related, running this troubleshooter would probably help without much advanced tweaks. Below is how you can do this.
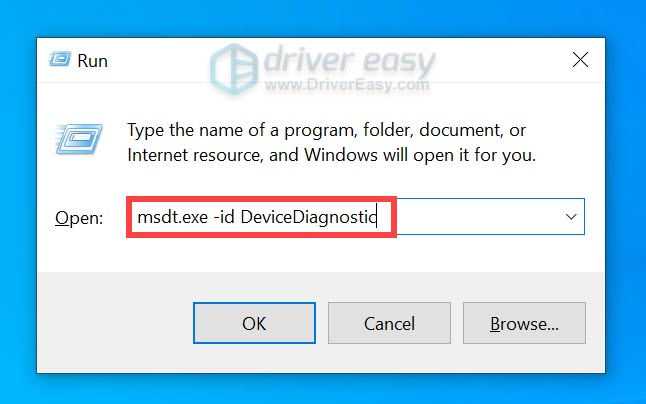
- On your keyboard, press the Windows logo + R keys simultaneously to open the Run box.
- Enter msdt.exe -id DeviceDiagnostic into the box and hit Enter.
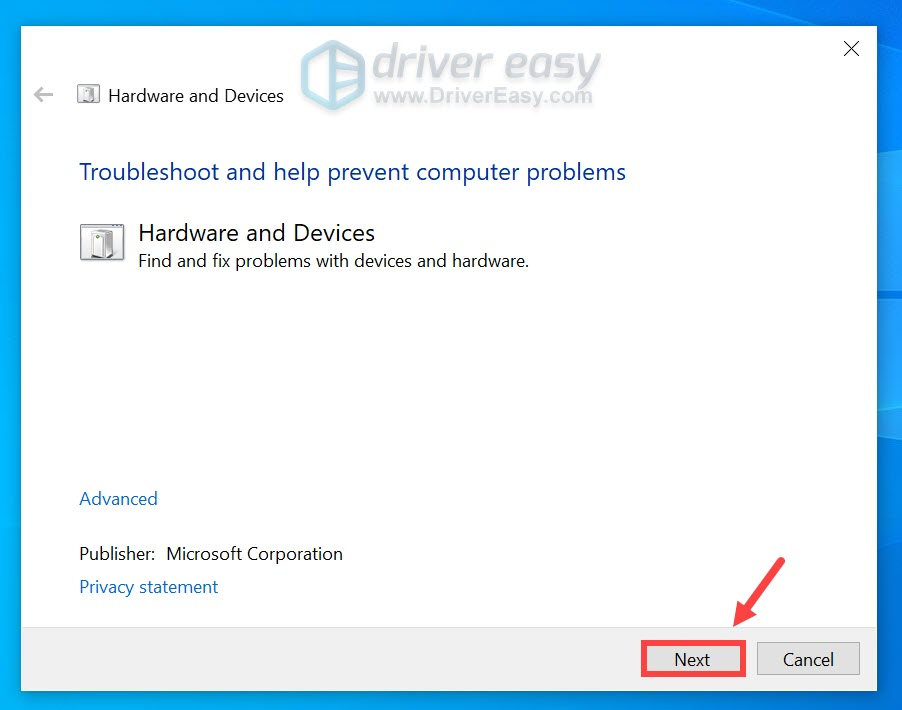
- When the window opens, click on the Next button.
- If any issues are detected, you’ll be prompted to fix them;
If there are no issues found, close the window and try the next fix below.
2. Download & install all Windows updates
It’s fair to say that you should run a Windows Update on a regular basis. The latest Windows security patches usually fix the vulnerabilities and errors in Windows and associated software. Occasionally, they bring new features. Therefore, to rid yourself of the fatal error, you should check if there are any updates available.
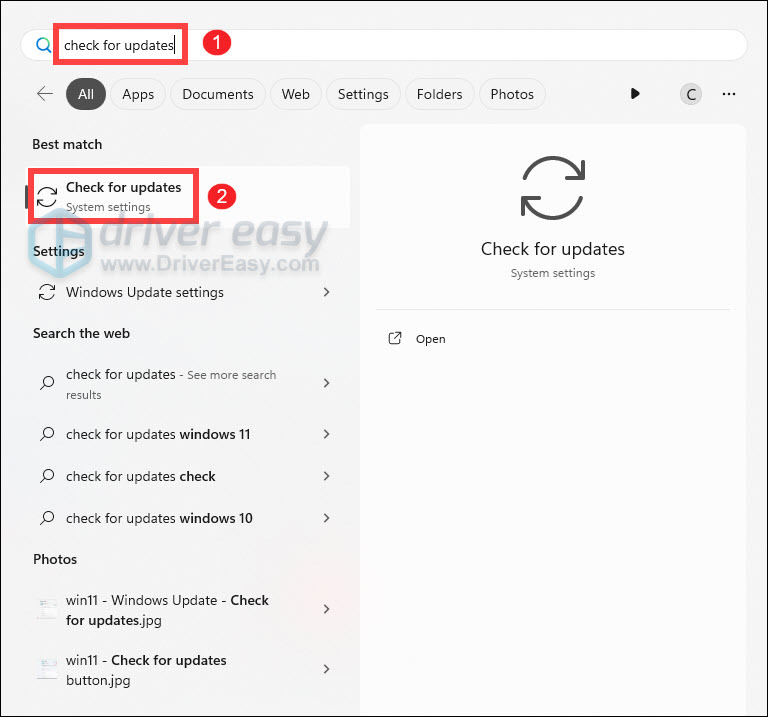
- On your keyboard, press the Windows logo key to invoke the Search. Type check for updates, then click Check for updates from the list of results.
- If you’re told that “Updates available to install”, simply click on the Install all button. Or you can click on the button Check for updates to see if there are updates available and then follow the on-screen instructions to download and install them.
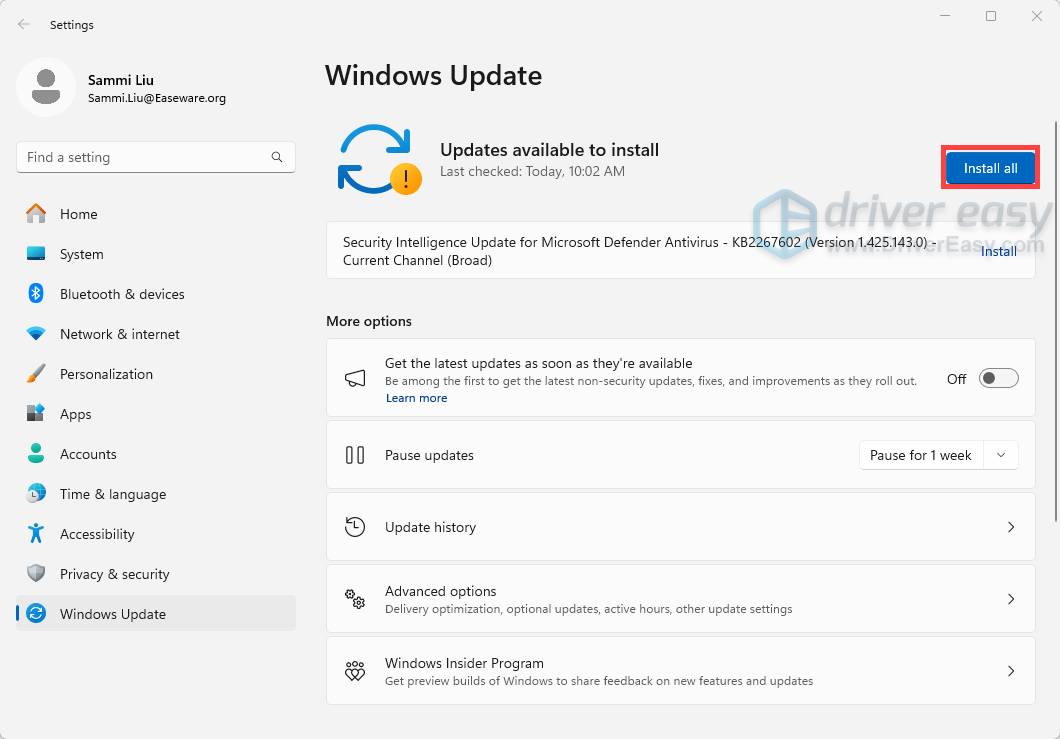
Once complete, reboot your computer to check whether your problem has been resolved. If the fatal error appears again, move on to the next fix.
3. Update your graphics driver
Your outdated graphics driver is one of the various factors that are attributed to this fatal error. In this scenario, you need to verify if you’re using an out-of-date graphics driver.
To do this, you can go to the Device Manager, find your device name, right-click it and select Update driver. Or you can head to the manufacturer’s driver download page. Then search for the latest driver that’s corresponding with your system and download and install it by following the on-screen prompts.
If updating drivers manually seems too tedious and troublesome, you can instead use Driver Easy to help you do all the busy work. It’s a useful tool that helps detect any problem drivers, then download and install the latest drivers for your system, direct from the manufacturers. With Driver Easy, updating drivers is just a matter of a few mouse clicks.
- Download and install Driver Easy.
- Run Driver Easy and click on the Scan Now button. Driver Easy will then scan your computer and detect any missing or outdated drivers.

- Click the Activate & Update button next to the flagged device or click Update All to update all the outdated drivers. You can sign up for the free trial to update drivers with no upfront cost.

- Click Start Trial to try Driver Easy Pro for free.

The price after the trial period is $39.95. If you do not want to continue the subscription, you can cancel it before the trial ends.
After the driver updates, restart your computer for the changes to take full effect.
If this doesn’t do the trick, move on to the next fix.
4. Perform a clean boot
Sometimes an application or service might be causing an issue or trigger an error. To identify whether that’s your case, you can perform a clean boot by taking the steps below.
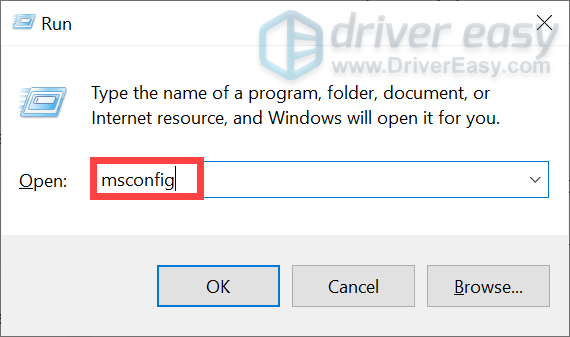
- On your keyboard, press the Windows logo + R keys simultaneously to open the Run box.
- Type in msconfig and hit Enter.
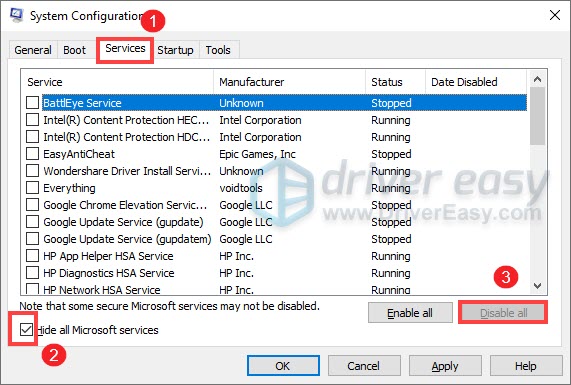
- Select the Services tab. Check the box next to Hide all Microsoft services. Then click Disable all.
- Then select the Startup tab. And click Open Task Manager.
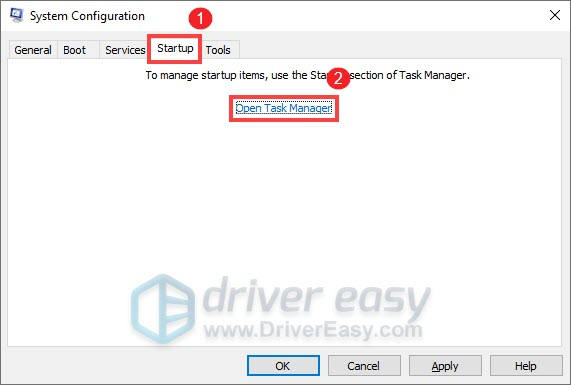
- When the Task Manager opens, right-click any startup program you suspect might be interfering and select Disable.
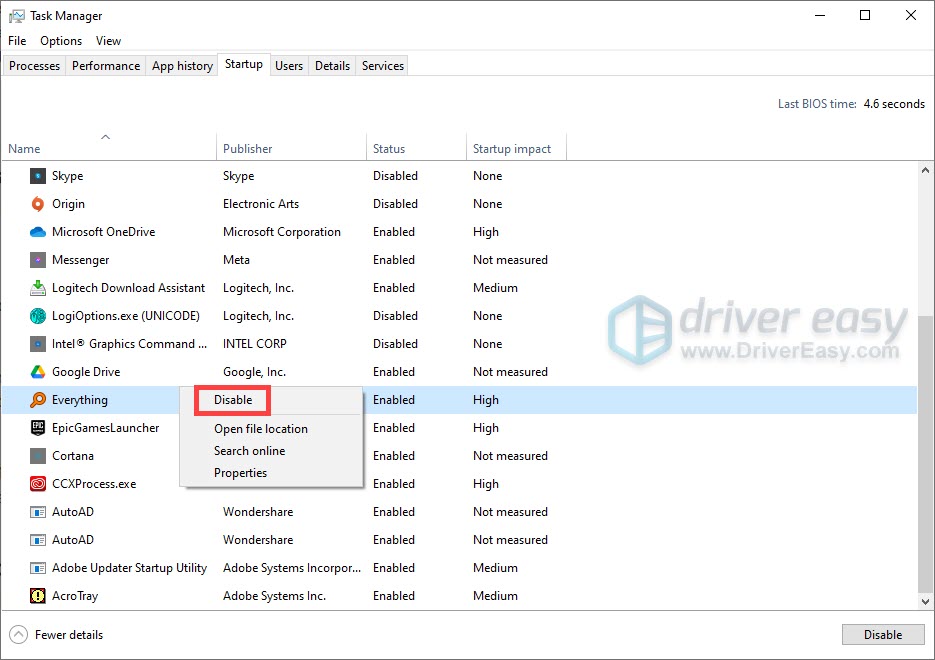
- Then close the Task Manager.
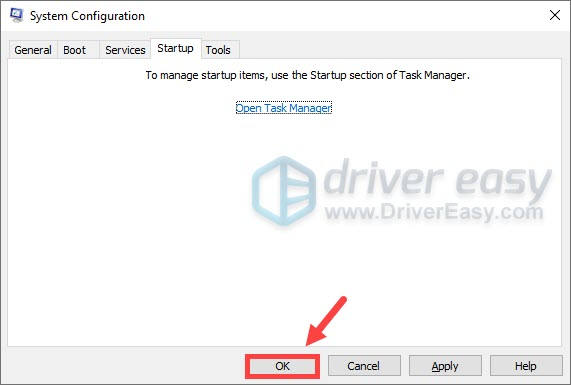
- Go back to the System Configuration window and click OK.
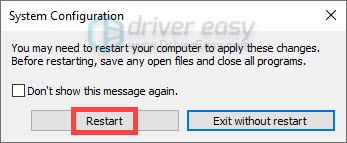
- Click Restart to restart the system. Then it should be in a clean boot environment.
If this works, follow the steps below to reset your computer to start as usual.
If this doesn’t give you any luck, proceed to the next fix.
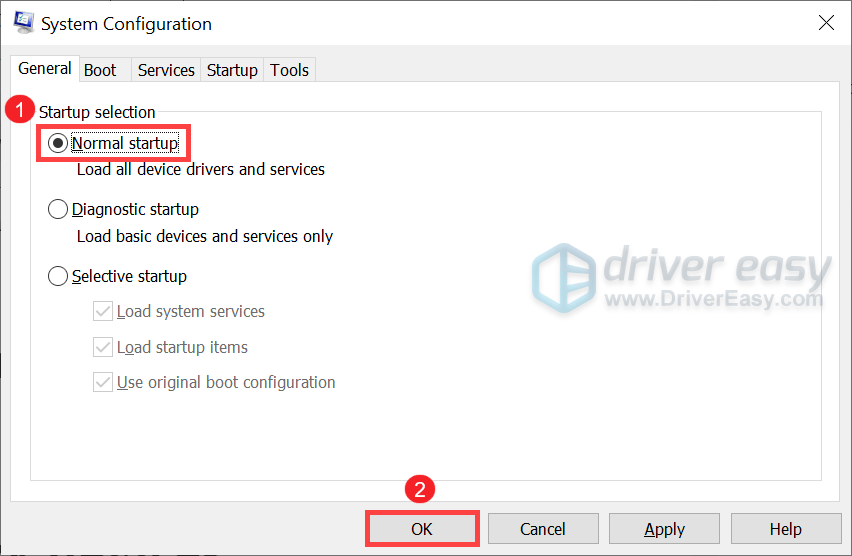
- On your keyboard, press the Windows logo + R keys simultaneously to open the Run box.
- Type or paste msconfig and press Enter.
- Under the General tab, select the Normal Startup option, and then click OK.
5. Turn off fast startup
Windows fast startup is a feature enabled by default to provide users with a faster boot time when starting up your PC. However, sometimes it triggers startup issues. To fix the error you’re having, you can try to turn it off and see how things go.
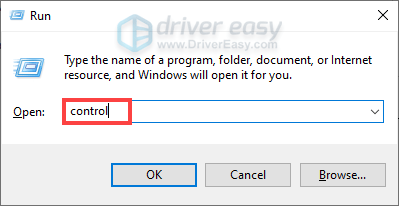
- On your keyboard, press the Windows logo + R keys simultaneously to open the Run box.
- Type in control and hit Enter.
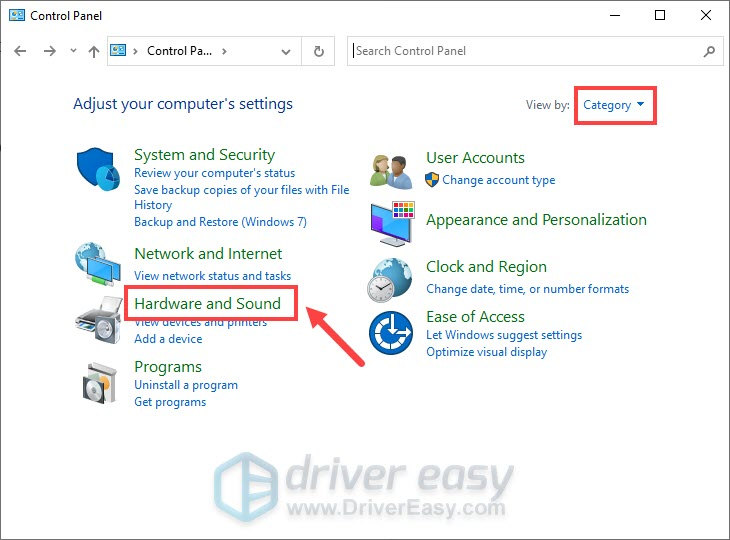
- Click on Hardware and Sound. If you can’t find it, make sure you’ve selected Category as your View by.
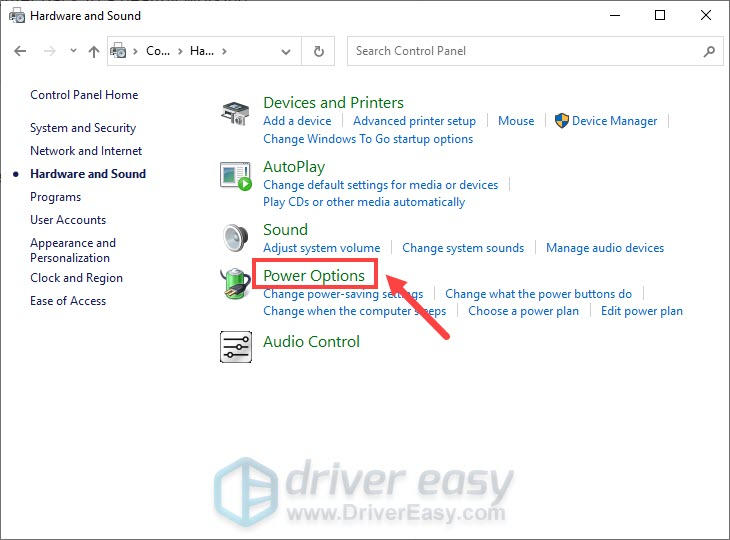
- Select Power Options.
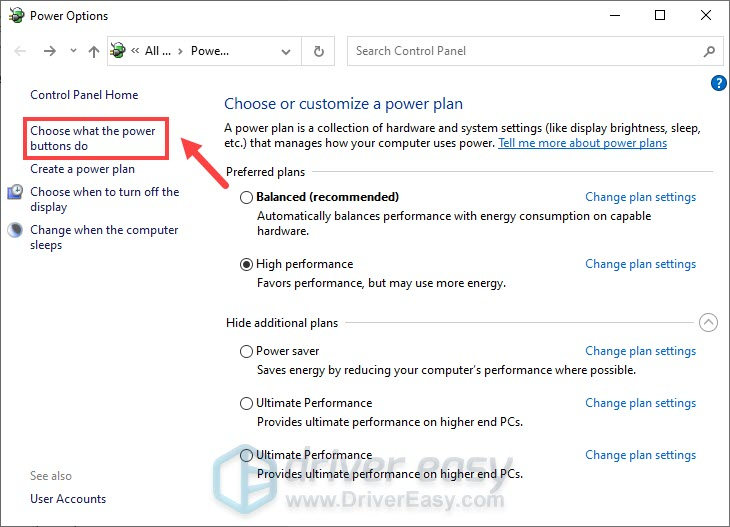
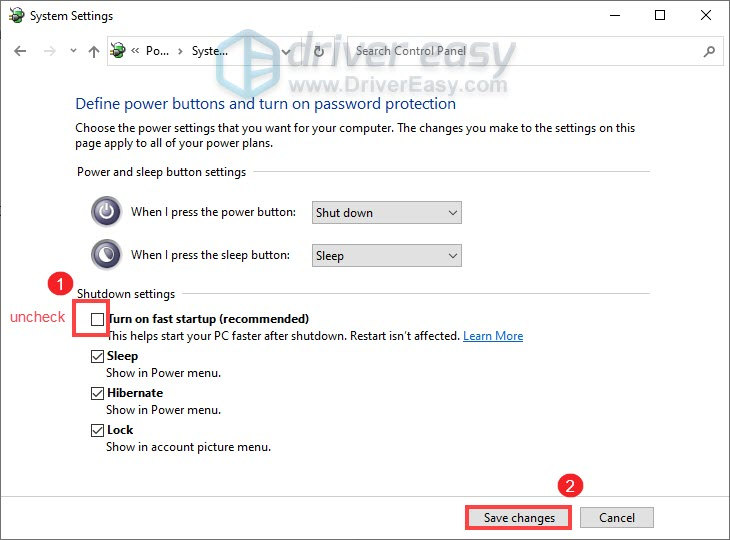
- From the left pane, click on Choose what the power buttons do.
- Uncheck the box next to Turn on fast startup (recommended) to turn it off. Then click Save changes.
If this option is grayed out, scroll up and click Change settings that are currently unavailable.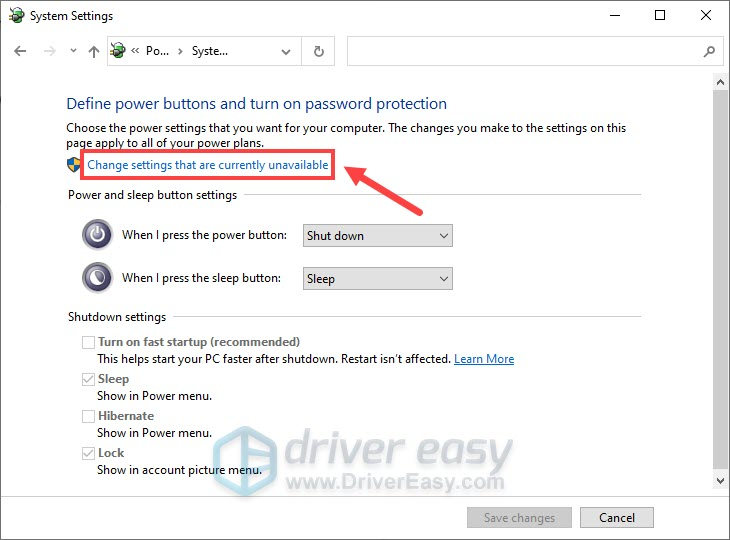
However, if turning off fast startup doesn’t work for you, you should try the next method below.
6. Repair corrupt system files
Another cause that may lead to the Video_Dxgkrnl_Fatal_Error is any missing or corrupt files on your system. In this situation, all you have to do is try to repair them. Below we’ve put together two methods to do this. Select the one that suits your case.
Run the System File Checker tool
The System File Checker is a handy tool that’s run with administrator privileges. When your Windows is experiencing blue-screen or other crashes, or some Windows features just aren’t working properly, this tool may help. Below are the steps you can take to run SFC to inspect all of the important Windows files.
- In the search box, type cmd. Find Command Prompt from the list of results. Make sure you right-click it and select Run as administrator.
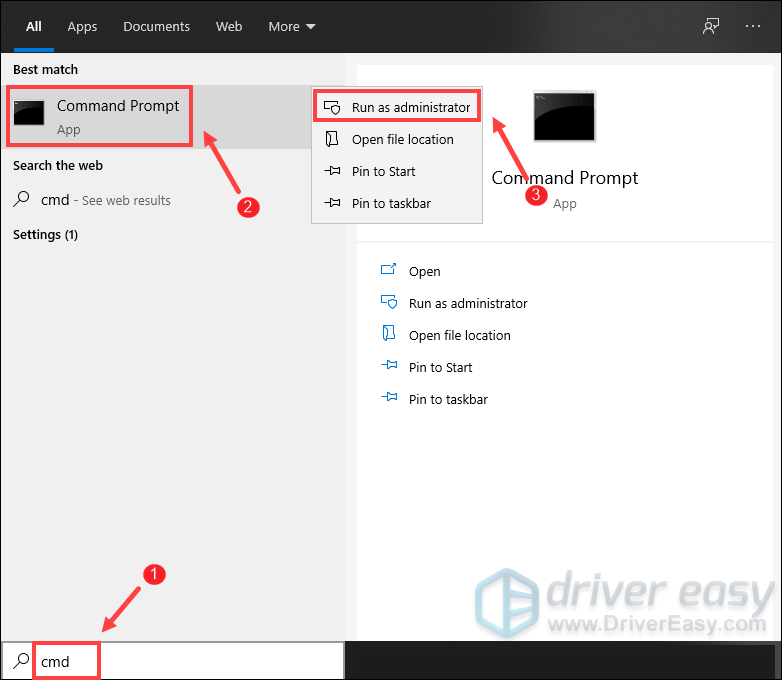
- On the User Account Control (UAC) prompt, click Yes.
- In the command prompt window, type sfc /scannow and press Enter.
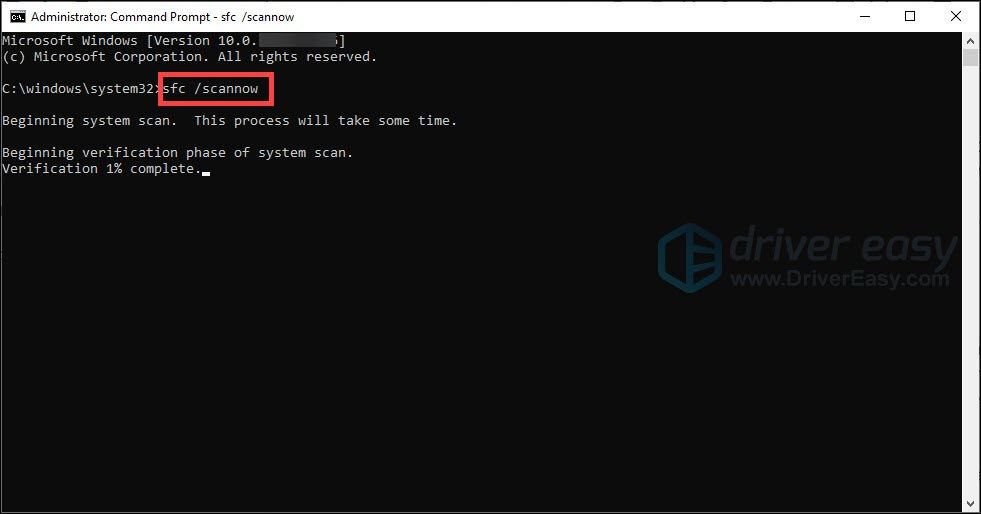
The utility will check the integrity of Windows system files and repair them if required.
After it finishes the process, restart your computer and check if it resolves your issue.
If running the sfc /scannow command cannot repair Windows system files and help you get rid of the error, you can give the DISM command tool a shot.
Run DISM
DISM, or Deployment Image Servicing and Management tool is an administrator-level command-line tool of Windows that is often used to scan and repair potential issues with the .wim store in Windows that may impact system files. When SFC doesn’t run properly, DISM can come into play.
- In the search bar, type cmd. Right-click Command Prompt and select Run as administrator.
- On the User Account Control (UAC) prompt, click Yes.
- In the command prompt window, type DISM /Online /Cleanup-Image /RestoreHealth and hit Enter.
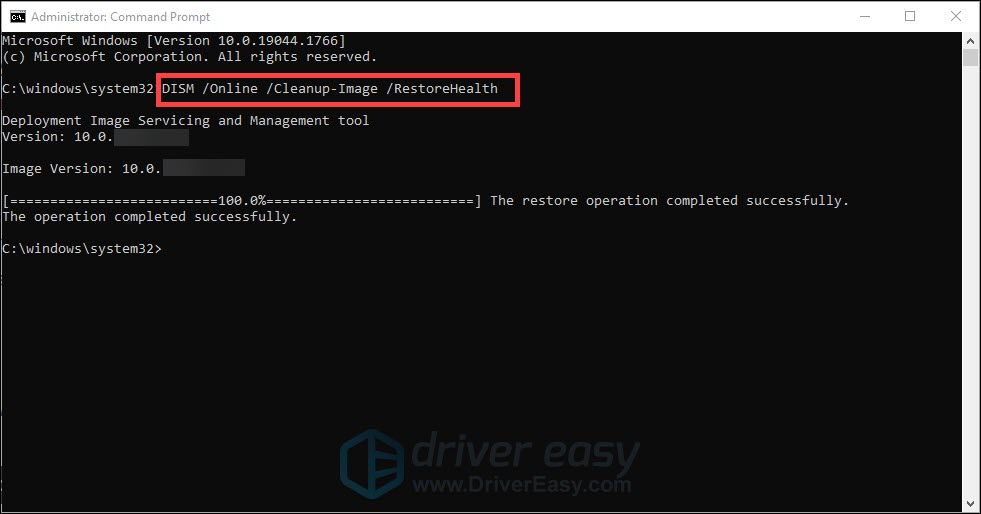
- Wait for the process to complete.
- Reboot the computer and check if the error message still shows up.
Hopefully, the troubleshooting steps in this article will resolve the Video_Dxgkrnl_Fatal_Error. If these methods don’t work, you may need to reinstall Windows as a last resort.