


It would be quite awful if there’s something wrong with Windows Explorer, as it is in charge of creating parts of the user interface, such as the Start Menu, Taskbar, desktop icons, file manager and more in Windows OS.
If Windows Explorer (or the explorer.exe process) keeps crashing on your Windows 11 / 10 / 8.1 / 7 PC, you’re not alone. Lots of Windows users have reported the exact same issue. The good news is, you’ve come to the right place, and you should be able to resolve this issue quickly and easily after reading this guide!
Try these fixes
Here’re the latest 6 fixes that have helped many Windows users fix the Windows 10 File Explorer crashes (and for other Windows edition). You may not have to try them all; just work from the first one until you solve your problem.
- Clear File Explorer history
- Update your graphics driver
- Launch folder windows in a separate process
- Give your account full permission to access the folder content
- Run netsh and winsock reset
- Shorten file path
Fix 1: Clear File Explorer history
Using Windows Explorer for a long period of time will accumulate a lot of files, and such files may cause the executable module (explorer.exe) to crash. According to some Windows users, they fixed this issue after clearing Flie Explorer.
Before trying anything more complicated, follow the steps below to clear File Explorer history:
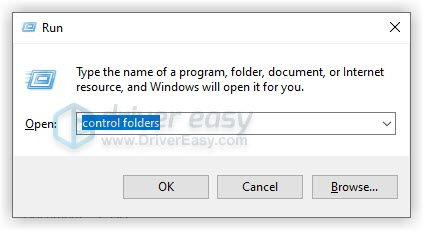
- On your keyboard, press the Windows logo key and R at the same time to envoke the Run command box. Type control folders and press Enter to open the File Explorer Options window.
- Under the General tab, click the Clear button next to “Clear File Explorer history” to clear File Explorer history. Then OK to save the changes.

- On your keyboard, press the Windows logo key and E at the same time to open File Explorer and check to see if it works fine.
If it still crashes, read on and try the next fix, below.
Fix 2: Update your graphics driver
An outdated or corrupted graphics driver could also cause Windows Explorer to crash. If Fix 1 didn’t work for you, try update your graphics driver.
Generally, there are two ways to update your graphics driver: manually or automatically.
Manual driver update – You can update your graphics driver manually by going to the manufacturer’s website for your graphics card, and searching for the most recent correct driver for each. Be sure to choose only drivers that are compatible with your variant of Windows OS.
Automatic driver update – If you don’t have the time, patience or computer skills to update your graphics driver manually, you can, instead, do it automatically with Driver Easy.
Driver Easy will automatically recognize your system and find the correct drivers for it. You don’t need to know exactly what system your computer is running, you don’t need to be troubled by the wrong driver you would be downloading, and you don’t need to worry about making a mistake when installing. Driver Easy handles it all.
You can update your drivers automatically with either the 7 days free trial or the Pro version of Driver Easy. It takes just 2 clicks, and you get full support and a 30-day money-back guarantee with the Pro version:
- Download and install Driver Easy.
- Run Driver Easy and click the Scan Now button. Driver Easy will then scan your computer and detect any problem drivers.

- Click the Activate & Update button next to the flagged device to automatically download and install the correct version of this driver.
Or click Update All to automatically download and install the correct version of all the drivers that are missing or out of date on your system (You’ll need the Pro version for this – when you select Update All, you’ll get a prompt to upgrade. If you’re not prepared to purchase the Pro version yet, Driver Easy provides a 7-day trial at no cost, granting access to all Pro features like fast downloads and easy installation. No charges will occur until after your 7-day trial period ends.)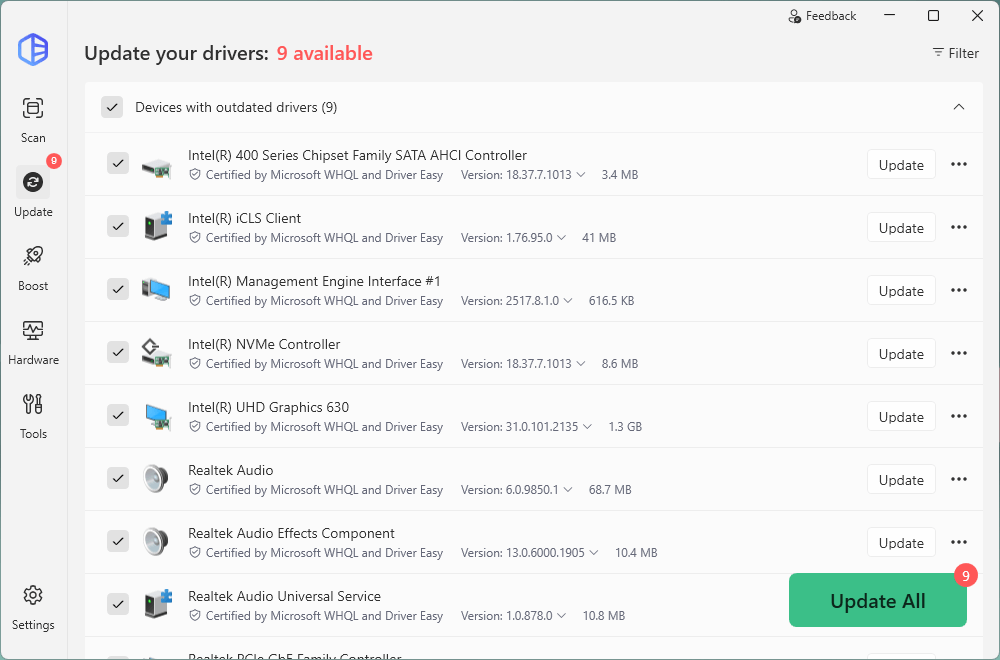
- Once done, press the Windows logo key and E at the same time on your keyboard to open File Explorer and check to see if it works fine.
Fix 3: Launch folder windows in a separate process
By default, File Explorer runs as a single process. In rare cases, this may introduce stability issues to slower PCs, which would cause Windows Explorer to crash. To fix it, you can try launching folder window in a separate process:
- On your keyboard, press the Windows logo key and R at the same time to envoke the Run command box. Type control folders and press Enter to open the File Explorer Options window.
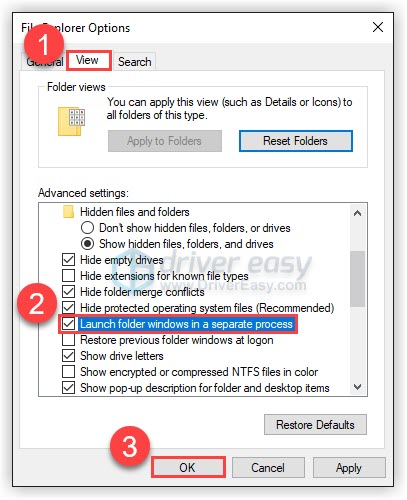
- Navigate to the View tab and check the box nex to “Launch folder window in a separate process”. Click OK to save the changes.
- On your keyboard, press the Windows logo key and E at the same time to open File Explorer and check to see if it works fine.
See if this issue persists. If this fix didn’t work for you, try the next fix, below.
Fix 4: Give your account full permission to access the folder content
File Explorer also crashes when your account is not given full permissions to access the contents of a folder. You can follow the instructions below to grant your account full permission to access the foloder content:
- On your keyboard, press the Windows logo key and E at the same time to open the File Explorer.
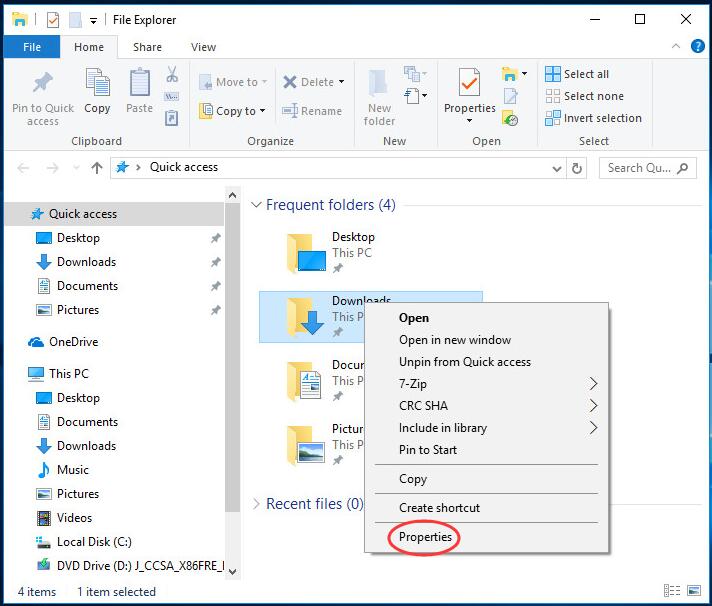
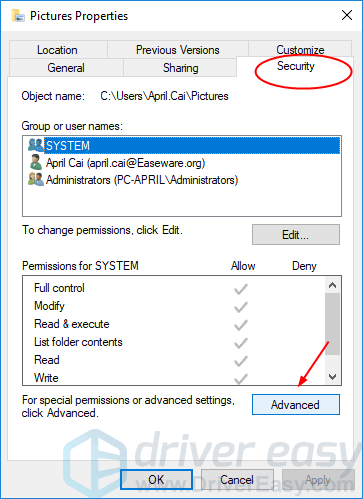
- Right-click on any file folder in File Explorer. Then click Properties.
- Navigate to the Security tab.Then click Advanced.
- Click Change on the pop-up window. Then enter your account name in the box and then click OK.
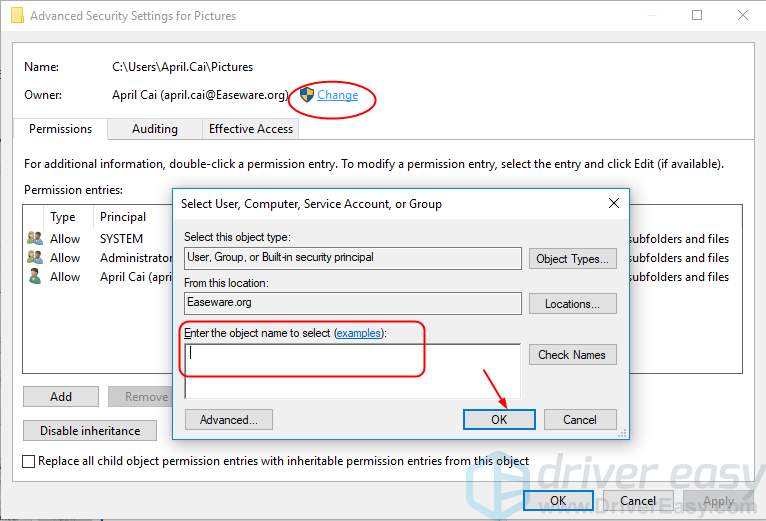
NOTE: If you aren’t sure your account name, follow these:
Click Advanced > Find Now. Find and click your account from search results. Then click OK to on the previous window.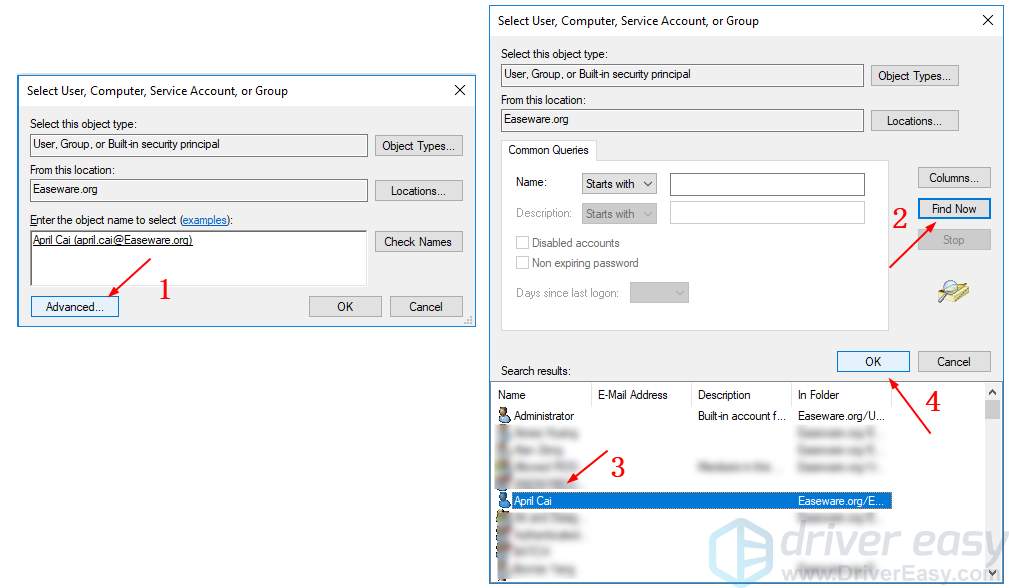
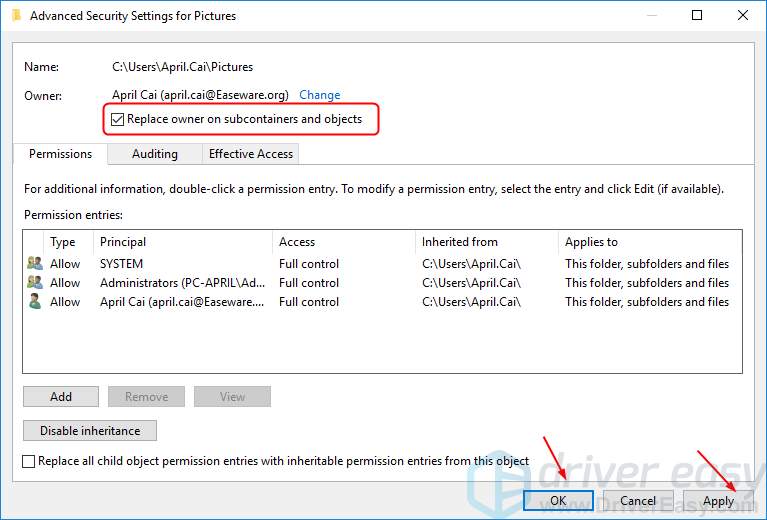
- Now it will automatically back on Advanced Security Settings window. Check on Replace owner on subcontainers and objects. Then click OK.
- Back on the File Explorer window, this time right-click on the file folder which you want to set full access to your account. Click Properties, then click Advanced > Add.
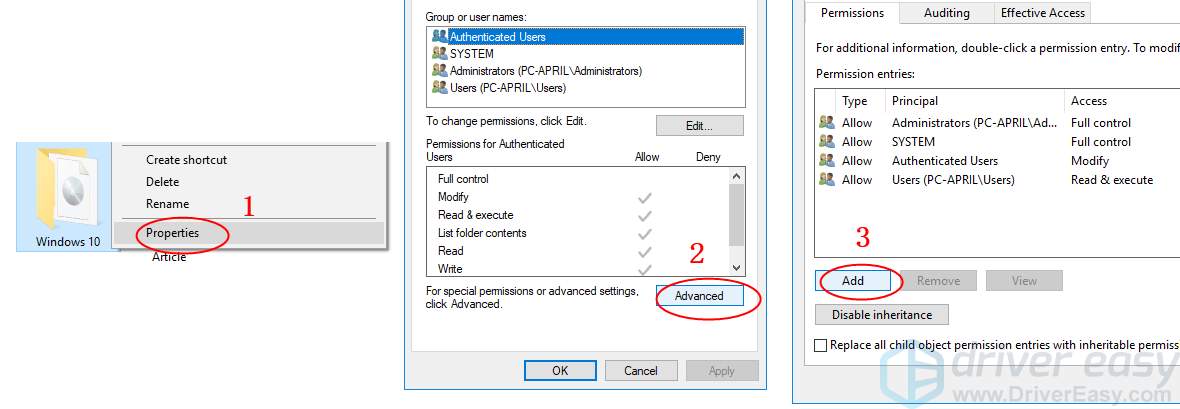
- Click Select a principal. Then enter your account as the previous steps you set and click OK.
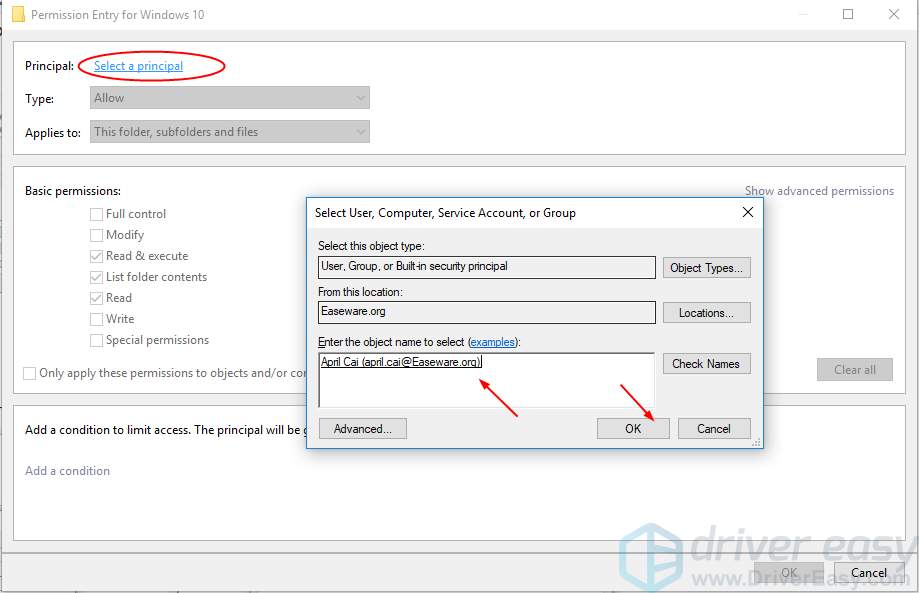
- Once you had set your principal, set the Type to Allow. Check the box next to Full Control under Basic permissions. Then click OK.

- Click OK when it goes back on each previous window.
- On your keyboard, press the Windows logo key and E at the same time to open File Explorer and check to see if it works fine.
See if this issue is fixed. If not, try the next fix, below.
Fix 5: Run netsh and winsock reset
Some Windows users resolved the Windows Explorer crashes by running netsh and winsock reset. If you didn’t try this fix before, and none of the fixes above worked, give this fix a shot:
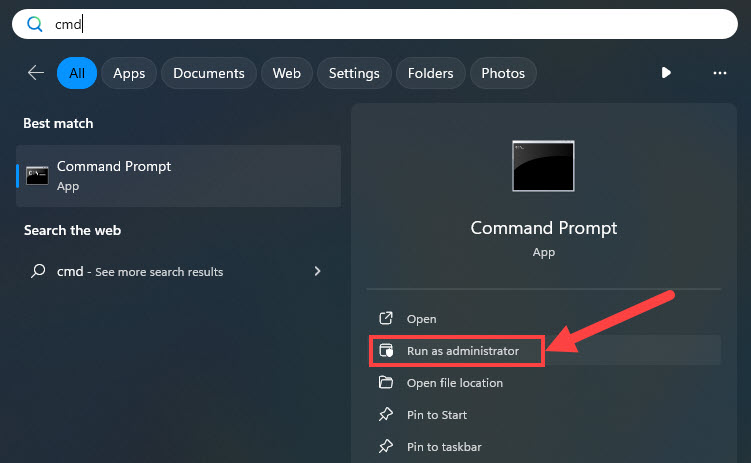
- On your keyboard, press the Windows logo key and type cmd, then right-click on Command Prompt to select Run as administrator. Click Yes when prompted by the UAC.
- Type the following commandin the Command Prompt window and press Enter to run it.
netsh winsock reset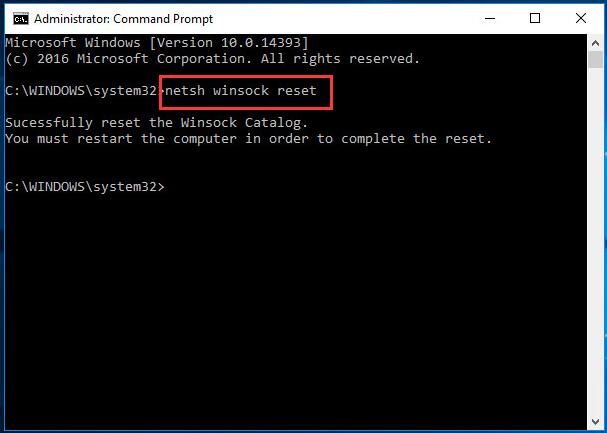
- Restart Windows OS.
- On your keyboard, press the Windows logo key and E at the same time to open File Explorer and check to see if it works fine.
Fix 6: Shorten file path
This fix is derived from a reader’s real experience. He/she found out that when the combination of folder names and file names is too long, Windows 10 explorer will crash when trying to copy. Also, some programs such as Acrobat Reader will report that access is denied when attempting to open the program file. However, attempts to rename the file will not be successful either.
It’s true that the maximum path length for a file or folder in Windows is 260 characters. If the combination of folder names and file names exceeds the limit, you may encounter various issues, including crashes in Windows Explorer. This limitation is due to the historical design of the Windows file system, which has a maximum path length constraint. The issue is not specific to Windows 10 but has been present in earlier versions of Windows as well.
This reader also provides two approaches to verify this problem:
- Copy the folder which contains the problem file to a shorter combination of folder and file names in the path.
- Attempt to create a new text document in the same folder as the problem file and to make the name of that new text file long to the point that additional characters will not be accepted. A comparison of the length of the accepted file name to the name of the problem file may reveal that the name of the problem file is too long.
If your File Explorer is crashing due to this issue, check the following fixes we tried:
- Shorten file paths: Try to organize your files and folders in a way that reduces the overall path length. This might involve renaming folders or using shorter names for files.
- Use mapped network drives: If the files are on a network drive, you can try using mapped network drives with shorter paths.
- Consider moving files: If possible, consider moving files to a different location with a shorter path.
- Use third-party tools: There are third-party tools available that can help you manage long file paths. Some tools can recursively shorten paths for multiple files.
We would like to express sincere gratitude and appreciation to this reader for providing us with new methods. Also, if you have other fixes or thoughts, please don’t hesitate to share them below or email us. Thank you!
Hopefully, this guide helped you fix the Windows 10 File Explorer crashing issue. If you have any questions or suggestions on this issue, feel free to drop a line in the comment area below. Thanks for reading!