


Launched on 10 November 2015, Fallout 4 is now with a history of around 4 years. Still, some players are complaining of lag issues that almost ruin their gaming experience in Fallout 4. If you happen to be one of those victims, don’t worry – this post provides 5 fixes for you to solve the problem.
5 fixes for Fallout 4 lagging
Here are a few easy-to-apply methods that have helped other users fix their lag issues in Fallout 4. You may not have to try them all; just work your way down the list until you find the one that works for you.
Fix 1: Update your video card drivers
Fix 2: Modify your video card settings
Fix 3: Adjust in-game settings
Fix 5: Stop CPU/memory hogging applications
Fix 1: Update your video card drivers
Keep in mind to update your video card drivers at regular times; otherwise an out-dated or corrupt driver may end up lowering your FPS and even preventing the game from running smoothly.
Besides, if it turns out that merely updating the video drivers cannot solve your issue, you should take a shot at updating every possible device driver (such as CPU and audio) and see whether that works for you.
No need to worry if you don’t have the time, patience, or computer skills to update drivers manually – Driver Easy is there for you.
Driver Easy will automatically recognize your system and find the correct drivers for it. You don’t need to know exactly what system your computer is running, you don’t need to risk downloading and installing the wrong driver, and you don’t need to worry about making a mistake when installing. Driver Easy takes care of everything.
You can update your drivers automatically with either the FREE or the Pro version of Driver Easy. But with the Pro version it takes just 2 clicks (and you get full support and a 30-day money back guarantee):
1) Download and install Driver Easy.
2) Run Driver Easy and click the Scan Now button. Driver Easy will then scan your computer and detect any problem drivers.

3) Click Update All to automatically download and install the correct version of all the drivers that are missing or out of date on your system (this requires the Pro version – you’ll be prompted to upgrade when you click Update All). Or if you just want to update your video card driver, simply click the Update button next to it.
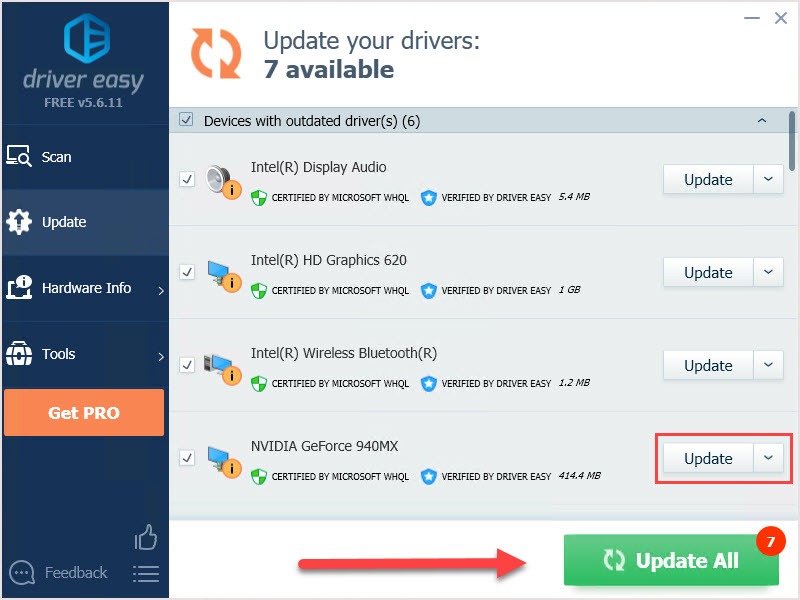
Note: you can do it for free if you like, but it’s partly manual.
Now launch the game and check whether it runs smoothly. Hopefully it does; but if not, read on and try out the next fix below.
Fix 2: Modify your video card settings
To modify your video card settings, use the following procedure:
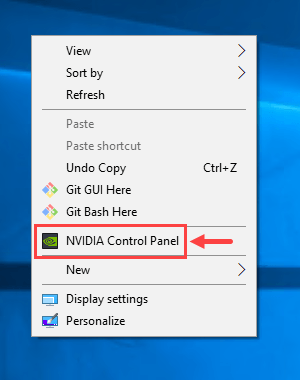
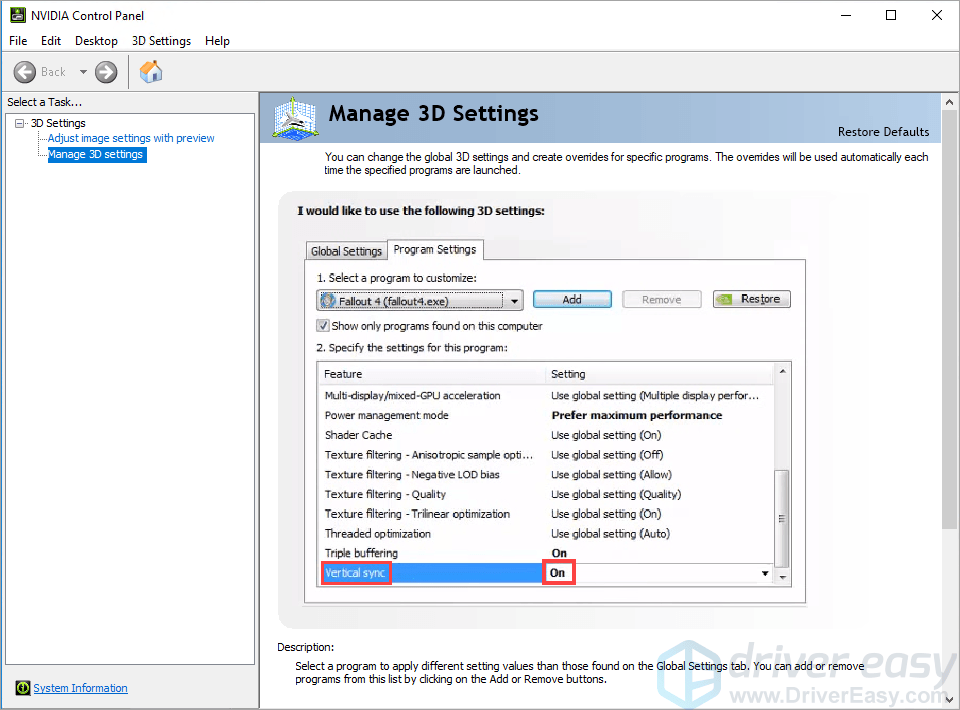
1) Right-click an empty area on your desktop and then select NVIDIA Control Panel from the context menu.
2) In the pop-up window, select Manage 3D settings from its left pane. Then, click Add to locate and choose the executable file of Fallout 4.
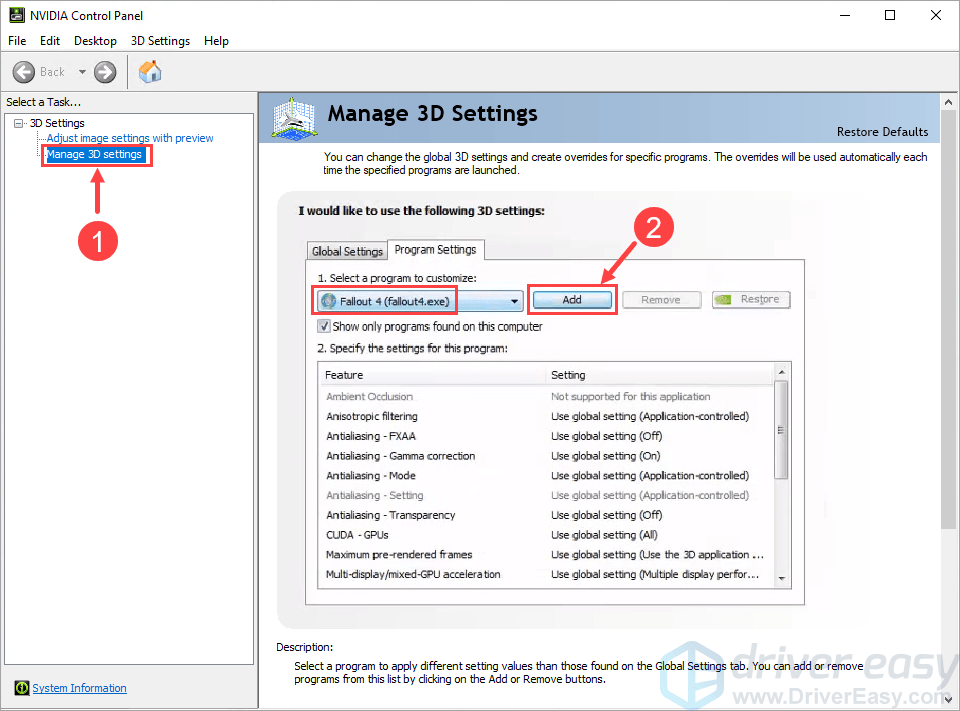
Now you’re able to modify the settings of this program.
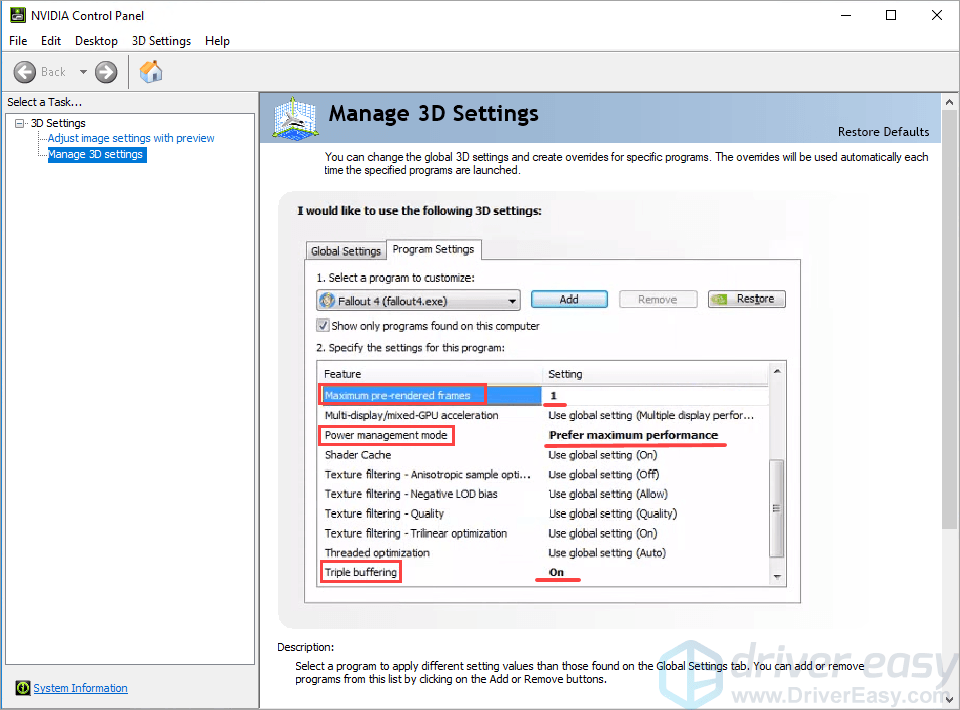
3) Pay attention to the list below Specify the settings for this program:. Scroll through the list to locate these items and make the tweaks accordingly:
- Set Power management mode to Prefer maximum performance
- Set Triple buffering to On
- Set Maximum pre-rendered frames to 1
- Set Vertical sync to On
After modifying your graphics card settings, it’s time to check whether these tweaks have solved your lag problem in Fallout 4. If not, please proceed to the next fix.
Fix 3: Adjust in-game settings
This is also a quick-fix when you find yourself suffering from a lag issue in Fallout 4 – adjust the in-game settings.
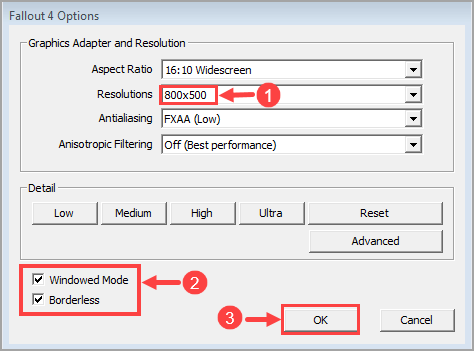
1) Launch Fallout 4. Then, on the launch menu, click Options.
2) Set Resolutions to the same value as your monitor uses. After that, make sure you check these two boxes: Windowed Mode and Borderless. Click OK to save the changes.
Run the game to see if it goes smoothly this time. If not, move on and check out the next fix.
Fix 4: Uncap FPS limit
You may seek to uncap the FPS limit of Fallout 4 by using Notepad to modify some certain values. Here’s how to do it:
1) Navigate to the following folder (this is where the game file basically resides):
C:\Users\YourWindowsName\Documents\My Games\Fallout4
2) Locate a file named Fallout4Prefs.ini. Right-click on it to open the context menu and then click Open with > Notepad.
3) After the file is opened, press Ctrl + F on your keyboard to invoke the Find dialog box. Then, type in iPresentInterval and hit Enter.
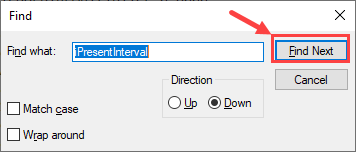
When you find out the line, change iPresentInterval=1 to iPresentInterval=0.
4) Save the file and exit Notepad.
Note: According to some players, uncapping FPS limit may bring about messy side effects such as “UI is boosted up” (thanks to the comment by one russian лёха). If you run into problems like that, please revert the change. Just reset iPresentInterval to 1, exit the game and then relaunch it.
If this fix doesn’t work for you, you may read on and try the next one.
Fix 5: Stop CPU/memory hogging applications
If you have too many CPU/memory hogging applications running in the background, that may slow down the processing speed of your computer and lead to low FPS in Fallout 4. Thus, you need to close these applications before you start to play the game. Here are the steps:
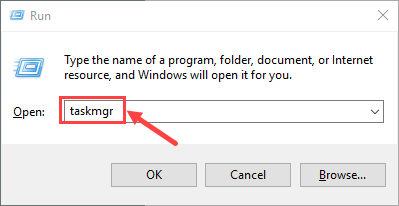
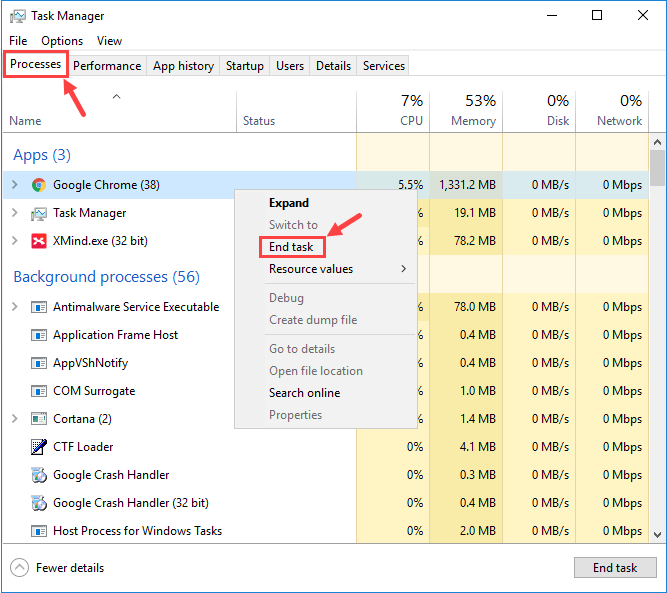
1) On your keyboard, press the Windows logo key and R at the same time to invoke the Run dialog box. Type in taskmgr and hit Enter.
2) Select the Processes tab. Right-click on the CPU/memory hogging process such as Google Chrome to open its context menu. Then click End task.
3) Disable your antivirus software temporarily. This is optional to you but you can give it a try and see if that mitigates your problem.
Note that Microsoft has its own default anti-malware, Windows Defender. It’s automatically enabled even if you also have other antivirus applications installed. Even if you disable the third-party antivirus programs, Windows Defender is still there for you during that certain time range. So, no need to worry too much about temporarily turning your antivirus off.
So far, have you succeeded in solving your lag issue in Fallout 4? If you have any further questions or ideas, please feel free to leave a comment below. Thanks for reading, and take your time scavenging in the wasteland!