


Try these fixes
- Restart the Print Spooler service
- Do a full power cycle
- Update your printer driver
- Set your printer as the default printer
- Check for Windows updates
- Scan your system
Note: the screenshots below are taken from Windows 10, but the solutions apply to Windows 7/8 as well.
Solution 1 – Restart the Print Spooler service
Restarting the Printer Spooler in Services solves most printer issues. To do so, you can cancel all the print jobs first, then follow these steps:- On your keyboard, press the Windows
 key and R at the same time to open the Run box.
 - Type services.msc and click OK.
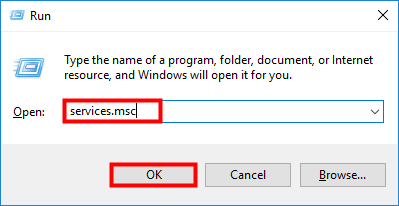
- Navigate to and select Print Spooler.
- Click Restart on the upper left to restart the Printer Spooler service.

- Check by printing something.
Solution 2 – Do a full power cycle
Another solution that works for many users is turning the computer, printer, and Wi-Fi completely off and then on again. Doing so may help reinitialize the configurations and parameters sets of your printer or recover it from an unresponsive state. It’s also used to reset all the network configurations as they are all lost when you turn the device completely off. So, you might as well give it a go:- )Turn off your computer, printer and Wi-Fi.
- Unplug your computer and printer.
- After a period of about 5 minutes, plug in both devices, turn them on and try connecting and printing something.
Solution 3 – Update your printer driver
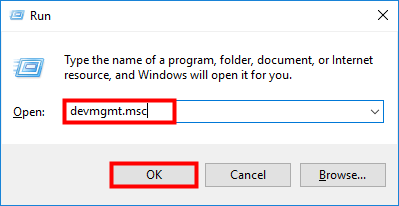
If the steps above don’t resolve your Another computer is using the printer problem, it may be caused by an outdated or a faulty printer driver. Then you can go to Device Manager to update your printer driver:- Press Windows+R to invoke the Run box.
- Type devmgmt.msc and click OK.
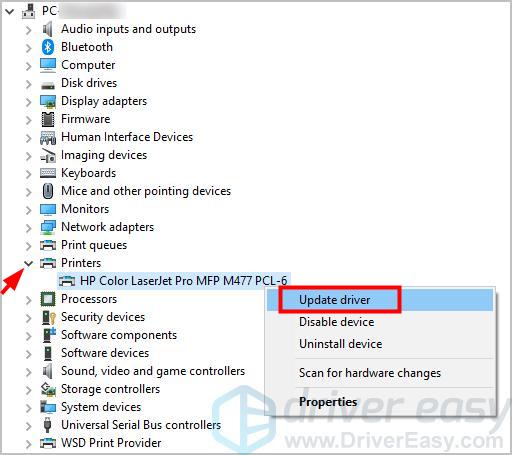
- Open the Printers entry, right-click on your printer and select Update driver.
- Click Search automatically for updated driver software.
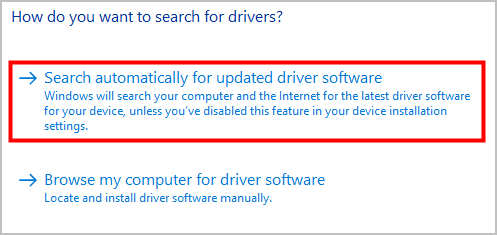
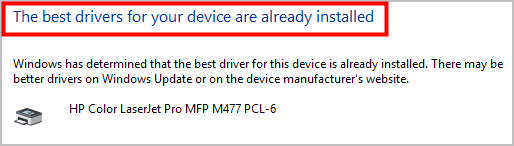
Note: It’s possible that Windows could not find driver updates and tell you that The best drivers for your device are already installed. (see screenshot below)
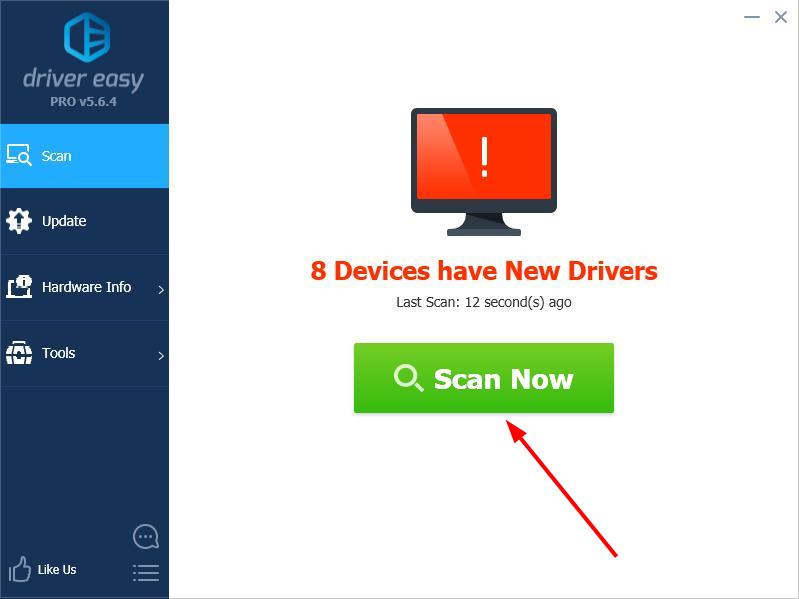
 Then you can try Driver Easy, a tool that detects, downloads and (if you go Pro) installs any driver updates your computer needs.
Driver Easy will automatically recognize your system and find the correct drivers for it. You don’t need to know exactly what system your computer is running, you don’t need to be troubled by the wrong driver you would be downloading, and you don’t need to worry about making a mistake when installing.
You can update your drivers automatically with either the FREE or the Pro version of Driver Easy. But with the Pro version it takes just 2 steps (and you get full support and a 30-day money back guarantee):
Then you can try Driver Easy, a tool that detects, downloads and (if you go Pro) installs any driver updates your computer needs.- Download and install Driver Easy.
- Run Driver Easy and click the Scan Now button. Driver Easy will then scan your computer and detect any problem drivers.
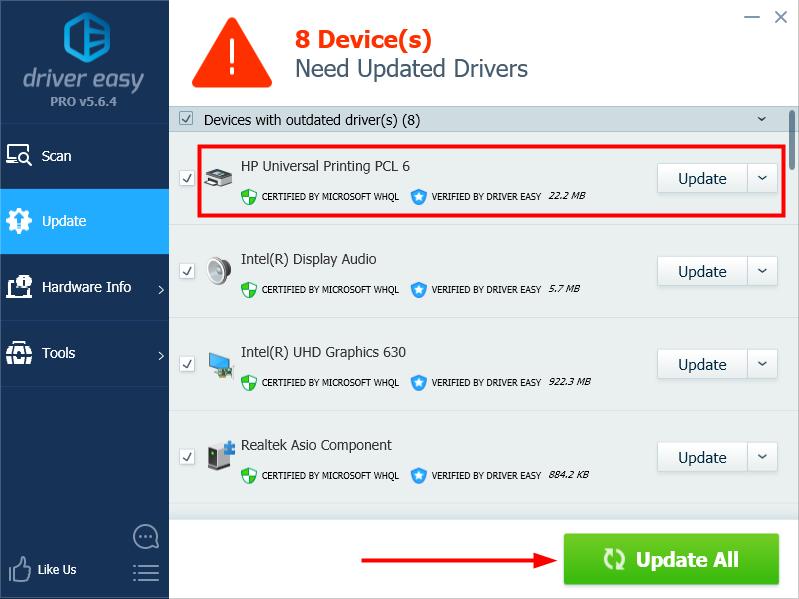
- Click the Update button next to your printer driver to automatically download the correct version of it, then you can manually install it (you can do this with the FREE version).Or click Update All to automatically download and install the correct version of all the drivers that are missing or out of date on your system (this requires the Pro version – you’ll be prompted to upgrade when you click Update All).
- Restart your PC to check if the problem is resolved.
Solution 4 – Set your printer as the default printer
If you’re using a Canon printer, setting your printer as the default printer in Settings may do the trick.Canon printers tend to have two printers listed in place of a single printer. One is a normal printer and the other has the same name but has a ‘WS’ at its end. If you are connected to the ‘WS’ printer, this may be causing the issue of “Another computer is using the printer“. Under such circumstances, all you need to do is simply set the normal printer as the default printer. Besides, you can remove the WS printer as it is not required.
Follow me:
If you’re using Windows 10
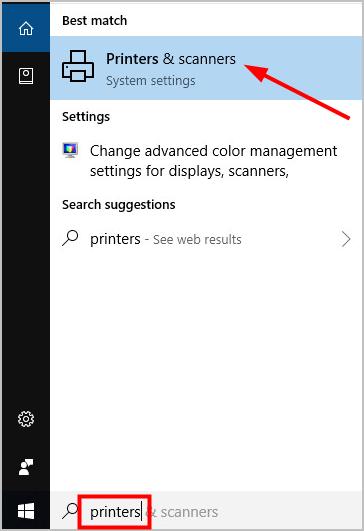
- Type printers in the Windows search box and select Printers & scanners.
- In the right pane, uncheck Let Windows manage my default printer.

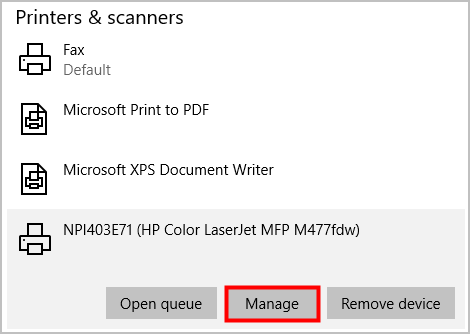
- Under Printers & scanners, select the printer you want to use and click the Manage button.
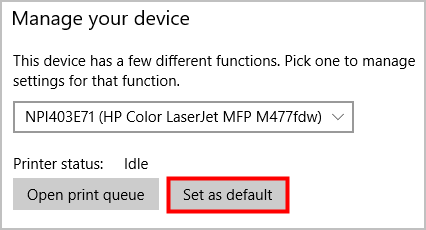
- Click Set as default.
If you’re using Windows 8
-
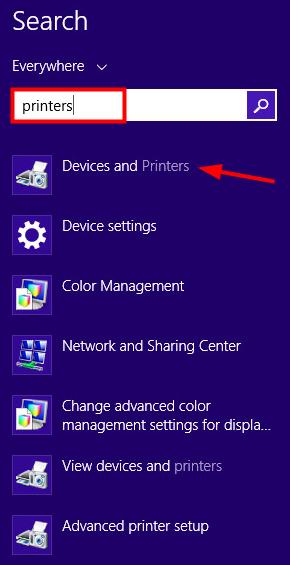
Click the Start button, then the Search icon in the upper right.
- Type printers and select Devices and Printers.
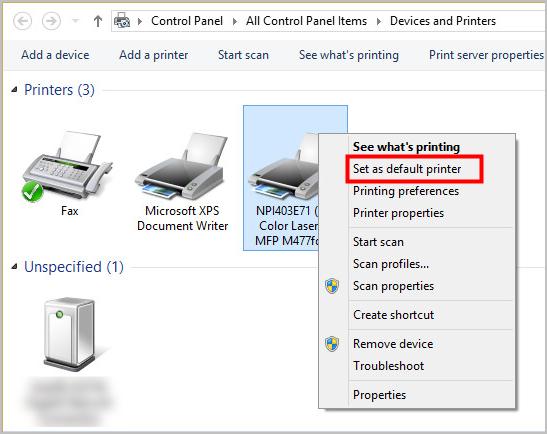
- In the Printers section, right-click on the printer you want to use and select Set as default printer.
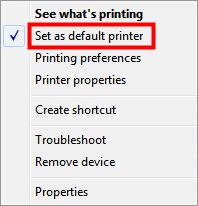
If you’re using Windows 7
- click the Start button, and Devices and Printers.
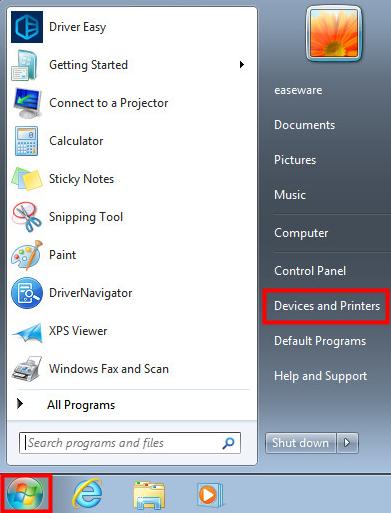
- Right-click on the printer you want to use and select Set as default printer.
Solution 5 – Check for Windows updates
Some users solve their printer issues by updating their system. To do so: type update in the Windows search box, and select Check for updates or Windows update.Solution 6 – Scan your system
In case your printer issue is being caused by malware, when the above methods fail, you can use Windows Defender to scan your system — type windows defender in the Windows search box to run a scan.The above are our recommended solutions to the Another computer is using the printer problem. Do they work for you? Leave a comment below to tell us the results or any other suggestions are welcome.
38
38 people found this helpful
9 Comments
Most Voted