


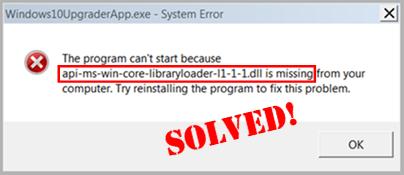
If you find your computer stuck with this api-ms-win-core-libraryloader-l1-1-1.dll is missing error when trying to upgrade it to Windows 10 or 11, you’re not alone. Many users have reported the same. But don’t worry, it can be easily fixed…
About api-ms-win-core-libraryloader-l1-1-1.dll
“api-ms-win-core-libraryloader-l1-1-1.dll” is a type of dll file that enables different applications on Windows to share the same functionality. And since it’s not a file that comes with Windows 7, it can be prone to api-ms-win-core-libraryloader-l1-1-0.dll is missing from your computer, api-ms-win-core-libraryloader-l1-1-0.dll Not Found problems when trying to upgrade from Windows 7 to Windows 11.
6 fixes for api-ms-win-core-libraryloader-l1-1-1.dll is missing from your computer
Just work your way down the list until the .dll file missing error alert is resolved:
- Install the api-ms-win-core-libraryloader-l1-1-1.dll file
- Download & install Microsoft Visual C++
- Move the api-ms-win-core-libraryloader-l1-1-0.dll file
- Replace the wimgapi.dll file
- Install ALL Windows updates
- Want us to fix the problem for you?
Fix 1: Install the api-ms-win-core-libraryloader-l1-1-1.dll file
Perhaps the most straightforward solution to this api-ms-win-core-libraryloader-l1-1-1.dll is missing from your computer error is to restore the missing file. If you don’t know exactly how to install the DLL, or are unsure which version to choose, you can try the following steps.
- Go to DLL-Files. Use the search box to look for the DLL file that is missing from your computer.

- Once it gets a hit in the database, you will see the available .dll files. You can then click the file and follow the instructions on the page to download the file to the designated location.
A side note:
In this process, you may find multiple files available. Mostly you can simply pick the highest version. However, when the versions are the same, it could mean that the files work for different architectures.
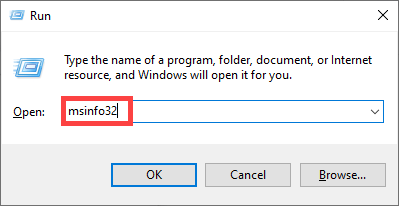
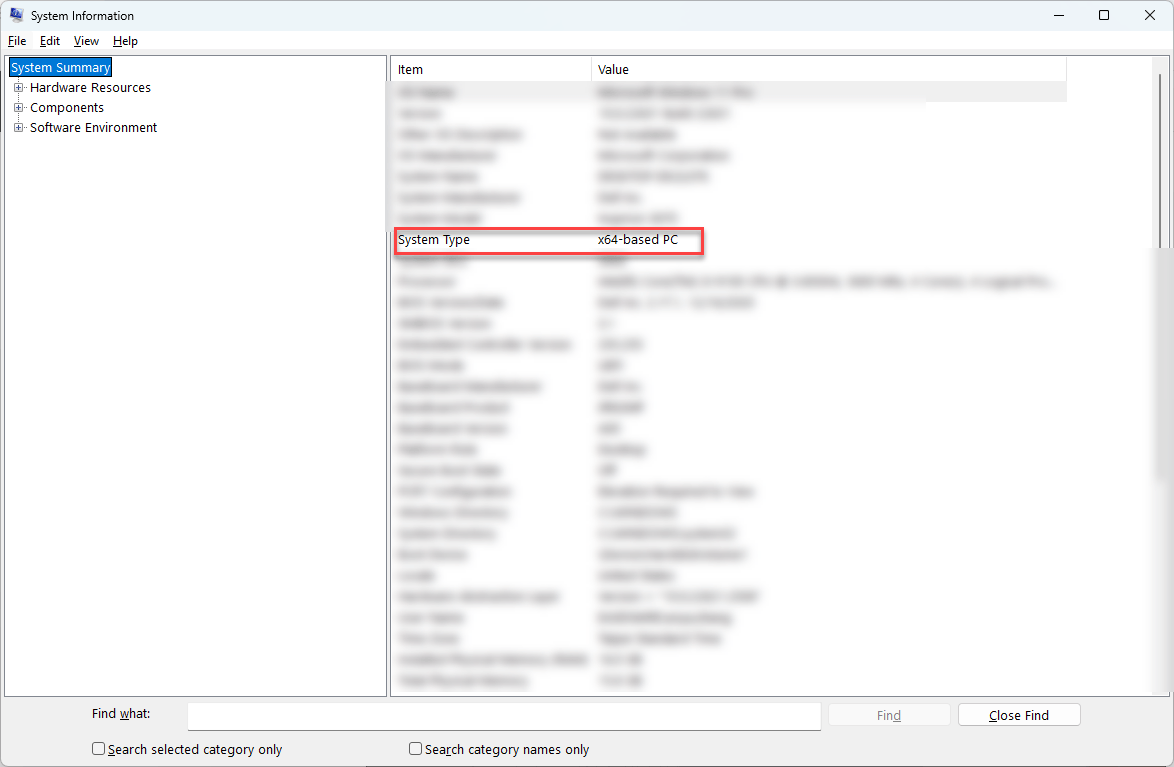
To find out the architecture of your system (whether it’s 64-bit or 32-bit), you can open System Information. Here are the quick steps:
- On your keyboard, press the Windows logo key and R keys, then type msinfo32 and press Enter.
- Locate the System type.
Once finished, check to see if the DLL file missing issue is resolved. If not, try the next fix, below.
Fix 2: Download & install Microsoft Visual C ++
The api-ms-win-core-libraryloader-l1-1-1.dll is missing error may occur because the required Visual C++ runtime components are not installed or have become corrupted. Since this DLL is part of Microsoft Visual C++, the best way to fix this is to ensure you have the latest redistributable package installed.
You can download and install Microsoft Visual C++ either manually or automatically. If you’d rather save the manual hassle, you can do it automatically with Driver Easy. Originally designed as a driver updater tool, Driver Easy now also includes features that scan for missing or outdated system components.
When enabled, its “Scan Devices Automatically” feature scans your system for missing or outdated drivers and essential runtime libraries, including the Visual C++ redistributables. With just a few clicks, Driver Easy detects what you’re missing and helps you install or update these components automatically.
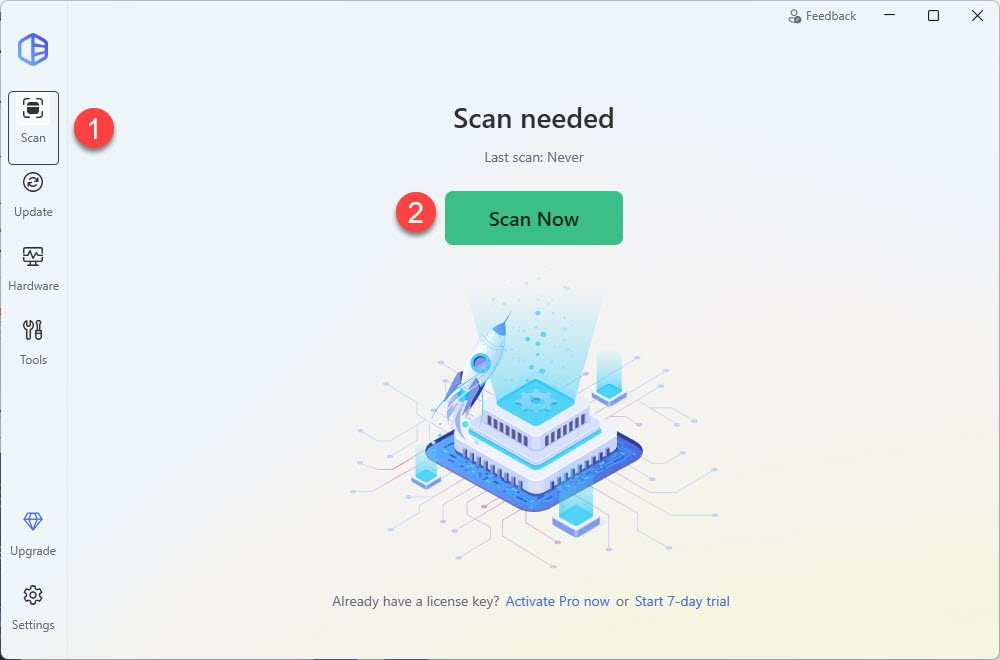
- Download and install Driver Easy.
- Run Driver Easy.
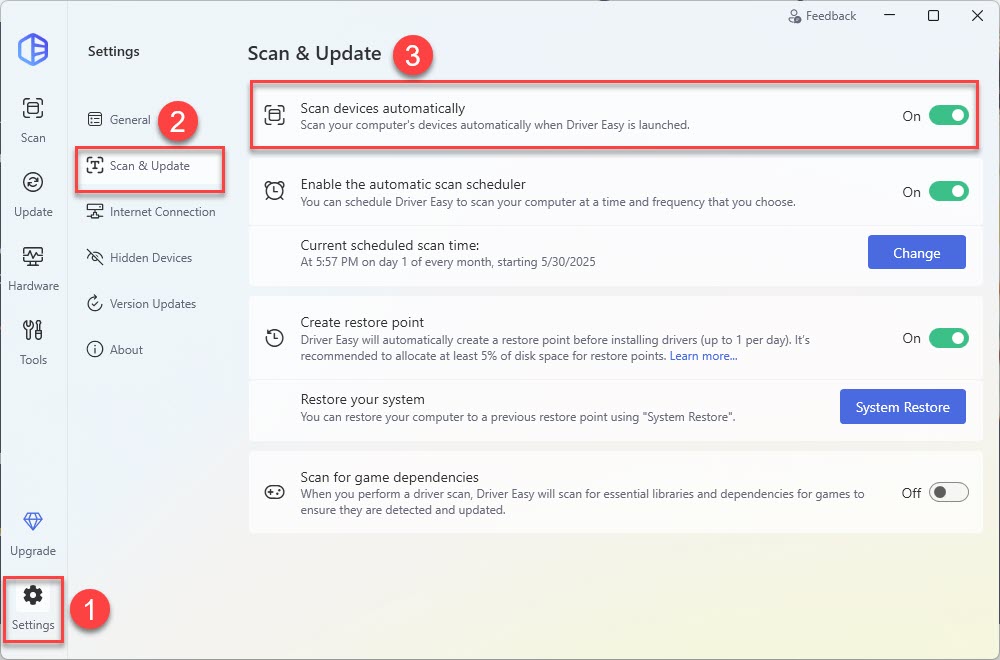
- Click Settings > Scan & Update. Then enable the Scan devices automatically option.
- Click Scan > Scan Now.
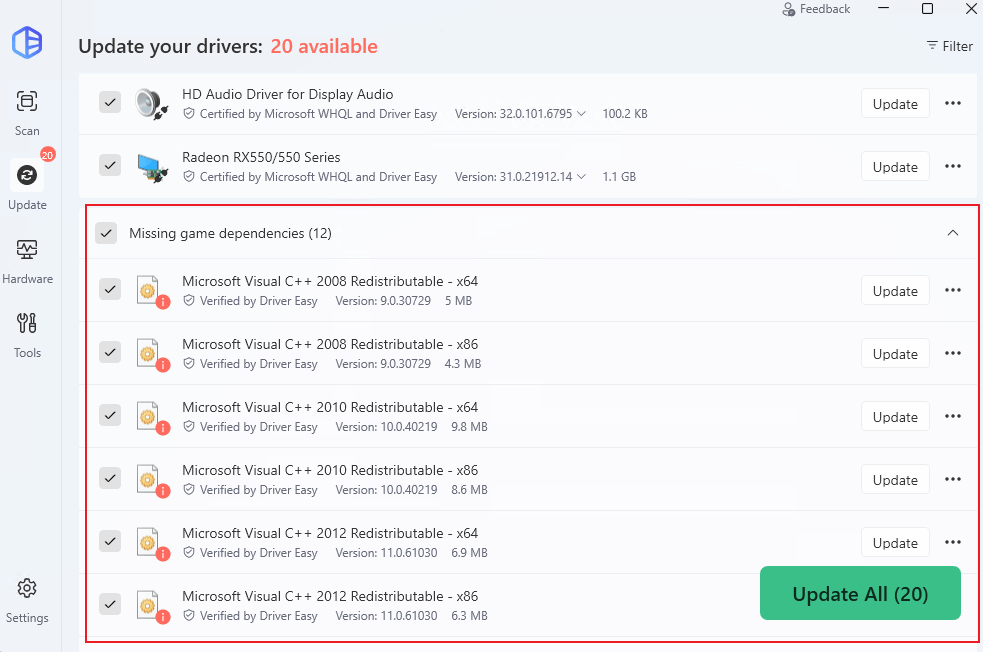
- Check if Microsoft Visual C ++ is flagged in the list of scan results. If yes, click Activate & Update to start a 7-day free trial or upgrade to Driver Easy Pro. Either option will automatically update Microsoft Visual C++ for you..
- Restart your computer for the changes to take effect.
If you go the manual route, here are the steps:
- Go to Microsoft downloads for Microsoft Visual C ++ (If you’ve already had Microsoft Visual C ++ installed on your PC, skip this).
- Make sure you click the first link for the latest version.
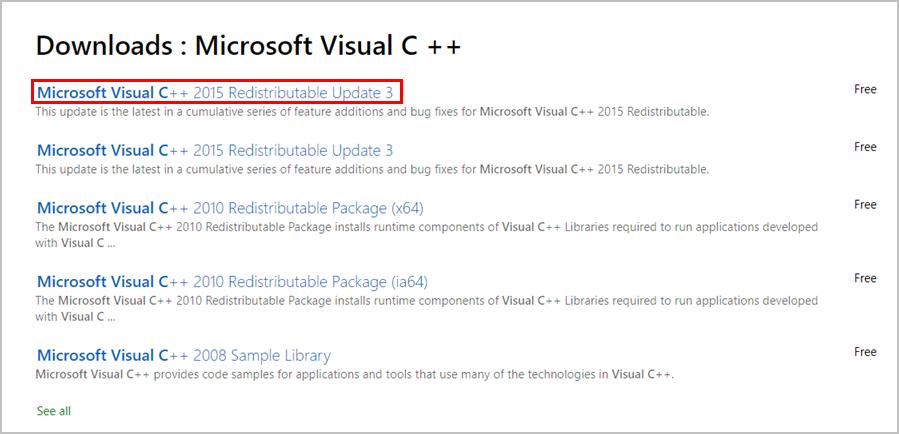
- Click Download.

- Select your Windows bit version and click Next.
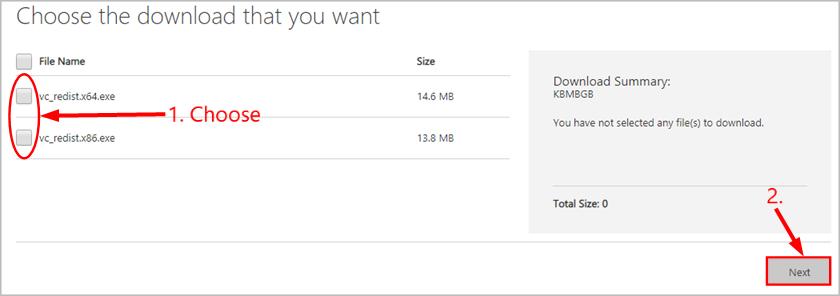
- Once the download finishes, double-click on the file and follow the on-screen instructions to install.
- Keep track of the upgrade, and hopefully it proceeds smoothly this time.
Fix 3: Move the api-ms-win-core-libraryloader-l1-1-0.dll file
- Depending on what bit version your computer is running:
- If it’s a 64-bit: copy & paste the api-ms-win-core-libraryloader-l1-1-0.dll file into C:WindowsSysWOW64;
- If it’s a 32-bit: copy & paste api-ms-win-core-libraryloader-l1-1-0.dll file into C:WindowsSystem32.
- Restart your computer and see if the .dll file missing error has disappeared.
Fix 4: Replace the wimgapi.dll file
If the two fixes above fail to resolve the api-ms-win-core-libraryloader-l1-1-0.dll file missing problem, then you should probably try replacing the dll file responsible for the error (the wimgapi.dll ) from another local copy. Here’s how to do it…
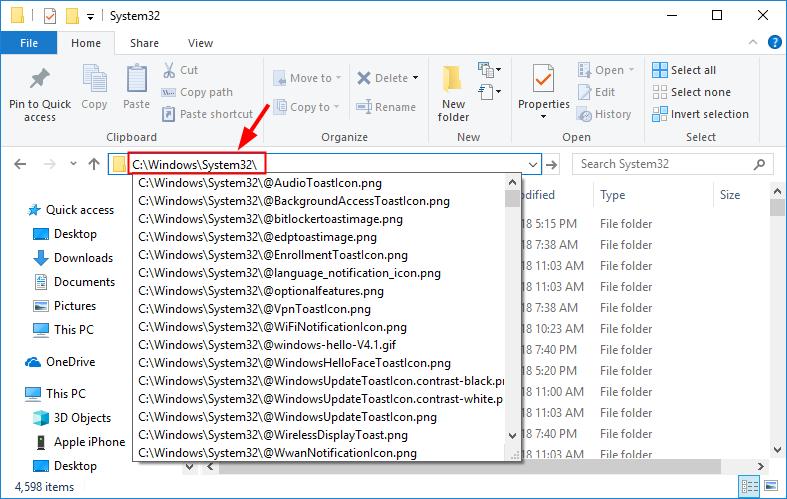
- On your keyboard, press the Windows logo keyand E at the same time. Then copy & paste C:WindowsSystem32 into the address bar and press Enter.
- Copy & paste wimgapi.dll into the search box. Then copy the wimgapi.dll file.
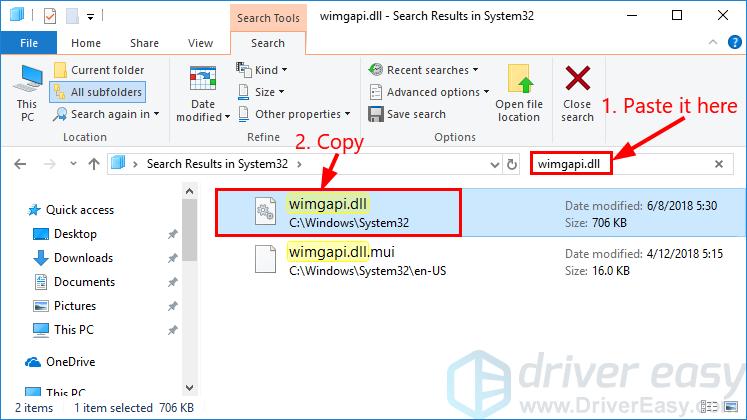
- Go to C:Windows10upgrade and paste the file into the background area.
- Click Yes when asked to confirm replacing the wimgapi.dll file with a new one.
- Re-launch the upgrade assistant and see if it runs without fail this time.
Fix 5: Install ALL Windows updates
Windows Update keeps releasing patches and packages designated to fix bugs/errors, update/replace files and enhance the overall performance of the Windows components. And api-ms-win-core-libraryloader-l1-1-0.dll missing file can be one of them. To manually run Windows Update:
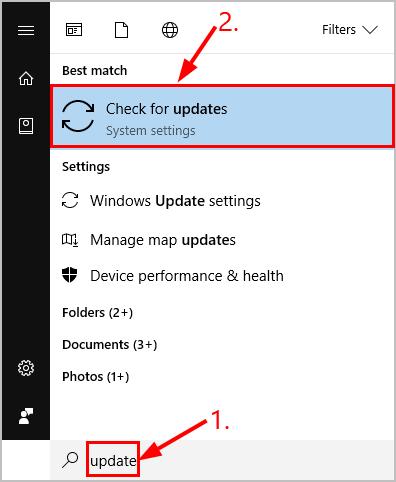
- On your keyboard, press the Windows logo key and type update. Then click on Check for updates.
- Click Check for updates.
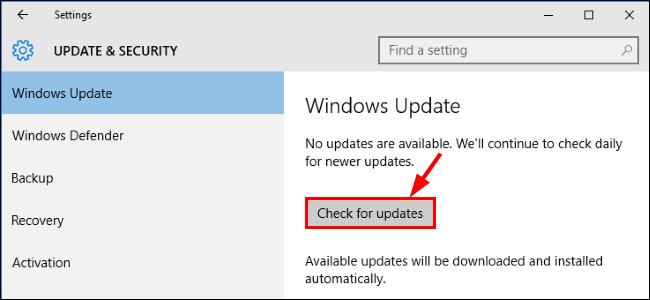
- All updates available will be downloaded & installed automatically. After that, try the upgrade again and see if it succeeds this time.
Fix 6: Want us to fix the problem for you?
If the fix above didn’t work, and you don’t have the time or confidence to troubleshoot the problem for yourself, get us to fix it for you. All you need to do is buy a 1-year subscription to Driver Easy (just $29.95) and you get free technical support as part of your purchase. This means you can contact our computer technicians directly and explain your problem, and they’ll investigate to see if they can resolve it remotely.

How have the fixes above helped you with your troubleshooting? Do you have any ideas or tips to share with us? Feel free to drop us a comment below to let us know your thoughts. 🙂