


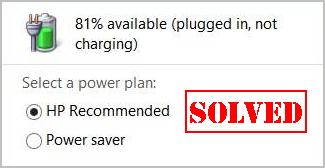
Many ASUS laptop users have reported that their ASUS laptop battery is not charging. The battery indicator on the laptop says “plugged in, not charging” even when an AC adapter is connected to the laptop.
This is so frustrating. But don’t worry. Many people have resolved the “plugged in, not charging” issue on ASUS laptops with the solutions below.
Try these fixes
- Troubleshoot the hardware issues
- Reinstall your battery driver
- Power reset your laptop
- Switch to Full Capacity Mode in ASUS Battery Health Charging
- Repair corrupted system files
Fix 1: Troubleshoot the hardware issues
As the error message suggested, the battery has been plugged but it’s not charging, so make sure to plug your adapter correctly and tightly, in order to be detected.
In addition, probably your AC adapter or cable is damaged, which is why it’s not detected and charging. If that’s the case, you’ll need to switch to another AC adapter for your battery.
However, before buying a new battery charger for your ASUS laptop, you can try the following solutions and these methods work like a charm for many people.
Fix 2: Reinstall your battery driver
A missing or outdated battery driver can cause your ASUS laptop “Plugged in, Not charging” issue. So you should reinstall your battery driver for your laptop, to fix the battery not charging issue.
There are two ways to reinstall your battery driver: manually and automatically.
You can manually reinstall your battery driver via Device Manager. Connect your laptop to the Internet and uninstall the driver from your laptop. This requires time and computer skills.
If you don’t have time or patience, you can do it easily and quickly with Driver Easy.
Driver Easy will automatically recognize your system and find the correct drivers for it. You don’t need to know exactly what system your computer is running, you don’t need to risk downloading and installing the wrong driver, and you don’t need to worry about making a mistake when installing.
- Download and install Driver Easy.
- Click Tools > Driver Uninstall > System Device Drivers > Batteries. Click your battery device driver and select Uninstall.
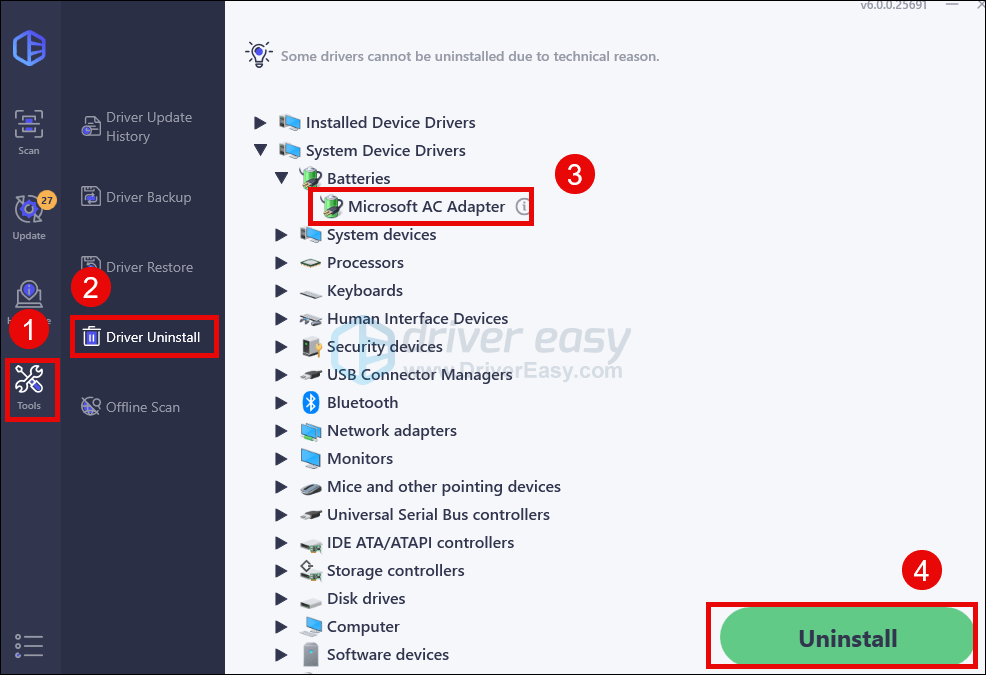
- Restart your computer afterward.
The battery driver will be reinstalled automatically after the start. Then check if your battery is charging now. If unfortunately, the driver doesn’t reinstall after restarting, please move on to the next fix.
Fix 3: Power reset your laptop
If the battery is plugged in but not charging on your ASUS laptop, you should perform a power reset for your laptop, and this method works for people who have the same issue. Here’s what you need to do:
- Shut down your laptop (ensure to save your work before shutting down).
- Remove any peripheral devices connecting to your laptop, such as a USB drive, or Bluetooth.
- Unplug the AC adapter charger from your laptop.
- Remove the battery from your ASUS laptop (if your battery is irremovable, skip this step).
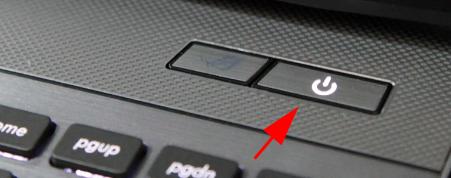
- Press and hold down the power button for 60 seconds, then release.
- Replug the AC adapter/power charger to your laptop.
- Power on your laptop as normal.
Your ASUS laptop should be charging and saying “plugged in, charging”. Then your battery won’t charge issue should be resolved.
If the problem still persists, don’t worry. There’s something else to try.
Fix 4: Switch to Full Capacity Mode in ASUS Battery Health Charging
Another possible solution for the ASUS laptop “plugged in not charging” problem is to check your battery health mode and make sure to choose Full Capacity Mode (many thanks to our lovely users for the advice).
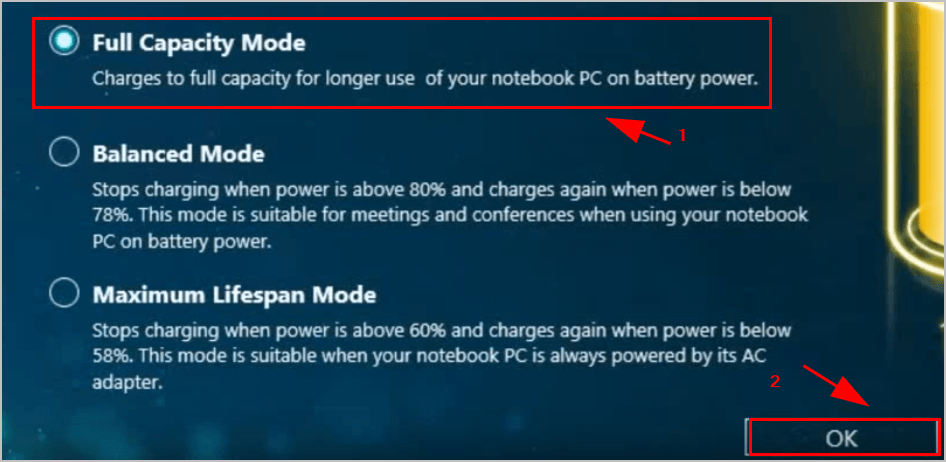
ASUS laptops provide a feature named “ASUS Battery Health Charging”, and it pops up automatically in the very beginning after your OS is installed. And it offers three options for you to choose for your battery health:
- Full Capacity Mode: Your battery is charged to its full capacity.
- Balanced Mode: Your battery stops charging when the power is above 80% and re-charges when the power is below 78%.
- Maximum Lifespan Mode: Your battery stops charging when the power is above 60% and re-charges when the power is below 58%.
So if your ASUS laptop is in Balanced Mode or Maximum Lifespan Mode, you’ll no doubt have the battery not charging problem. To fix it, follow these steps:
- Go to Taskbar > Show hidden icons at the bottom right corner.

- Click the battery health charging mode icon.
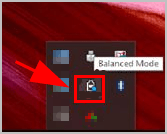
- In the pop-up window, select the first option: Full Capacity Mode. Then click OK to save.
- Restart your laptop.
Now your ASUS laptop should be able to charge while plugged in.
Fix 5: Repair corrupted system files
Missing, corrupt, or damaged system files may be the culprit for this ASUS laptop “plugged in not charging” error. To eliminate this issue as a possible cause, you can try running the SFC scan to repair possible system file issues.
System File Checker (SFC) is a handy feature in Windows that helps scan your system files and repair missing or corrupted system files(including those related to BSOD). To run the SFC scan:
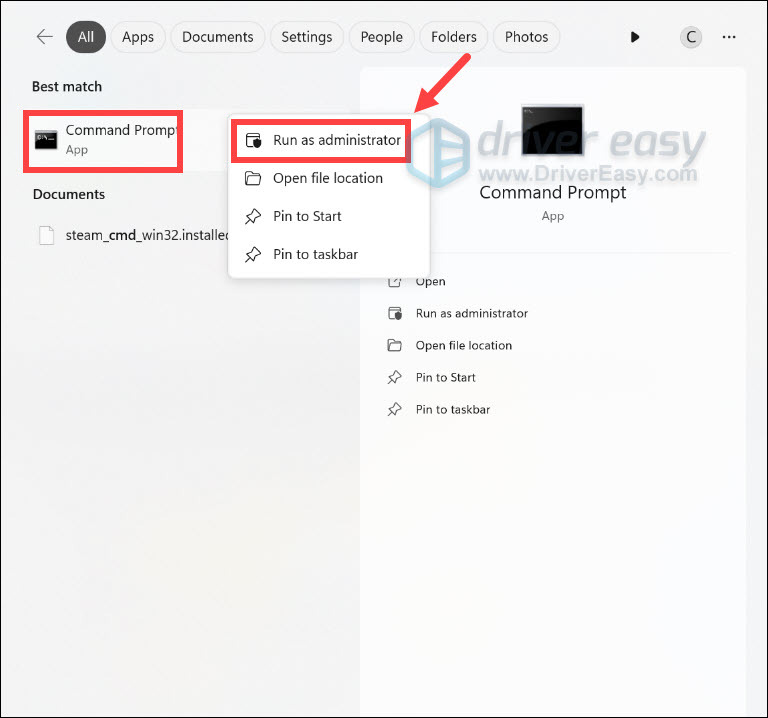
- On your keyboard, press the Windows logo key and type cmd. Then right-click on Command Prompt and click Run as administrator.
- Click Yes when prompted to confirm.
- In the command prompt window, type sfc /scannow and press Enter.
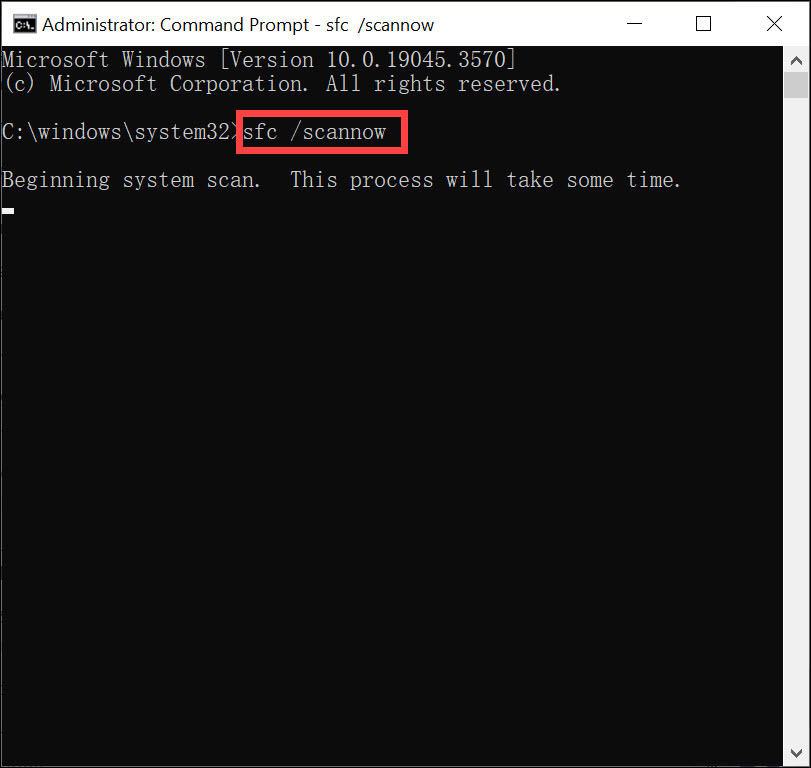
It’ll take some time for the SFC to replace the corrupted system files with new ones if it detects any, so please be patient. - Restart your computer for the changes to take effect.
- Check your computer to see if the problem has been fixed.
That’s it. Hope this post comes in handy and fixes your ASUS laptop “Plugged in, Not charging” issue.
Feel free to leave a comment below and let us know which method helps.