


You’re this close to jumping out of your seat when Call of Duty refuses to update at all. The launcher tells you an update is needed, but it just sits there — 0.0B of 0.0B, no progress, no download, nothing. Frustrating, right? Well, you’re not the only one dealing with this.
But don’t worry. It can be fixed. In this article, we will show you the 7 most useful methods that have helped many players fix the Call of Duty won’t update on PC issue and get back into the fight. Read on!
How to fix Call of Duty won’t update issues on PC
1. Restart your network & try a different connection
Game updates require consistent communication with Blizzard’s (or Steam’s) servers, but sometimes the problem isn’t your PC or the game itself — it’s your internet connection. If your current network is dropping packets, experiencing high latency, or being filtered or throttled by your ISP, it can interrupt or completely prevent the update from starting. Temporary routing issues can also block your launcher from connecting properly.
Before switching networks, try power cycling your router and modem. Just unplug them from power for about 60 seconds, then plug them back in.

Once your connection comes back online, try launching the update again. If it starts downloading, then great! But if it remains stuck, proceed with the following steps:
- If you’re on Wi-Fi, try switching to a wired connection (Ethernet), which is more stable and reliable for large downloads.
- If you’re already wired, try connecting to a different network entirely. For example:
- Use your mobile phone’s hotspot as a temporary connection.
- Switch to another Wi-Fi (home, work, or a friend’s).
If switching to a different network has helped you kickstart a stalled update and get past the COD update stuck issue, then great! You can usually switch back to your usual connection once it’s underway. But if the update is still stuck or won’t start despite a different network, please proceed to Fix 2, below, for further troubleshooting.
2. Update your device drivers
Outdated or faulty drivers can directly interfere with how your PC connects to update servers. Even if your internet seems fine, a misbehaving network adapter driver can silently block stable communication, causing the update to hang. Similarly, outdated graphics drivers may cause system instability that could interrupt game updates.
To rule this out, you should update your drivers to the latest stable version. You can manually search for updates through the official websites, but this method requires care: installing the wrong driver version or missing a critical clean install step can introduce new instability.
If you’d rather avoid the hassle of manual searching — and the risks that come with it — you can update automatically with Driver Easy. Driver Easy is a trusted driver updater that makes the process effortless. It automatically detects the exact drivers your system needs and installs them correctly, without the risk of picking the wrong version.
You can start with the free trial, which gives you 7 days of access to all Pro features. During this time, you’ll be able to automatically download and install the correct drivers with just a few clicks—no payment required unless you decide to keep using the Pro version.
All it takes is just a few clicks:
- Download and install Driver Easy.
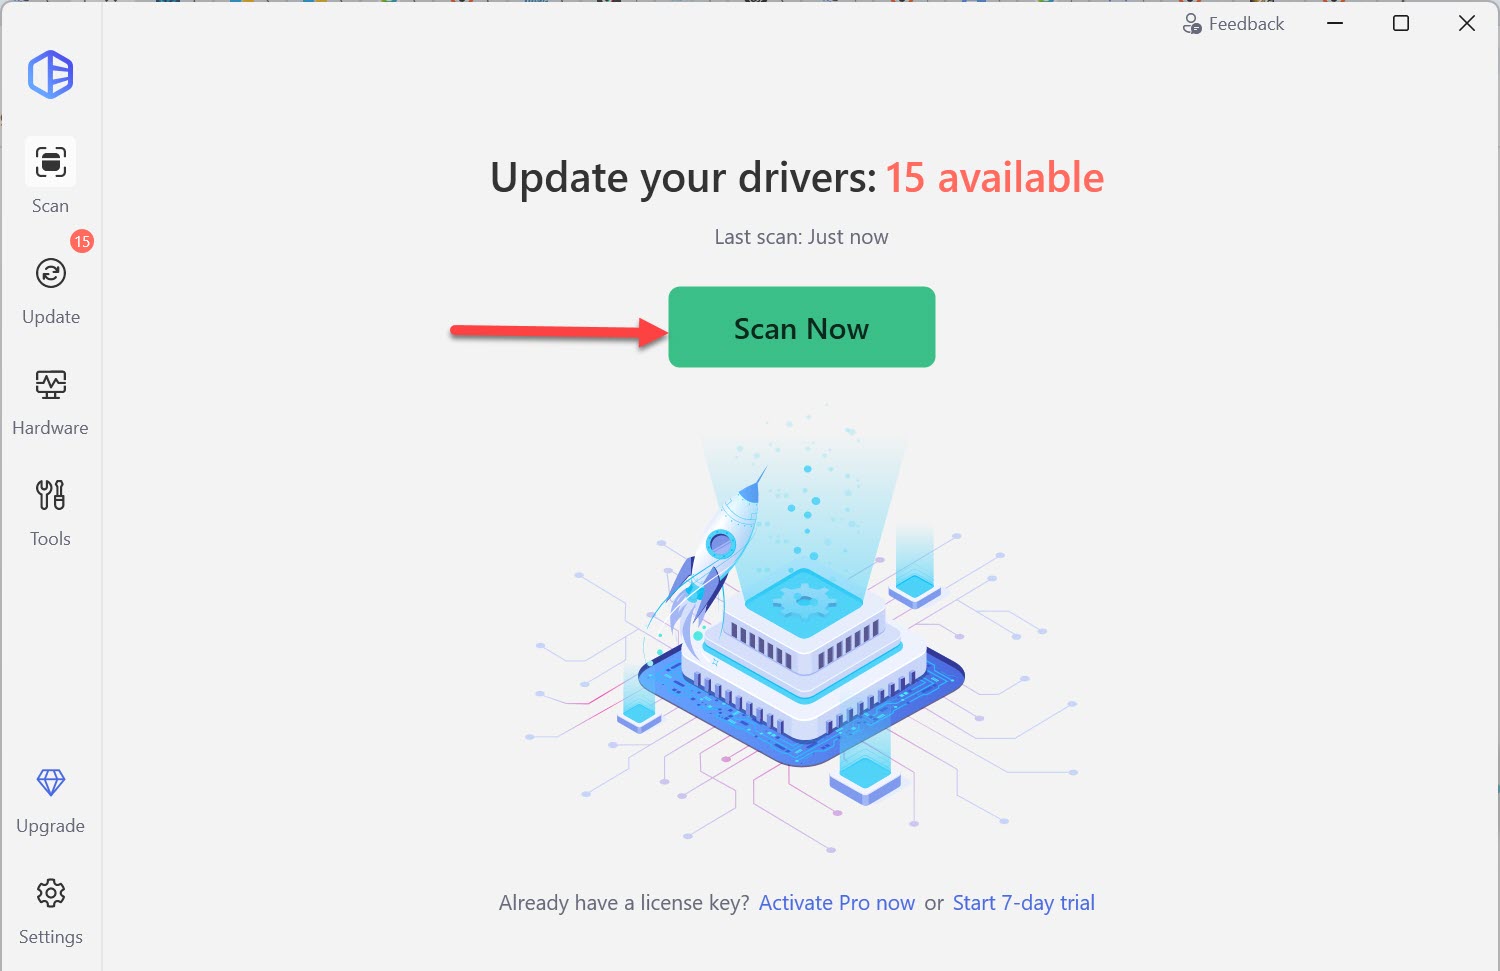
- Run Driver Easy and click the Scan Now button. Driver Easy will then scan your computer and detect any problem drivers.
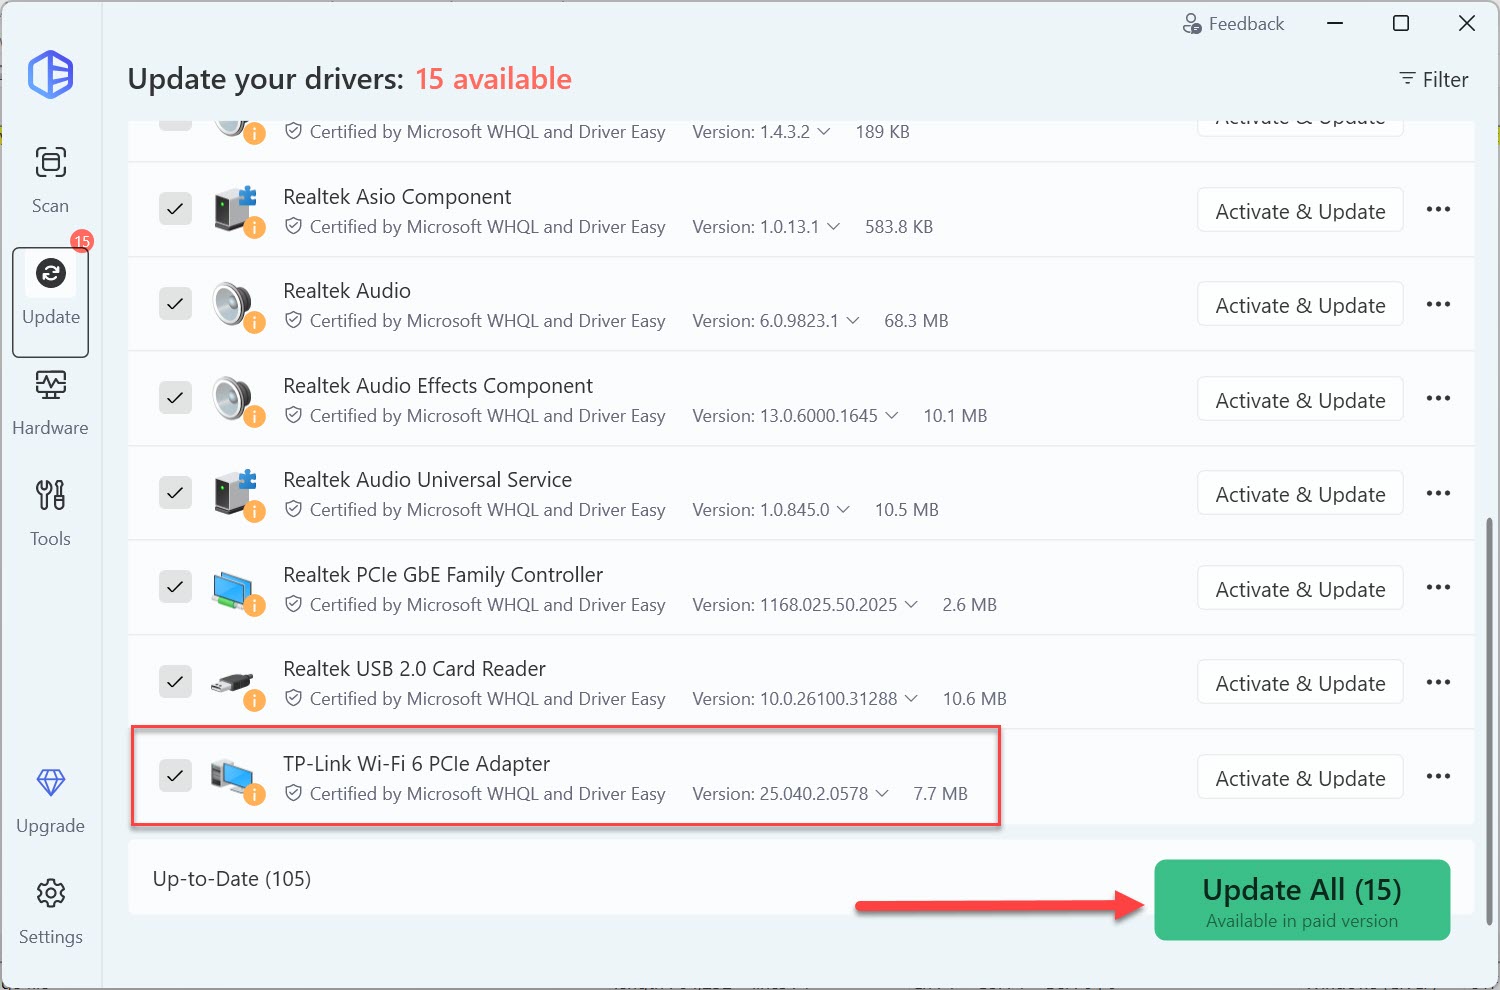
- Check if Driver Easy detects any outdated drivers. If it does, just click Update All to start a 7-day free trial or upgrade to the Pro version. Either option will automatically download and install the correct drivers for you.
- Restart your computer for the changes to take effect.
- Launch the Battle.net or Steam client and check for the Call of Duty update. If an update is available, click the Update button to start downloading. Once the update begins, verify if the issue is resolved. If the update proceeds normally, you’re all set. If the problem persists, move on to Fix 3, below.
3. Repair game files
If your Call of Duty installation has corrupted or missing files, the launcher may struggle to recognize the current game version, or fail to update it at all. This can lead to the 0.0B stuck issue or constant update loops. Fortunately, both Battle.net and Steam offer built-in repair tools to automatically check and fix these problems.
Here’s how to repair your game files:
On Battle.net:
- Open the Battle.net launcher.
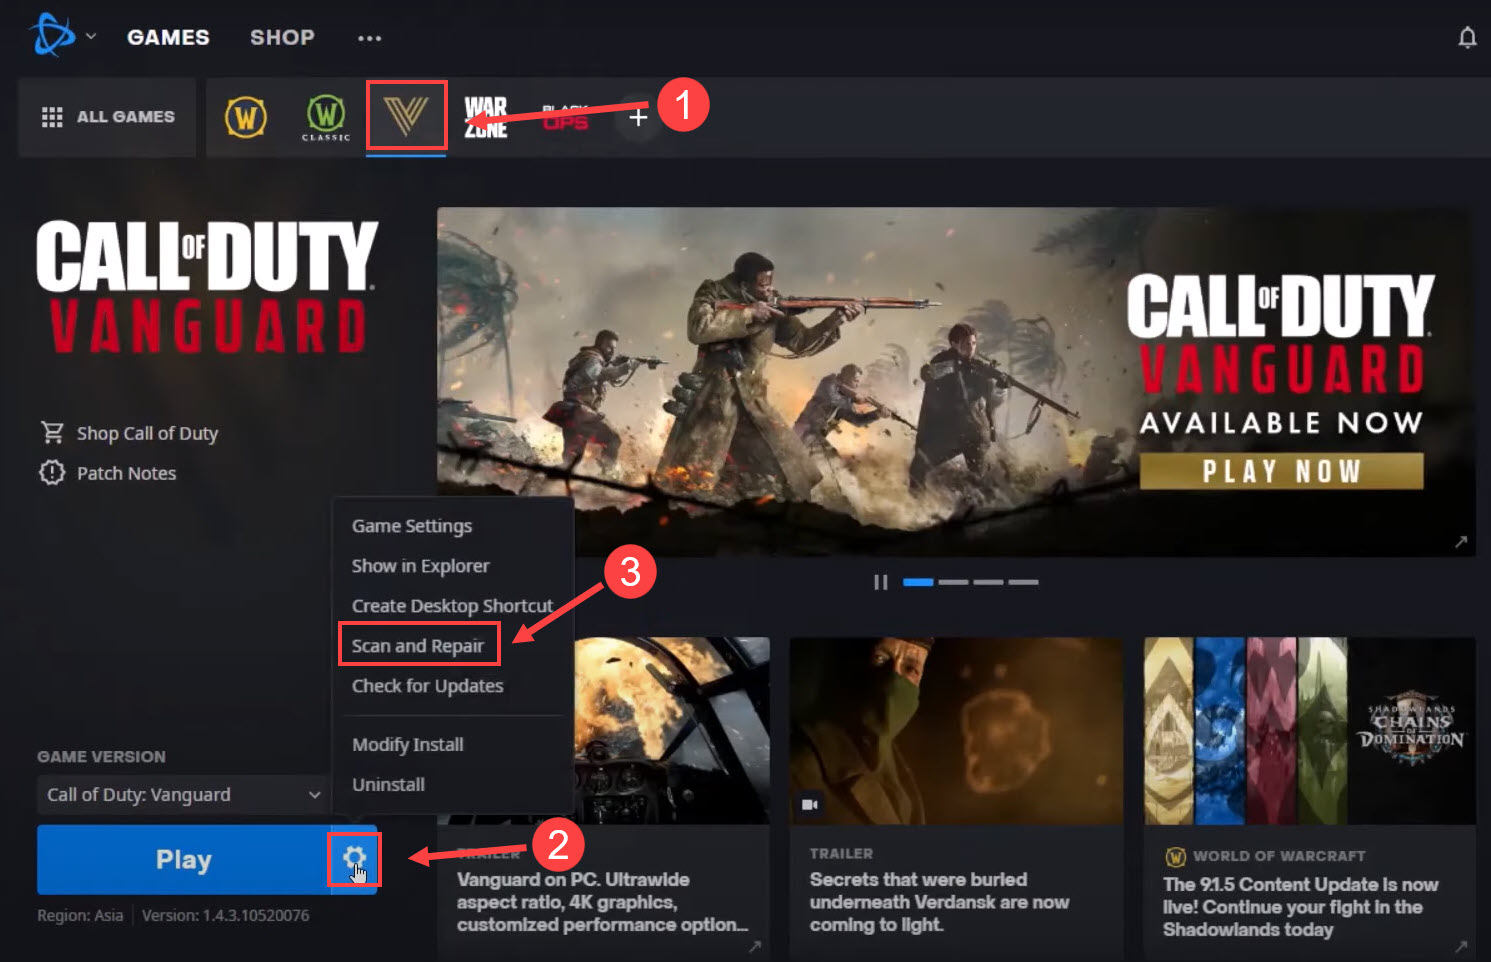
- Go to your Games tab and select Call of Duty. Then, click the gear icon next to the Play button and choose Scan and Repair.
- Click Begin Scan and wait for the process to complete.
On Steam:
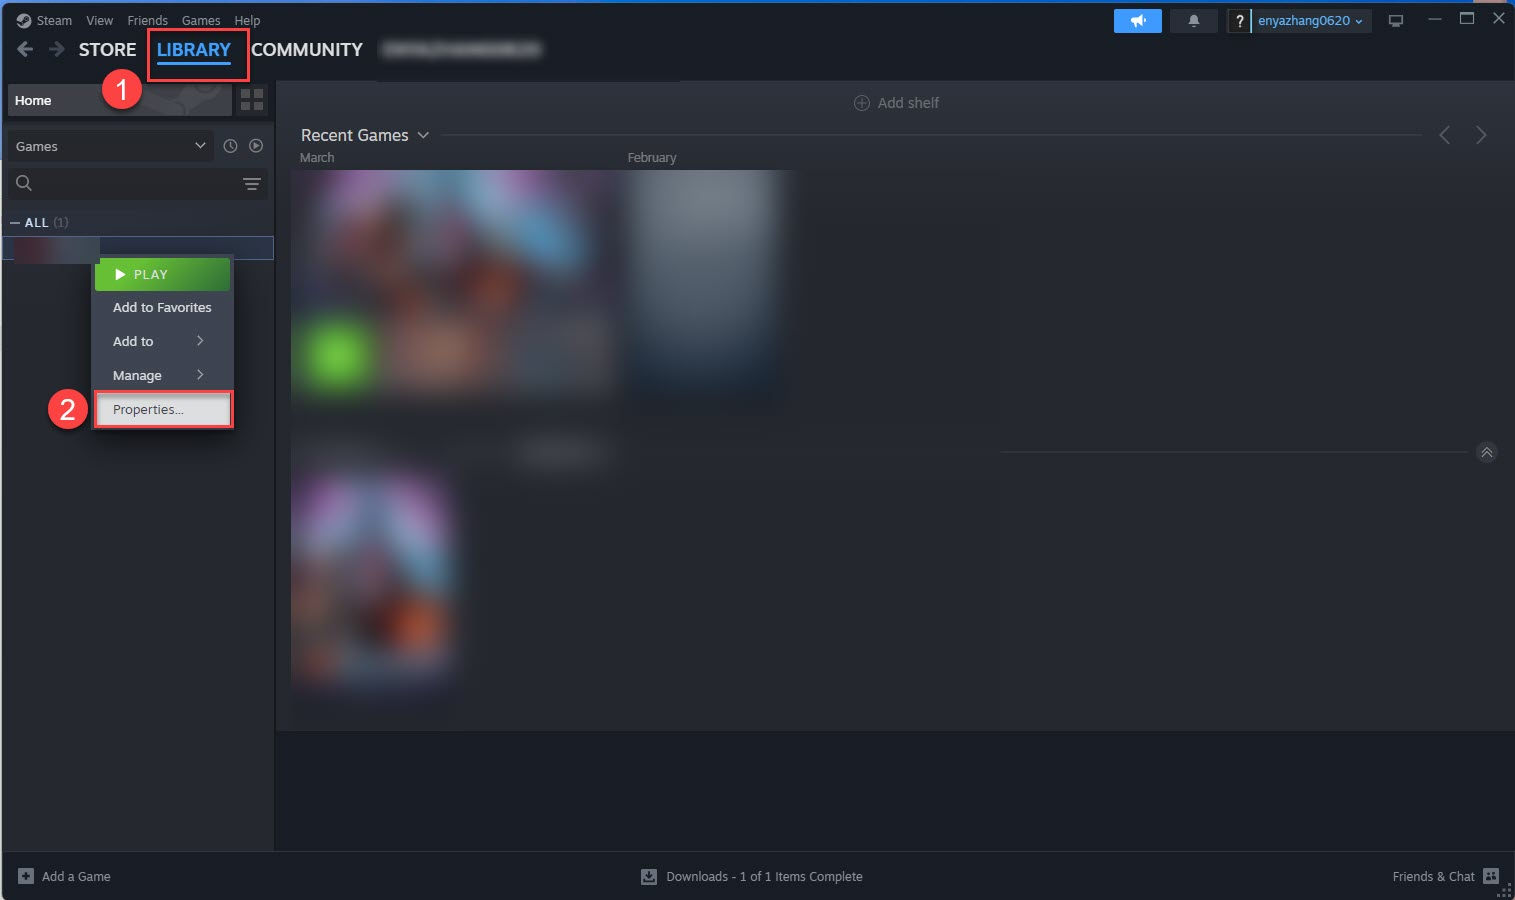
- Open Steam and head to LIBRARY.
- Locate & right-click on your Call of Duty game and select Properties…
- Go to the Installed Files tab and click Verify integrity of game files.
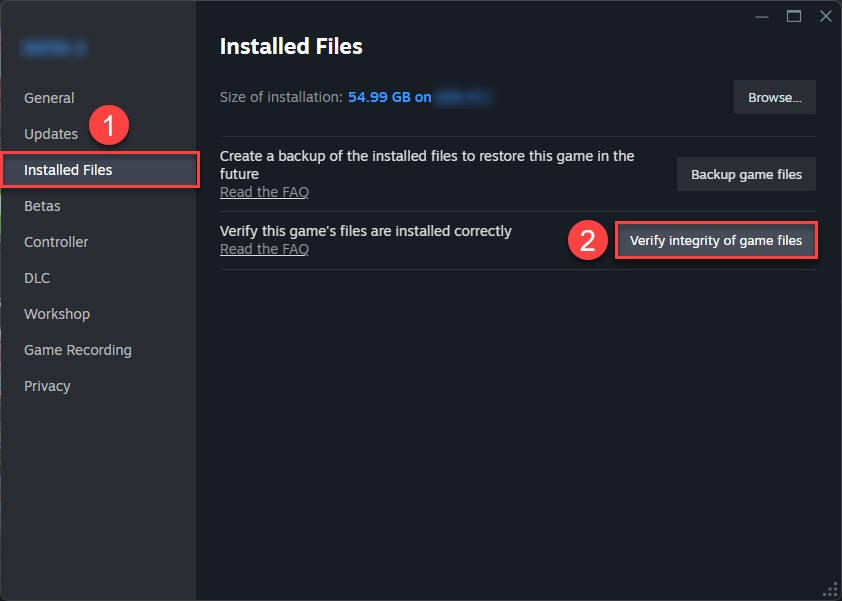
The verification process can take several minutes, depending on your system and disk speed. Once done, launch the game client and check if the update issue is resolved.
If repairing game files doesn’t solve the problem, move on to Fix 4 below.
4. Delete beta or corrupted leftover files
Leftover files from previous beta versions or corrupted partial downloads may interfere with how updates are applied. These files might mislead the launcher into thinking the game is already updated or cause it to get stuck trying to apply mismatched data. Clearing them out can often force a clean re-check and allow the update to proceed.
To clear them out:
For Battle.net:
- Close the Battle.net app completely.
- On your keyboard, press the Windows logo key and R at the same time, then type
%ProgramData%and press Enter. - In the folder that opens, delete the following folders (if you see them):
Battle.netBattle.net_components
- Restart your PC and relaunch Battle.net.
Note: This won’t delete your game — only the cached and temporary data. You may need to log back into Battle.net afterward.
For Steam:
- Open Steam and go to LIBRARY.
- Right-click on Call of Duty and click Properties…
- Select Installed Files > Browse…
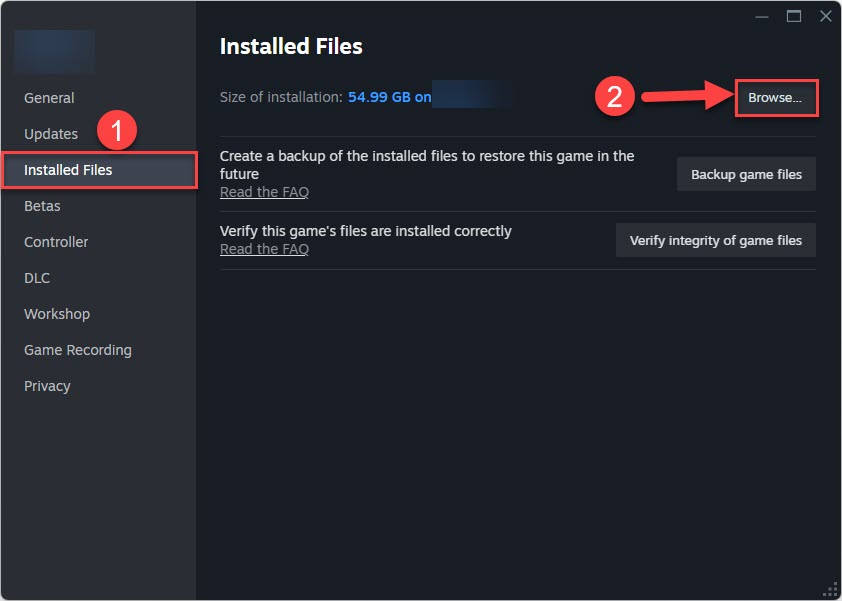
- Look for any folders or files related to “beta”, “temp”, or “patch” in the Call of Duty directory.
- Back up these files just in case, then delete them.
After deleting the leftover files, restart your PC, launch the game client, and check if the update begins normally. If the update still won’t start or gets stuck again, continue to Fix 5 for another effective solution.
5. Temporarily disable antivirus
Overprotective antivirus or firewall software can sometimes interfere with Call of Duty game updates, especially if it mistakenly flags the launcher or update files as suspicious. This can block the connection to update servers or prevent critical files from being written to your drive, resulting in a stuck or failed update.
To check if your security software is the culprit, try temporarily disabling your antivirus and firewall:
For Windows Defender:
- On your keyboard, press the Windows logo key and I to open Settings.
- Navigate to Privacy & Security > Windows Security.
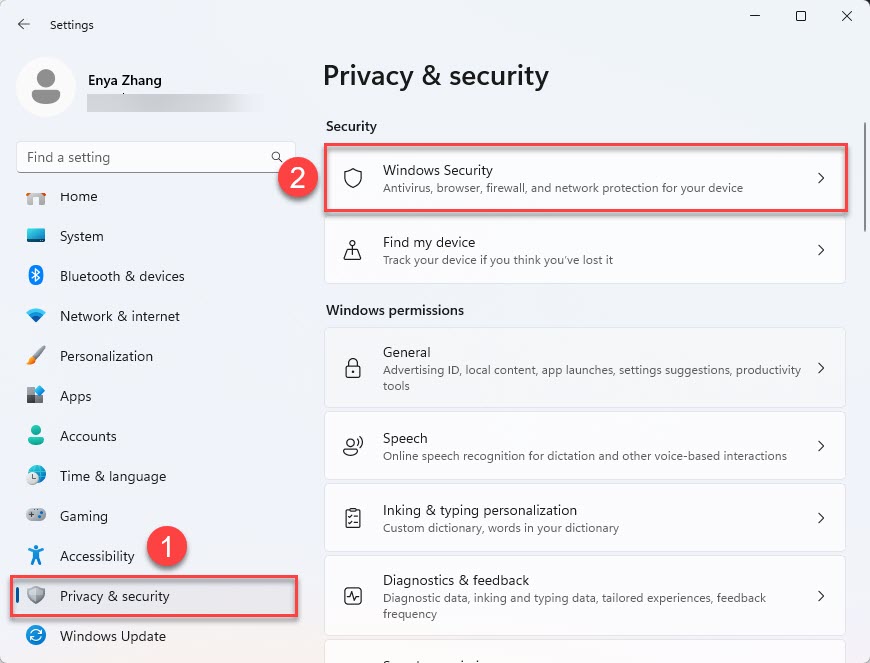
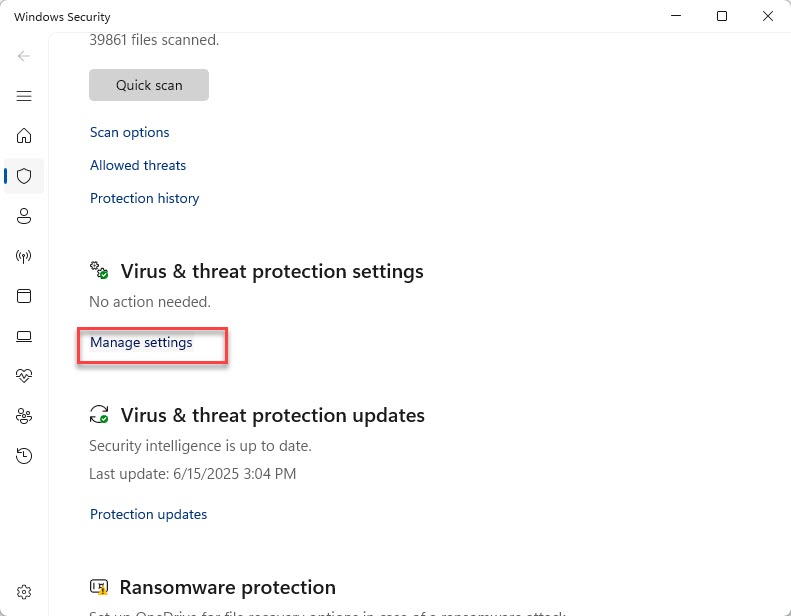
- Choose Virus & threat protection.
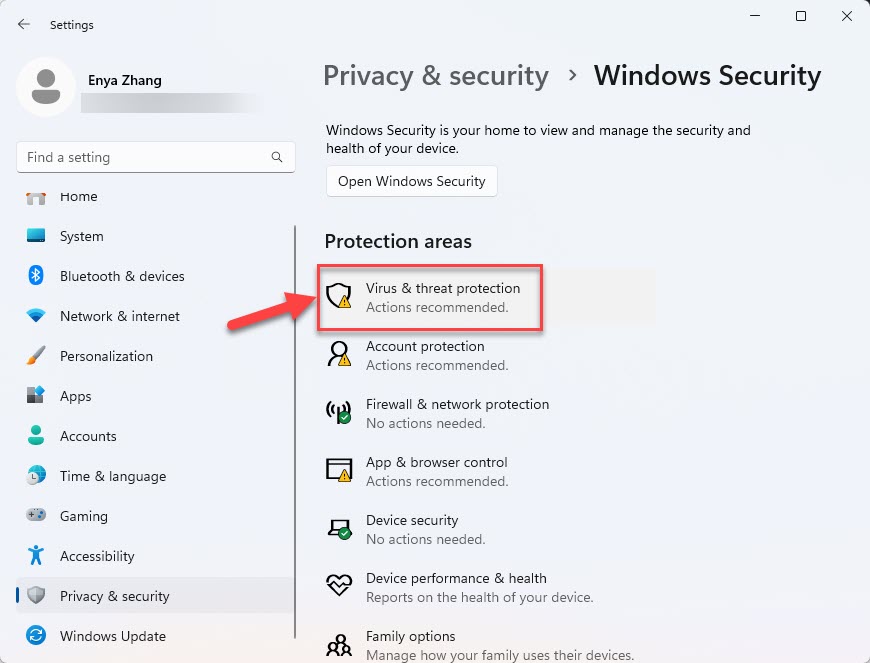
- Under Virus & threat protection settings, click Manage settings.
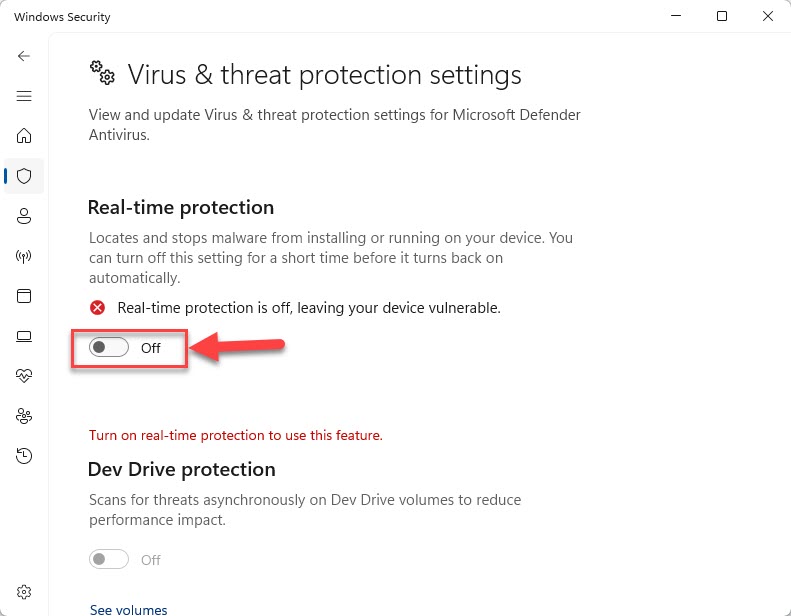
- Toggle off Real-time protection.
For third-party antivirus:
- Open your antivirus application (such as Avast, Bitdefender, Norton, etc.).
- Look for a toggle to disable real-time protection or shields temporarily.
- Set it to disable for a short time (e.g., 10–15 minutes).
After disabling your antivirus, relaunch the game client and check if the update starts. If the update proceeds normally, you’ve found the issue. You can consider adding the game and its launcher to your antivirus exceptions list. If the update is still stuck, re-enable your antivirus and proceed to additional troubleshooting.
6. Switch DNS to Google
Sometimes, your default DNS (Domain Name System) settings — typically assigned by your ISP — may be slow, unreliable, or struggle to reach certain servers. This can cause issues with downloading game updates or connecting to the necessary services. Switching to a public DNS like Google’s can help improve speed, stability, and connectivity.
Here’s how to switch your DNS to Google’s:
- On your keyboard, press Windows + R, then type
ncpa.cpland press Enter to open the Network Connections window.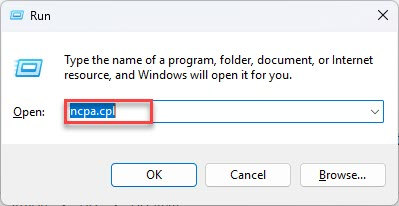
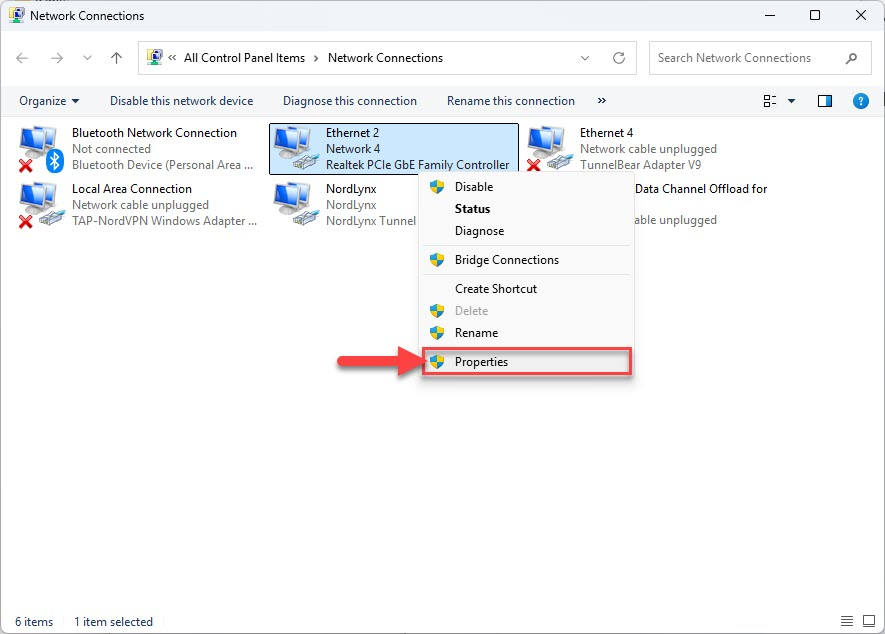
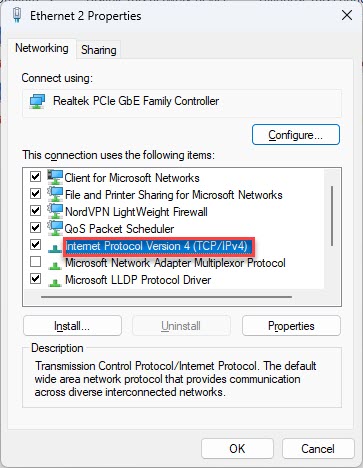
- Right-click your active network connection (Wi-Fi or Ethernet) and select Properties.
- Scroll down and double-click Internet Protocol Version 4 (TCP/IPv4).
- In the lower section, select Use the following DNS server addresses, then enter:
- Preferred DNS server:
8.8.8.8 - Alternate DNS server:
8.8.4.
and click OK to save the settings. Then close the window.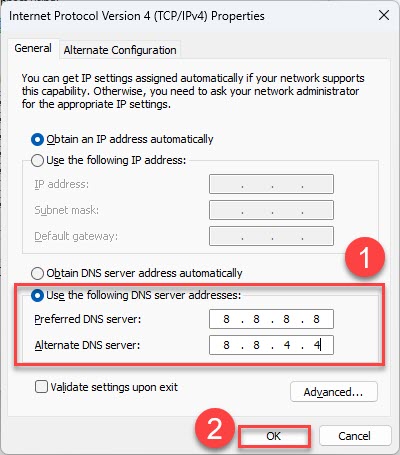
- Preferred DNS server:
- Restart your PC.
- Launch your game client and check if the update now proceeds as expected.
7. Reinstall the game
If all previous fixes fail to resolve the update issue, a clean reinstall of Call of Duty can often help. This removes any corrupted or incomplete files that might be blocking the update process.
Here’s how to do it:
- Uninstall Call of Duty from your PC via the Control Panel or the game launcher.
- Restart your computer.
- Download the latest installer from the official Battle.net or Steam website.
- Install the game fresh.
- Launch the game client and check if the update now downloads and installs properly.
That’s it! Hopefully, one of these fixes gets your Call of Duty update back on track. If the problem still persists after the above fixes, it may be worth contacting the game’s support team for further assistance.