


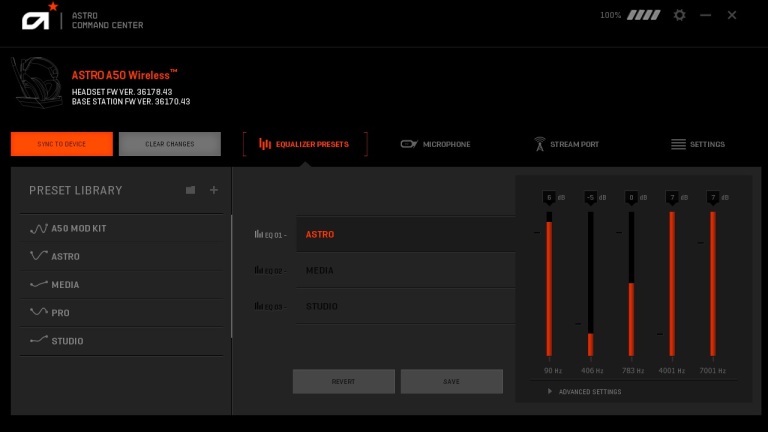
ASTRO Command Center is a handy tool for users to update the firmware and customize the input and output parameters to be precisely configured for their specific setup. But some of them run into the issue of it not detecting the headset, A50.
If you happen to be one of them and are scratching your head wondering how to troubleshoot it, you’ve come to the right place. We’ll walk you through the steps to fix it.
Try these fixes
You may not need to try them all; simply work your way down the list until you find the one that does the trick.
- Check for hardware issues
- Check for Windows Updates
- Update your device drivers
- Reinstall Astro Command Center
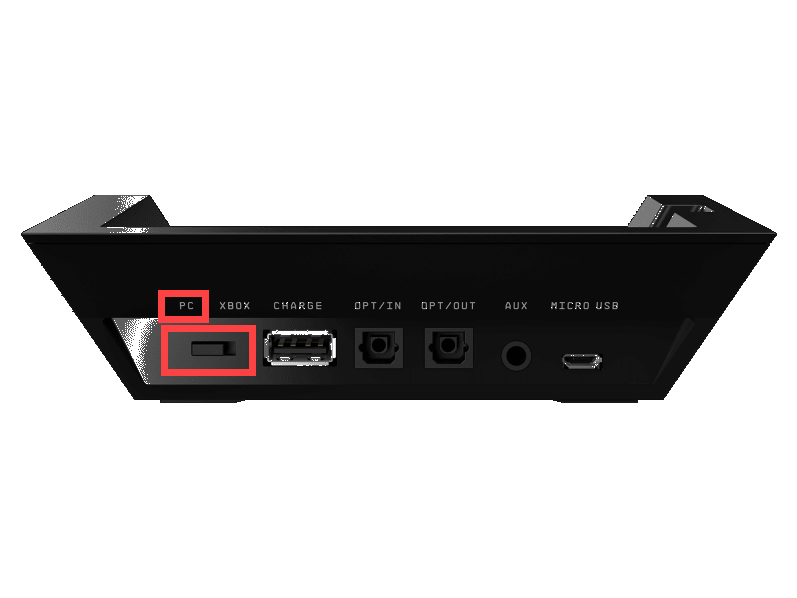
For users who have A50 Base Station, before diving into any troubleshooting steps below, you need to make sure to set it to PC Mode to ensure that the Command Center will be able to detect it.
1. Check for hardware issues
To rule out the problem, you’ll first need to verify if there is any hardware glitch. To get started, simply perform the steps below:
- Disconnect the headset from your computer.
- Connect the headset to a different computer where the ASTRO Command Center is installed.
- Check if your headset is successfully recognized.
- If it’s not detected, you may have to contact the ASTRO support or the seller for repair or replacement.
Or you can hard reset your A50 and see how it goes:
- Remove the headset from the dock and turn it on.
- Hold down the Game button (on the ear cup) and the Dolby button simultaneously for 10-20 seconds until the lights on the headset blinks. After the reset, A50 will reboot automatically.
- Once completed, pair the headset with your PC and check if it’s detected in ASTRO Command Center.
If the tricks above work as intended on the other computer, your problem could be attributed to misconfigurations on your system or there are some bugs within the version of the software you installed. In this case, you can try the next fix below.
2. Check for Windows updates
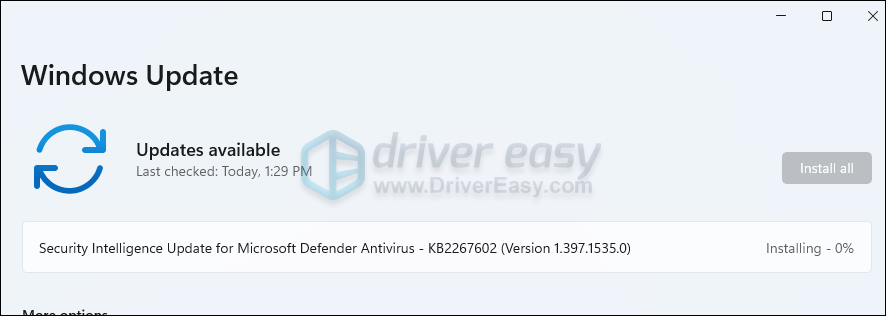
Windows updates usually come with bug fixes and introduce new features. Some updates address bugs and issues in Windows, which can negatively impact the stability of your Operating System. And that might trigger the issue you’re having. To fix it, simply download and install all Windows updates.
On Windows 11:
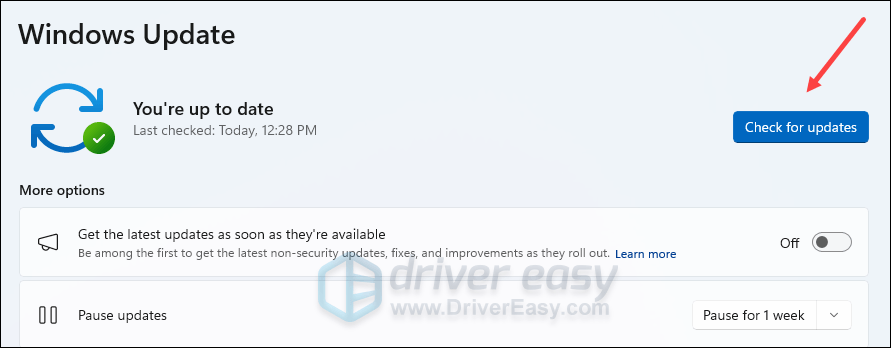
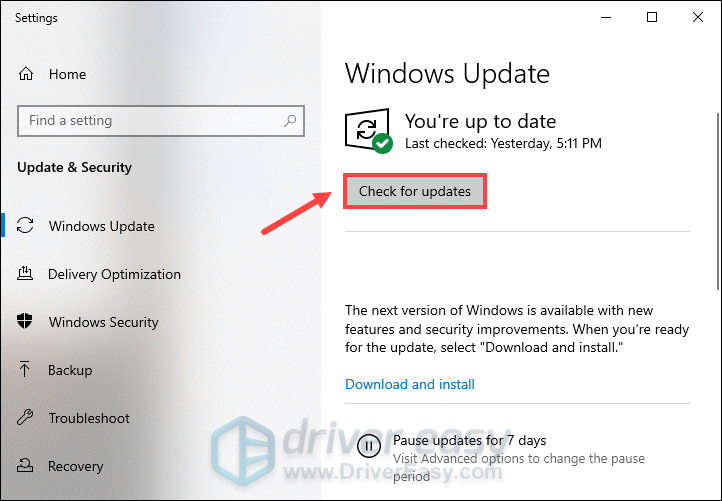
- On your keyboard, hit the Windows key, then type check for updates, then click Check for updates.

- Click Check for updates, and Windows will scan for any available updates.
- If there are available updates, Windows will automatically download them for you. Restart your computer for the update to take effect if needed.
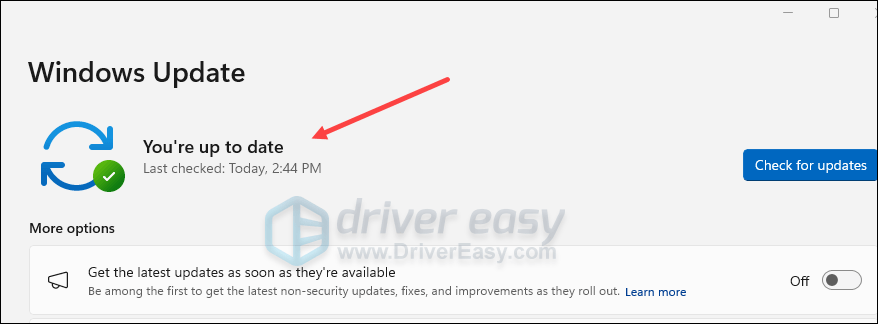
- If there are no available updates, you’ll see You’re up to date like this.
On Windows 10:
- In the search box, type in check for updates. Then click it from the list of results.

- Click on the Check for updates tab. When available, your system will start downloading and installing the updates. Patiently wait for it to finish and you’ll be asked for a reboot.
After the reboot, try to connect your device. If your issue persists, move on to the next fix.
3. Update your device drivers
Next you would need to have a look at your drivers. If you’re using outdated or misconfigured drivers, various types of issues can occur. Since drivers play an important role in keeping your computer in good operating condition and saving it from potentially expensive problems down the line.
You can perform manual updates via the Device Manager or go to your device manufacturers’ driver download page to look for the drivers that are compatible with your system, then download and install each of them properly by following the on-screen instructions. Sounds like a tedious and harrowing process, right? It is, especially if you’re not tech-savvy.
To make it simple, you can use Driver Easy, a powerful tool that can help detect any outdated or missing drivers, download and install the correct drivers for your system.
- Download and install Driver Easy.
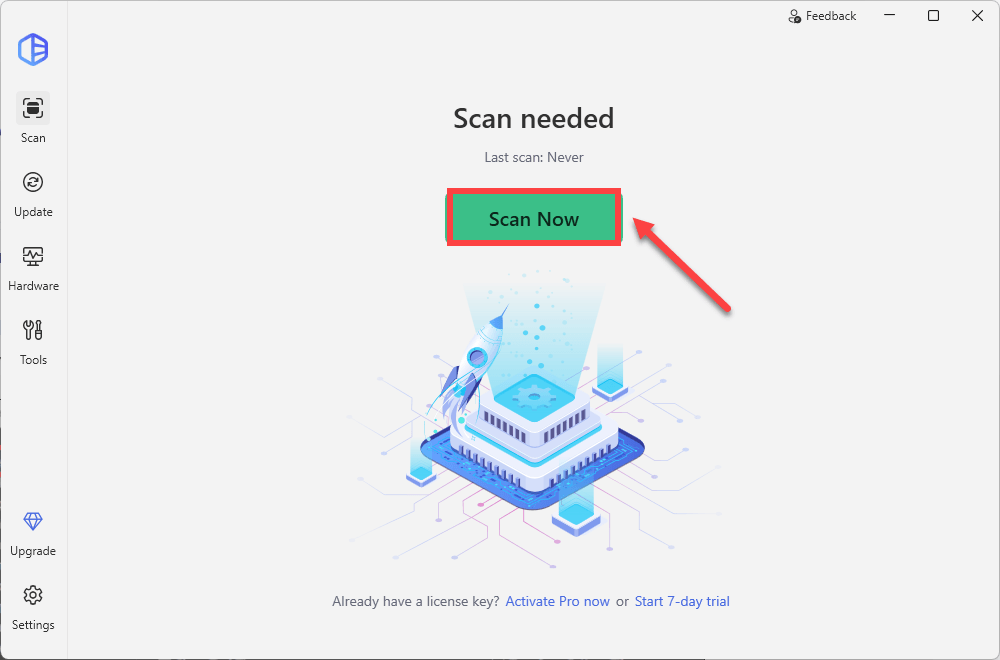
- Run Driver Easy and click the Scan Now button. Driver Easy will then scan your computer and detect any problem drivers.
- Click Update All to automatically download and install the correct version of all the drivers that are missing or out of date on your system.
(This requires the Pro version which comes with full support and a 30-day money-back guarantee. You’ll be prompted to upgrade when you click Update All. If you’re not ready to buy the Pro version, Driver Easy offers a 7-day free trial which includes access to all the Pro features such as high-speed download and one-click install. You won’t be charged anything until your 7-day trial has ended.)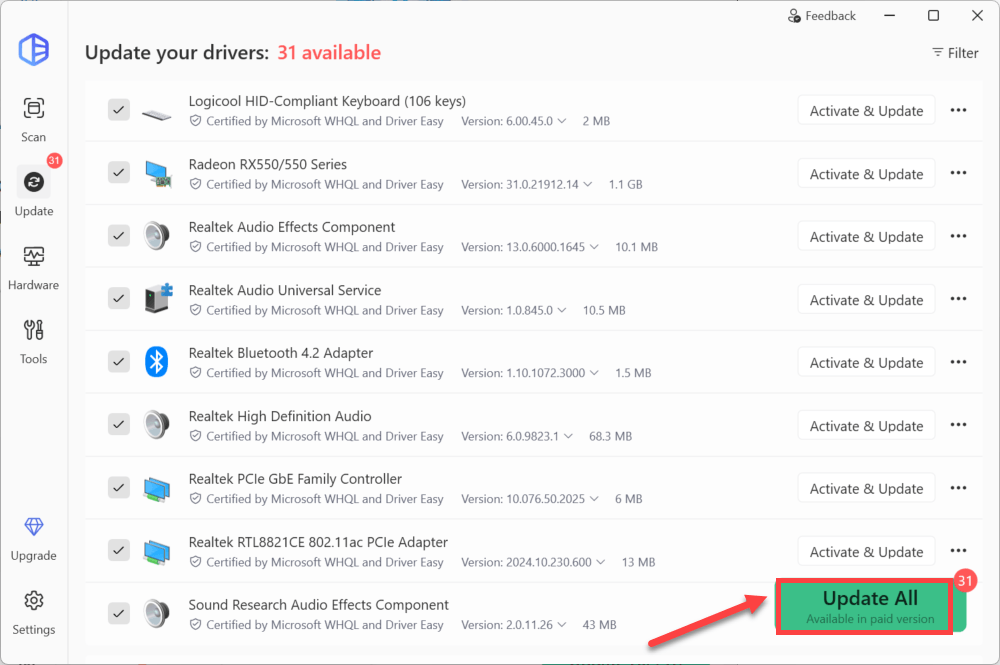
- Restart your computer for the changes to take effect.
Then check if ASTRO Command Center can detect your device now. If you still can’t solve your problem, proceed to the next fix.
4. Reinstall Astro Command Center
If there’s nothing wrong with your system, it’s high time you check if the version of the software you’re currently using is in an error state. This happens at one point or another and a simple reinstallation can fix the issue.
To reinstall ASTRO Command Center, you’ll need to first uninstall it. Press Windows logo + R keys simultaneously to open the Run box. Then type appwiz.cpl. Once a window opens, find ASTRO Command Center and uninstall it.
When the uninstallation process is finished, try to download and install it. Then check if your issue persists.

Hope this post helped! If you have any ideas or questions, feel free to drop us a line in the comment section below. And we’ll get back to you ASAP.