


It can be very frustrating if you can’t print your PDF files on Adobe. No error messages; each time you click Print on Adobe, it just doesn’t print at all. Don’t worry. This guide is going to help you solve this problem step by step. Read on to find out how.
Before we go…
The problems of your printer, your PDF files, and your Adobe software all can cause you can’t print a PDF file. First things first, figure out if the problem is due to your printer, your PDF file, or your Adobe software.
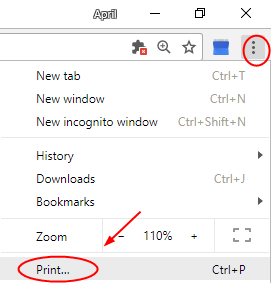
- Try to print this post you’re viewing. If you’re viewing this article on a browser like Chrome, and Microsoft Edge, click the three dots icon, then select Print.
- If you can’t print this page either, there are some issues with your printer, follow to troubleshoot problems of your printer.
If you can print this page, go on to check:
- Open your PDF file in your browser, then print it in the browser.
- If you can’t print your PDF file in your browser either, probably your PDF files are corrupted, follow to repair or recreate your PDF file.
- If you can print your PDF file in your browser, you need to troubleshoot problems with your Acrobat Reader.
Try these fixes
- Troubleshoot problems with your printer
- Repair or recreate your PDF file
- Scan your computer to detect issues
- Troubleshoot problems with your Acrobat Reader
Fix 1: Troubleshoot problems with your printer
Either a USB-connected printer or a network one you’re using, make sure your printer is set as the default printer and your printer driver is up-to-date.
1. Make sure your printer is set as the default printer
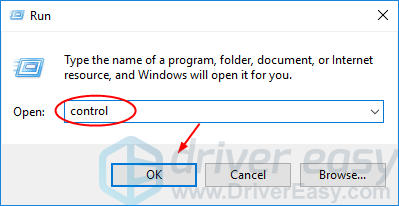
- On your keyboard, press the Windows logo key and R at the same time to invoke the Run box.
- Type control and click OK.”
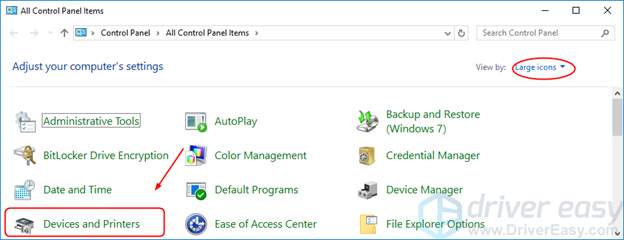
- Click Devices and Printers in Large icons.
- Make sure there is a green ✔ mark with your printer, which means it’s set to default.
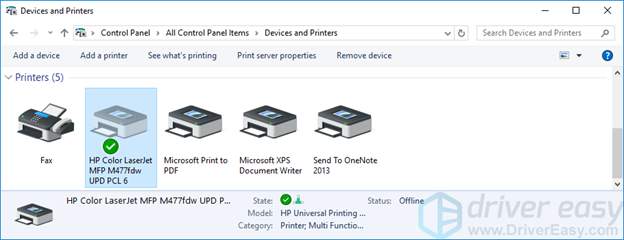
If it’s not set to default, right-click on your printer and click Set as default printer.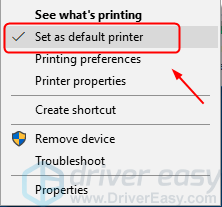
2. Make sure your printer driver is up-to-date
The latest printer driver enables your printer to work fine. An old, corrupted, or missing printer driver would make you cannot print PDF files. Follow these to update your printer driver to solve your problem:
- Go to the official website of your printer manufacturer, like HP, Dell, Canon, Brother.
- Go to the specific driver-download page and find the correct latest driver for your printer.
- Download and install the driver on your computer.
- Restart your computer and try to print your PDF file in Adobe to see if it works.
Alternatively, you can update your printer driver automatically with Driver Easy, if you’re not confident playing around with drivers manually.
Driver Easy will automatically recognize your system and find the correct drivers for it. You don’t need to know exactly what system your computer is running, you don’t need to be troubled by the wrong driver you would be downloading, and you don’t need to worry about making a mistake when installing. Driver Easy handles it all.
You can update your drivers automatically with either the 7 days free trial or the Pro version of Driver Easy. It takes just 2 clicks, and you get full support and a 30-day money-back guarantee with the Pro version:
- Download and install Driver Easy.
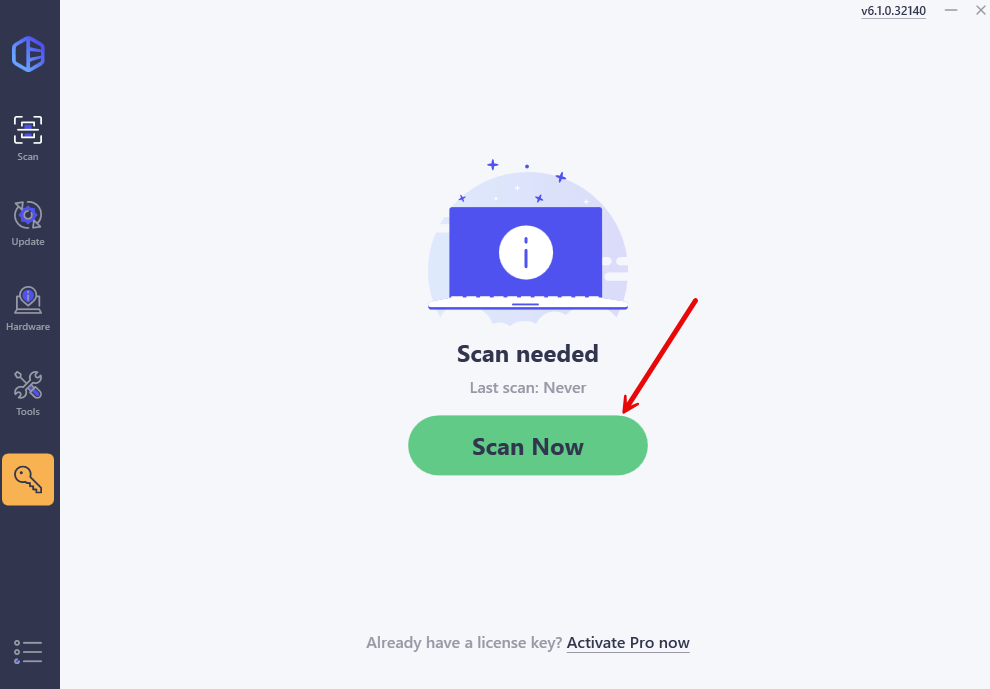
- Run Driver Easy and click the Scan Now button. Driver Easy will then scan your computer and detect any problem drivers.
- Click the Activate & Update button next to the flagged device to automatically download and install the correct version of this driver.
Or click Update All to automatically download and install the correct version of all the drivers that are missing or out of date on your system (You’ll need the Pro version for this – when you select Update All, you’ll get a prompt to upgrade. If you’re not prepared to purchase the Pro version yet, Driver Easy provides a 7-day trial at no cost, granting access to all Pro features like fast downloads and easy installation. No charges will occur until after your 7-day trial period ends.)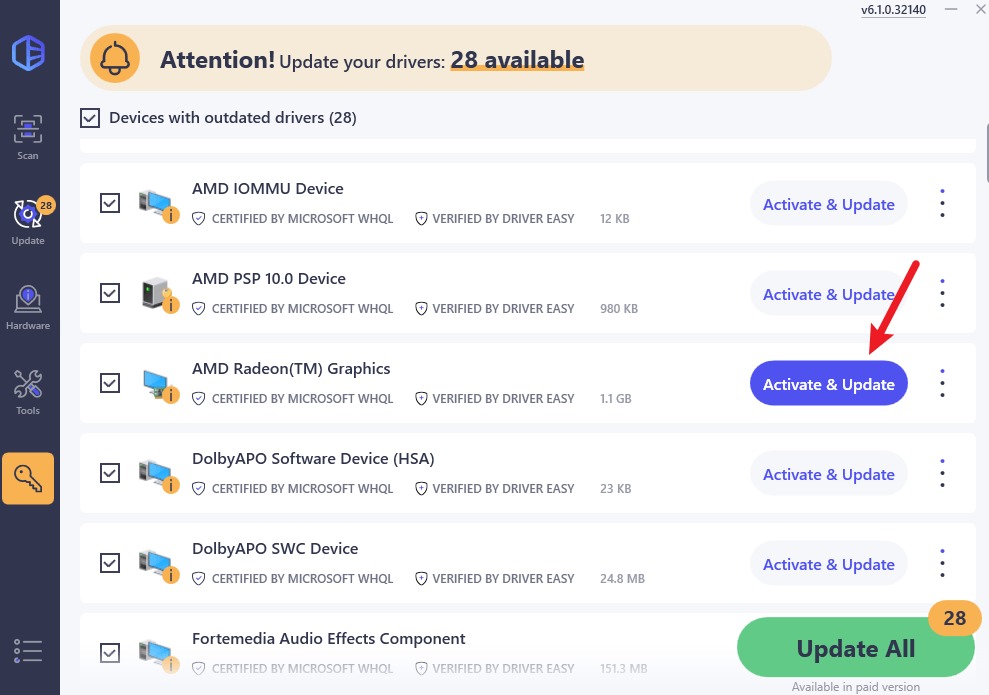
- Restart your computer for the change to take effect.
Fix 2: Repair or recreate your PDF file
If there were any corrupted or incompatible data in your PDF file, your file wouldn’t be printed successfully. Here we give you two methods to try:
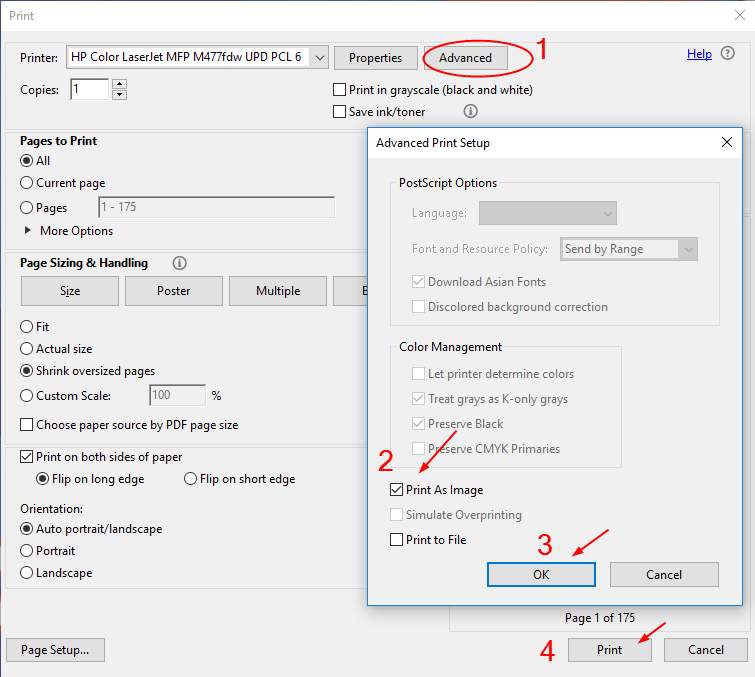
1. Try the Print As Image feature in Acrobat Reader
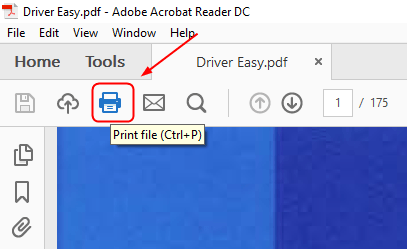
- Open your PDF file in Acrobat Reader.
- Click the print icon on the toolbar.
- Click Advanced, then tick on Print As Image. Go on to click OK > Print to see if your PDF file can be printed.
2. Recreate a new PDF file
- Choose a way to recreate a new PDF file:
a) If you downloaded the PDF file from a URL or cloud, download it again and save it directly to your hard drive.b) If you created the PDF file by yourself, create a new one and save it directly to your hard drive.
c) Using the Save as… feature in Acrobat Reader: Click File > Save as…, save your PDF file directly to your hard drive.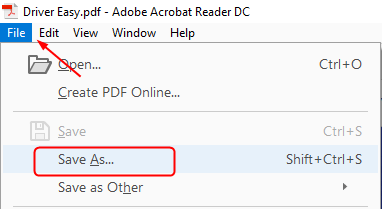
- Double-click the new PDF file on your hard drive and then try to print it to see if successful.
Fix 3: Scan your computer to detect issues
Can’t print PDFs but worry about wasting too much time troubleshooting? You can perform a complete scan on your PC to locate the exact problem.
Step 1. Scan corrupt files with System File Checker
System File Checker (SFC) is a Windows built-in tool to identify and repair corrupted system files.
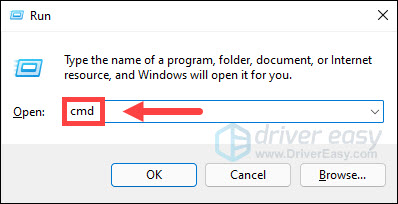
1) On your keyboard, press the Windows logo key and R at the same time to open the Run box. Type cmd and press Ctrl+Shift+Enter to run Command Prompt as administrator.
Click Yes when prompted for permission to make changes to your device.
2) In the Command Prompt, type the following command and hit Enter.
sfc /scannow
3) System File Check will begin to scan all system files and repair any corrupted or missing ones it detected. This may take 3-5 minutes.
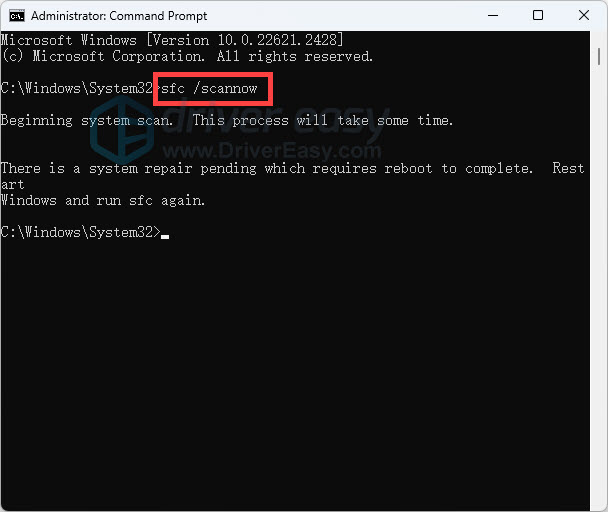
4) You may receive something like the following messages after the verification.
- no errors
- it fixed some errors
- could not fix all errors
- could not fix errors at all
- ……
No matter what message you receive, you can try running dism.exe (Deployment Image Servicing and Management) to further scan the health of your PC.
Step 2. Run dism.exe
1) Run Command Prompt as admin and enter the following commands.
- This command line will scan the health of your PC:
dism.exe /online /cleanup-image /scanhealth
- This command line will restore the health of your PC:
dism.exe /online /cleanup-image /restorehealth
2) After the restore health process finishes, you may get some error messages.
- If restoring health gives you errors, you can always try this command line. This will take up to 2 hours.
dism /online /cleanup-image /startcomponentcleanup
- If you get Error: 0x800F081F with the restore health scan, reboot your PC and run this command line.
Dism.exe /Online /Cleanup-Image /AnalyzeComponentStore
Restart your PC after repairing the corrupt files and test your printer.
Fix 4: Troubleshoot problems with your Acrobat Reader
If something corrupt happens to your Acrobat Reader or if the software is of an old version, you can’t use it to print your PDF file, either. Troubleshoot the problem with your Acrobat Reader:
- Restart your computer.
- Open your PDF file in Acrobat Reader and try to print it to see if successful. If a simple restart cannot solve your problem, reinstall your Acrobat Reader with the latest version with the following steps.
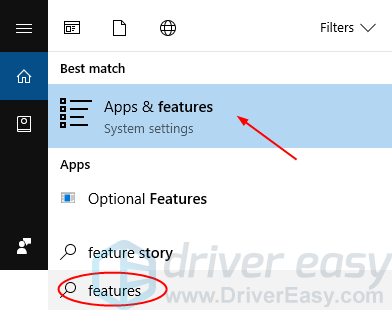
- Type features in the search box from Start. Then click Apps & features.
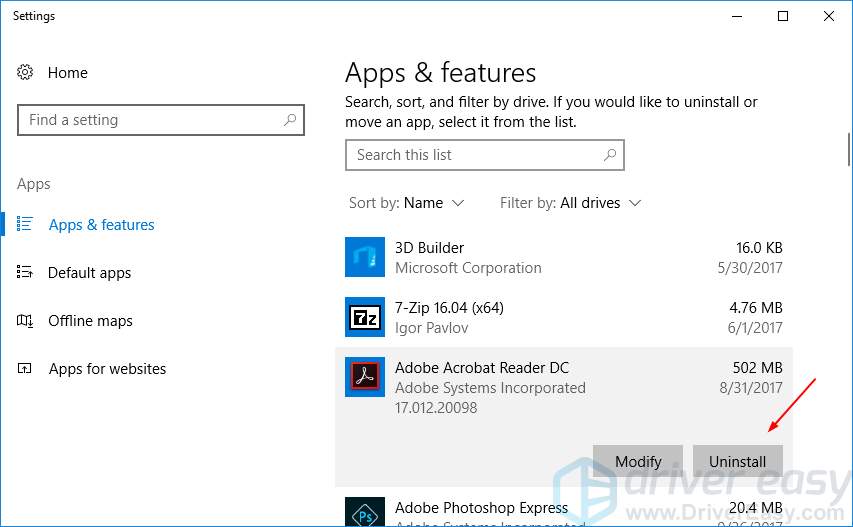
- Find your Acrobat Reader, then Uninstall.
- Go to the official Adobe website, download, and the latest version of Acrobat Reader on your computer.
- Open your PDF file using the new Acrobat Reader. Then try to print it to see if successful.
Hopefully, one of the methods above fixed your PDF not printing error. Feel free to leave us a comment if you have any questions or suggestions.