If your computer has been hanging on a blue screen with CLASSPNP.SYS failed while booting up, don’t worry. It’s often not hard to fix at all…
5 fixes for CLASSPNP.SYS
Here’re 5 fixes that have helped other users resolve the CLASSPNP.SYS problem.
If you CANNOT log into your computer system, please start from Fix 1; If you CAN log into your computer system properly however, please start from Fix 2.
- Enter Safe Mode with Networking
- Repair corrupt system files
- Update your device drivers
- Update your BIOS
- Check for hardware corruption
Fix 1: Enter Safe Mode with Networking
- Make sure your computer is off.
- Press the power button to turn on your PC. Then when Windows displays a login screen (i.e. Windows has fully booted), long press the power button to turn it off.
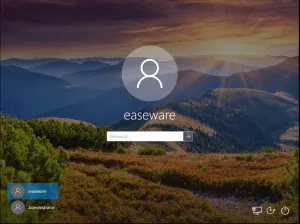
- Repeat 1) and 2) until the screen says Preparing Automatic Repair.
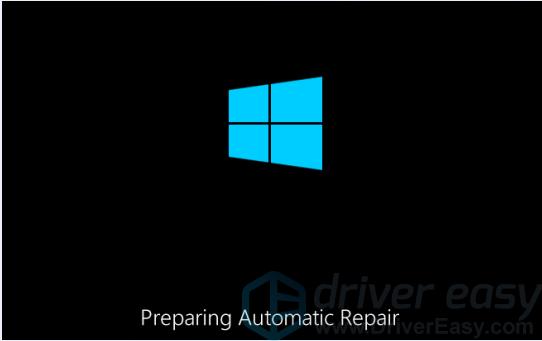
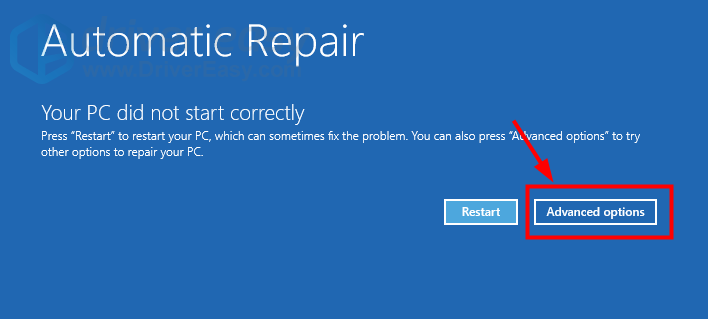
- Wait for Windows to finish diagnosing your PC, and click Advanced options.
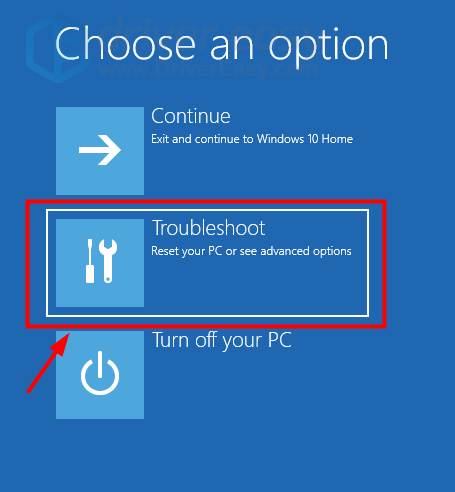
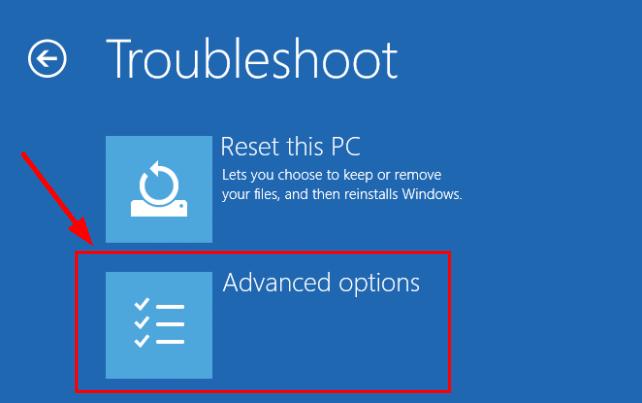
- Click Troubleshoot.
- Click Advanced options.
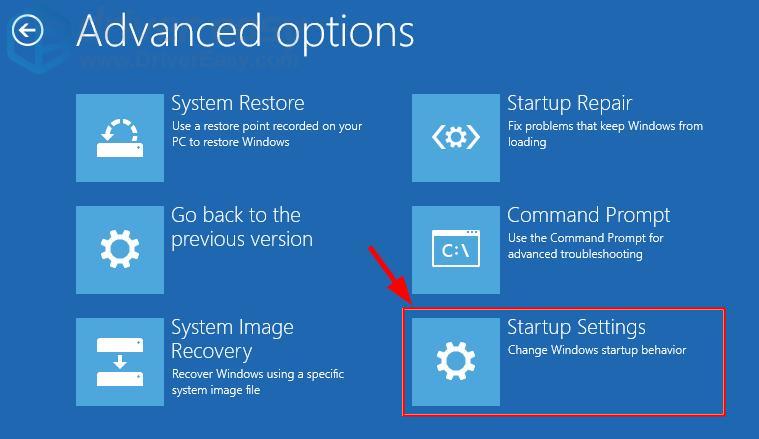
- Click Startup settings.
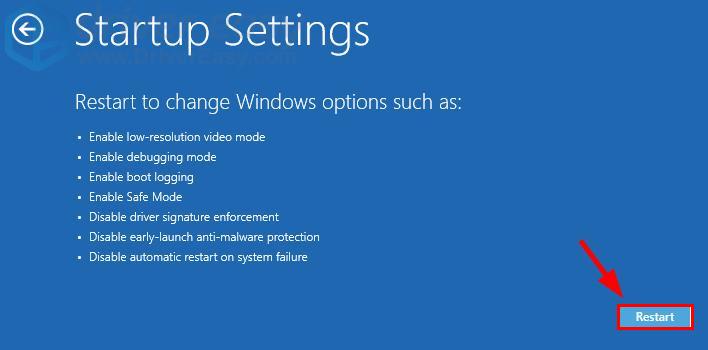
- Click Restart.
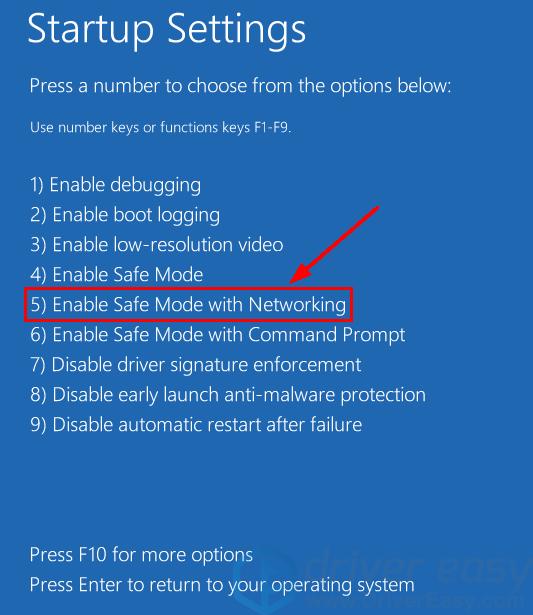
- On your keyboard, press 5 to enable Safe Mode with Networking.
- Now you’ve successfully booted up in Safe Mode with Networking, continue with Step 2 to troubleshoot the blue screen problem.
- Make sure your computer is off.
- Press the power button to turn on your PC and immediately press F8 at a 1-second interval.
- Press the arrow keys to navigate to Safe Mode with Networking and press Enter.
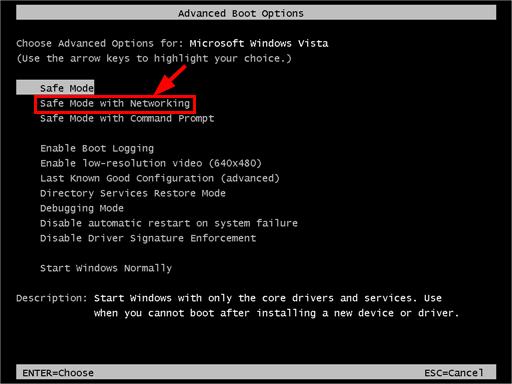
- Now you’ve successfully booted up in Safe Mode with Networking, continue with Step 2 to troubleshoot the CLASSPNP.SYS blue screen problem.
Fix 2: Repair corrupt system files
The CLASSPNP.SYS blue screen error could be caused by missing, corrupt or damaged system files on your computer. To see if this is the case, you should run a Windows repair.
There are two ways you can repair possible issues with your system files:
Repair & replace corrupt system files with Fortect
Fortect is a tool specializing in Windows repair. With Fortect, the preliminary will scan your computer’s operating system for viruses, malware, and missing, damaged, or corrupt files, then it removes all problematic files found and replaces them with new healthy files. It’s like a clean reinstall of your operating system, except that you won’t lose any user data, and all programs, and settings are exactly as they are before the repair.
Here’s how to use Fortect to run a Windows repair:
1) Download and install Fortect.
2) Open Fortect- and run a free scan on your PC. The process might take a couple of minutes.
3) Once the scan finishes, you will get a summary of the issues found on your computer. 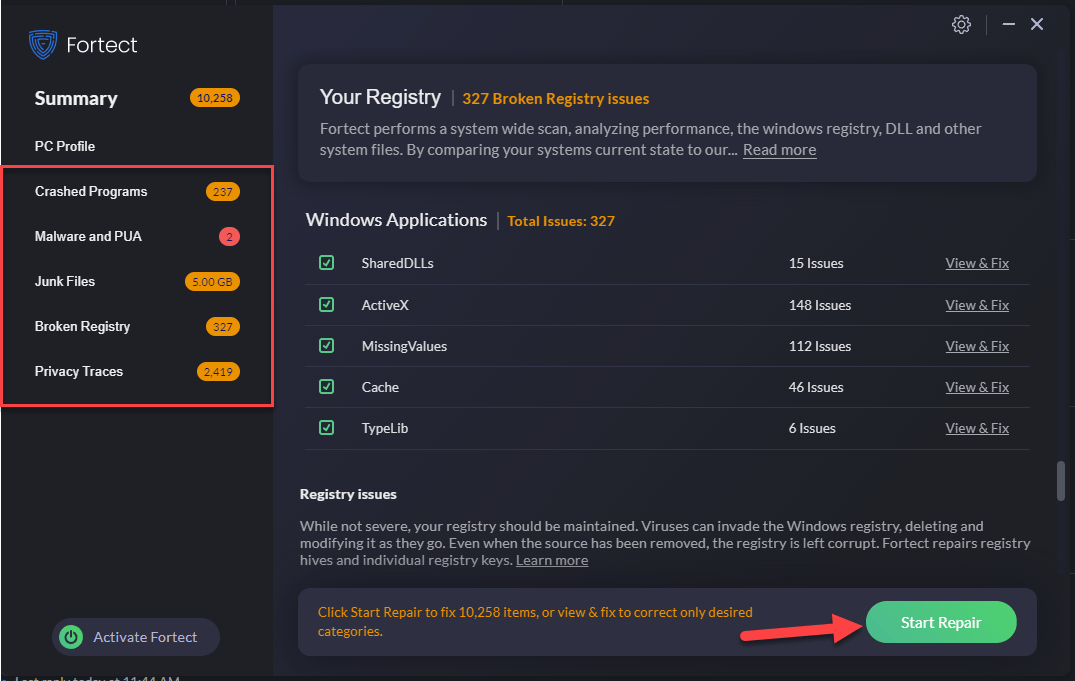
If you need to proceed with the repair function, you’ll be required to purchase the full version.
4) Restart your computer for the changes to take effect.
5) Check your computer to see if the CLASSPNP.SYS BSOD problem has been fixed.
Run SFC scan
System File Checker (SFC) is a handy feature in Windows that helps scan your system files and repair missing or corrupted system files(including those related to BSOD). To run the SFC scan:
1) On your keyboard, press the Windows logo key and type cmd. Then right click on Command Prompt and click Run as administrator.
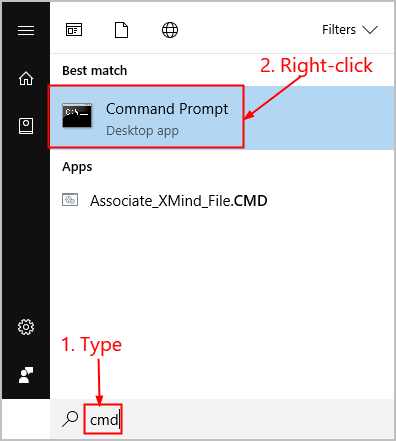
2) Click Yes when prompted to confirm.
3) In the command prompt window, type sfc /scannow and press Enter.
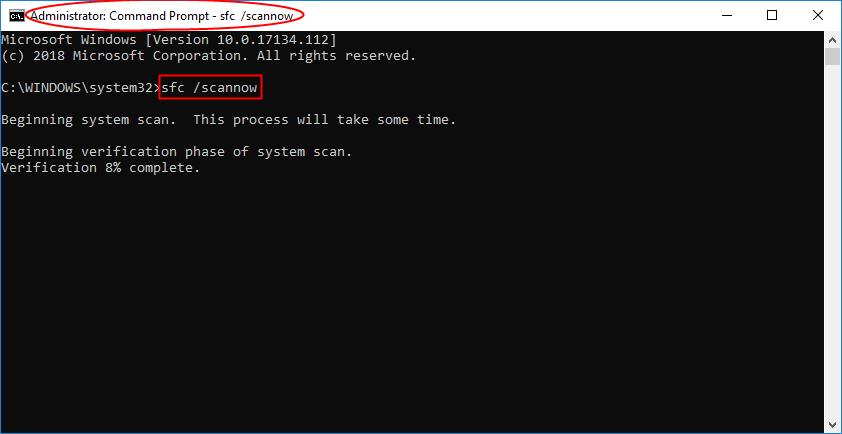
It’ll take some time for the SFC to replace the corrupted system files with new ones if it detects any, so please be patient.
4) Restart your computer for the changes to take effect.
5) Check your computer to see if the CLASSPNP.SYS BSOD problem has been fixed. If yes, then congrats! If the issue still persists, please move on to Fix 3, below.
Fix 3: Update your device drivers
This problem may occur if you are using the wrong or outdated device drivers. So you should update your device drivers to see if it fixes your problem. If you don’t have the time, patience or skills to update the driver manually, you can do it automatically with Driver Easy.
Driver Easy will automatically recognize your system and find the correct drivers for it. You don’t need to know exactly what system your computer is running, you don’t need to be troubled by the wrong driver you would be downloading, and you don’t need to worry about making a mistake when installing. Driver Easy handles it all.
You can update your drivers automatically with either the FREE or the Pro version of Driver Easy. But with the Pro version it takes just 2 clicks (and you get full support and a 30-day money back guarantee):
- Download and install Driver Easy.
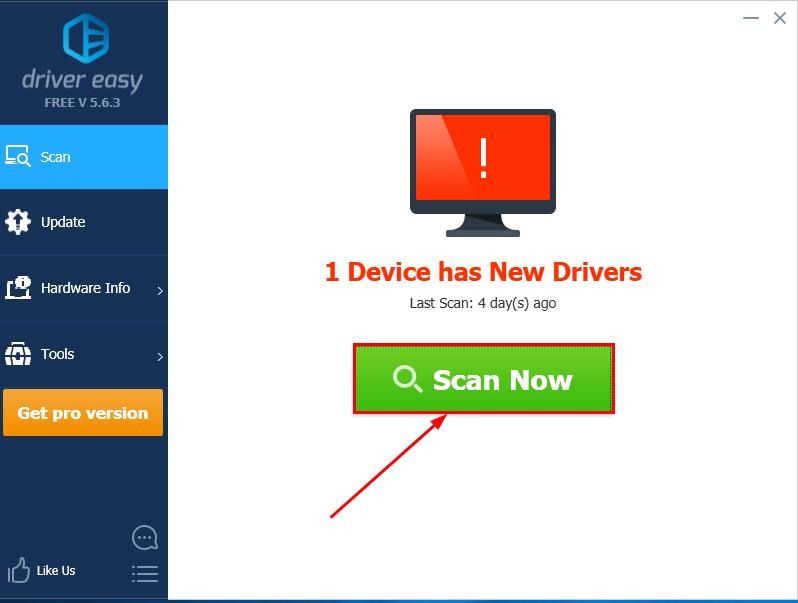
- Run Driver Easy and click the Scan Now button. Driver Easy will then scan your computer and detect any problem drivers.
- You can upgrade to the Pro version and click Update All to automatically download and install the correct version of ALL the drivers that are missing or out of date on your system.
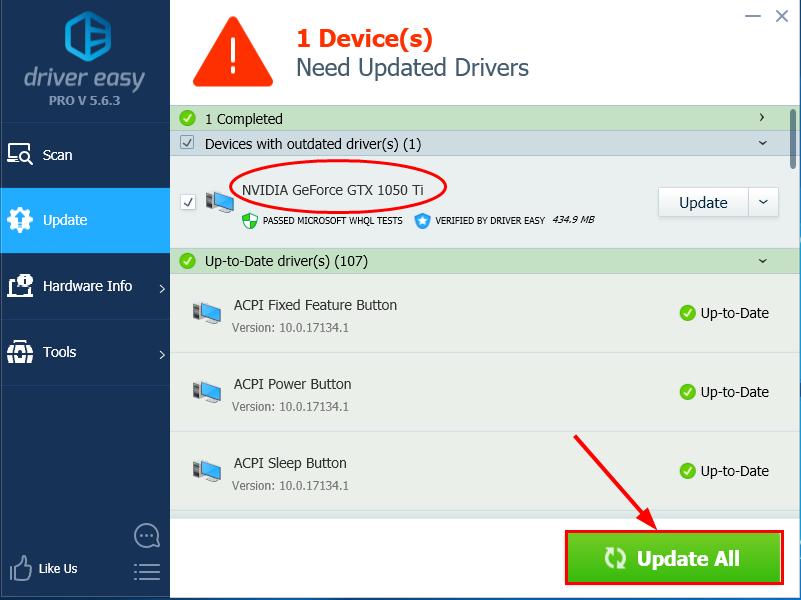
You can also click Update to do it for free if you like, but it’s partly manual.
- Restart your computer hopefully the CLASSPNP.SYS blue screen issue has been fixed. If the problem persists, move on to Step 4, below.
Fix 4: Update your BIOS
BIOS (Basic Input/Output System) performs the hardware initialization and jumpstarts the processes during the booting process of your computer. So we can try updating our BIOS to see if it sorts out our CLASSPNP.SYS blue screen issue.
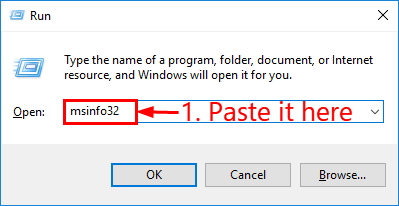
- On your keyboard, press the Windows logo key and R at the same time, then copy & paste msinfo32 into the box and press Enter.
- In the information in BIOS Version/Date and go to the manufacturer’s official website.
- Check out the Support (or Download) section and search for the latest BIOS update.
- Download the file and install it properly.
- Restart your PC and see if the CLASSPNP.SYS blue screen problem has been resolved. If yes, then great. But if it doesn’t work, don’t worry. There’s one more step for you to try.
Fix 5: Check for hardware corruption
Your CLASSPNP.SYS blue screen problem can also happen because of a damaged hard drive. So we might have to run the built-in tool to scan our system for disk error and fix them if finds any.
To do so:
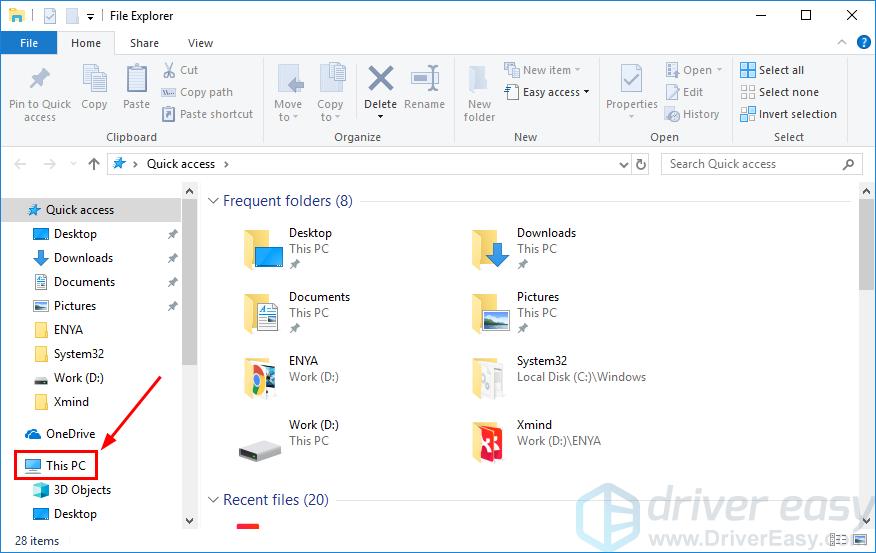
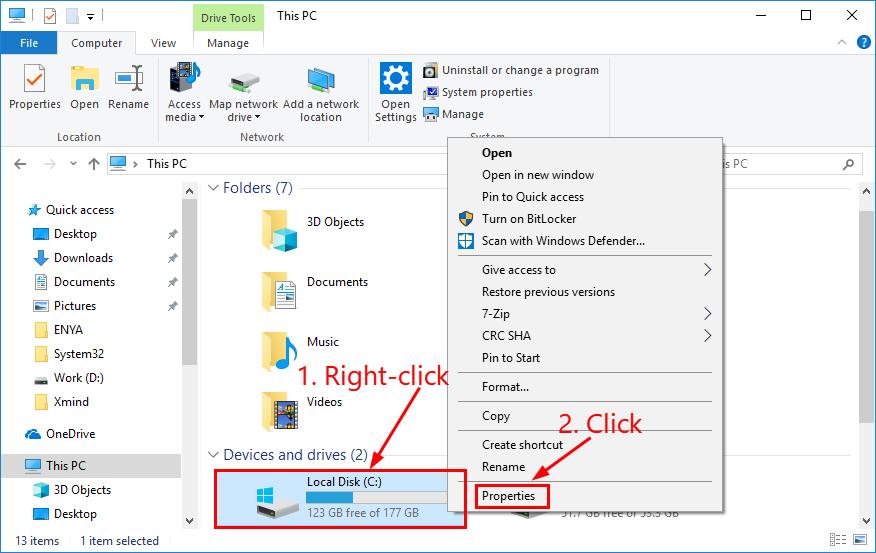
- On your keyboard, press the Windows logo key and E at the same time, then click This PC.
- Right-click on Local Disk and click Properties.
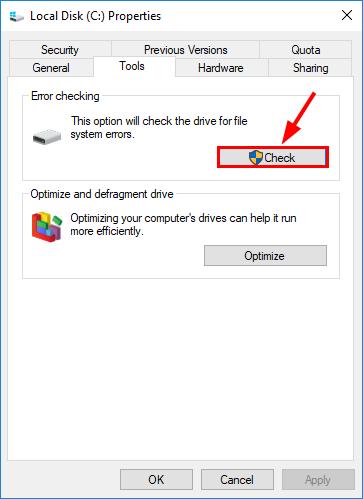
- Click the Tools tab > Check.
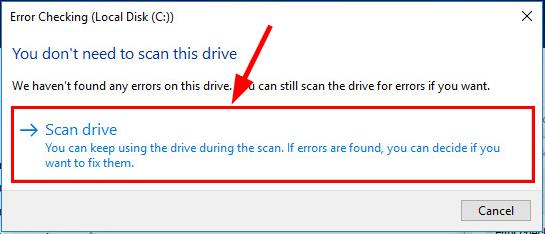
- Click Scan drive.
- Follow the on-screen instructions for Windows to detect and fix the errors found.
- Restart your computer and see if the CLASSPNP.SYS error has been fixed.
If all else fails, then it’d most likely be hardware issues. Be sure to leave your computer with professional hands so as not to compromise your PC.
There you go – top 5 fixes for your CLASSPNP.SYS blue screen issue. Hope this helps and feel free to drop us a comment if you have any further ideas to share with us. 🙂


