


Want to reduce your CS: GO lag? You’ve come to the right place! Although it is very frustrating, you’re definitely not the only person to experience this problem. Thousands of players have recently reported the very same issue. More importantly, you should be able to fix it pretty easily…
Try these fixes
Here’s a list of fixes that have resolved this problem for other CS: GO players. You don’t have to try them all. Just work your way through the list until you find the one that does the trick for you.
- Reboot your network
- Update your graphics driver
- Modify your graphics card settings
- Lower in-game settings
- Restrict applications and downloads in the background
- Change the power plan of your PC
- Adjust your Windows system for the best performance
- Disable CPU Core Parking
Fix 1: Reboot your network
When CS: GO lags, the first thing you should check is your network connection. If there’s something wrong with your network, CS: GO will definitely keep stuttering.
One of the easiest fixes for games lag issue is to simply reboot your network. By rebooting your network, your Internet connection speed may be back to normal. And if everything else is OK, this issue can be resolved after you reboot your network. Here is how to do it:
1) Unplug your modem (and your wireless router, if it’s a separate device) from power for 60 seconds.

2)Plug in your network devices again and wait until the indicator lights are back to its normal state.
Launch CS: GO to see if you fixed this issue. If your CS: GO still lags after you reboot your network, try the next fix, below.
Fix 2: Update your graphics driver
If CS: GO lag issue is not triggered by network problems, you should try updating your graphics driver to the latest version. An outdated graphics driver can also be the root of the game lag issues.
There are two ways to update your graphics card driver: manually and automatically.
Manually update the driver: You should go to the manufacturer website of your graphics card, find the latest version of the driver and install it in your computer.
Or
Automatically update the driver: If you don’t have the time, patience or computer skills to update your graphics card driver manually, you can, instead, do it automatically with Driver Easy. You don’t need to know exactly what system your computer is running, you don’t need to risk downloading and installing the wrong driver, and you don’t need to worry about making a mistake when installing. Driver Easy handles it all.
1) Download and install Driver Easy.
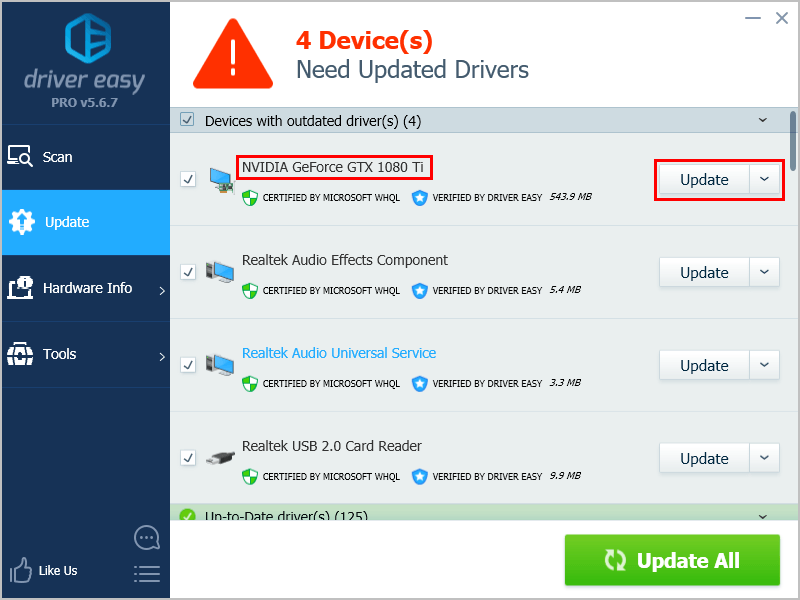
2) Run Driver Easy and click the Scan Now button. Driver Easy will then scan your computer and detect any problem drivers.

3) Click Update next to your graphics card to automatically download the correct version of its driver, then you can install it manually. Or click Update All to automatically download and install the correct version of all the drivers that are missing or out of date on your system (This requires the Pro version – you’ll be prompted to upgrade when you click Update All. You get full support and a 30-day money back guarantee).
Fix 3: Modify your graphics card settings
After updating your graphics driver to the latest version, try modifying your graphics card settings to see if you can fix this issue. Here is how to do it:
- If you’re using NVIDIA graphics card
- If you’re using AMD graphics card
- If you’re using Intel graphics card
If you’re using NVIDIA graphics card:
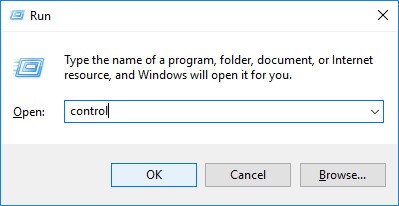
1) On your keyboard, press the Windows logo key and R at the same time to open the Run dialog. Then type control and press Enter to open Control Panel.

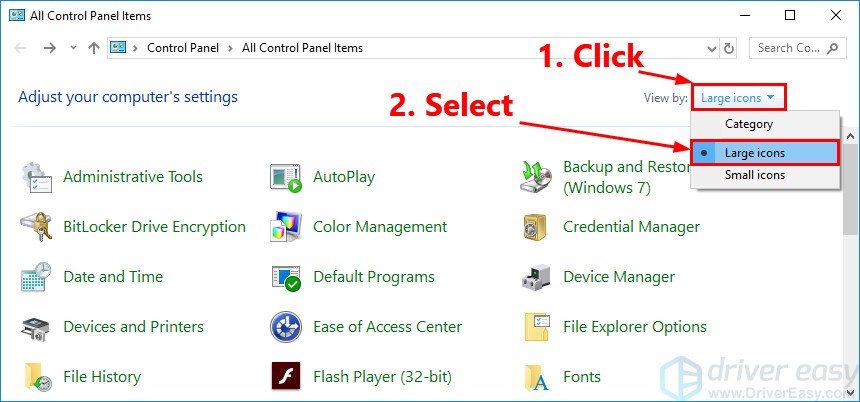
2) View Control Panel by Large icons.

3) Select NVIDIA Control Panel to open it.

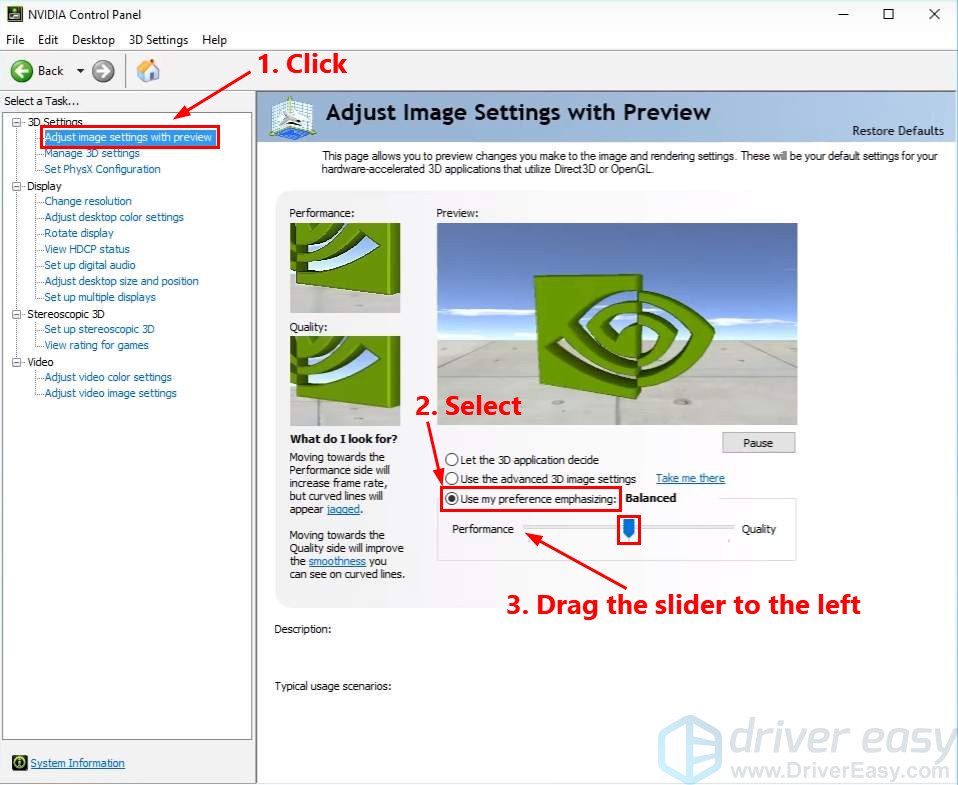
4) Click 3D Settings and select Adjust image settings with preview. Then select Use my preference emphasizing and drag the slider to the left.
If you’re using AMD graphics card:
1) On your keyboard, press the Windows logo key and R at the same time to open the Run dialog. Then type control and press Enter to open Control Panel.
2) View Control Panel by Large icons.
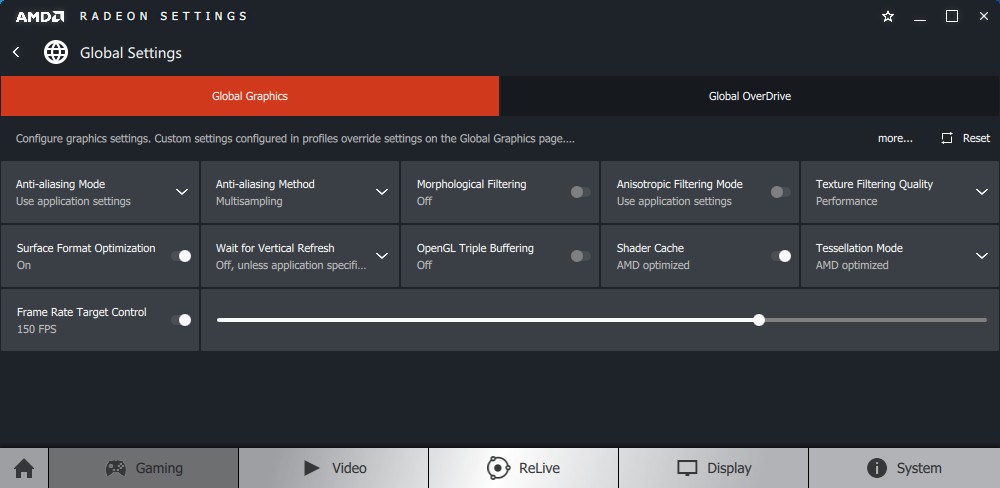
3) Select your AMD Radeon Settings to open it.
4) Go to Gaming > Global Settings. Then modify the settings the same way you see on the screenshot below.
If you’re using Intel graphics card:
1) On your keyboard, press the Windows logo key and R at the same time to open the Run dialog. Then type control and press Enter to open Control Panel.
2) View the Control Panel by Large icons.
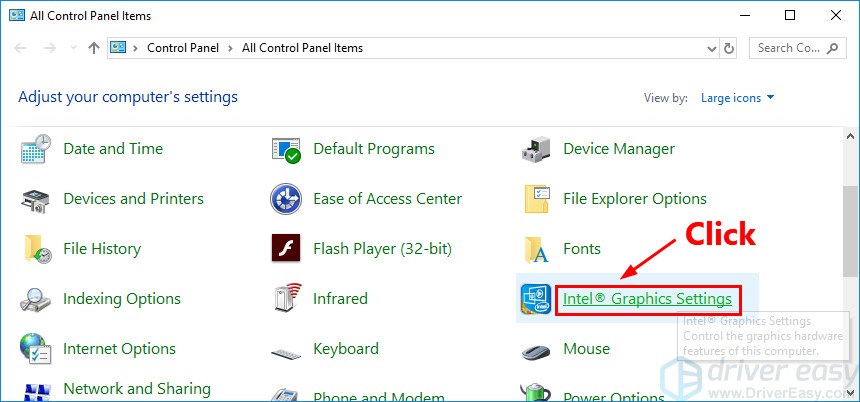
3) Select Intel Graphics Settings to open it.
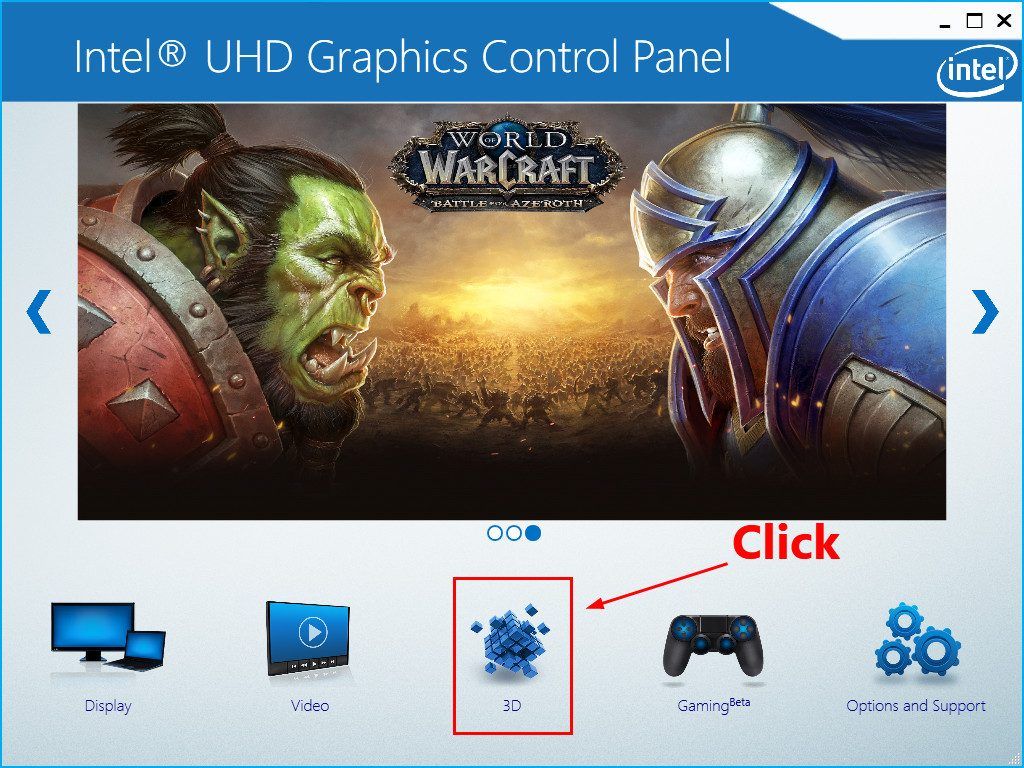
4) Click 3D to open the 3D settings.
5) Click Scan to add your CS: Go to the application list.
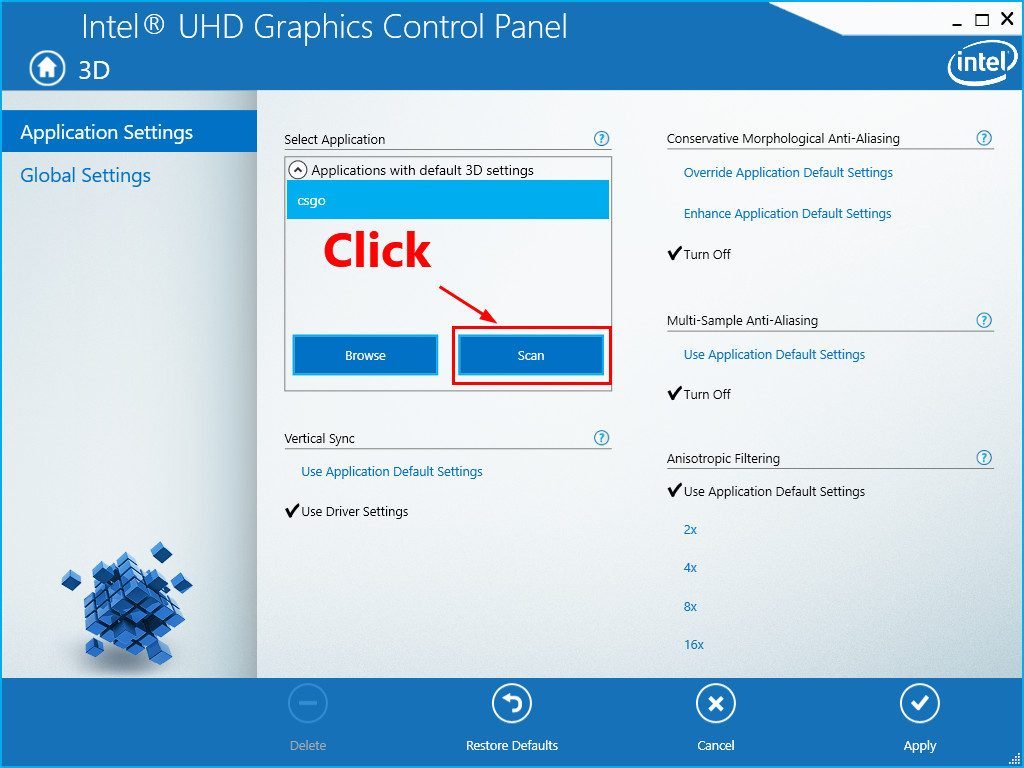
6) Modify the settings the same way you see on the screenshot below.
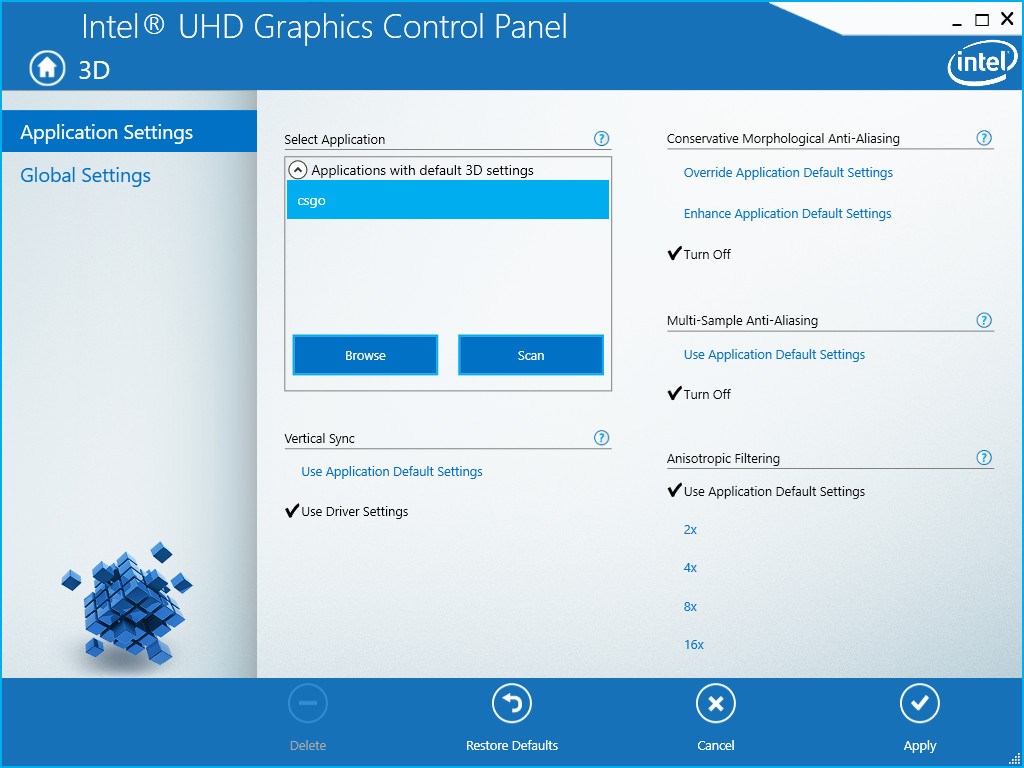
7) Click Apply to save the settings.

Run the game again to see if this issue is resolved. If not, try the next fix, below.
Fix 4: Lower in-game settings
If this issue reappears after you modify your graphics setting, it’s time to lower in-game settings. Here is how to do it:
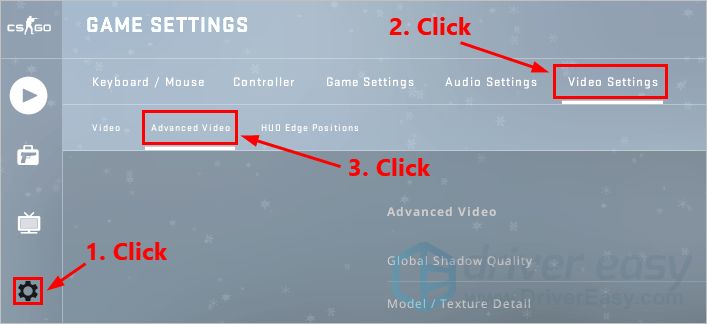
1) Open the Steam client to run CS: GO. Then click the gear button to open the game settings. Go to Video Settings > Advanced Video.
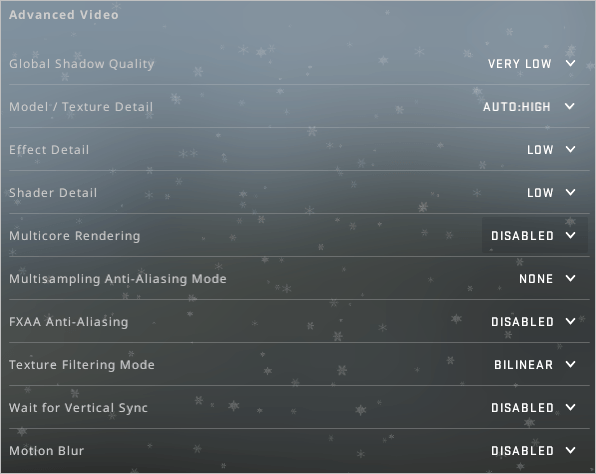
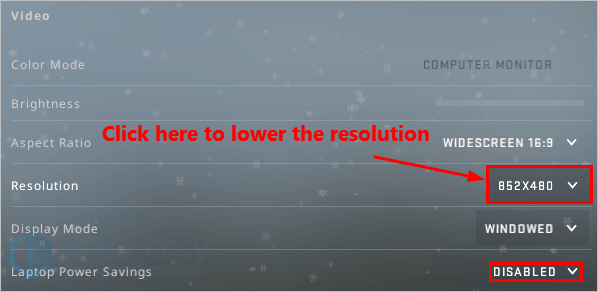
2) Modify the video settings of the game following the screenshot below to gain the maximum performance.
3) If CS: GO still lags, try playing the game in windowed mode and lowering the resolution of your CS: GO. And make sure you DISABLED Laptop Power Savings.
Launch CS: GO and check you fixed this issue. If this issue persists, try the next fix, below.
Fix 5: Restrict applications and downloads in the background
The CS: GO lag issue may occur if you’re running some other applications or programs at the same time. So try restricting applications and downloads in the background before playing the game to see if this issue reappears. Here is how to do it:
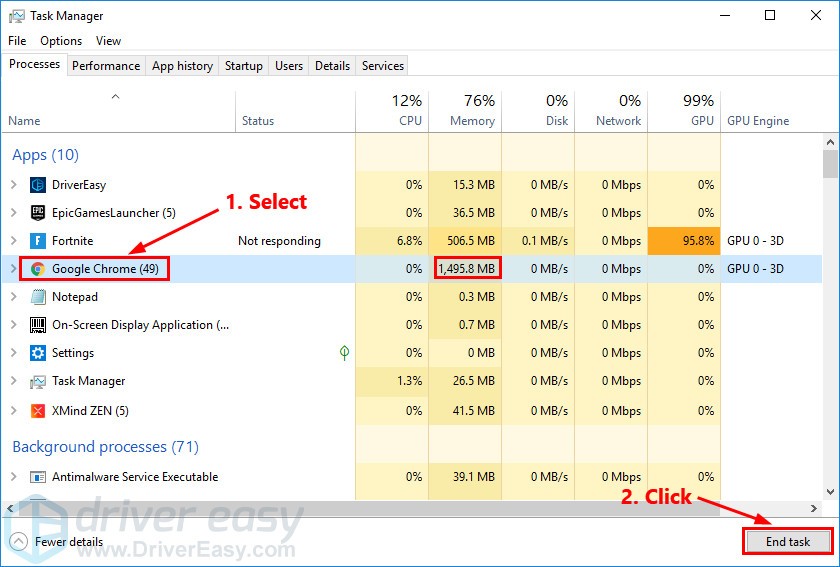
1) On your keyboard, press Ctrl, Shift and Esc at the same time to open Task Manager. You will be prompted for permission. Click Yes to open Task Manager.
2) Select other applications and programs that take up a large amount of CPU, memory and network and then click End task to close it.
Run CS: GO again to see if you can play the game smoothly. It CS: GO still lags, try the next fix, below.
Fix 6: Change the power plan of your PC
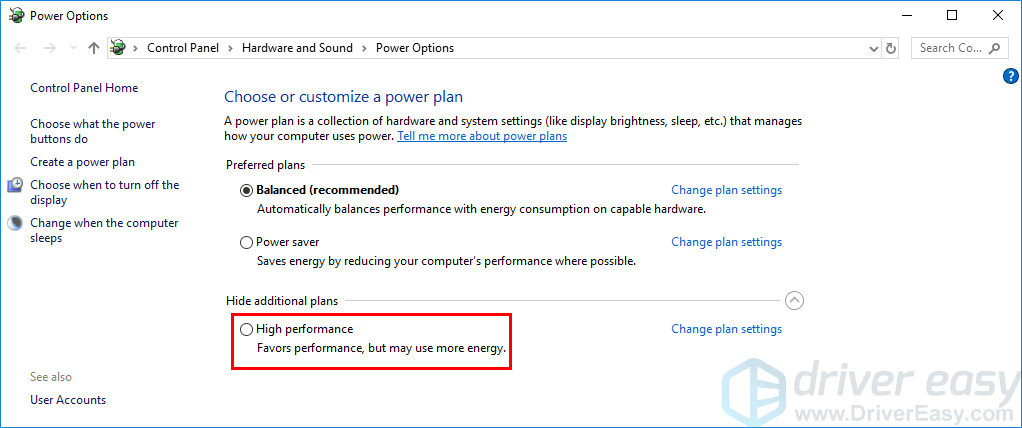
If the power plan of your PC is Power saver or Balanced, you might run into games lag issue. Most PC are configured to Balanced, which may limits the operating capacity of your graphics card and CPU. To fix the game lag issue, try changing the power plan of your PC to High performance. Here is how to do it:
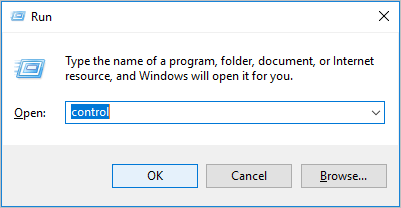
1) On your keyboard, press the Windows logo key and R at the same time, then type powercfg.cpl and press Enter.

2) In the pop-up window, expand Hide additional plans and select High performance.
Run CS: GO to see if you resolve this issue . If not, try the next fix below to adjust your Windows system for the best performance.
Fix 7: Adjust your Windows system for the best performance
If your PC fails to meet the recommended system requirements for CS: GO, try adjusting your Windows system for the best performance. Here is how to do it:
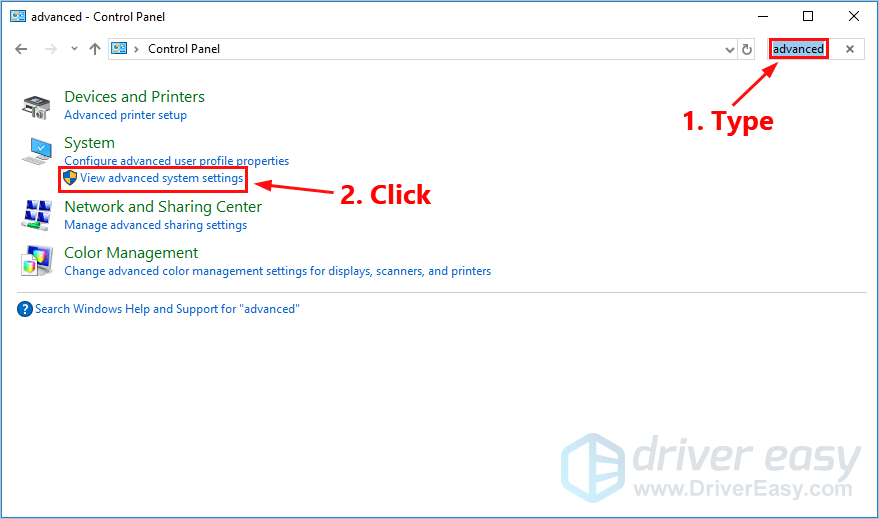
1) On your keyboard, press the Windows logo key and R at the same time to open the Run dialog. Type control and press Enter to open Control Panel.
2) In Control panel, type advanced in the search bar on the upper-right corner. Then click View advanced system settings.
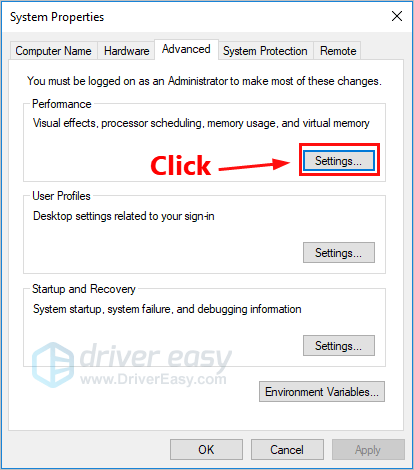
3) In the pop-up window, click Settings… in the Performance section.
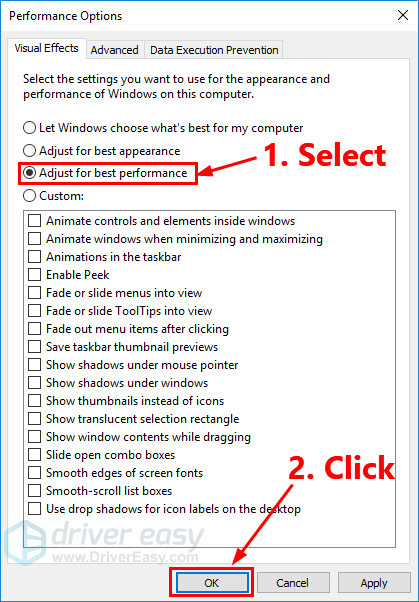
4) Select Adjust for best performance and click OK.
Launch CS: GO to see if it still lags. If this issue persists, try the next fix to disable CPU Core Parking.
Fix 8: Disable CPU Core Parking
As a Windows kernel power manager, Core Parking helps improve the energy efficiency of your system, because it can dynamically scale the number of logical processors that are in use based on the workload.
If you enabled Core Parking, the performance of your CPU may be limited when you play CS: GO. You can follow the steps below to disable CPU Core Parking:
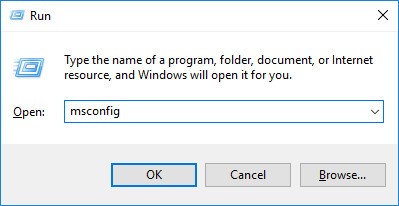
1) On your keyboard, press the Windows logo key and R at the same time to open the Run dialog. Then type msconfig and press Enter.
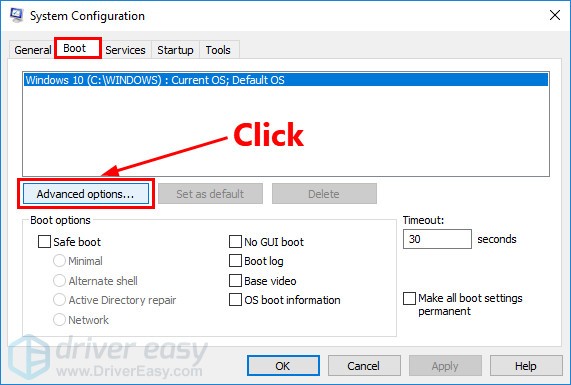
2) In the pop-up window, navigate to the Boot tab and click Advanced options.
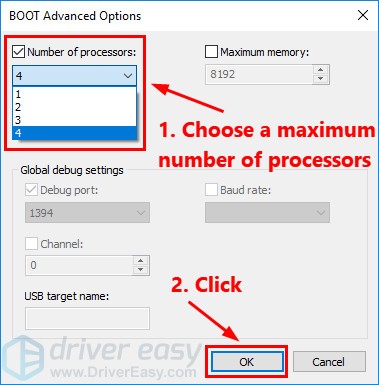
3) Check the box in front of Number of processors and choose a maximum number of processors. Then click OK to save the settings.
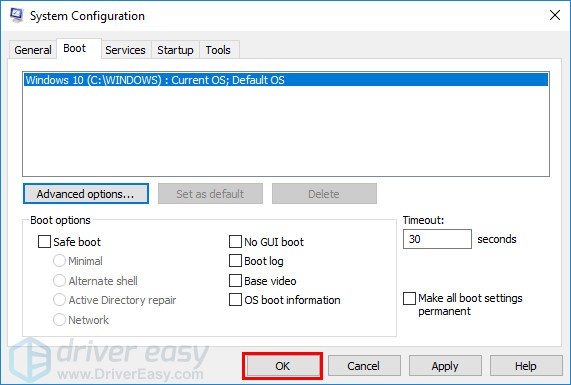
4) In the System Configuration window, click OK.
5) Click Restart to restart your PC.
Launch CS: GO to see if you resolved the game lag issue.
Hopefully one of the fixes above resolved this issue for you. If you have any questions or suggestions, please leave your comment below.