


Find your mic not working in Dota 2? Teamwork and interactivity are the biggest attraction. For this reason, a properly working microphone and headset are very important if you want to get the most out of this game.
If your mic is not working, or there are audio dropouts when you speak to your microphone, don’t worry. We’ve put together all the possible fixes that have helped many other players solve the Dota 2 mic not working issue.
Why do I get microphone issues on Dota 2?
There are several reasons why you are having problems with your microphone when playing Data 2:
- Your headphone Mute button has been activated
- The headset microphone hasn’t been set as the default input device
- Your microphone is incorrectly set up in Dota 2
- The audio drivers are out of date
- The Windows Audio Enhancements setting is turned on
Try these fixes
First, make sure your headphone microphone is not muted. If you’re using a splitter, ensure it’s firmly plugged in.
Here are 6 fixes that prove to be useful to many players. You don’t have to try all of them; simply work from the top down until you find the one that works.
- Set your microphone as the default device
- Check in-game settings
- Update device drivers
- Allow access to the microphone
- Verify integrity of game files
- Restart the Windows Audio service
The screenshots in this post are captured from a Windows 11 operating system. If you are using Windows 10 or older versions, please be aware that the visual appearance of your screen may vary slightly, but the steps to perform the task remain consistent.
Fix 1: Set your microphone as the default device
Before you try other fixes, it’s recommended to check the microphone is set correctly on your Windows PC.
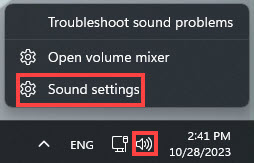
- At the bottom right corner of your computer screen – namely the notification area – you’ll find the volume icon. Right-click it and select Sound settings.
- Under the Input section, drag the sliders of the Microphone to turn up the volume. Just make sure you haven’t muted them or set them to such low levels that you cannot hear the voice yourself.
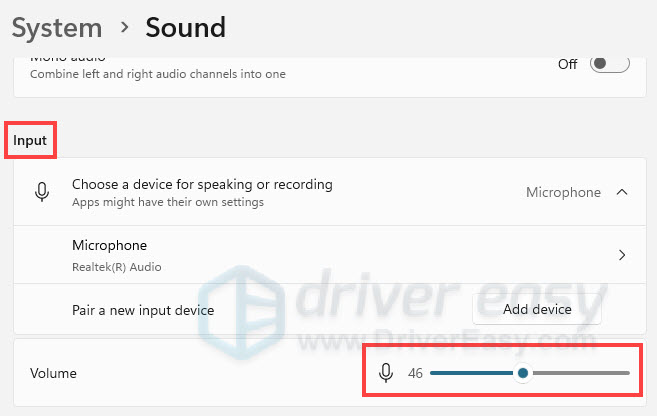
- Make sure the decide is set as default if you have many.
Now that the microphone of your headset is enabled and set as the default device, and you’ve turned up your microphone volume, try launching Dota 2 and see if the mic is working properly. If it does, congrats! But if not, you may want to try the next fix, below.
Fix 2: Check in-game settings
Make sure you haven’t turned off any options related to the microphone in Dota 2. From the main Dota 2 menu, you can set up your microphone for voice chat.
- Launch Dota 2 and click the gear icon in the top left corner.
- Select the AUDIO tab and ensure that the Sound Device and Speaker Configuration are set to default.

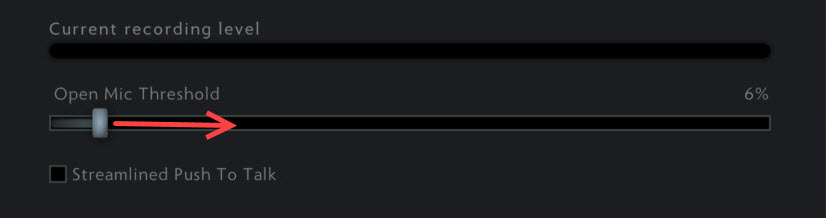
- Activate Voice Chat (PARTY) and set your Push to Talk shortcut key for your team.
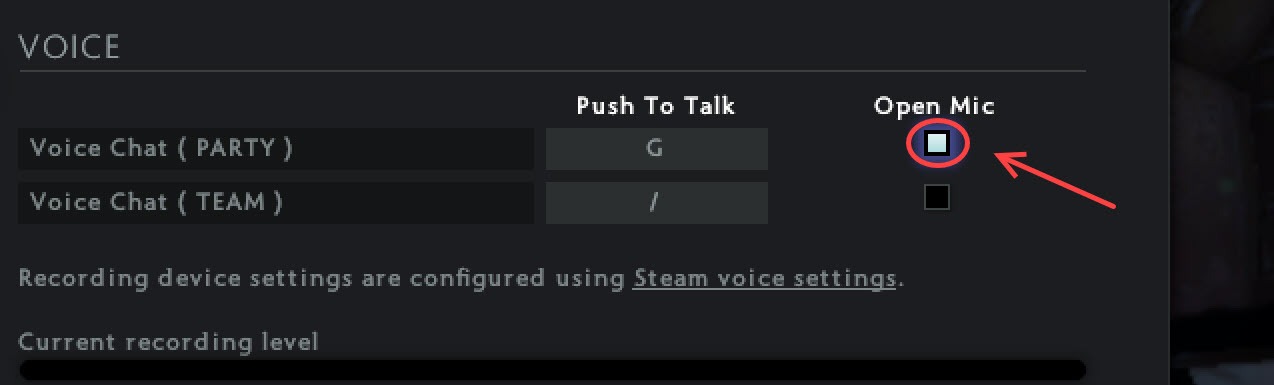
- Select the appropriate Open Mic Threshold using the slider at the bottom of this tab to get your microphone to make sure your voice can be recorded at an appropriate level (we recommend about 30%).
When you’re all set, join a squad to see if you can use the mic properly. If not, move on to the next fix.
Fix 3: Update device drivers
Sometimes an outdated, corrupt or incompatible driver may trigger the mic not working issue. To fix it, you should try updating not only the audio driver but also drivers for other motherboard devices like chipsets.
It’s always important to keep these device drivers up to date if you want to get your audio and graphics card to its tip-top performance. To update a driver manually, you’ll need to download the latest drivers from the manufacturer and install them step by step.
If you don’t have the time, patience, or computer skills to update the graphics card driver manually, you can do it automatically with Driver Easy.
Driver Easy will automatically recognize your system and find the correct drivers for it. You don’t need to know exactly what system your computer is running, you don’t need to risk downloading and installing the wrong driver, and you don’t need to worry about making a mistake when installing. Driver Easy handles all.
You can update your drivers automatically with either the FREE or the Pro version of Driver Easy. But with the Pro version, it takes just 2 clicks.
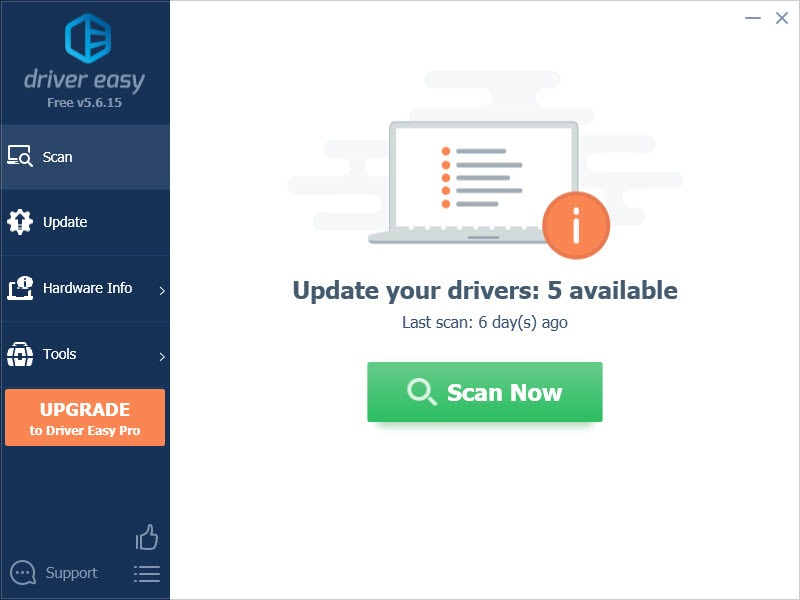
- Download and install Driver Easy.
- Run Driver Easy and click the Scan Now button. Driver Easy will then scan your computer and detect any problem drivers.
- Click the Update button next to the flagged device to automatically download the correct version of the driver (you can do this with the FREE version), and then manually install it.
Or click Update All to automatically download and install the correct version of all the drivers that are missing or out of date on your system (this requires the Pro version – you’ll have full support and a 30-day money back guarantee).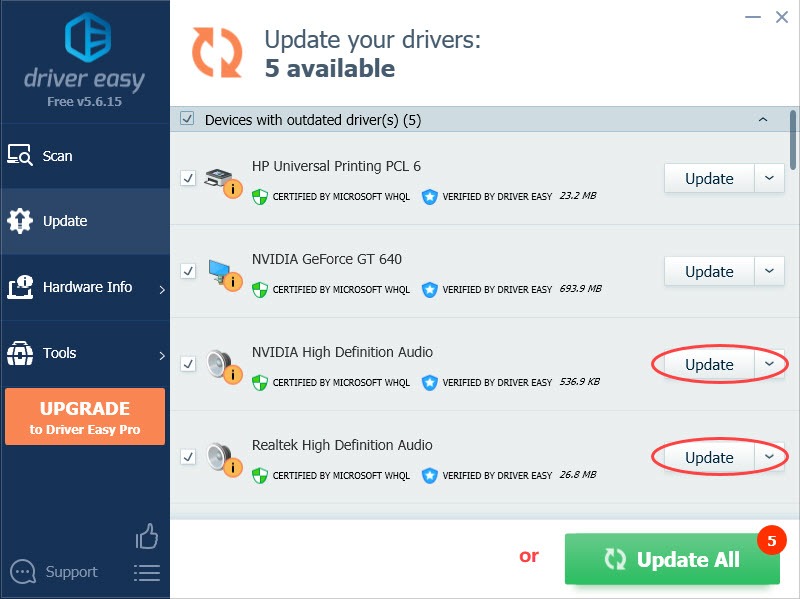
- Restart your computer for the changes to take effect.
Fix 4: Allow access to the microphone
It’s possible that your microphone has been disabled in privacy settings. If that’s the case, your Dota 2 won’t be able to access your mic. To modify the settings, here’s how:
- On your keyboard, press the Windows logo key to invoke the Search box and type microphone. Then select Microphone Privacy Settings from the results list.
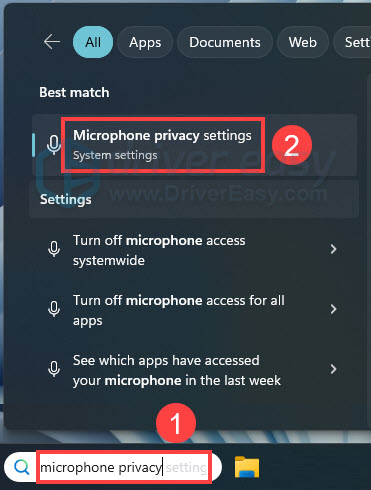
- Click Change to see if the toggle for Microphone access for this device has been set to On.
Under the Allow Apps To Access Your Microphone tab, ensure that the toggle is in the On position so that other apps can use your microphone.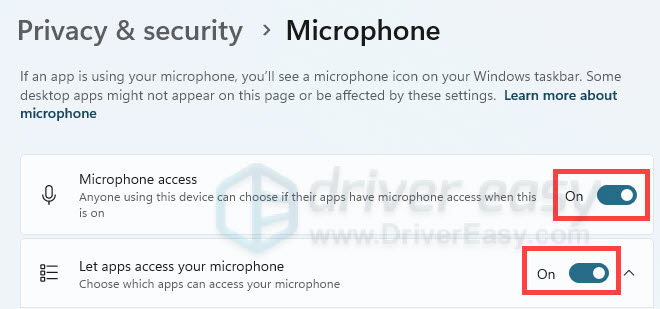
Check to see if your mic goes back to normal in Dota 2. If not, you can try the next fix.
Fix 5: Verify integrity of game files
If the microphone is still not working on Dota 2, you can try a quick fix — verify the in-game files. Here is how:
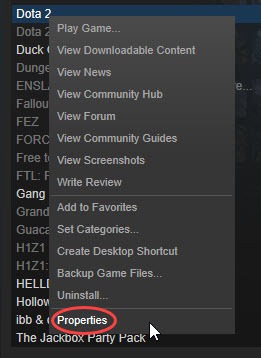
- Launch Steam, and click Library.
- Right-click Dota 2, and select Properties.
- Go to the LOCAL FILES tab. Then click VERIFY INTEGRITY OF GAME FILES…
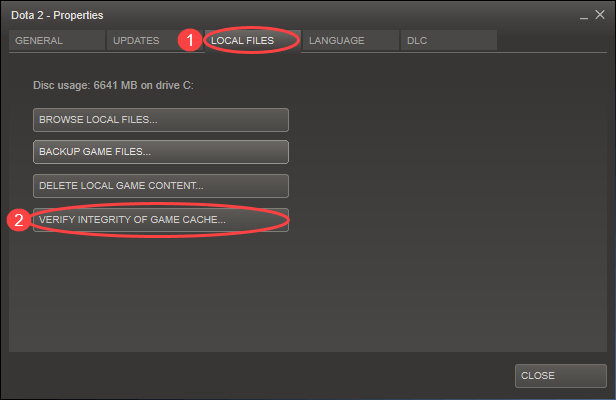
- Wait for the process to complete.
Once you verify that all the cache files are in a normal state, please launch Dota 2 and check if your mic is working properly this time. In case the problem persists, you can move on to the next fix.
Fix 6: Restart the Windows Audio service
If the mic not working issue is happening to all your games, the possible cause is the Windows Audio Service is not working normally. To fix it, here’s how:
- On your keyboard, press the Windows logo key and R at the same time to invoke the Run box.
- Type services.msc and press Enter.

- Scroll through the list of services to locate Windows Audio. Right-click it and click Restart.
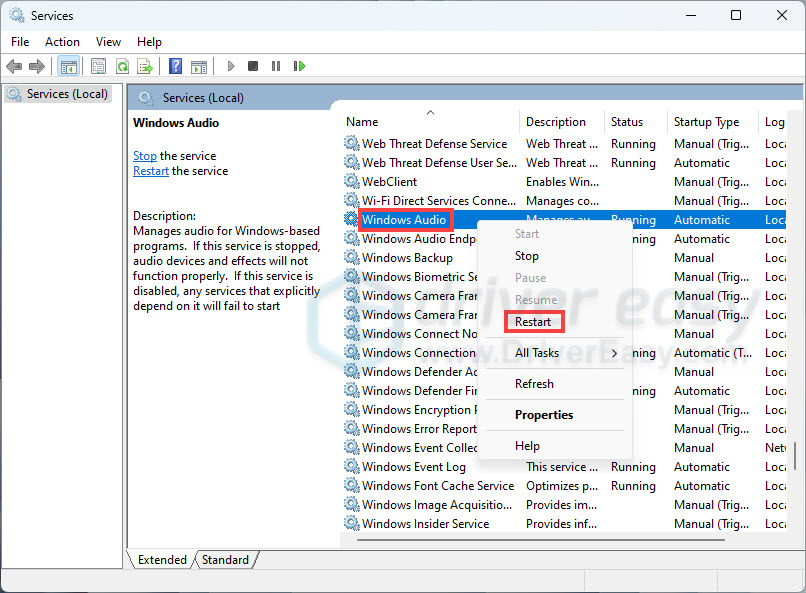
- Wait for 1-3 seconds for the process to complete.
Try the microphone again, and see if it’s working this time. If not, you can uninstall the Dota 2 or contact Dota 2 support team to further fix the microphone not working issue.
Hopefully, this post helped resolve your Dota 2 mic not working issue. Please feel free to leave a comment below if you have any follow-up questions or ideas.