




If you’re using an Intel wireless adapter on your computer, you should keep its driver up to date to make sure your WiFi connection is in good condition. The correct driver depends on your Intel wireless adapter and Windows version.
In this guide, you’ll learn how to download the correct Intel Wi-Fi driver and update it manually or automatically.
Do you need to update the Intel Wi-Fi Driver?
Yes. Keeping your Intel Wi-Fi driver up to date can help maintain a stable and reliable wireless connection. Newer driver versions often include bug fixes and optimizations that can improve Wi-Fi stability and performance.
You should consider updating your Intel Wi-Fi driver if:
- Your Wi-Fi connection is slow, unstable, or frequently disconnects.
- Windows has trouble detecting your Intel wireless adapter.
- You see a warning icon or driver error in Device Manager.
- Your Wi-Fi problems started after a Windows update or system upgrade.
- You want to benefit from the latest compatibility improvements and bug fixes for your Intel wireless adapter.
Even if your Wi-Fi is working normally, periodically checking for a newer compatible driver can help keep your system up to date.
How to update your Intel WiFi driver
Here are two methods to update your Intel wireless adapter driver, easily and safely.
Method 1: Manually download the driver from Intel
Intel provides Wi-Fi drivers through its Download Center. Here’s how to download and install the driver step by step.
If you don’t know which Intel Wi-Fi adapter is installed on your PC, you’ll need to identify it via Device Manager first.
Step 1: Identify your Intel wireless adapter
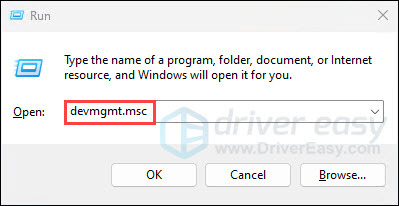
1) Press the Windows key and R at the same time to invoke the Run command.
2) Type devmgmt.msc and press Enter.
3) Expand Network adapters. Look for an Intel wireless adapter, such as Intel(R) Wi-Fi 6 AX200, Intel(R) Wi-Fi 6E AX210, or Intel(R) Wireless-AC 9560, and note the exact adapter model.
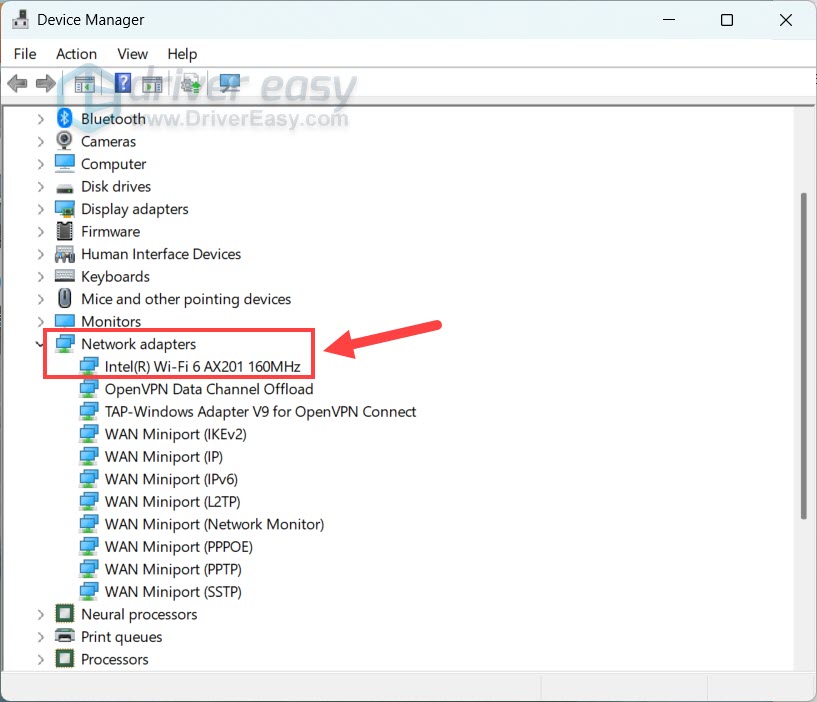
If you don’t see an Intel adapter under Network adapters, check for an Unknown device or a device with a yellow warning icon. You can right-click it, select Properties > Details, choose Hardware Ids from the drop-down list, and search for the value online to identify the hardware.
Step 2: Check your Windows version
1) On your keyboard, press the Windows key + I to open Settings.
2) Navigate to System > About.
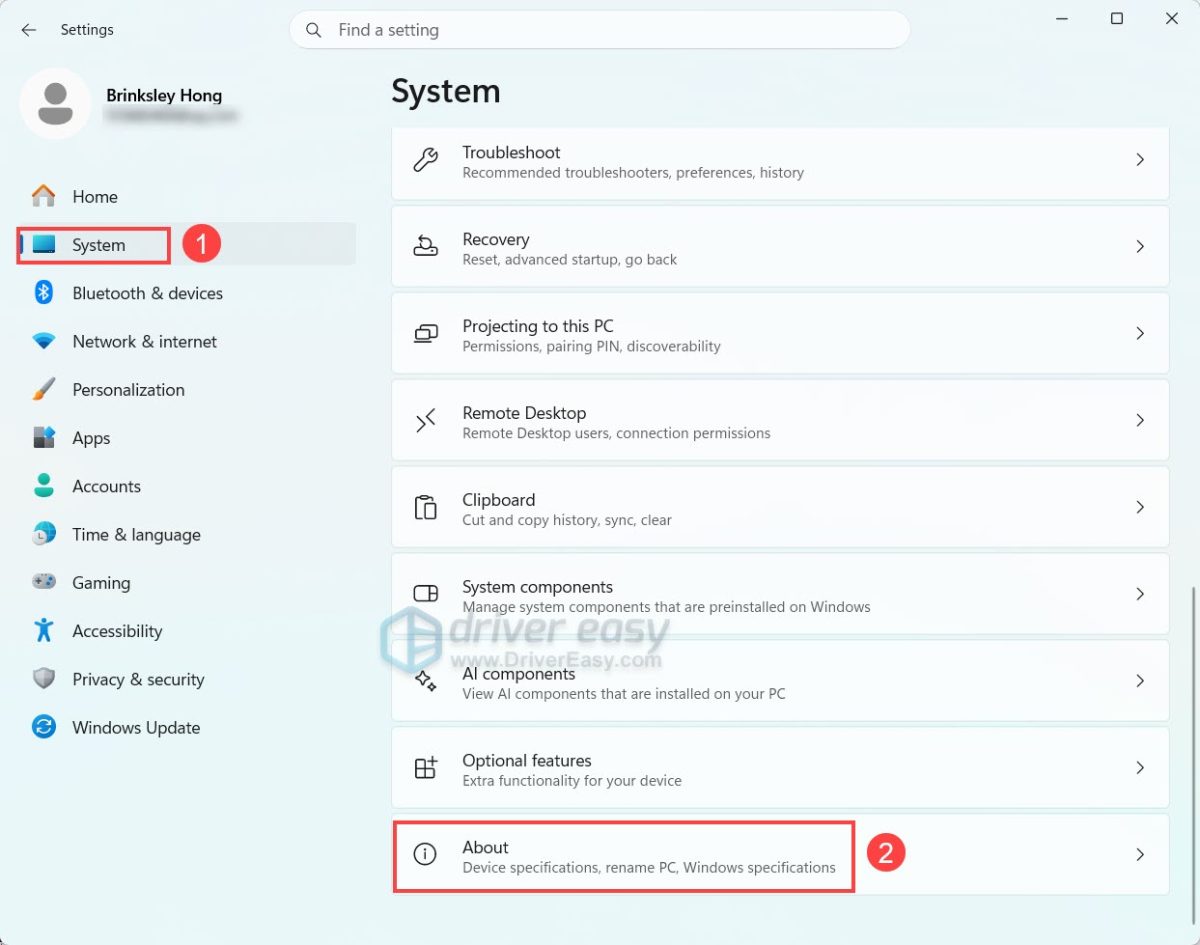
3) Note down your Windows edition and version, and also System Type, so you’ll know whether you’re using 32-bit or 64-bit Windows.
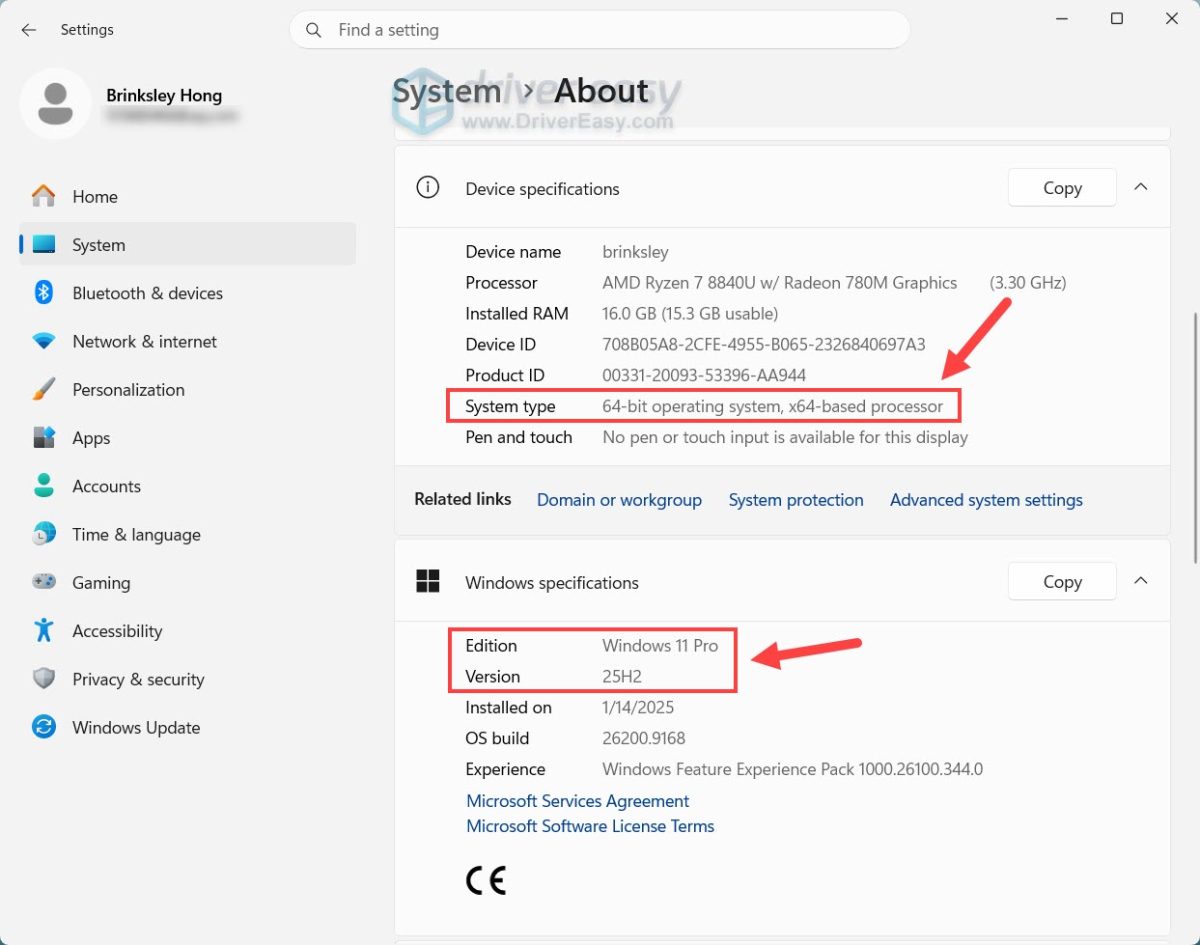
Step 3: Download and install the Intel WiFi driver
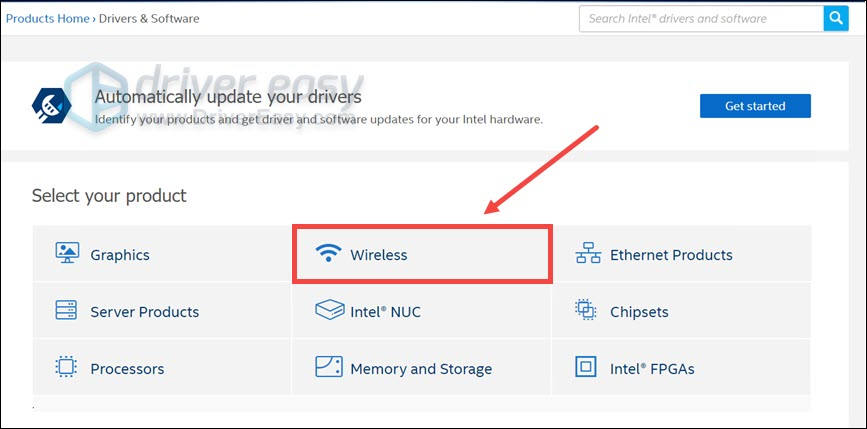
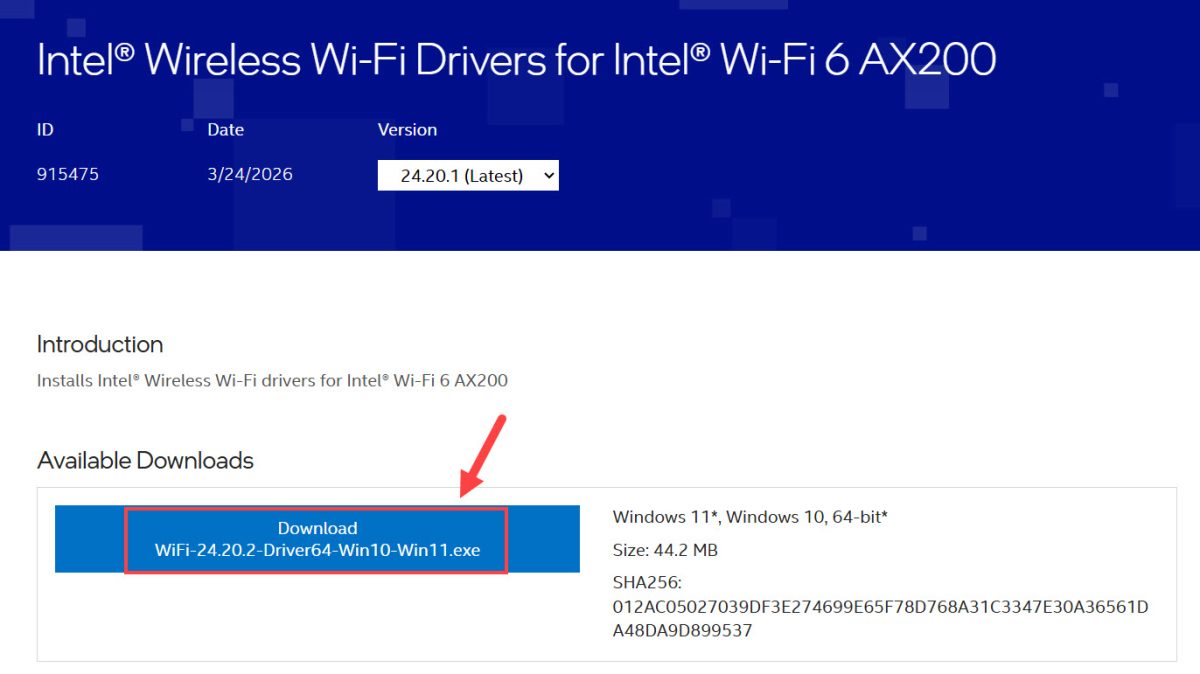
1) Go to the official Intel download center, then select Wireless.
2) Type your Intel wireless adapter into the search bar at the top and select the correct driver for your Windows version from the results.
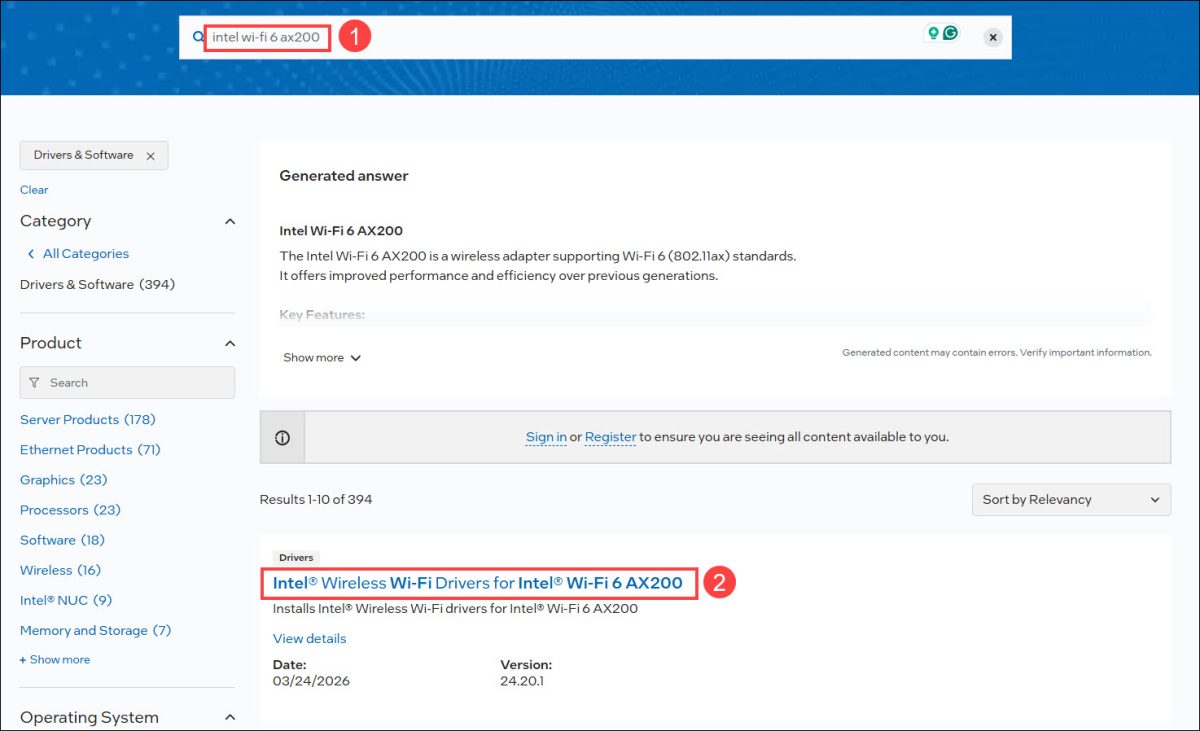
3) Download the Wi-Fi driver exe file.
4) Once done, double-click the file and follow the on-screen instructions to complete the installation.
5) Restart the computer to apply the changes.
Test your Wi-Fi connection. Open a few websites or run a speed test. If you were experiencing Wi-Fi disconnects, slow speeds, or connection drops, check whether the problem has improved after the restart.
Method 2: Update your Intel Wi-Fi driver automatically
If you don’t have the time, patience or skills to update your wireless adapter driver manually, you can do it automatically with Driver Easy.
Driver Easy will automatically recognize your system and find the correct drivers for it. You don’t need to know exactly what system your computer is running, you don’t need to risk downloading and installing the wrong driver, and you don’t need to worry about making a mistake when installing.
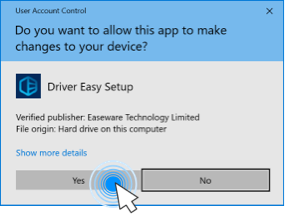
1) Download and install Driver Easy.
2) Run Driver Easy and click the Scan Now button. Driver Easy will then scan your computer and detect any problem drivers.

3) Click the Activate & Update button next to your wireless adapter to download the latest and correct driver for it. You can also click the Update All button at the bottom right to automatically update all outdated or missing drivers on your computer.
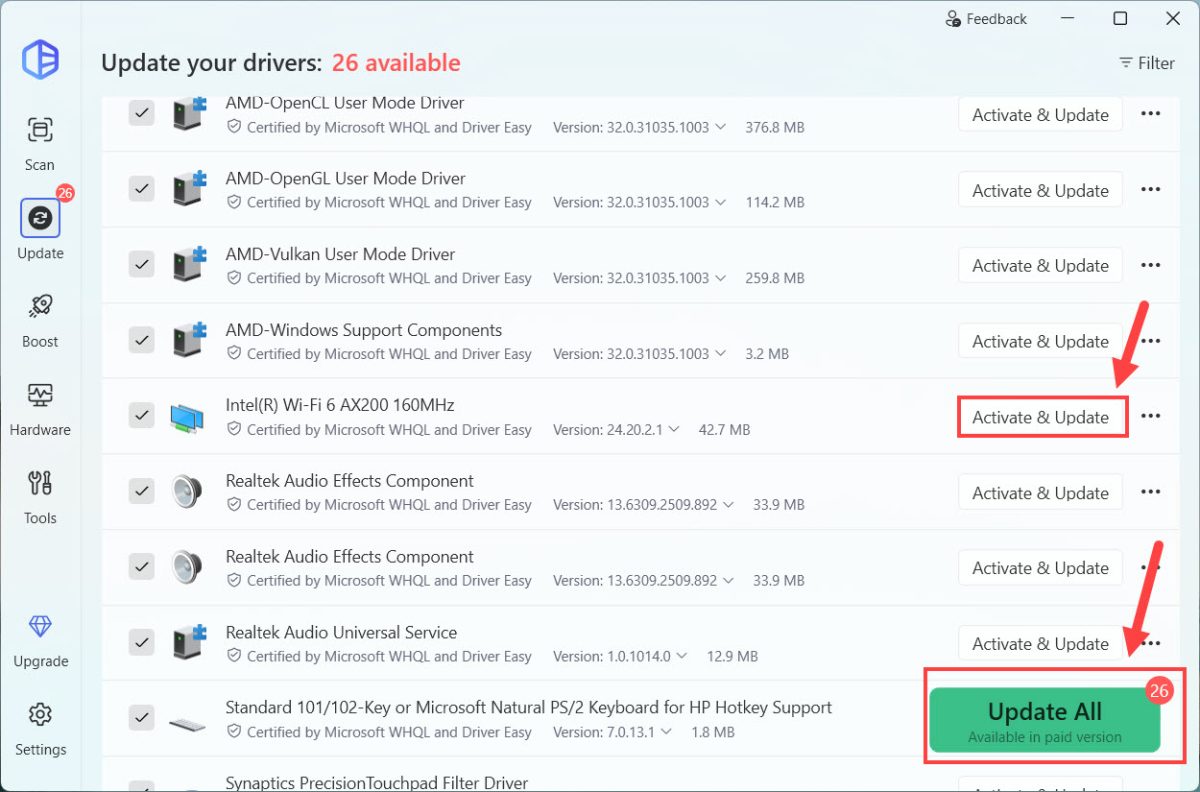
You’ll be prompted to upgrade to the Pro version to update the drivers. With Driver Easy Pro, you can update multiple drivers automatically, access advanced features such as driver backup and rollback, and also get full technical support. If you want to give it a try first, you can sign up for a 7-day free trial to unlock all the Pro features.
After the installation finishes, restart your computer and test your Wi-Fi connection. Check whether the connection is stable and whether the original Wi-Fi problem has been resolved.
If you’re troubleshooting a Wi-Fi problem or want to boost your wireless connection, updating the driver is a wise move because it’s relatively simple and can resolve issues caused by outdated, corrupted, or incompatible driver software. Follow the steps above to update your Intel Wi-Fi driver without hassle.
If you have any questions or encounter other Intel Wi-Fi problems, feel free to leave a comment below.