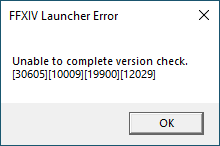
Seeing an error “Unable to complete version check” on your Final Fantasy XIV game launcher? Don’t worry! You’re not the only person to experience it. A lot of FFXIV players have experienced this issue when booting their game launcher. Although this error is common, it’s still fixable…
Try these fixes
You may not have to try them all; just work your way down the list until you find the one that works for you.
Fix 1: Check your Internet connection
Checking Internet connection is the first thing you should try when you see the “Unable to complete version check” error. There are a few things you can try:
1. Restart your router
This is helpful for fixing temporary network connection issues that causes the “Unable to complete version check” error.
- Turn off your computer, then turn off your router/modem.
- Wait for one or two minutes
- Turn on your router/modem, and then start your computer.
Now launch your game and see if the error is gone.
2. Use a mobile hotspot to launch FFXIV
The version check of your FFXIV launcher may not work properly on your network connection. You may need to test it on another network.
One thing you can try is to use your cellphone as a mobile hotspot. Once you set it up, try connecting your computer to the hotspot. When you’ve launched and updated the launcher, you can switch back to your original network and play FFXIV.
3. Use a VPN
You can also use a VPN service to fix this error. It helps you get around the interruption of your launcher version check.
To use a VPN service, we recommend NordVPN. It’s very easy to use, and helps you set up a fast, stable and secure VPN connection to anywhere. And you can do this with just a few clicks!

Once you set it up, use it to launch and update your FFXIV launcher. Hopefully it’s helpful for you to resolve your problem.
If none of the things above helped you, don’t worry! There are still other fixes for you to try.
Fix 2: Edit the Boot Configuration file
You can adjust the version check setting to fix the “Unable to complete version check” error. Here is what and how you should adjust:
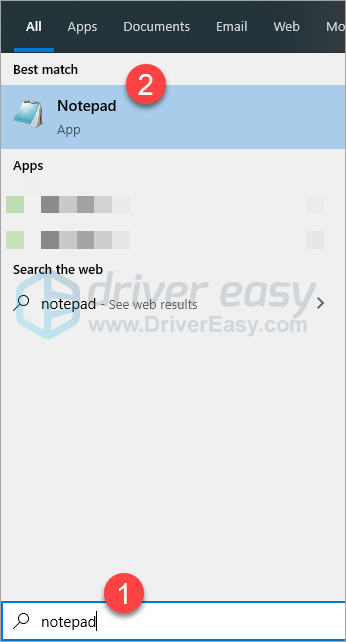
- Press the Windows logo key on your keyboard and type “notepad”, then select Notepad in the results.
- Open File Explorer (by pressing the Windows logo key and E on your keyboard at the same time).
- Go to the following location (by copying the path below and pasting it to the address bar, then pressing Enter):
%userprofile%DocumentsMy GamesFINAL FANTASY XIV - A Realm Reborn

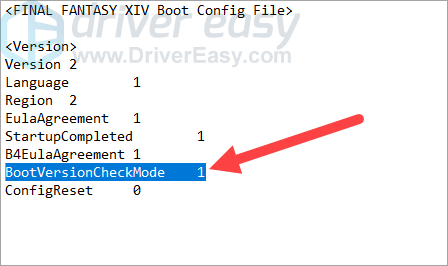
- Open the FFXIV_BOOT.cfg file with Notepad (click and drag it to the Notepad window).

- Change the value of BootVersionCheckMode from 0 to 1.
- Press the Ctrl key and S on your keyboard at the same time to save your change.
- Close the file, then run your FFXIV launcher to see if this fixes your version check error.
Hopefully it does. But if not, there is still one fix you can try…
Fix 3: Update your device driver
Perhaps you’re seeing the “Unable to complete version check” error because one of your device drivers is not working properly. You should update your device drivers to see if this helps you resolve your problem.
There are two ways you can update your drivers:
Option 1 – Manually – You’ll need some computer skills and patience to update your drivers this way, because you need to find exactly the right driver online, download it and install it step by step.
OR
Option 2 – Automatically (Recommended) – This is the quickest and easiest option. It’s all done with just a couple of mouse clicks – easy even if you’re a computer newbie.
Option 1 – Download and install the driver manually
Your device manufacturers keep updating drivers. To get them, you need to go to their website, find the drivers corresponding with your specific flavor of Windows version (for example, Windows 64 bit) and download the driver manually.
Once you’ve downloaded the correct drivers for your system, double-click on the downloaded file and follow the on-screen instructions to install the driver.
Option 2 – Automatically update your drivers
If you don’t have the time, patience or computer skills to download your device drivers manually, you can do it automatically with Driver Easy.
Driver Easy will automatically recognize your system and find the correct drivers for it. You don’t need to know exactly what system your computer is running, you don’t need to risk downloading and installing the wrong driver, and you don’t need to worry about making a mistake when installing.
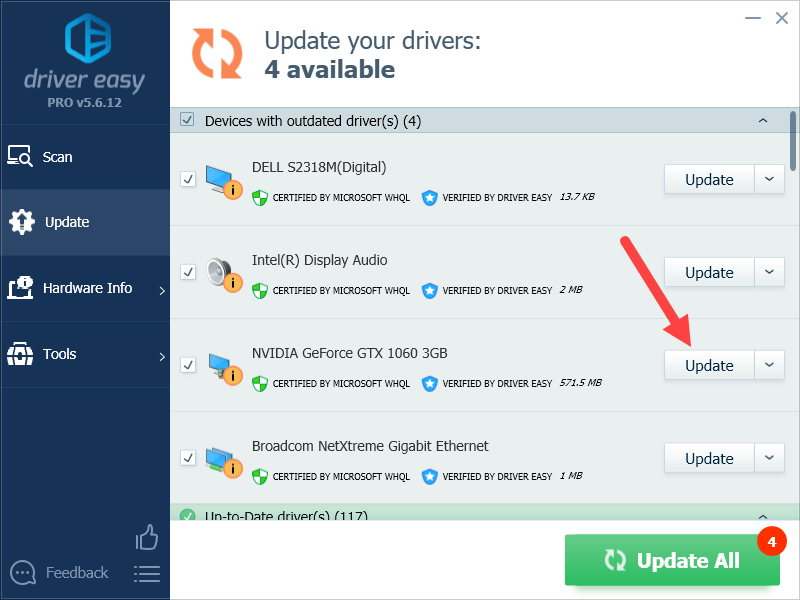
You can update your drivers automatically with either the FREE or the Pro version of Driver Easy. But with the Pro version it takes just 2 clicks:
1) Download and install Driver Easy.
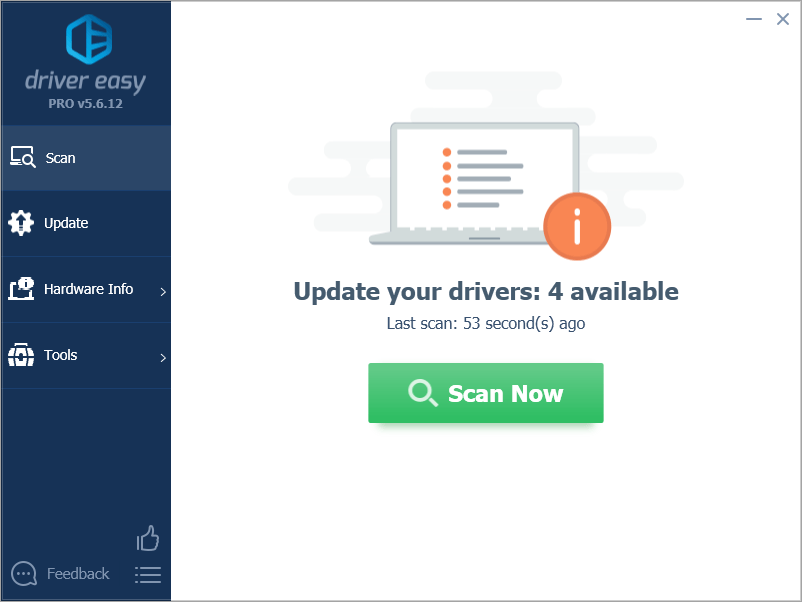
2) Run Driver Easy and click the Scan Now button. Driver Easy will then scan your computer and detect any problem drivers.
3) Click Update All to automatically download and install the correct version of all the drivers that are missing or out of date on your system (this requires the Pro version – you’ll be prompted to upgrade when you click Update All).