


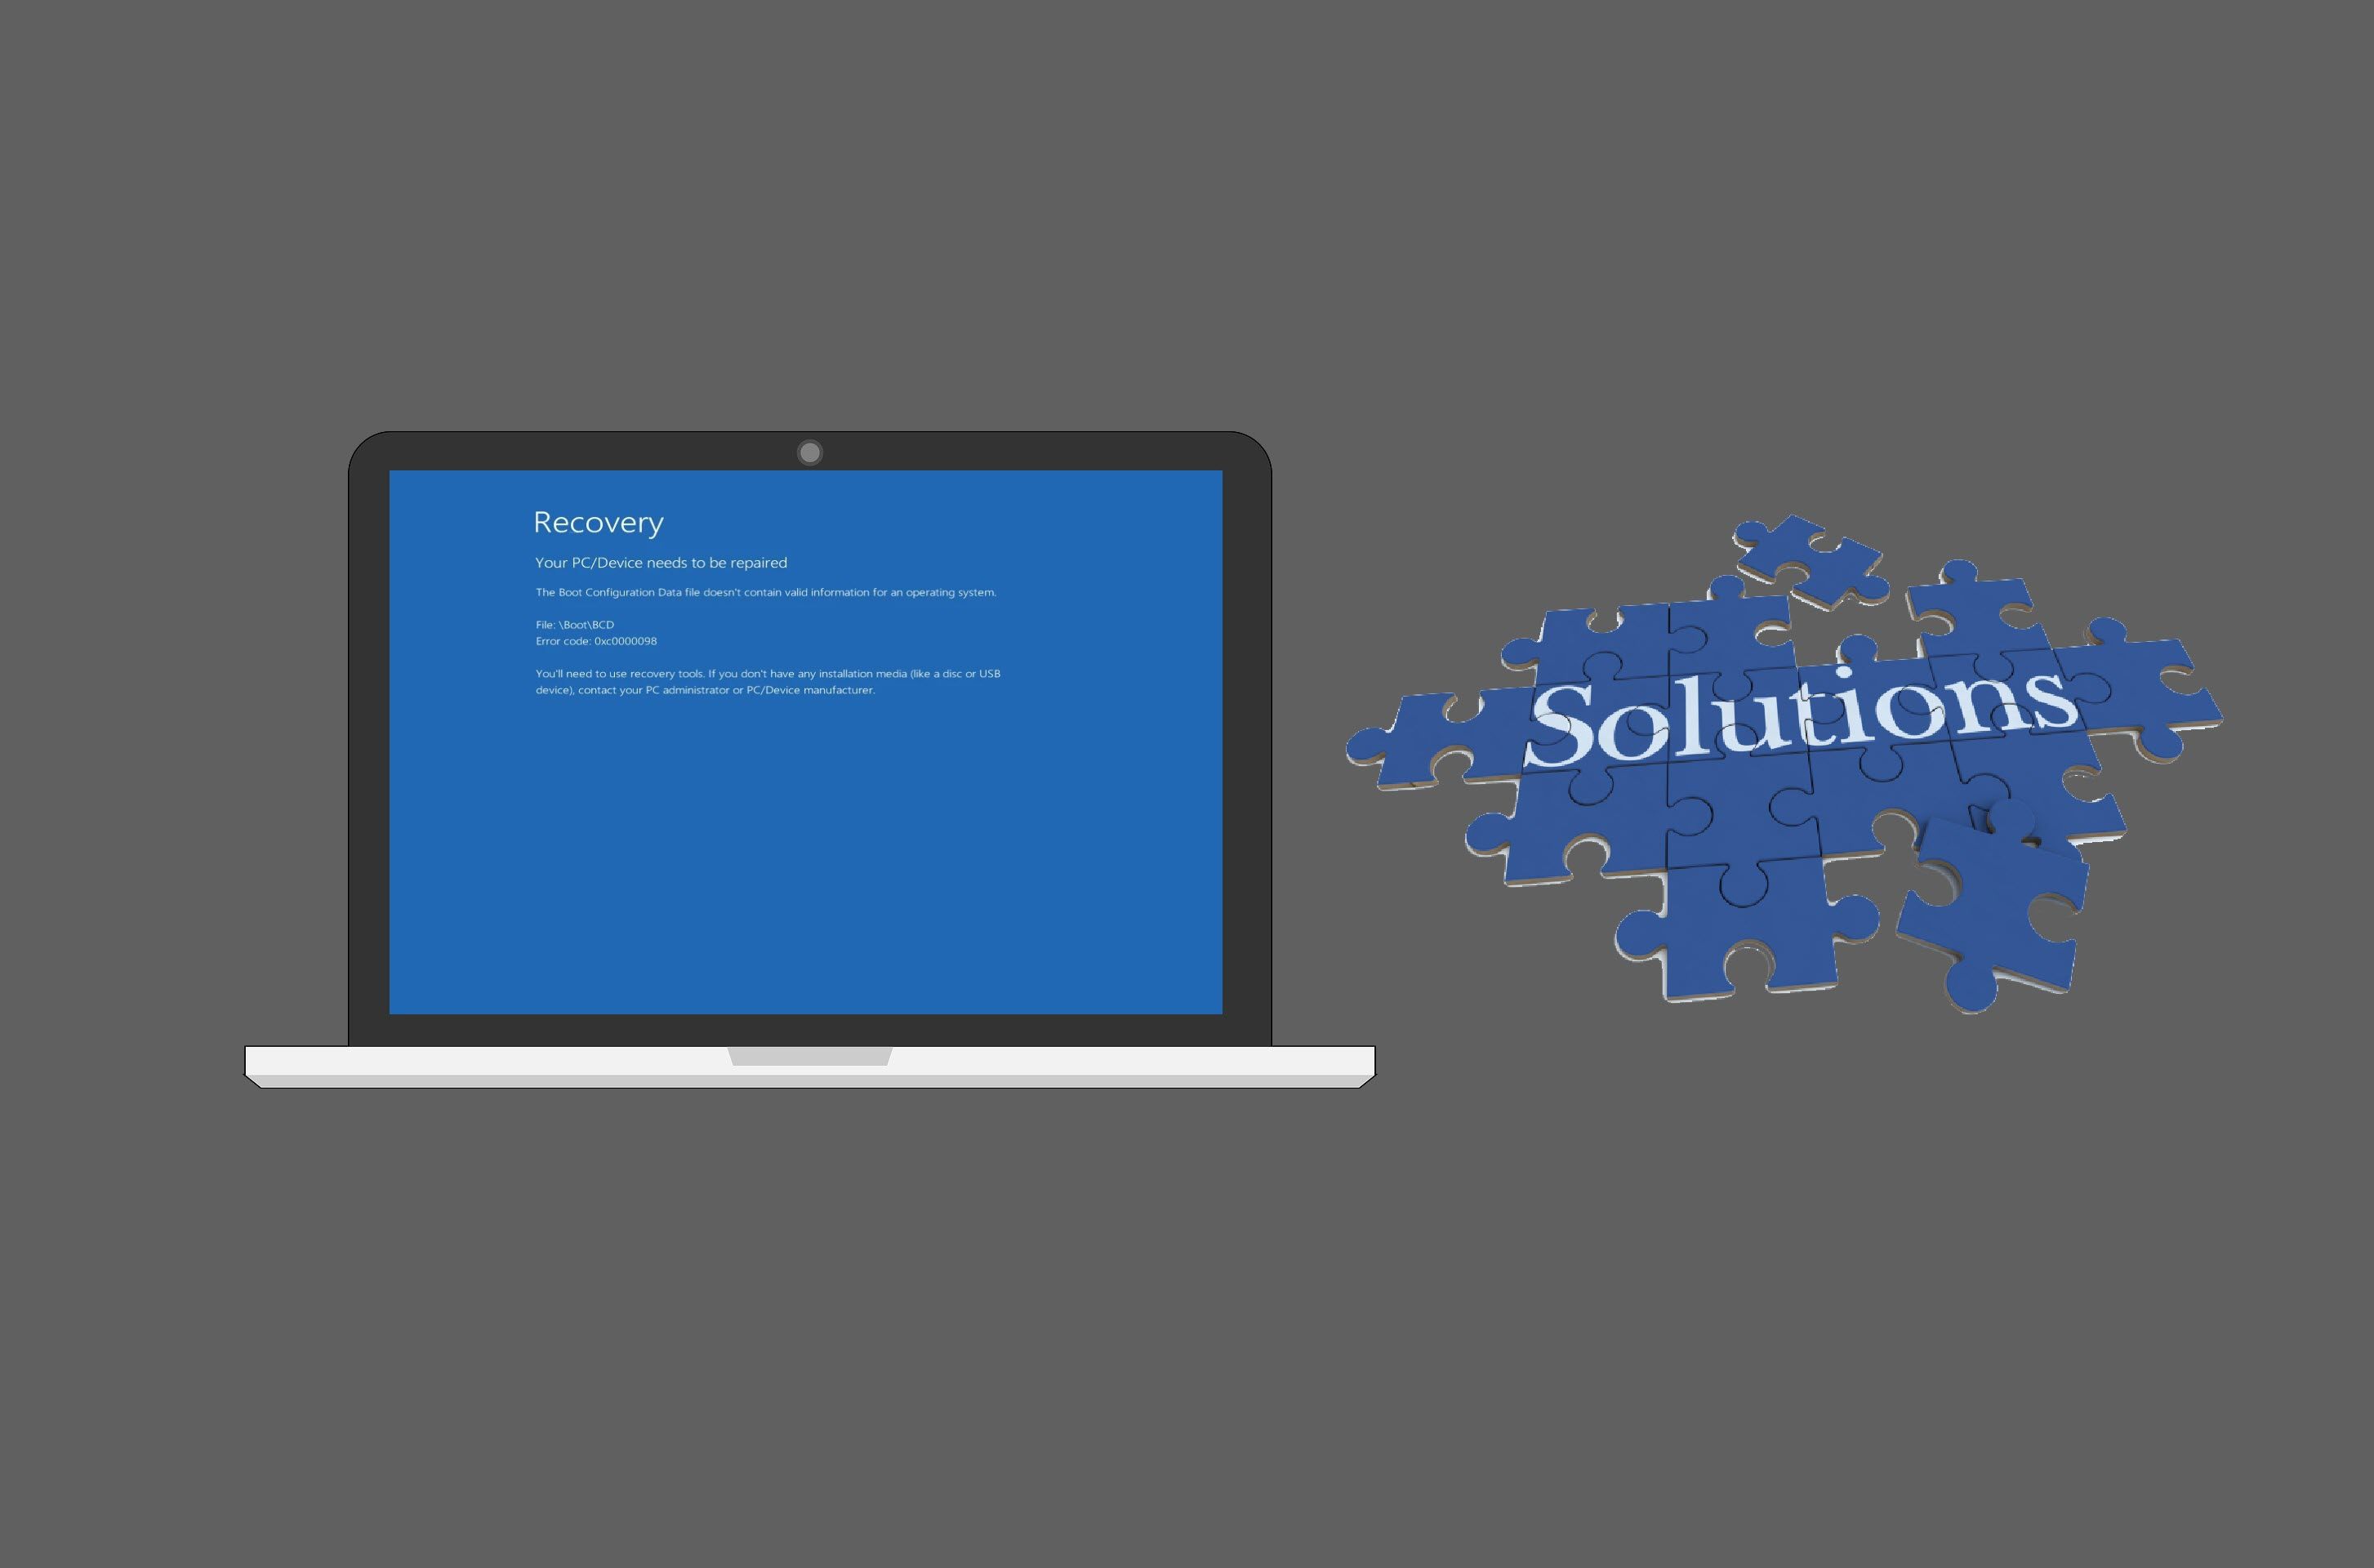
While booting your PC, Windows gives you a BSOD with the error code 0xc0000098. It can be rather frustrating not being able to use your device. You just get stuck at the blue/black screen. But don’t panic. This is a most common Windows error and it’s never hard to fix it at all…
About the error 0xc0000098
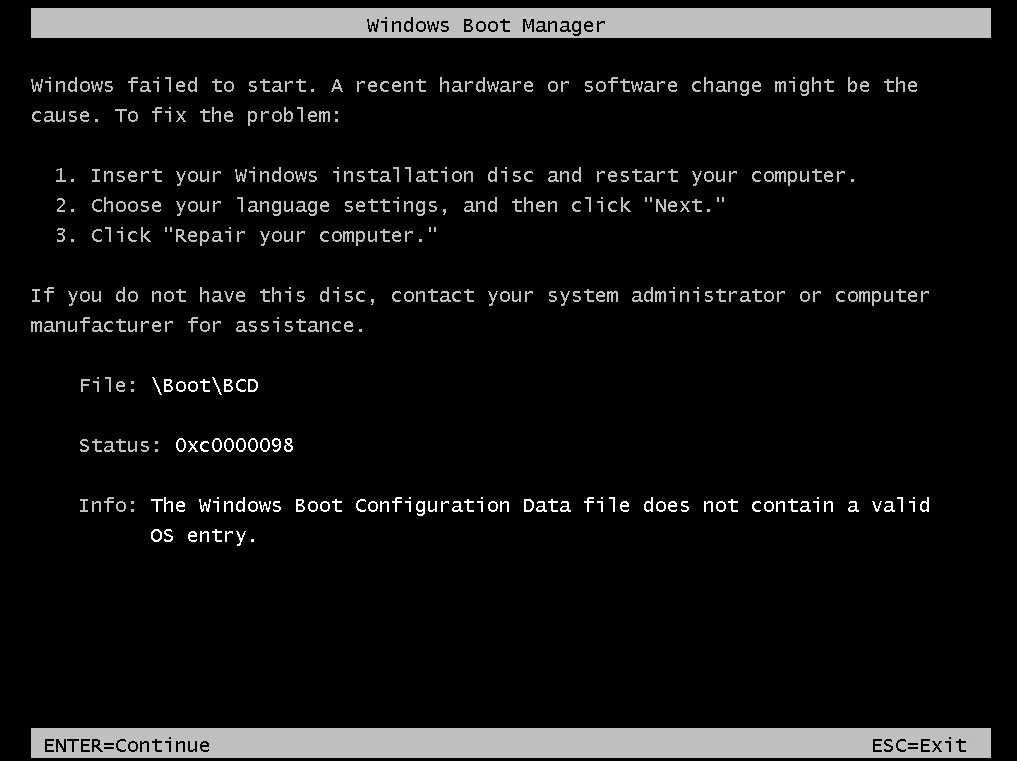
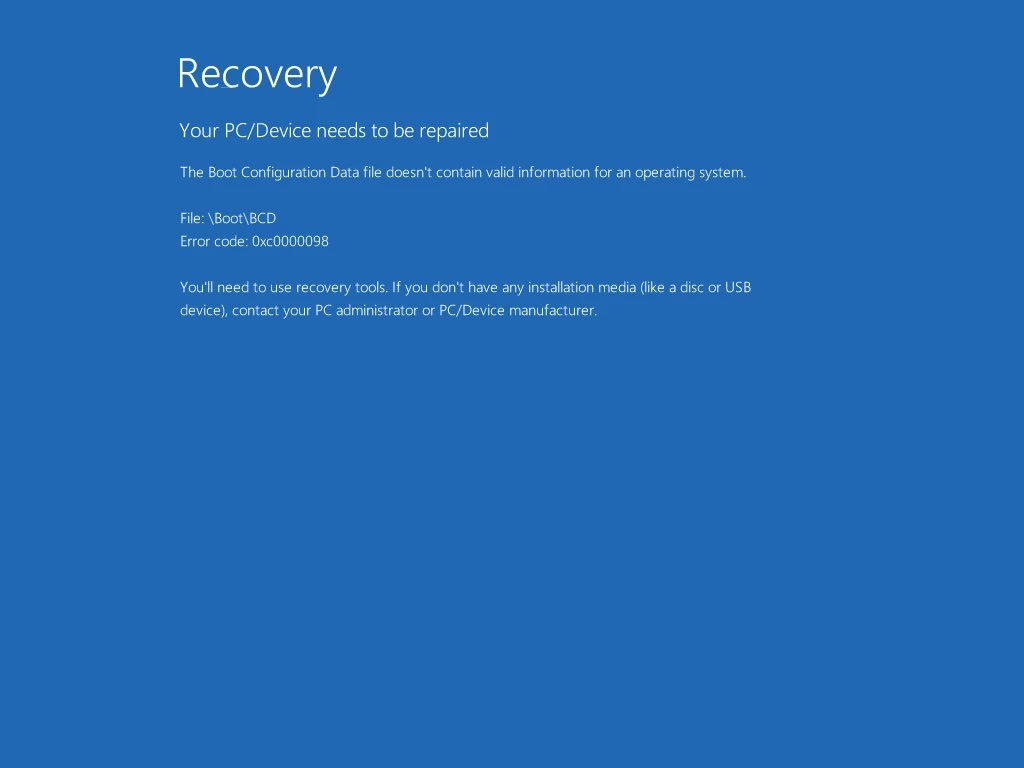
During the start-up process, the Boot Configuration Data (BCD) is very essential to provide required information to load the operating system. If the Boot Configuration Data is missing or corrupted, Windows won’t be able to load operating system and gives you the error 0xc0000098.
Try these fixes
Below you will get to know all possible fixes to solve your boot error 0xc0000098. You may not have to try them all; just work your way down the list until you find the one that works for you.
- Rebuild BCD manually
- Try Startup Repair
- Perform a CHKDSK
- Run System File Checker
- Perform a clean install of Windows
Fix 1: Rebuild BCD manually
Since this is a BSOD error, you won’t be able to access your PC normally. To repair your PC, you’ll need to use a Windows recovery drive: an installation USB media or a CD/DVD.
Step 1: Prepare installation media
If you don’t have one, you need to create USB/DVD bootable media yourself. Here is how to do it:
1) Go to Windows 10 download page. (Or Windows 11, Windows 8, Windows 7)
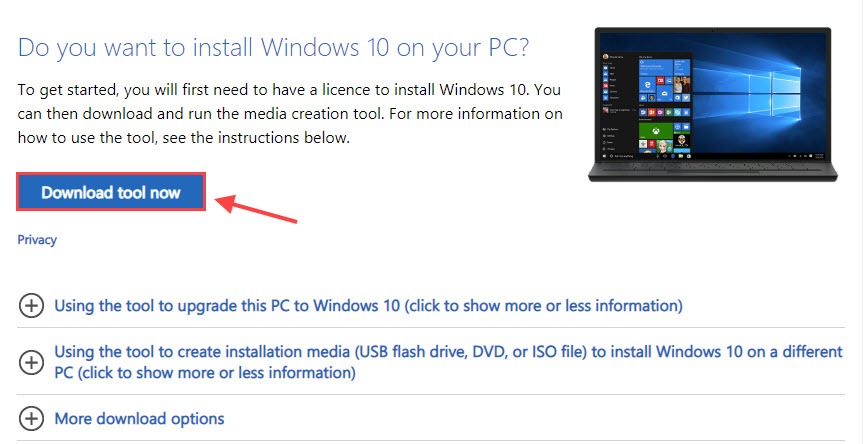
2) Download the installation media and save it on your computer.
3) Double-click the Media Creation Tool to launch the tool.
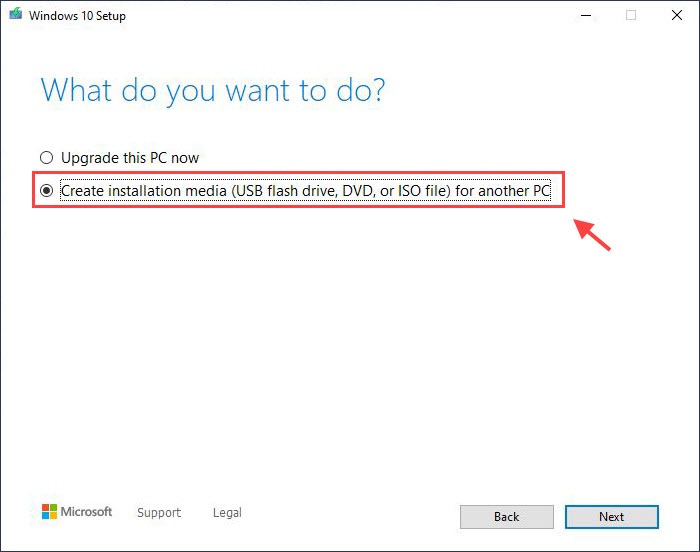
4) Select the Create installation media (USB flash drive, DVD, or ISO file) for another PC option.
5) Select the language, edition, and architecture (64-bit or 32-bit) for the Windows system.
6) Choose your preferred media. If you choose a USB flash drive, make sure you have a blank USB flash drive with at least 8GB of space.
7) Follow the on-screen instructions to finish the setup.
Step 2: Change the boot order to USB/DVD
Change the boot order in the BIOS setup. If you use a bootable USB drive, please put Removable Devices as the first boot choice. Otherwise, your PC will boot normally from your hard drive.
1) Turn on your device.
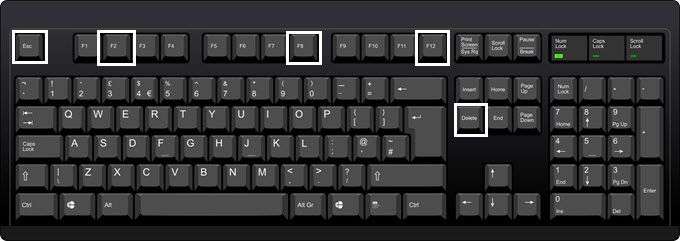
2) As soon as your computer starts booting up, press the function key to enter BIOS.
3) Once in BIOS, go to the Boot sector and set Removable Devices or CD-Rom Drive as the first boot device.
4) Save the changes and exit.
Step 3: Boot with an Installation or Repair disc or USB drive
1) Boot your PC from the bootable CD/DVD/USB.
2) In the Windows Setup menu, click Next.
3) Select Repair your computer in the lower-left corner.
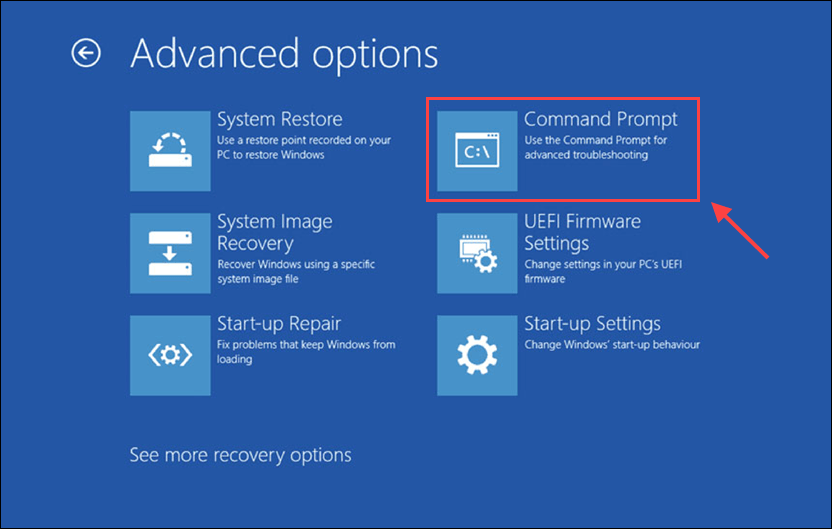
4) Go to Troubleshoot > Advanced Options > Command Prompt.
5) In Command Prompt, type the following command lines and hit Enter after each command. (There’s a space between bootrec and /.)
bootrec /scanos

bootrec /fixmbr

bootrec /fixboot

bootrec /rebuildbcd
Type Y and press Enter if you’re prompted for permission.
6) After you have entered the commands above, close the Command Prompt and Reboot your PC.
The 0xc0000098 error should now be fixed as your PC begins to load. If not, try the fix below.
Fix 2: Startup Repair
Startup Repair is a built-in tool to diagnose and repair some common problems on Windows. You may need to run Startup Repair (even 2 or 3 times).
1) Boot your PC from your setup disk (USB/DVD/CD).
2) Select Repair your computer and go to Troubleshoot > Advanced Options > Startup Repair.

3) Startup Repair will begin scanning your installation for known issues and will attempt a repair if it finds any.
4) If it fails, you can run Startup Repair again.
Fix 3: CHKDSK
CHKDSK, short for “check disk”, aims to check disk and verify system files for any errors.
1) Boot your device from your installation media and go to Command Prompt.
2) Type the following command line and press Enter.
chkdsk C: /f /r /x
- C: is the letter of the drive where Windows is installed, you can change it if you’ve installed it on another drive.
- r directs to find out the error.
- x symbolizes the volume that requires scanning.
3) CHKDSK will manage to fix the problems it finds.
4) Close Command Prompt and restart your device to check if the Windows system can load up again.
Fix 4: System File Checker
The error 0xc0000098 can also be caused by missing or corrupt system files. System File Checker (SFC) can help you to restore the missing files and repair any problematic ones.
1) Again go to Command Prompt and type the following command and hit Enter.
sfc /scannow /offbootdir=c:\ /offwindir=c:\windows
This command is slightly different from sfc /scannow because this is done with a different installation of Windows (/offwindir=c:\windows) on a different drive (/offbootdir=c:).
2) Wait for the scan to finish.
Fix 5: Perform a clean install of Windows
If neither of the fixes above did the trick, then you need to do a clean reinstall of Windows to fix your issues and return your PC to a cleaner state.
1) Boot from your installation media and select Next.
2) Select Install now > check the I accept box > Next > select Custom: Install Windows only (advanced).
3) If multiple disks are displayed, you’ll only need to delete all partitions from the disk where you want to install Windows.
3) Highlight each drive/partition in the list and select Delete. When the Windows Setup notification appears, select OK.
4) Do this for every drive in the list except the one that says Unallocated Space. When you’re finished, only Drive 0 Unallocated Space should remain.
5) Select Next.
6) The Windows setup screen requests you choose your language/keyboard layout, remove the external storage drive from your device, and select OK. This will restart your device.
7) Your device should be working properly now.
Pro tip: Update the essential drivers
If the new setup fails to add some essential drivers correctly after a clean installation, such as for the network adapter and graphics card, you’ll need to update the driver whether through Windows Update or Device Manager.
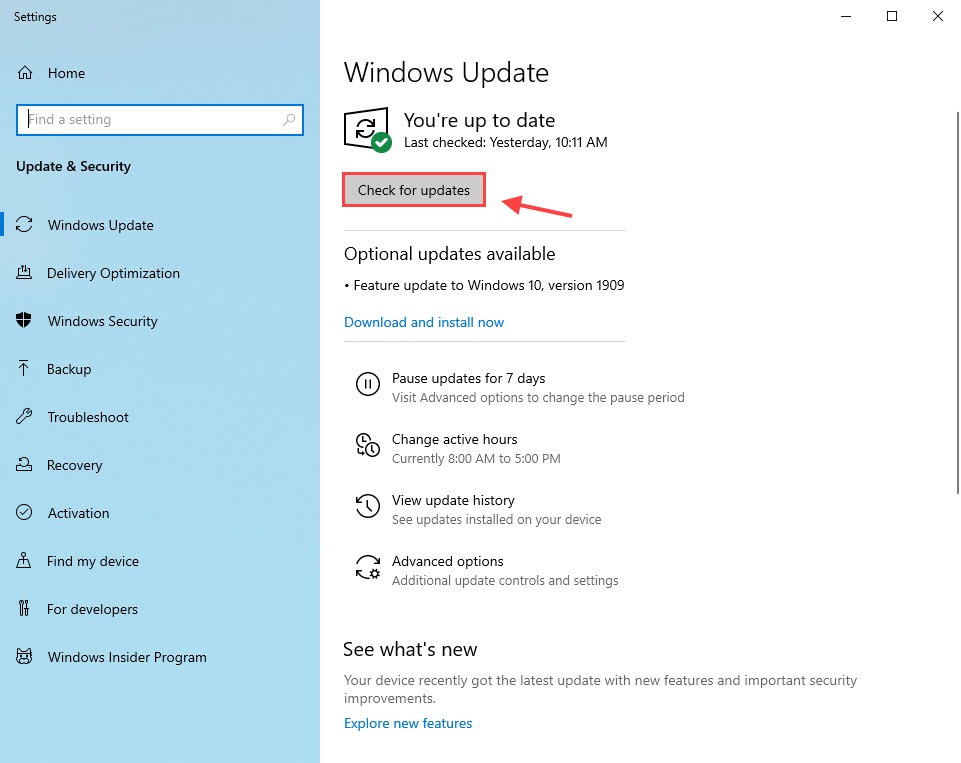
1. Check for updates
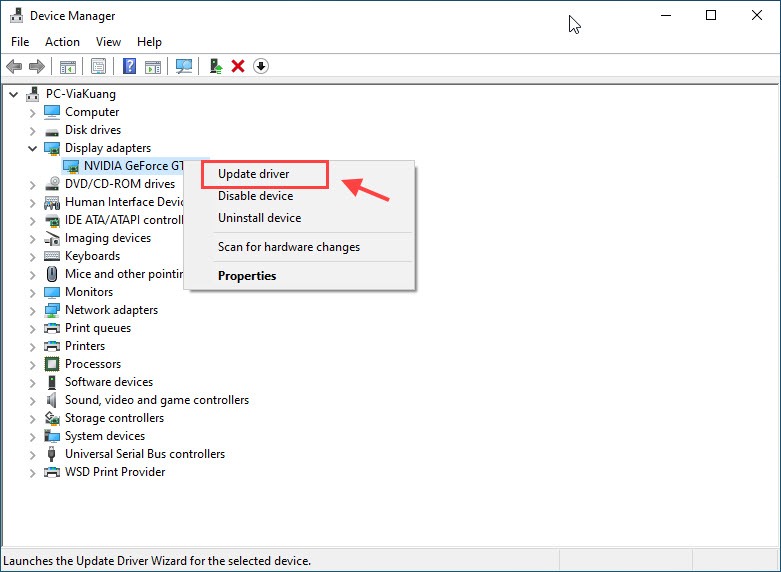
2. Device Manager
3. Download from the manufacturer’s website
Although Windows does a pretty good job detecting and installing most device drivers automatically, it can’t always update all of your drivers because of the OEM (Original equipment manufacturer) restrictions. In that case, you need to go to the manufacturer’s website for new drivers and install it manually.
4. Update all of your drivers automatically (Recommended)
If you don’t have the time, patience or computer skills to update these drivers manually, you can do it automatically with Driver Easy.
Driver Easy will automatically recognize your system and find the correct drivers for it. You don’t need to know exactly what system your computer is running, you don’t need to risk downloading and installing the wrong driver, and you don’t need to worry about making a mistake when installing.
You can update your drivers automatically with either the 7-day free trial or the Pro version of Driver Easy. It takes just 2 clicks, and you get full support and a 30-day money-back guarantee with the Pro version:
1) Download and install Driver Easy.
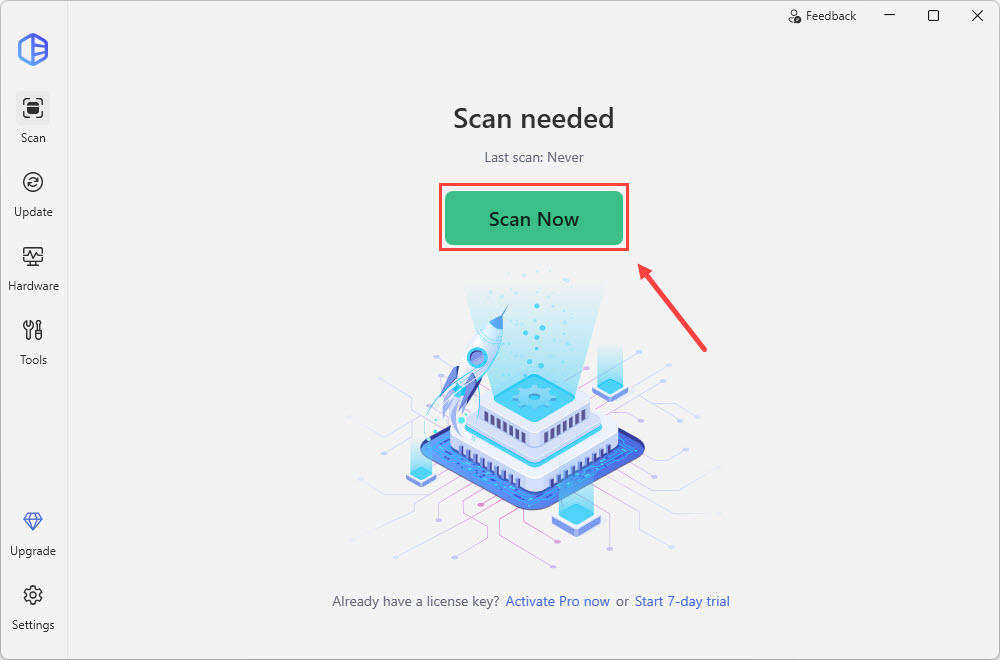
2) Run Driver Easy and click the Scan Now button. Driver Easy will then scan your computer and detect any problem drivers.
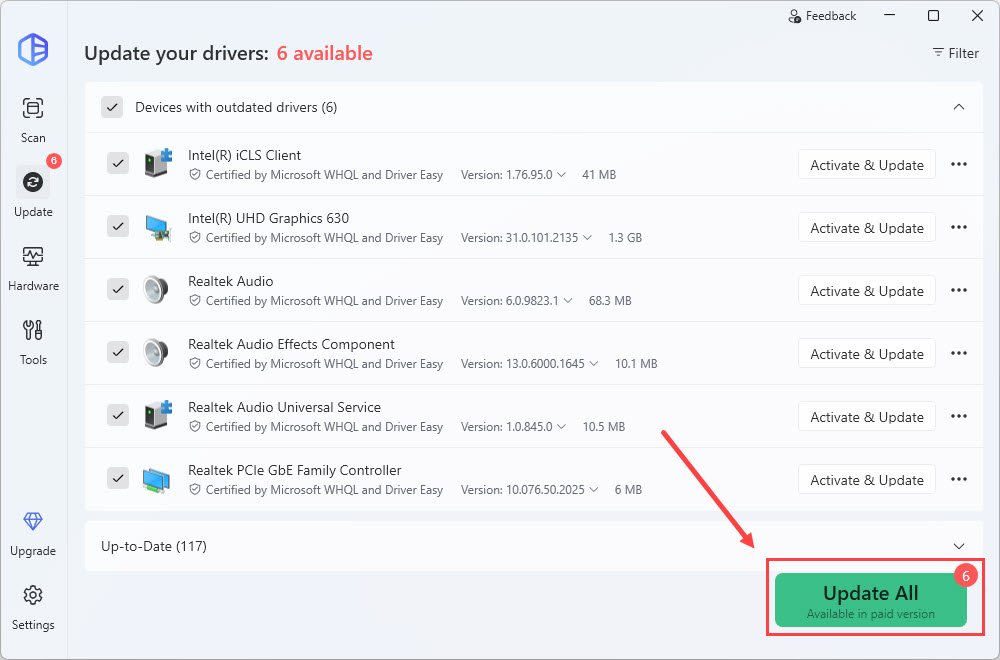
3) Click Update All to automatically download and install the correct version of all essential and peripheral drivers that are missing or out of date on your system (this requires the Pro version – you’ll be prompted to upgrade when you click Update All. You get full support and a no-questions-asked 30-day money-back guarantee.)
Good to go? Hopefully, one of the fixes above did the trick for you. Feel free to leave us a comment if you have further questions or suggestions.