


If you got an ACPI.sys blue screen error on your computer, don’t worry. It’s often not hard to fix at all…
Fixes for ACPI.sys
Here are 4 fixes that have helped other users resolve the ACPI.sys issue. Just work your way down the list until the error is resolved.
Fix 1: Update your ACPI driver
This problem may occur if you have the wrong or outdated ACPI driver or it’s out of date. So you should update your ACPI driver to see if it fixes your problem. If you don’t have the time, patience or skills to update the driver manually, you can do it automatically with Driver Easy.
Driver Easy will automatically recognize your system and find the correct drivers for it. You don’t need to know exactly what system your computer is running, you don’t need to be troubled by the wrong driver you would be downloading, and you don’t need to worry about making a mistake when installing. Driver Easy handles it all.
You can update your drivers automatically with either the FREE or the Pro version of Driver Easy. But with the Pro version it takes just 2 steps (and you get full support and a 30-day money back guarantee):
- Download and install Driver Easy.
- Run Driver Easy and click the Scan Now button. Driver Easy will then scan your computer and detect any problem drivers.

- Click Update All to automatically download and install the correct version of ALL the drivers that are missing or out of date on your system (this requires the Pro version – you’ll be prompted to upgrade when you click Update All).
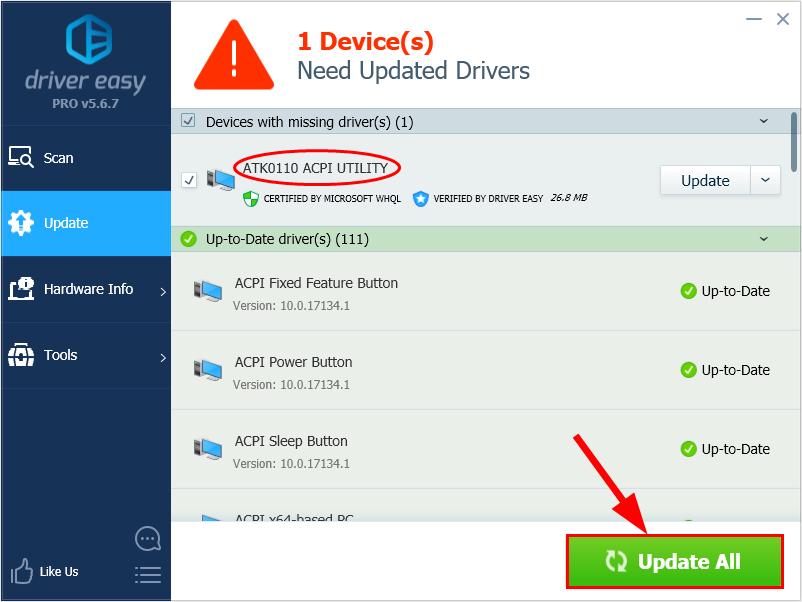
You can also click Update to do it for free if you like, but it’s partly manual. - Restart your computer for the changes to take effect.
- Check to see if the ACPI.sys error is resolved. If yes, then congrats! If the issue remains, please try Fix 2, below.
Fix 2: Run SFC
Sometimes the ACPI.sys issue happens if your system files are corrupt. So you should run SFC (System File Checker), the built-in Windows tool to scan for and restore corruptions in Windows system files if it detects any.
Here’s how to do it:
- On your keyboard, press the Windows logo key and type cmd. Then right click on Command Prompt and click Run as administrator.
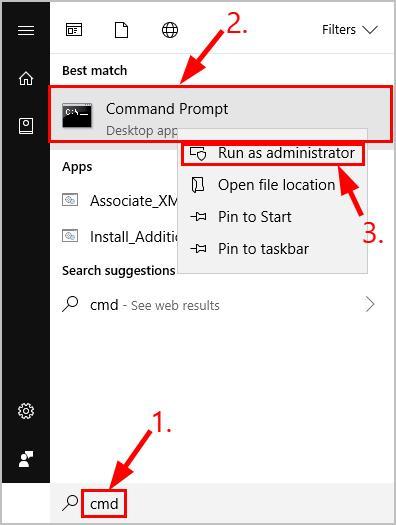
- Click Yes when asked to confirm.

- In the command prompt window, type sfc /scannow and press Enter.
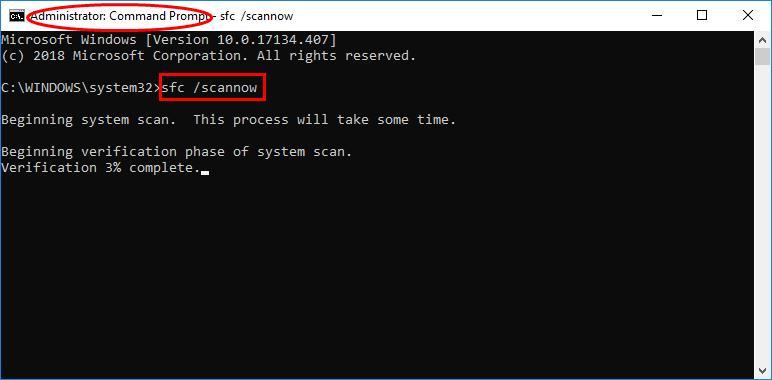
It’ll take some time for the SFC to replace the corrupted system files with new ones if it detects any, so please be patient. ?
- Restart your computer and hopefully the ACPI.sys problem has been resolved. If yes, then great! But if the problem persists, you should try Fix 3, below.
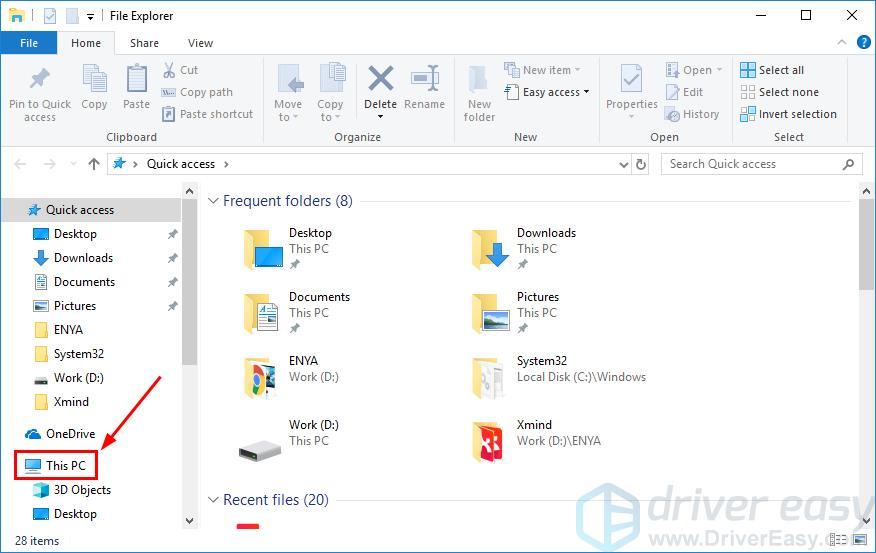
Fix 3: Run a disk check
Disk errors may also be the reason why you get the ACPI.sys blue screen. You can try doing a disk check to see if it works. Disk check is a useful in-built Windows tool that scans our hard disk and external drives for errors and fix them.
Here’s how to do it:
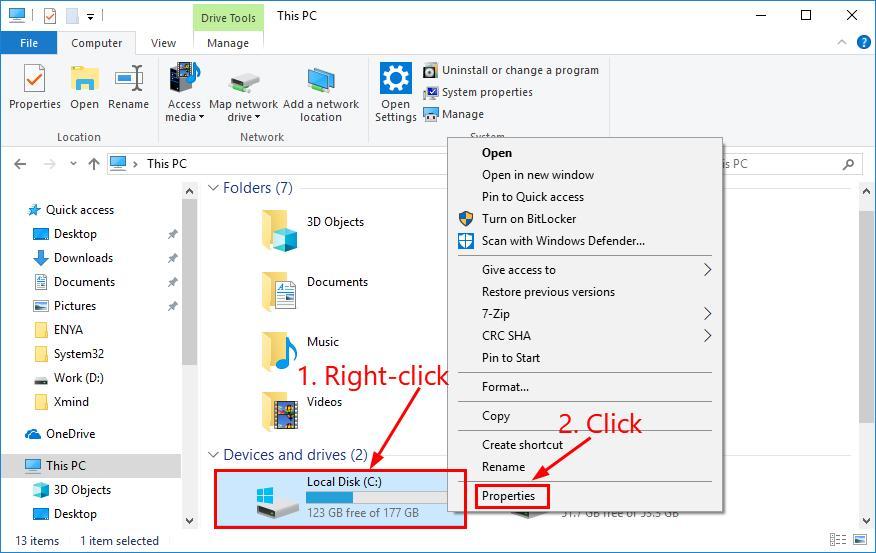
- On your keyboard, press the Windows logo key and E at the same time, then click This PC.
- Right-click on Local Disk and click Properties.
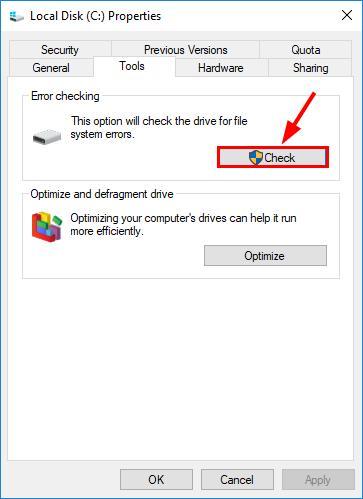
- Click the Tools tab > Check.
- Click Scan drive.
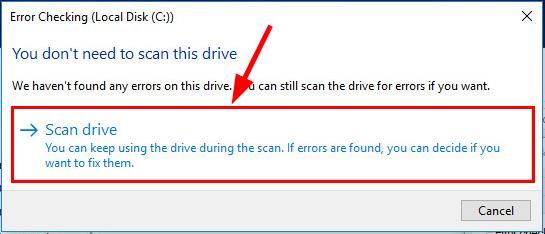
- Follow the on-screen instructions for Windows to detect and fix the errors found.
- Restart your computer and see if it fixes the ACPI.sys error. If the problem persists, move on to Fix 4, below.
Fix 4: Perform a system restore
If the fixes above failed, you can also try performing a system restore to revert Windows back to a previous state.
- Make sure your computer is off.
- Press the power button to turn on your PC. Then when Windows displays a login screen (i.e. Windows has fully booted), long press the power button to turn it off.

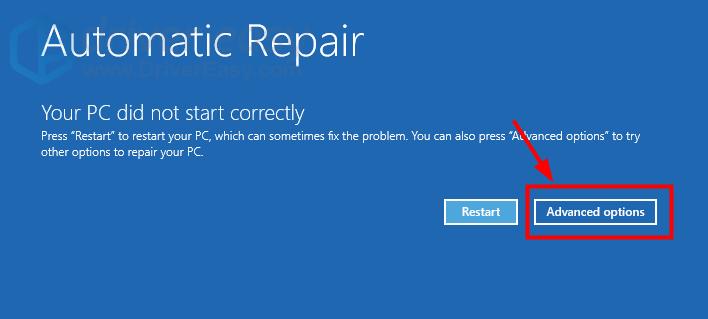
- Repeat 1) and 2) until the screen says Preparing Automatic Repair.
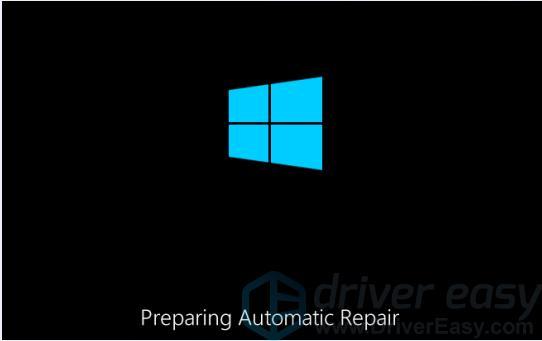
- Wait for Windows to finish diagnosing your PC, and click Advanced options.
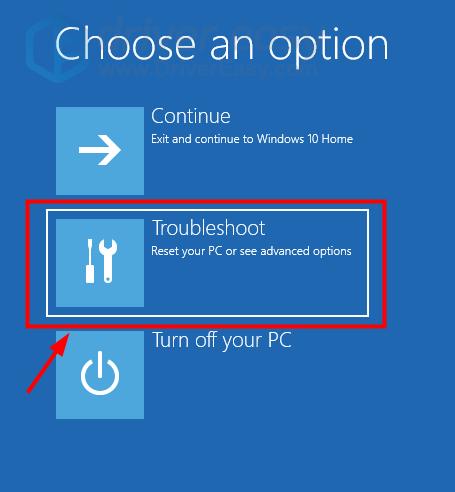
- Click Troubleshoot.
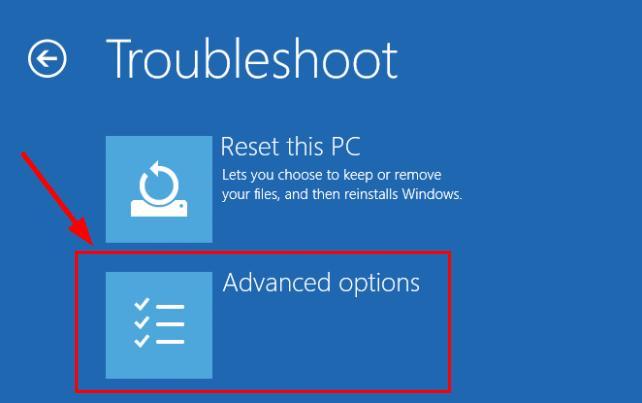
- Click Advanced options.
- Click System Restore.
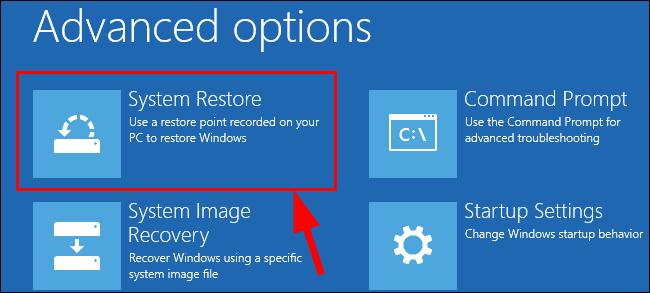
- Follow the on-screen instructions to restore your computer from a system restore point.
Lastly, keep track of your computer to see if the ACPI.sys error has been resolved.