


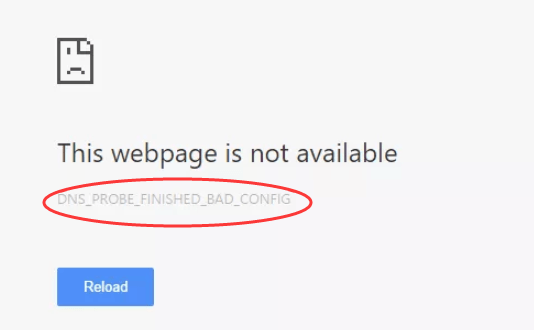
If you’re unable to connect to internet due to error DNS_PROBE_FINISHED_BAD_CONFIG, which suggests a DNS related error, don’t worry. You can tell this is a DNS related error from the error message. If internet connection is not working properly, or if DNS server is not responding, this error would occur. Follow instructions below then you can access the websites again.
When you get this error, the first simple thing you can do is restart the router. No further steps are required. Restart your router and check to see if the problem is resolved.
If that does’t resolve the problem, try below methods. There are two methods you can use to fix the error.
Method 1: Release & Renew IP Address
Method 2: Change DNS Server Settings
Method 1: Release & Renew IP Address
Windows and other operating systems store DNS data in the cache, so you can fast access the website you visited before. But if the IP address of the website is changed, you cannot access the website and will get DNS related errors like DNS_PROBE_FINISHED_BAD_CONFIG. To fix this error, you can try to flush the DNS cache and renew IP address.
Follow these steps:
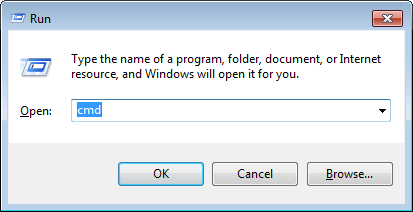
1) On your keyboard, press Win+R (Windows logo key and R key) at the same time to invoke the run box.
2) Type cmd and click the OK button. This is to open Command Prompt.
3) Type ipconfig /release and press the Enter on your keyboard.

4) Then type ipconfig /flushdns and press the Enter key on your keyboard.
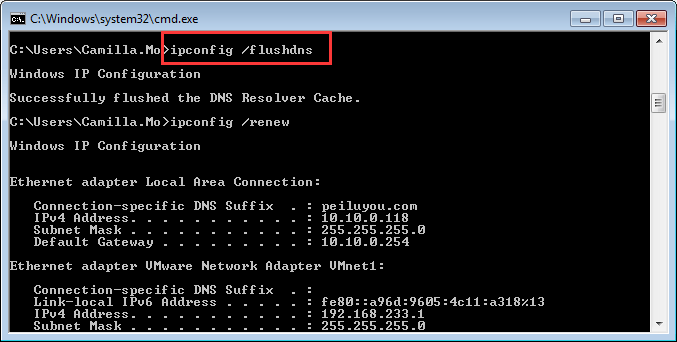
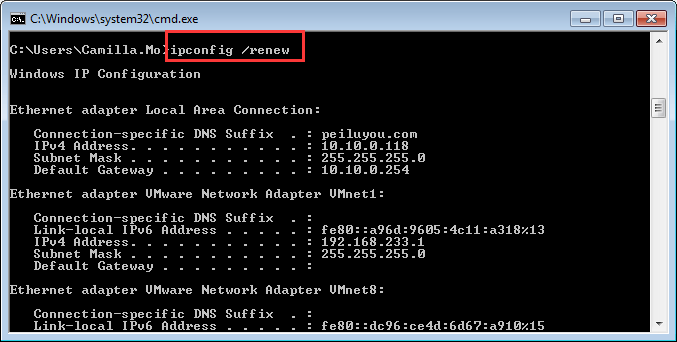
5) Then type ipconfig /renew and press the Enter key on your keyboard again.
6) Check to see if the problem is resolved.
Method 2: Change DNS Server Settings
If above method doesn’t work, you can try to change the DNS server. When you connect to internet, your ISP (Internet Service Provider) will assign you a DNS server automatically. when you get DNS_PROBE_FINISHED_BAD_CONFIG error, your current DSN server is likely to have problems. So you can change the DNS server to an available DNS server. You can find free DNS servers by google search with keyword “free DNS server”. I recommend using Google’s public DNS server, which is safe and stable.
Follow these steps to change the DNS server:
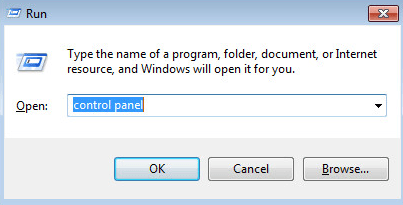
1) On your keyboard, press the Win+R (Windows logo key and R key) at the same time to invoke the run box.
2) Type control panel and click the OK button. This is to open Control Panel.
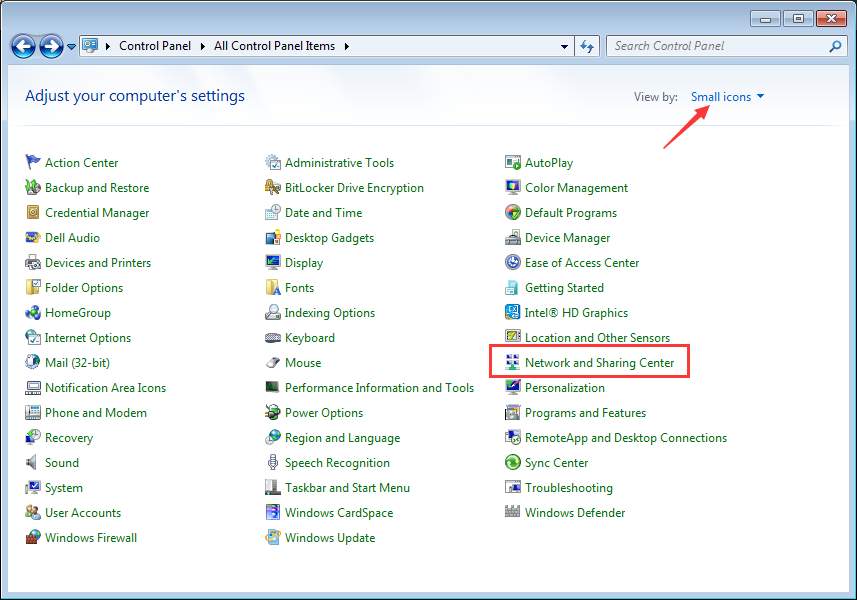
3) View by Small icons and click Network and Sharing Center.
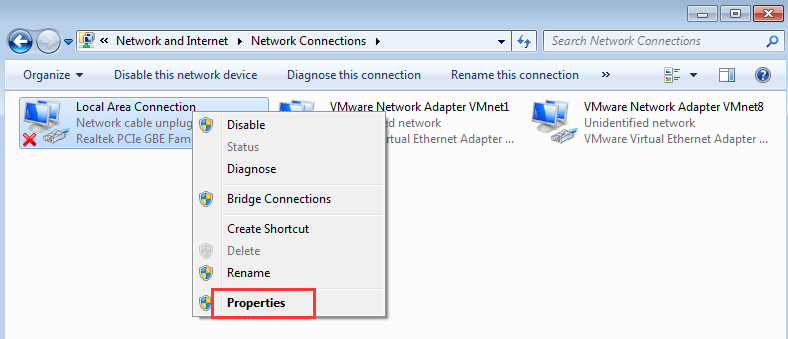
4) Click Change adapter settings in left pane.

5) Right-click the problem network (If the network is having problem, you may a red X mark on the icon.), and select Properties.
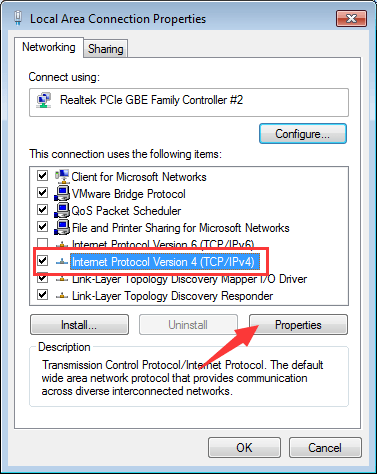
6) In Networking tab, high light item Internet Protocol Version 4 (TCP/IPv4) and click the Properties button.
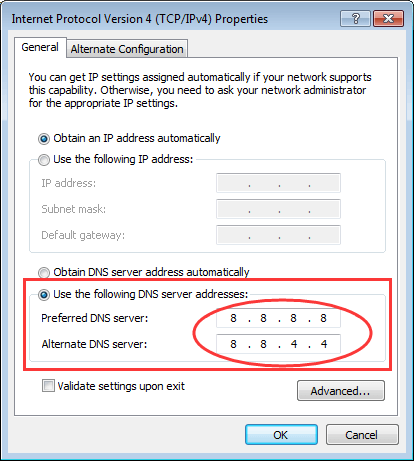
7) Under “Use the following DNS server addresses”, set the DNS server to another available server. The recommended DNS server is Google’s public server: 8.8.8.8 and 8.8.4.4.
You can set Preferred DNS server as 8.8.8.8 and set Alternate DNS server as 8.8.4.4. Then click the OK button. See below image:
8) Check to see if the problem is resolved.
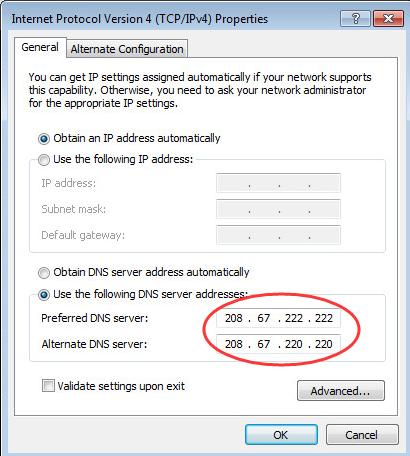
If you are still unable to access the internet, try to use below DNS server addresses and see if it works.
Preferred DNS server: 208.67.222.222
Alternate DNS server: 208.67.220.220
If you have any questions or suggestions, please leave your comment. I’d love to hear of any ideas and suggestions. Thanks for your reading.
You may also like…