


Update Network Card Driver
3 steps to update ALL drivers
1. Download; 2. Scan; 3. Update.
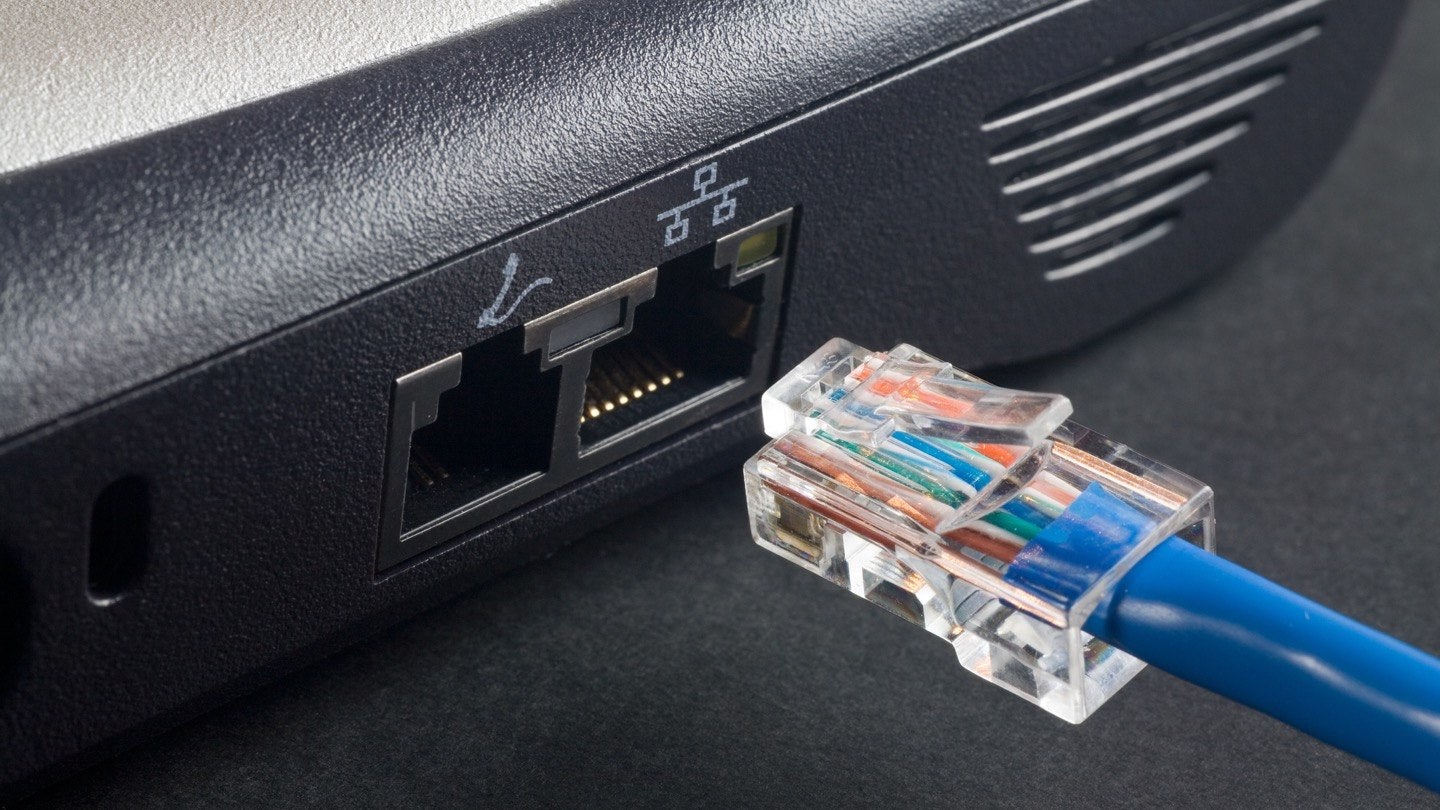
If you’re able to access the internet via Wi-Fi but unable to connect to the Ethernet via cable, don’t worry. The problem can be caused by cable issues, hardware issues, faulty network drivers, etc. We’ve put together a list of methods to fix the problem.
You may not have to try them all; just work your way down the list until you find the one that works for you.
- Check the router and cable situations
- Restart your modem and wireless router
- Update the network card driver
- Turn off any Antivirus or Firewall temporarily
- Make sure the Ethernet is enabled
- Run network commands
Method 1: Check the router and cable situations
If the port being used is broken or doesn’t work well, you cannot be connected to the router. Unplug the cable from the port and plug it into another port to see whether the problem resolves.
Make sure the cable is not broken. Swap a cable to do a test. If the problem is caused by the cable, it will work after swapping the cable.
Method 2: Restart your modem and router
This problem can be probably caused by the Internet Service Provider (ISP) issue. Restarting your modem and/or router can help you reconnect to your Ethernet network service. To do so:
- Unplug your router and modem from the wall outlet (remove the battery if your modem has a battery backup).
- Wait for at least 30 seconds.
- Plug your router and modem back into the power source again (put the battery back into the modem).
- On your device, reconnect to your Ethernet network.
Method 3: Update the network card driver
The connection problem can be caused by faulty network drivers. To fix the problem, you can try to update the drivers. If you don’t have the time, patience, or computer skills to update the drivers manually, you can do it automatically with Driver Easy.
Driver Easy will automatically recognize your system and find the correct drivers for it. You don’t need to know exactly what system your computer is running, you don’t need to risk downloading and installing the wrong driver, and you don’t need to worry about making a mistake when installing.
You can update your drivers automatically with either the 7 days free trial or the Pro version of Driver Easy. It takes just 2 clicks, and you get full support and a 30-day money-back guarantee with the Pro version:
- Download and install Driver Easy.
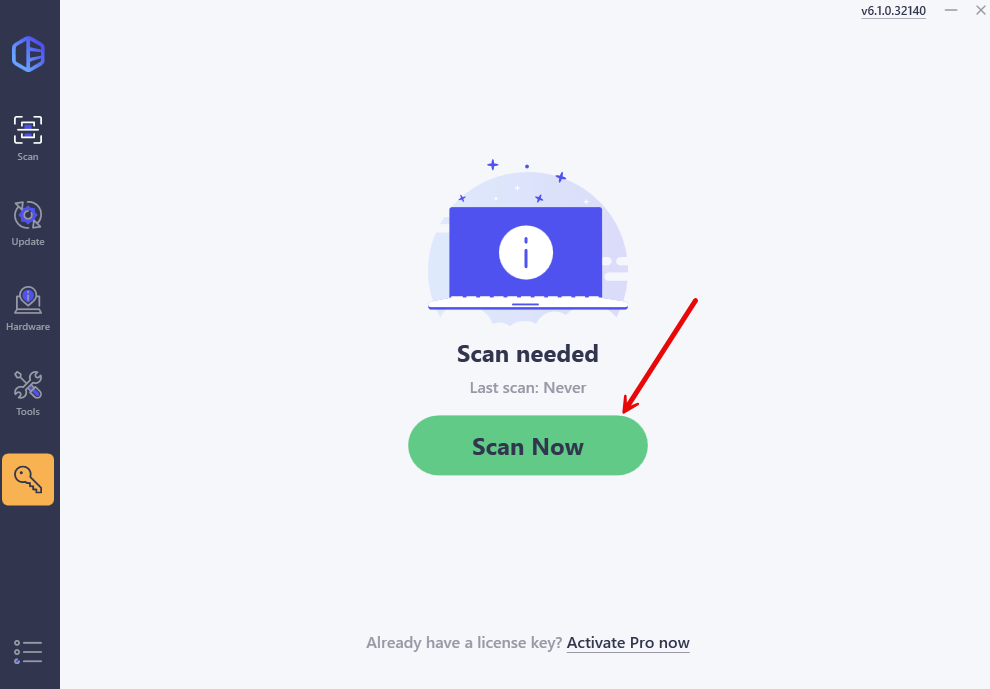
- Run Driver Easy and click the Scan Now button. Driver Easy will then scan your computer and detect any problem drivers.
- Click the Activate & Update button next to the flagged device to automatically download and install the correct version of this driver.
Or click Update All to automatically download and install the correct version of all the drivers that are missing or out of date on your system (You’ll need the Pro version for this – when you select Update All, you’ll get a prompt to upgrade. If you’re not prepared to purchase the Pro version yet, Driver Easy provides a 7-day trial at no cost, granting access to all Pro features like fast downloads and easy installation. No charges will occur until after your 7-day trial period ends.)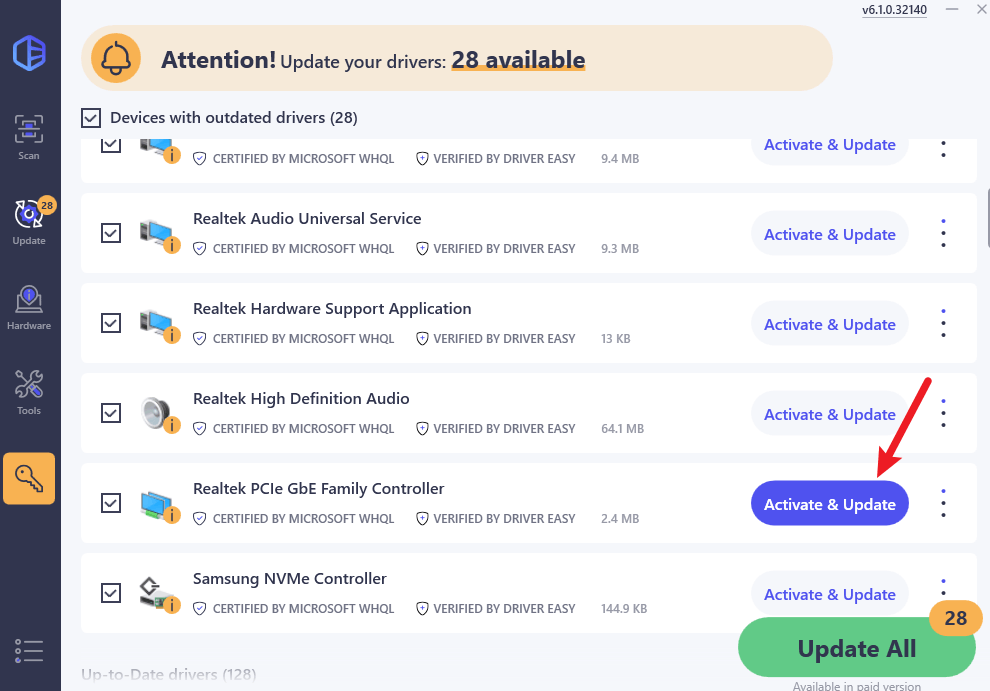
- After updating, restart your computer to take effect.
Method 4: Turn off any Antivirus or Firewall temporarily
This network issue is sometimes caused by interference from antivirus software. To see if that’s the problem for you, temporarily disable your antivirus and check if the problem persists. (Consult your antivirus documentation for instructions on disabling it.)
If this resolves the problem, contact the vendor of your antivirus software and ask them for advice, or install a different antivirus solution.
IMPORTANT: Be extra careful about what sites you visit, what emails you open, and what files you download when your antivirus is disabled.
Method 5: Make sure the Ethernet is enabled
After trying the tips above, if the problem persists, check if the Ethernet is disabled.
Follow the steps below:
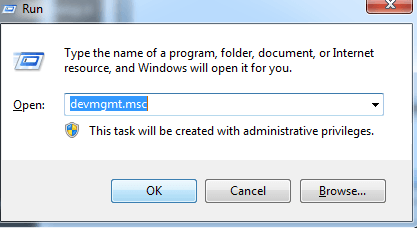
- Press the Windows key and R key at the same time. Type devmgmt.msc in the run box and click on the OK button.
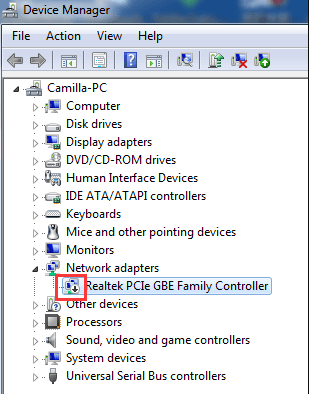
- In Device Manager, expand the Network adapters category.
- Next to the Ethernet card device name, if you see a computer icon with an arrow on it, the Ethernet has been disabled. The following screenshot is for your reference:
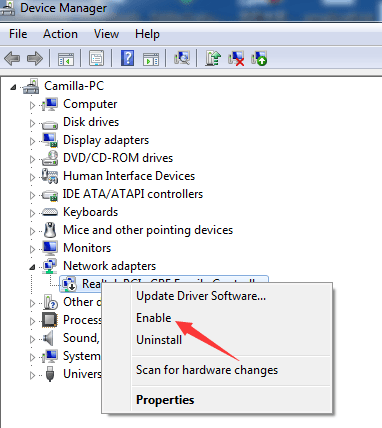
- If you see a down-arrow next to your Ethernet card, right-click it and click Enable from the pop-up menu.
Method 6: Run network commands
Corrupted DNS cache matters can prevent you from connecting to the internet because it can cause a mismatch in your IP address. Therefore, you might need to flush the DNS cache to fix the internet that is connected but not working issue.
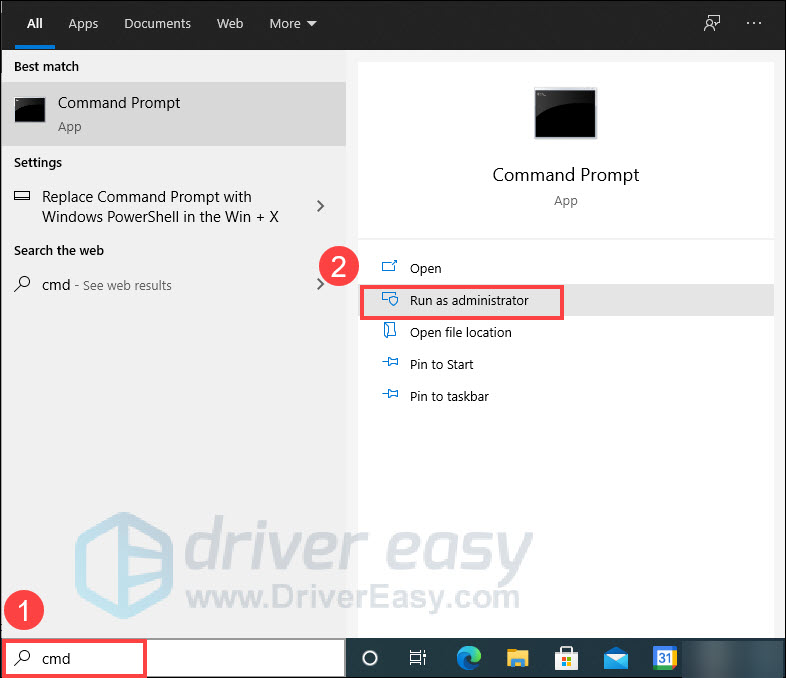
- In the search bar, type in “cmd” and select Run as admnistrator.
- Now type in the following commands and hit Enter after each one.
- ipconfig /flushdns
- ipconfig /release
- ipconfig /renew

- Once this is done, close the Command Prompt window and see if you have an internet connection via the Ethernet cable.
Hopefully, the tips above will help you resolve the Ethernet not working issue. If you have any questions or ideas, feel free to leave your comments below, please.
Superfast internet and up to $250 in reward cards
Order online and get up to a $200 reward card—plus an extra $50 reward card when you enter promo code FALL50 at checkout.
