


Want to use hardware acceleration or need to fix hardware acceleration issues on PC? You’ve come to the right place! You’ll find all the answers in this article.
You’ll learn
- What is hardware acceleration?
- How to check hardware acceleration on PC?
- How to disable hardware acceleration in browsers?
- How to fix hardware acceleration issues for Windows?
What is hardware acceleration?
Hardware acceleration refers to tasks being offloaded from the CPU to other more appropriate devices/hardware. These devices are called hardware accelerators. In most cases, the hardware accelerator is graphics card or sound card.
If you have capable devices and correct drivers, you can use hardware acceleration on PC. Hardware acceleration is enabled by default for Windows, and you can manually disable it in apps. Common apps that use hardware acceleration include browsers like Chrome and Firefox, video editing/rendering programs, and video games. With hardware acceleration, graphics cards can present crystal clear high-definition images and videos; sound cards can allow high-quality playback and recording of sound.
On the other hand, hardware acceleration isn’t always helpful. Some applications that use hardware acceleration may run much less stably. So, for example, if you have a black screen issue when playing a video in Chrome, you’d better manually disable hardware acceleration in the browser.
In short, you can enable hardware acceleration wherever you can, and disable it in the apps where you have bugs/stability issues.
How to check hardware acceleration on PC?
On Windows 10
Hardware acceleration is enabled by default on Windows 10. You can use the DirectX Diagnostic Tool to check:
- On your keyboard, press the Windows logo key and R at the same time to invoke the Run box.
- Type dxdiag and press Enter.

- Click the Display tab to check.
 Note: If a type of acceleration is shown as Disabled here, you can try updating your display/graphics card driver to solve the problem.
On Windows 7
If you’re using Windows 7, you can follow these steps to adjust hardware acceleration:
- Click the Start button, then Control Panel.
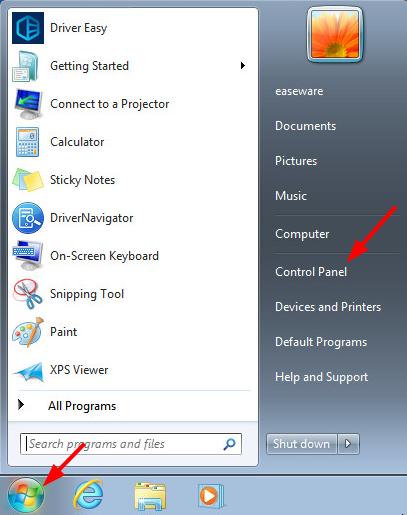
- Click Display.
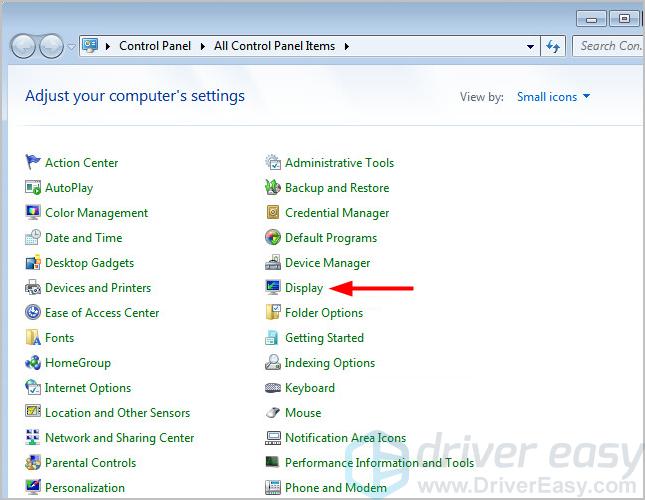
- Click Change display settings.

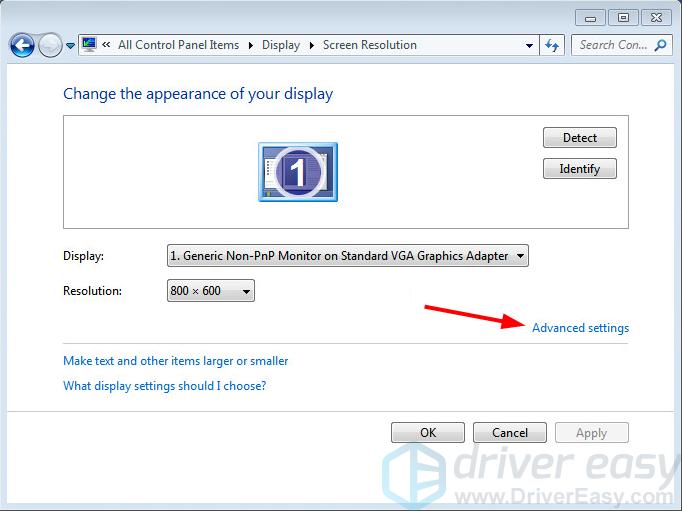
- Click Advanced settings.
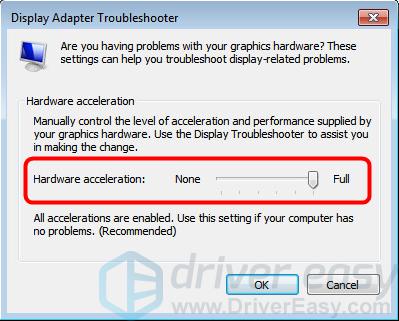
- Click the Troubleshoot tab, and the Change settings button.
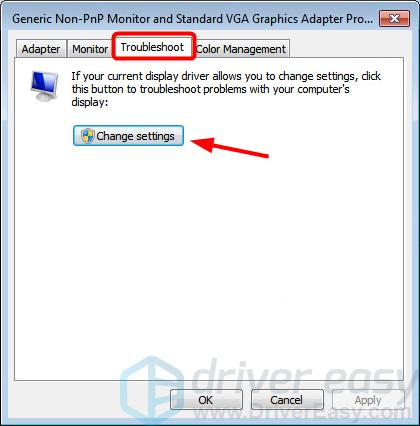
- You can move the slider to enable/disable/adjust hardware acceleration on your PC.
How to disable hardware acceleration in browsers?
- How to disable hardware acceleration in Chrome?
- How to disable hardware acceleration in Firefox?
- How to disable hardware acceleration in Internet Explorer?
How to disable hardware acceleration in Chrome?
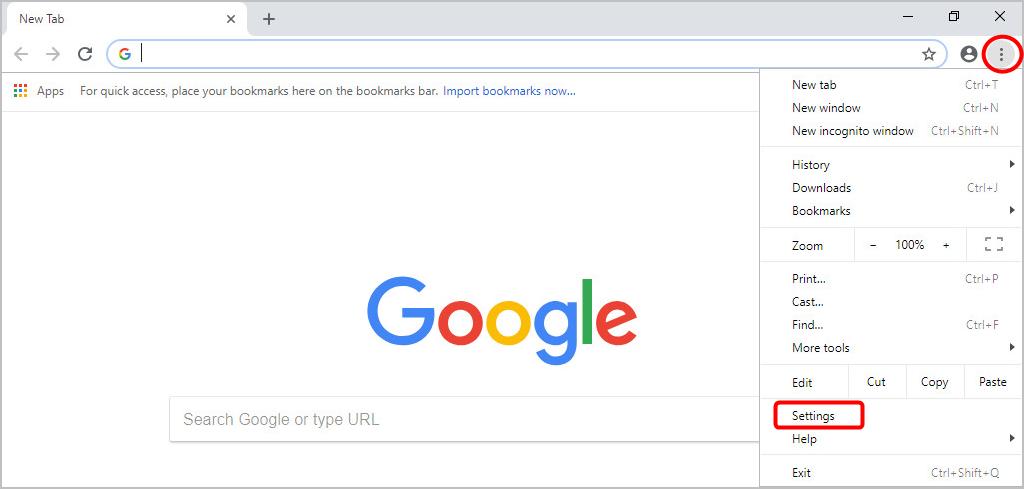
- Click the three dots on the far right, then select Settings.
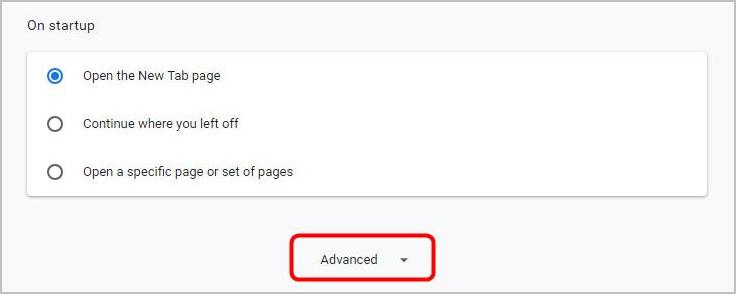
- Scroll down to the bottom and click Advanced.
- Under System, turn off the Use hardware acceleration when available option.
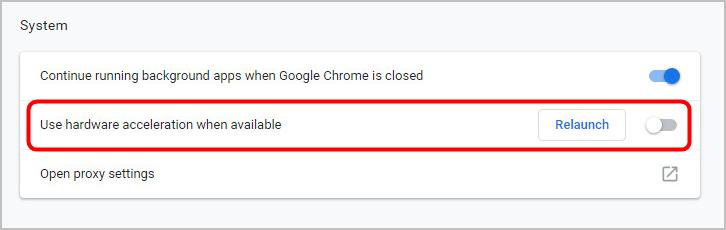
- Relaunch Chrome.
How to disable hardware acceleration in Firefox?
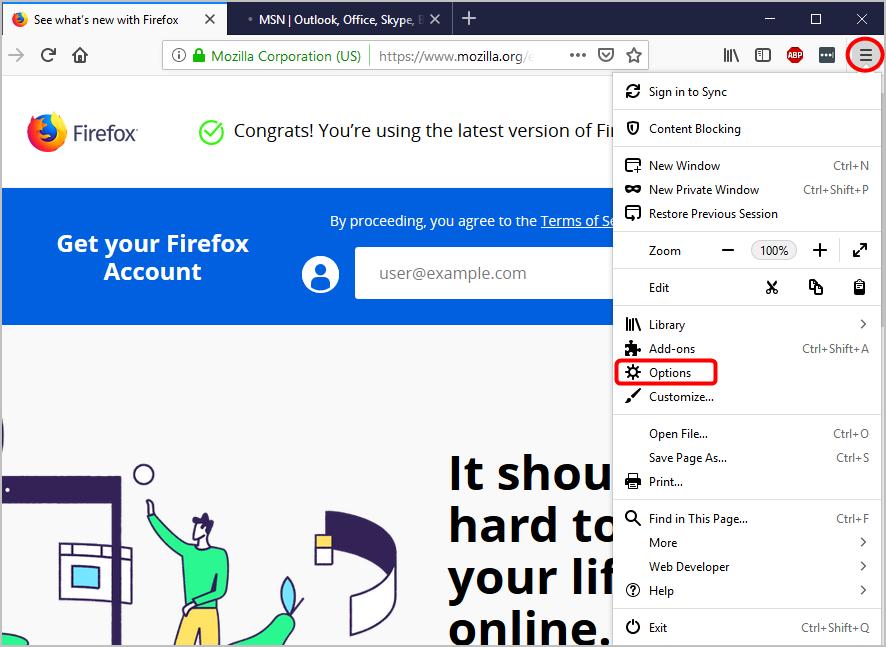
- Click the three lines in the upper right corner, and select Options.
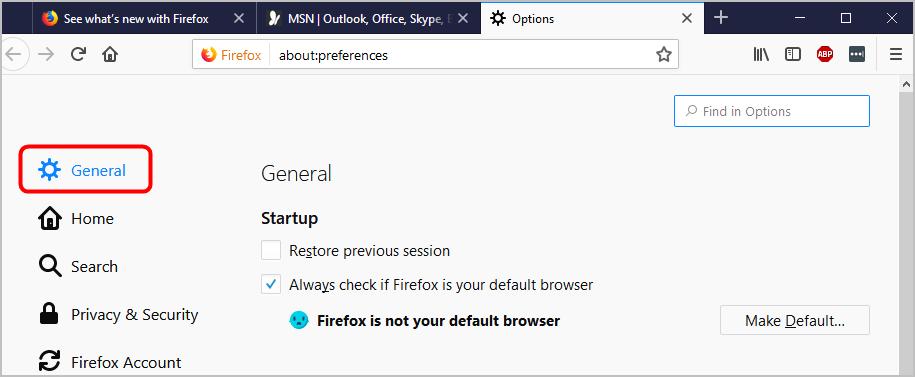
- Click General on the left.
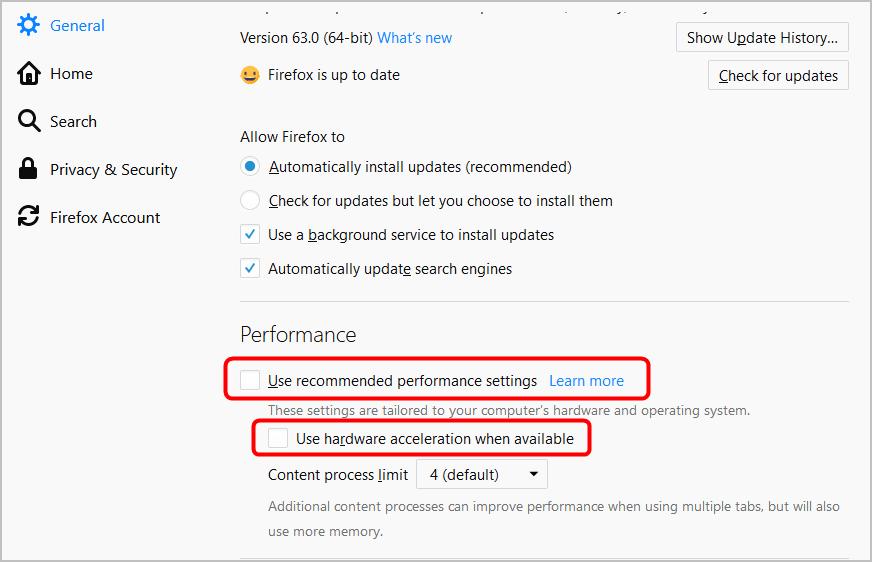
- Under Performance, uncheck Use recommended performance settings, then uncheck Use hardware acceleration when available.
- Close Firefox, then start it again to check.
How to disable hardware acceleration in Internet Explorer?
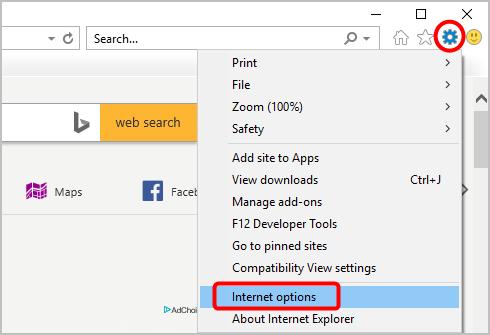
- Click the tools icon in the upper-right corner, then click Internet Options.
- Click the Advanced tab.
- Under Accelerated graphics, verify Use software rendering instead of GPU rendering is unchecked.
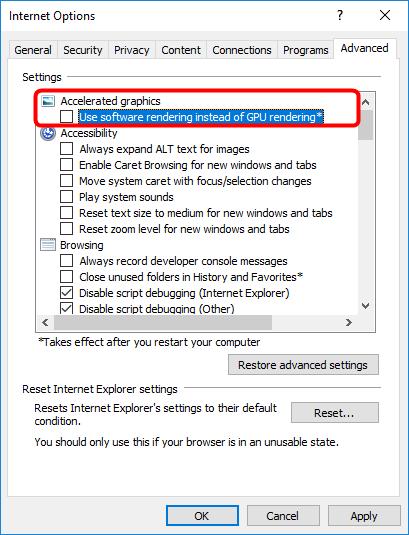
- Click Apply, then click OK.
- Close Internet Explorer and then restart it to test.
How to fix hardware acceleration issues for Windows?
When hardware acceleration is not working on your PC, or if you encounter a similar error message as shown below in a game or any other program, you should install a new driver for your graphics card or sound card, in other words, update your graphics card or sound card driver.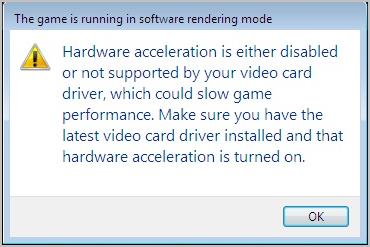
There are two ways to update your graphics card or sound card driver: manually and automatically.
Manual driver update — You can update your graphics card or sound card driver manually by going to the manufacturer’s website, and searching for the most recent correct driver. Be sure to choose the driver that’s compatible with your exact graphics card or sound card model and your version of Windows.
Automatic driver update — If you don’t have the time, patience or computer skills to update your graphics card or sound card driver manually, you can, instead, do it automatically with Driver Easy.
Driver Easy will automatically recognize your system and find the correct drivers for it. You don’t need to know exactly what system your computer is running, you don’t need to be troubled by the wrong driver you would be downloading, and you don’t need to worry about making a mistake when installing. Driver Easy handles it all.
- Download and install Driver Easy.
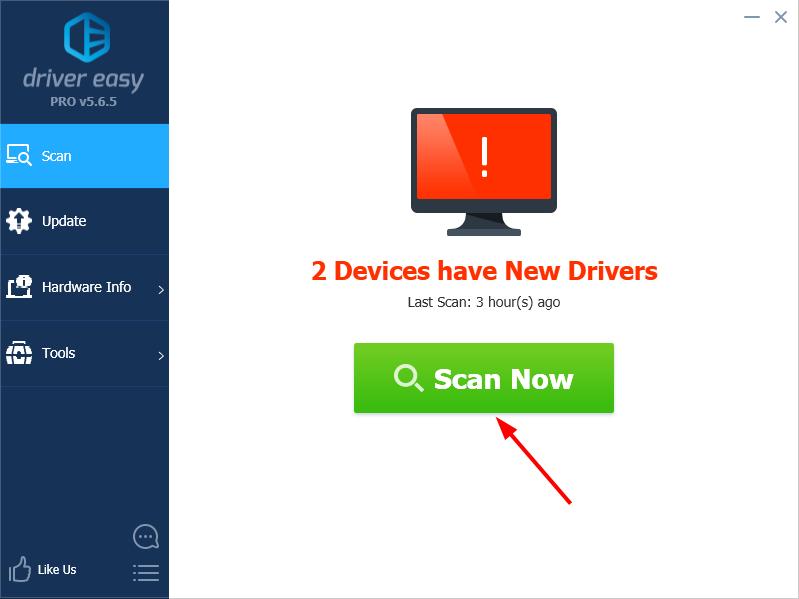
- Run Driver Easy and click Scan Now. Driver Easy will then scan your computer and detect any problem drivers.
- Click the Update button next to your graphics card or sound card to automatically download the correct version of its driver, then you can manually install it (you can do this with the FREE version).
Or click Update All to automatically download and install the correct version of all the drivers that are missing or out of date on your system. (This requires the Pro version which comes with full support and a 30-day money back guarantee. You’ll be prompted to upgrade when you click Update All.)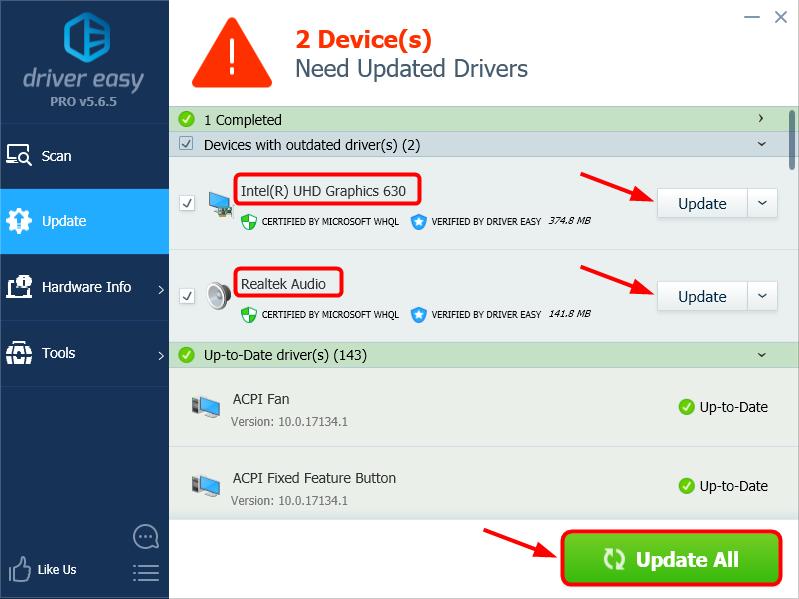
Just have a try now!
Please feel free to share your results or any other suggestions.