


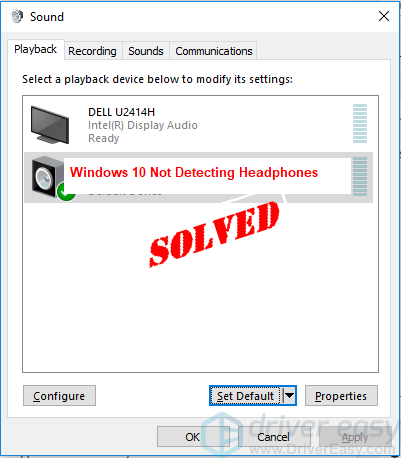
After you connected your headphone to Windows 10 or 11 computer, you could not hear sound from the headphones. In Playback devices, the headphone didn’t even show up. What happened? Don’t worry. This is a common issue in Windows 10/11. You can fix the error with one of the solutions below.
Before you try the solutions, ensure this is not a hardware issue:
If your computer has another port, plug your headphones to another port and see if the problem still persists. If you could hear the sound from headphones with another port, the problem probably is the port. If you don’t have another port available to plug into headphones, skip this troubleshooting.
If possible, connect your headphones to another computer to check to see if the problem persists. If you can use the headphones properly on another computer, the problem is the computer settings. Then try following solutions. If you can’t hear the sound using the headphone on another computer either, the problem is probably the headphones.
There are five solutions to fix the problem on your computer. You may not have to try them all. Just work your way down at the top of the list until you find the one that works for you.
- Show and enable the headphones manually
- Uninstall then reinstall the audio driver
- Update the audio driver
- Enable Stereo Mix
- Configure audio control panel settings
Solution 1: Show and enable the headphones manually
The headphone device might be disabled and hidden in Playback devices. You may need to make it appear and enable it manually.
Follow these steps:
1) Open Playback devices.
2) Right-click the blank place, and then select Show Disconnected Devices and Show Disabled Devices.
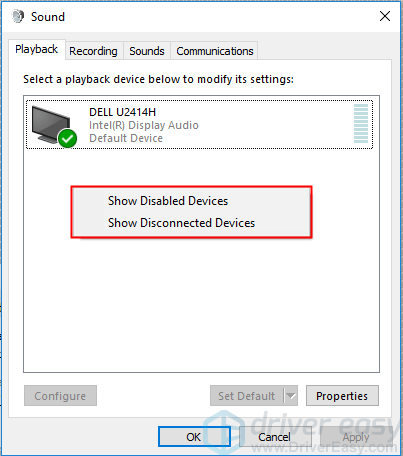
After that, you’ll see headphones appear in the Playback devices shown in Disabled status.
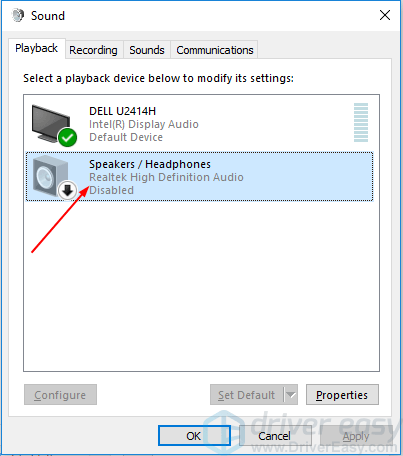
3) Right-click the headphones and click Enable.
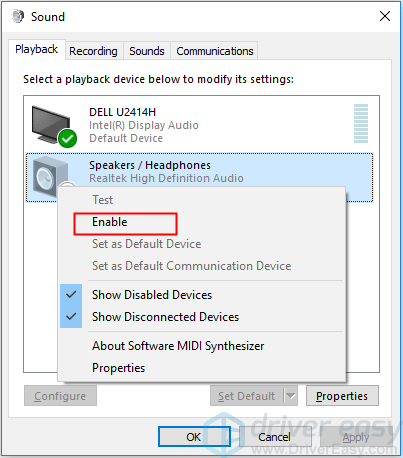
After the device is enabled, if you see it not set as Default Device, highlight it and click the Set Default button. If it’s already set as default device, move on to next step.
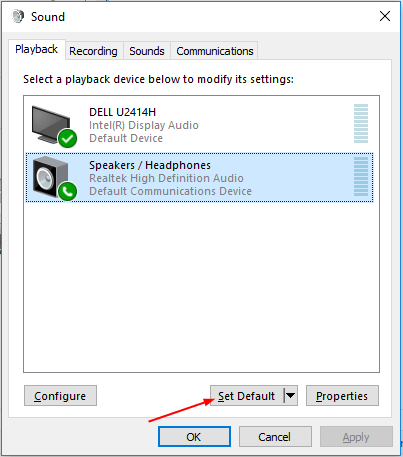
4) Click OK -> Apply.
5) Check to see if the problem is resolved.
Solution 2: Uninstall then reinstall the audio driver
The problem could be due to audio driver issues. To fix the problem, you can try to uninstall then reinstall the audio driver.
Follow steps below to uninstall the audio driver in Device Manager, then reinstall the audio driver.
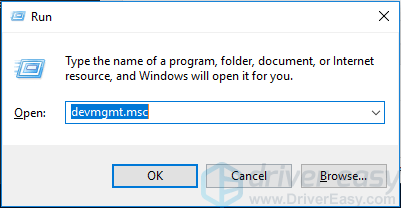
1) On your keyboard, press the Windows logo key and R key at the same time to invoke the run box.
2) Type devmgmt.msc and click the OK button.
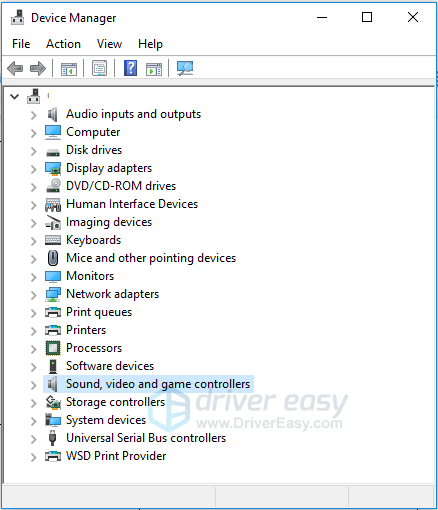
3) Double click Sound, video and game controllers to expand the list of the sound devices.
4) Right click the audio device and select Uninstall device. You may see more than one device under the list, ensure you uninstall the audio device but not the display audio device. You audio is likely to be Realtek High Definition Audio or IDT High Definition Audio.
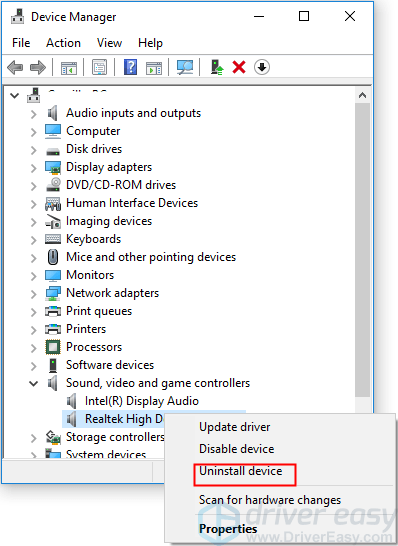
5) When prompted for the uninstall, if you see Delete the driver software for this device, check the box, then click the Uninstall button. If you don’t see the box, just lick the Uninstall button.
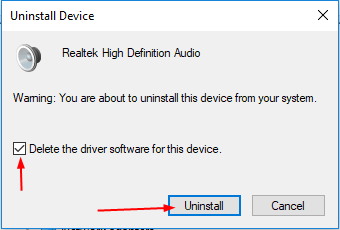
6) When uninstall completes, restart your computer to allow Windows to reinstall the driver.
7) Check to see if you can see the headphones in Playback devices.
Solution 3: Update the audio driver
If uninstalling driver doesn’t work, you might need to update the driver.
There are two ways to update your audio driver: manually or automatically.
Manual driver update – You can update your audio driver manually by going to the manufacturer’s website for sound card, and searching for the most recent correct driver. Be sure to choose only drivers that are compatible with your variant of Windows 10/11.
Automatic driver update – If you don’t have the time, patience or computer skills to update your audio driver manually, you can, instead, do it automatically with Driver Easy. Driver Easy will automatically recognize your system and find the correct driver for your sound card, and your variant of Windows 10/11, and it will download and install the driver correctly:
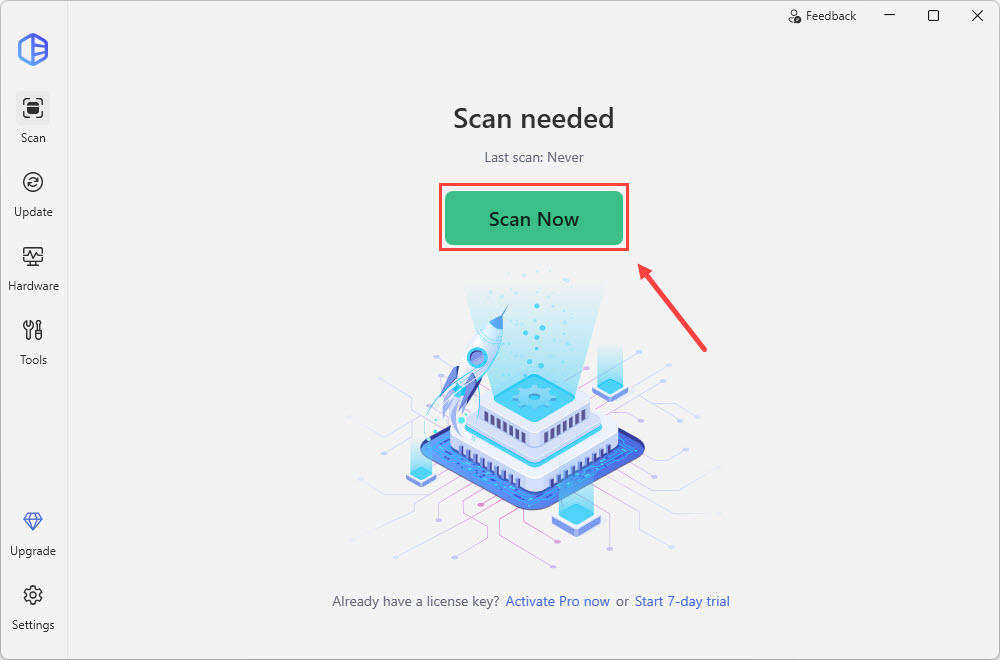
1) Download and install Driver Easy.
2) Run Driver Easy and click the Scan Now button. Driver Easy will then scan your computer and detect any problem drivers.
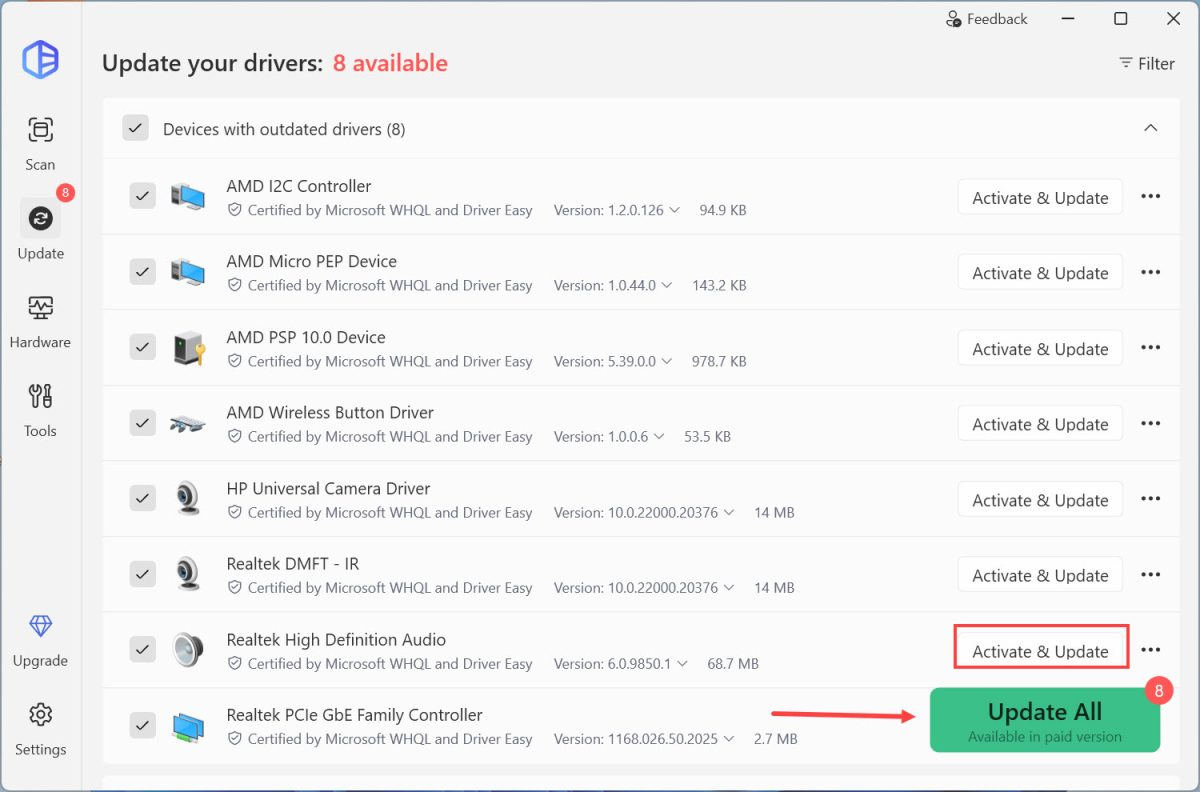
3) Click the Activate & Update button next to the flagged audio driver to automatically download and install the correct version of that driver.
Or click Update All to automatically download and install the correct version of all the drivers that are missing or out of date on your system. (This requires the Pro version which comes with full support and a 30-day money-back guarantee. You’ll be prompted to upgrade when you click Update All.)
4) Restart to your computer and check to see if Windows 10/11 detects your headphones.
Solution 4: Enable Stereo Mix
To fix the problem, you can try to enable the Stereo Mix. To do so:
1) Open Playback devices.
2) Under the Recording tab, right click on Stereo Mix and select Enable on the context menu.
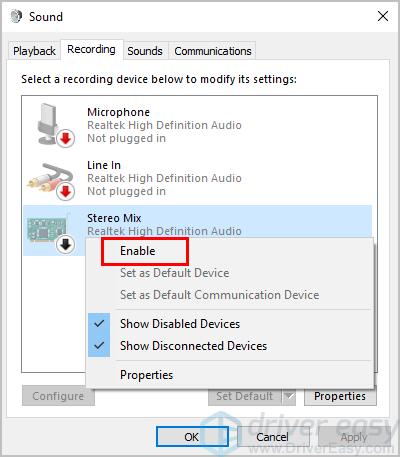
3) Click Apply -> OK.
4) Check to see if Windows 10/11 detects your headphones.
Solution 5: Disable front panel jack detection ( for Realtek audio driver only)
One cause of headphones not showing up in Playback devices could be enabled front panel jack detection. This often occurs to Realtek audio driver. If you have Realtek HD audio manager installed, you can try this method. If not, try other methods.
Follow steps below:
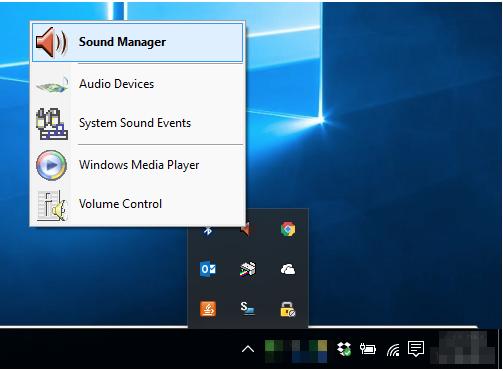
1) Open the Sound Manager.
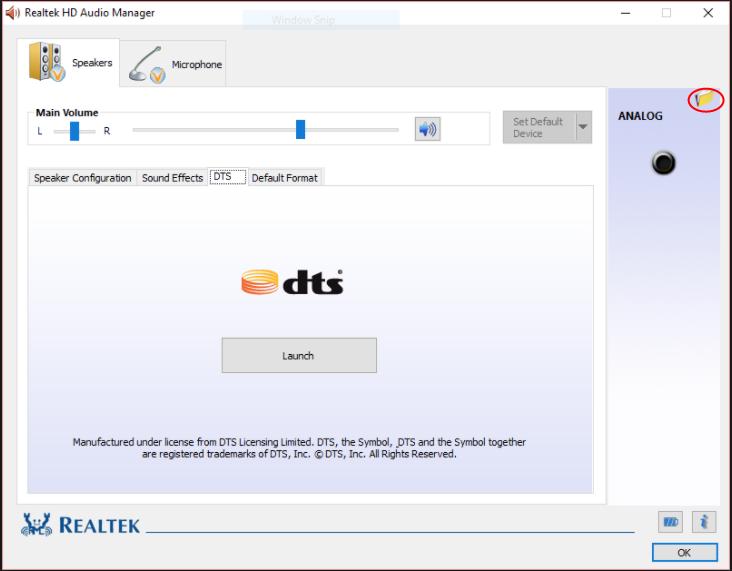
2) Click the small folder in the upper right corner.
3) Check the “Disable front panel jack detection” option.
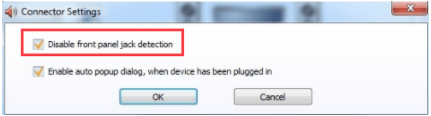
4) Click the OK button.
5) Check to see if the headphones appear in Playback devices.
Hope one of the solutions here works for you. If you have any questions, please leave your comment. We’d love to hear of any ideas or suggestions.
