


The black screen issue is one of the most difficult problems you can face with your Windows 11 computer.
When it occurs, your device may still be on and functioning; lights are blinking; the fans are all spinning, but the screen is a total black without giving any error code or error message you can use to determine the root of the issue.
If you’re also in this predicament, don’t panic. Here are 5 solutions to try. You may not have to try them all; just work your way down the list until you find the one that does the trick for you.
Fixes to try
Fix 1: Restart your PC
If the black screen issue seems to occur out of the blue, it could be just a temporary error that can be fixed by a simple restart.
You can force-shut down your computer by pressing and holding the power button for 3 to 5 seconds. Then press the power button to turn it back on.
If the black screen issue persists after the reboot, then go ahead with the next fix.
Fix 2: Check for loose connections (desktop only)
If your video cable has become loose or it was plugged into the wrong port, the image signal won’t be transmitted. To see if this is the cause of your issue, follow the instructions below:
Step 1 – Make sure your monitor is on
This is an obvious one, but it can still be overlooked. Make sure your monitor is plugged in and turned on before moving forward.
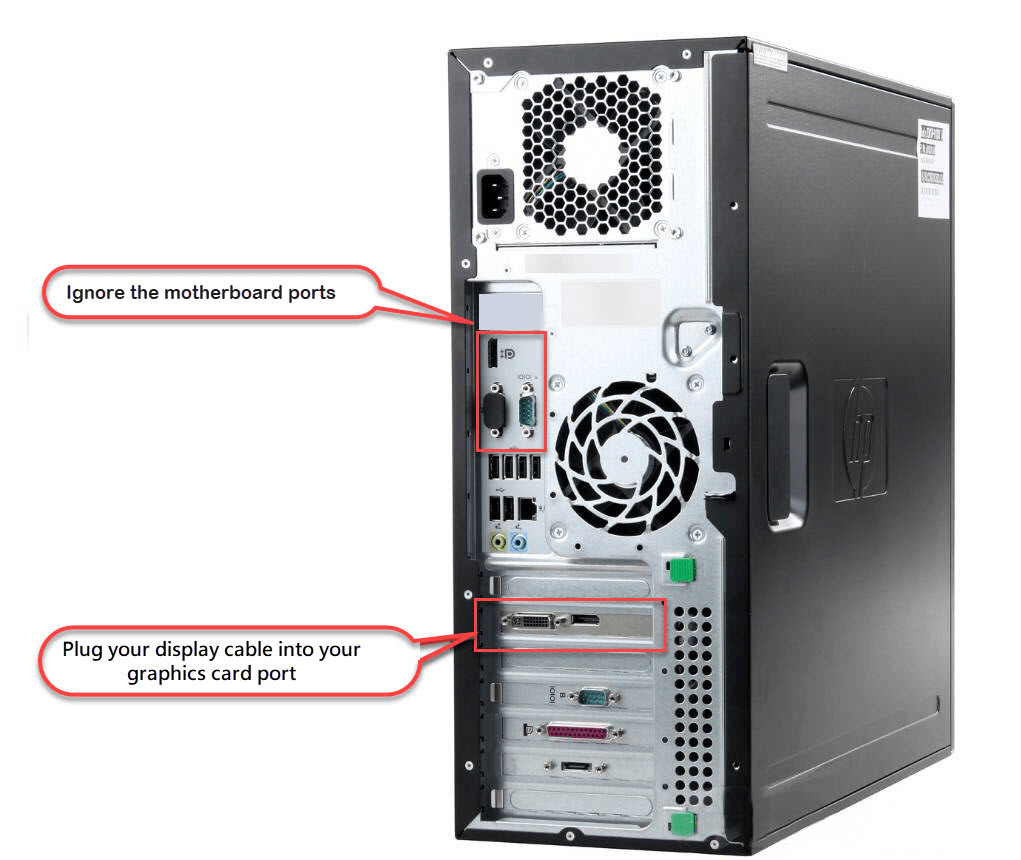
Step 2 – Plug the cable into your video card
If you have more than one graphics card, make sure your video cable is connected to your graphics card port instead of your motherboard.
Step 3 – Reconnect your monitor to computer
Make sure that your video cable is functioning correctly, then reconnect your monitor to your computer.
1) Unplug the video cable that connects your monitor to your computer.
2) Check the port connectors on your computer and your monitor.
If any connector on your device is bent or damaged, you’ll need to take the device to a repair shop.
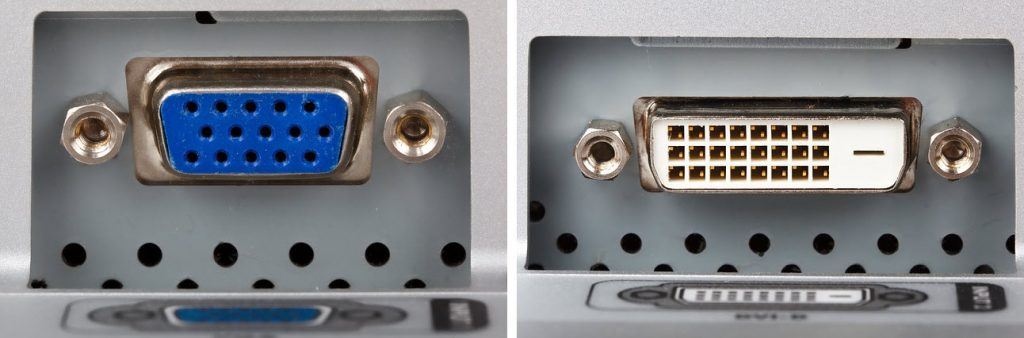
3) Check to see if your video cable is damaged.
If the video cable is fine, reconnect your computer to your monitor. Or, if you have another video cable available, try connecting the two devices using the new cable.
4) Try turning on your computer to test your issue.
If you run into the black screen error again, read on and try the fix below.
Fix 3: Disconnect your peripherals
Peripherals connected to your computer may also cause issues like the black screen error.
If you have multiple accessories connected to your Windows 11 PC, try disconnecting all non-critical ones to see if any of them are incompatible with your new system or conflict with programs running on your device.
1) Turn off your computer.
2) Disconnect all peripherals (your webcam, printer, scanner, speaker, etc.).
3) Turn on your computer again.
If your PC works without any problems, that could mean that one of the peripherals you removed is causing the black screen issue. In this case, you can reinstall your devices back into your computer and test them each time. Then, you’ll find the specific device that causes your problem.
Replace the problematic device once you’ve identified it. Or, consult the manufacturer of the device for assistance.
Fix 4: Check your video driver
An outdated or faulty video driver can also cause black issues on your Windows 11 device. To keep your graphics chipset working correctly with the new operating system and programs, it’s essential that you have the latest correct video driver installed.
In some cases you won’t be able to proceed with this fix with a black screen. You can try booting into safe mode (guide to enter Windows safe mode) and uninstall the exisiting graphics driver (guide to uninstall GPU driver with DDU).
You can get the latest correct graphics driver manually, by going to the manufacturer support website, such as Nvidia and AMD, finding the driver corresponding with your specific flavor of Windows version (for example, Windows 64 bit), and installing the driver.
If you don’t have the time, patience, or computer skills to update your graphics driver manually, you can do it automatically with Driver Easy. Driver Easy will automatically recognize your system and find the correct drivers for it with just 2 clicks:
1) Download and install Driver Easy.
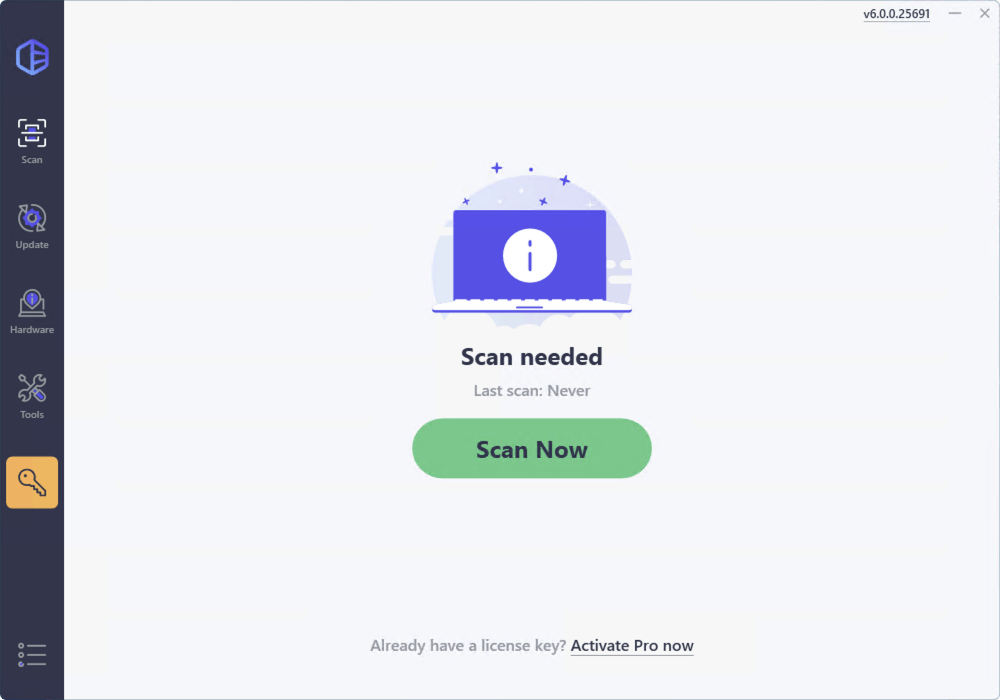
2) Run Driver Easy and click the Scan Now button. Driver Easy will then scan your computer and detect any problem drivers.
3) Click the Update button next to the display driver to automatically download the correct version of that driver, or click Update All to automatically download and install the correct version of all the drivers that are missing or out of date on your system. You’ll be prompted to upgrade when you click on these buttons. If you’re not ready for the purchase, sign up for our 7-day free trial to unlock all the premium features.

If the black screen still persists, please move on to the next fix.
Fix 5: Reinstall your RAM and graphics card
In some cases, the black screen error occurs because your hardware isn’t properly installed, especially your RAM module, or graphics card.
If you’re comfortable opening your computer case by yourself, follow the instructions below:
1) Press and hold the power button until your computer turns off.
2) Disconnect the AC power cord from the power supply, and then open your computer case.
3) Remove the RAM. On your motherboard, you should notice two tabs on either side of the memory slot. Press each tab down and away from the memory slot. If done correctly, the memory should pop out and once both tabs are away from the memory module you can lift the memory out with no effort.
RAM looks like this:
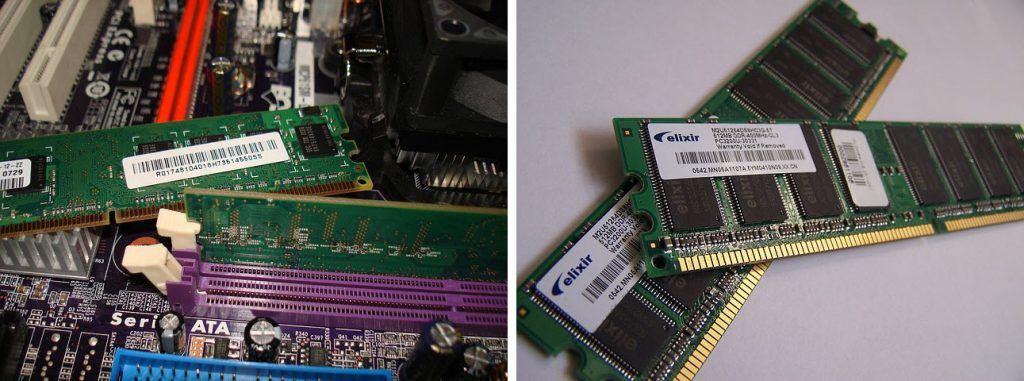
4) Put your RAM back into the slot.
5) Check if your graphics card is properly seated.
6) Connect the AC power cord to the power supply, and then turn on your computer to test the issue.
Hopefully, this article helped in resolving your issue. Feel free to leave a comment below if you have any questions or suggestions.