


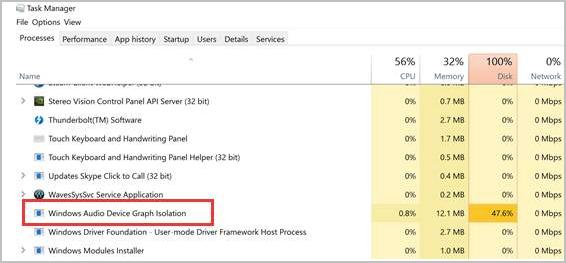
What is Windows Audio Device Graph Isolation?
In some cases, this process would show as AudioDG.exe. It is official part of Windows and the home of Windows audio engine. It controls the sound enhancement process. With it, sound card vendors can add fancy sound features to Windows with their sound drivers. And Windows can provide you with advanced audio effects.How to fix the issue?
The Windows Audio Device Graph Isolation high CPU usage issue occurs mostly due to enabled sound enhancement effects. Just use the solutions below to fix the issue. We’ve put together four solutions for you to fix the problem. You may not have to try them all; just work your way down the list until your problem is resolved.- Run a Full Virus Scan
- Update the Audio Driver
- Disable All Sound Effects
- Uninstall and Reinstall Skype
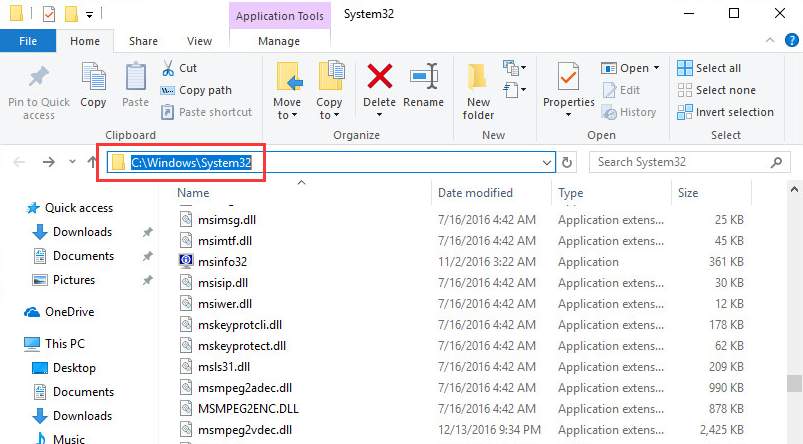
Solution 1: Run a Full Virus Scan Though the chances are low, the process could be virus. So use your antivirus software (if you have installed one) to run a full virus scan on your computer. AudioDG.exe is saved in “C:\Windows\System32” by default. So you can tell if the process is virus by checking the file location. Open the file location by right-clicking on the process and select Open file location.
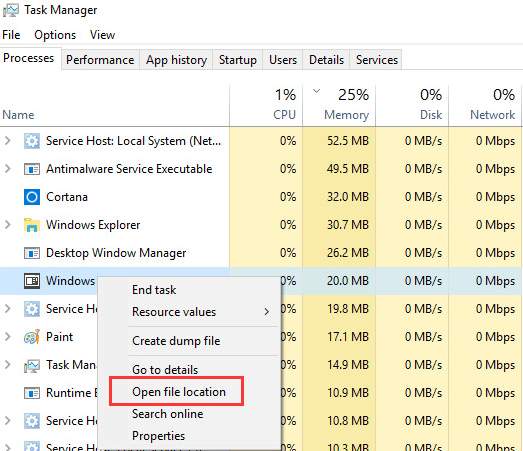 If the file is saved in C:\Windows\System32, then it is not virus.
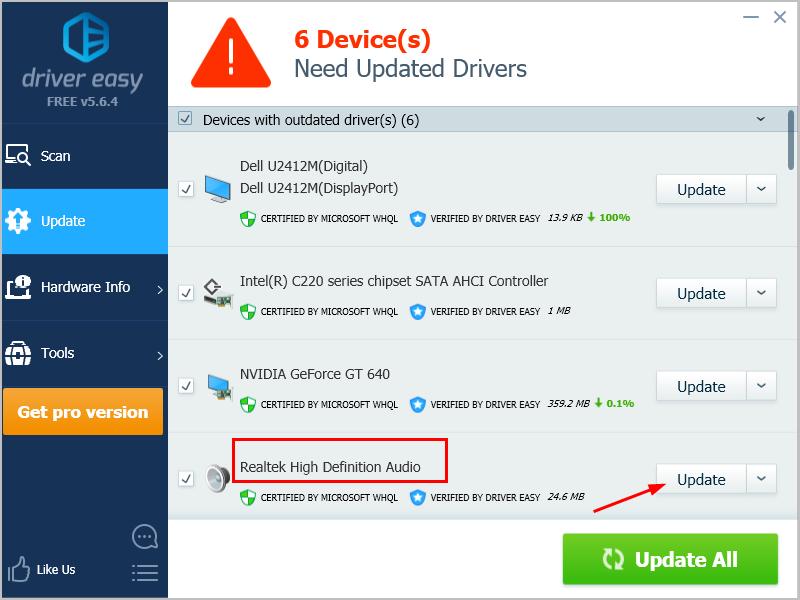
Solution 2: Update the Audio Driver The problem can be caused by a faulty audio driver. To fix the problem, you can update the audio driver. There are two ways you can get the right audio driver: manually or automatically. Manual driver update – You can update your audio driver manually by going to the manufacturer’s website and searching for the most recent correct driver for your sound card and your variant of Windows 10. Automatic driver update – If you don’t have the time, patience or computer skills to update your audio driver manually, you can, instead, do it automatically with Driver Easy. Driver Easy will automatically recognize your system and find the correct audio driver for your sound card and your variant of Windows 10, and it will download and install it correctly: 1) Download and install Driver Easy. 2) Run Driver Easy and click Scan Now. Driver Easy will then scan your computer and detect any problem drivers.

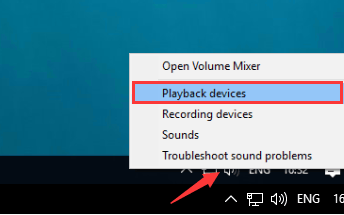
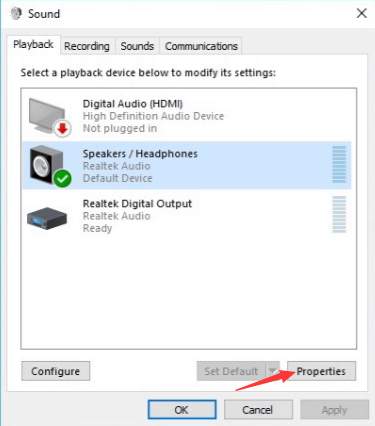
Solution 3: Disable All Sound Effects Follow steps below: 1. Right-click on the speaker icon at the bottom right corner of desktop and select Playback devices.
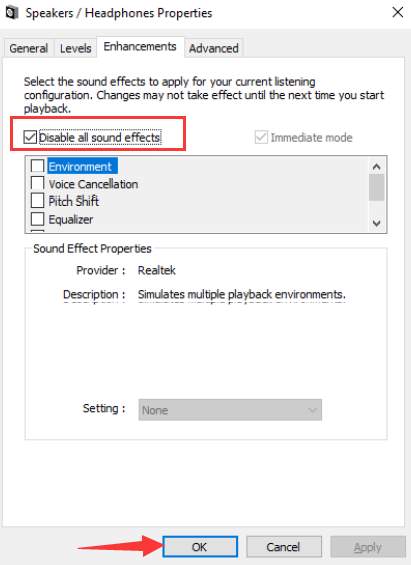 If you don’t see option “Disable all sound effects” in Speakers properties dialog box, go back to Sound dialog box and select other sound options probably like Microphone. Then disable the sound effects.
Solution 4: Uninstall and Reinstall Skype (for Skype Users) If you run into this issue when using Skype, uninstall the software and install a new version. Some Skype users have reported that this worked for them. Maybe it would work for you too. We hope one of these methods resolves your Windows 10 audio problem. Please feel free to leave your comment below if you have any questions.
34
34 people found this helpful
17 Comments
Most Voted