


If your Windows PC gets stuck on the screen of “Preparing to configure Windows” when you try to shut down your Windows system, don’t worry! You’re not alone. Many Windows users are reporting this annoying issue. But the good news is you can fix this issue on your own. You should be able to fix the problem quite easily using one of the fixes we’ve listed below.
Fixes to try:
You don’t have to try them all; just work your way down the list until everything’s working again.
- Wait until your Windows system installed all the updates
- Disconnect all external devices and perform a hard reboot
- Performing a clean boot
- Restore your Windows system
- Bonus tip: Update your driver to the latest version
Wait until your Windows system installed all the updates
If your PC seems to get stuck on the screen of “Preparing to configure Windows”, it may indicate that your Windows system is installing and configuring the updates.
If you haven’t installed Windows updates for a long time, it may take some time to install all the updates. So just give enough time to your Windows system to handle all the updates.
The time it may take depends on your hardware specifications. It is recommended that you wait for 2 hours. 2 hours later, if the your PC still gets stuck on the screen of “Preparing to configure Windows”, try the next fix.
Disconnect all the external devices and perform a hard reboot
Since your PC gets stuck on the screen of “Preparing to configure Windows” when you try to shut down your Windows system, in such a case, the only thing you can do is to disconnect all the external devices (such as USB flash drives, the external hard disk drive, etc) and perform a hard reboot. Follow the instruction below to perform a hard reboot:
- Press and keep holding the power button on your computer case until your PC shuts down.
- Disconnect any external power supply or remove the battery from your laptop.
- Hold down the power button for about 15 seconds.
- Wait a few minutes and then plug in your PC or connect the battery to your laptop.
- Press the power button again to reboot your system.
- Select the option to boot normally if you get a notice that the computer shut down improperly.
After you signed in your Windows system, follow the steps below to check if this issue persists:
- On your keyboard, press the Windows logo key and type windows update. In the list of search results, select Check for updates.
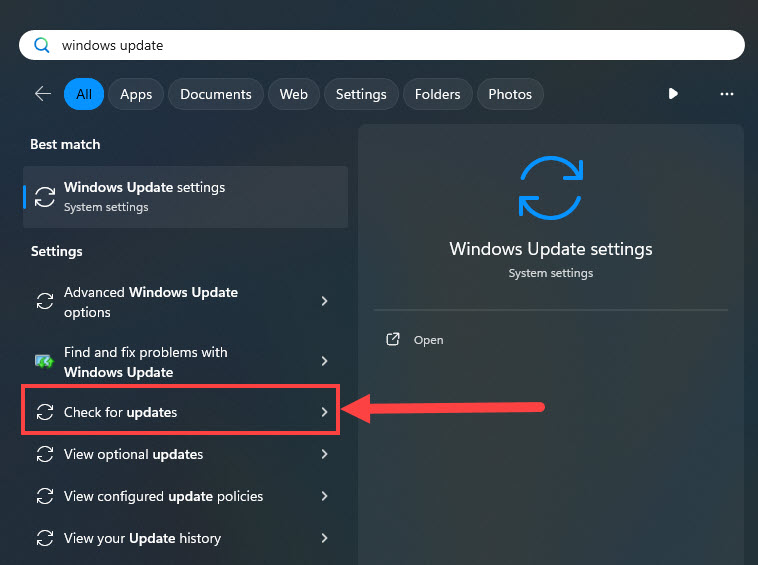
- In the pop-up window, click Check for updates.

- Wait until Windows downloads and installs all the updates.
Restart Windows to see if your PC will get stuck on the screen of “Preparing to configure Windows” again. It’s recommended that you plug in your PC and give your Windows system a whole night to configure all the updates. Normally, a whole night is enough for your Windows system to handle all these updates.
If your PC still gets stuck when you wake up, you should follow the instruction above to perform a hard reboot and then try the next fix.
Performing a clean boot
You may need to perform a clean boot if this issue persists. The clean boot is a troubleshooting technique that allows you to manually disable startups and services so that you can find out the problematic software that makes your game keep crashing. Once you find it out, just uninstall it, and then the this issue will be solved. Here’s how to do it:
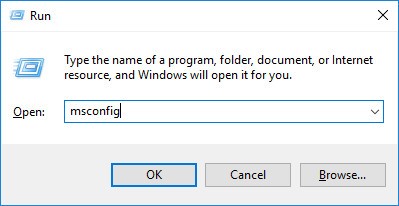
- On your keyboard, press the Windows logo key and R at the same time to open the Run Dialog. Type msconfig and press Enter to open the System Configuration window.
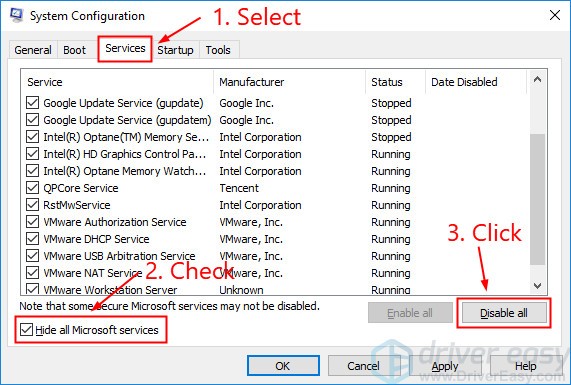
- Select the Services tab, check Hide all Microsoft services and then click Disable all.
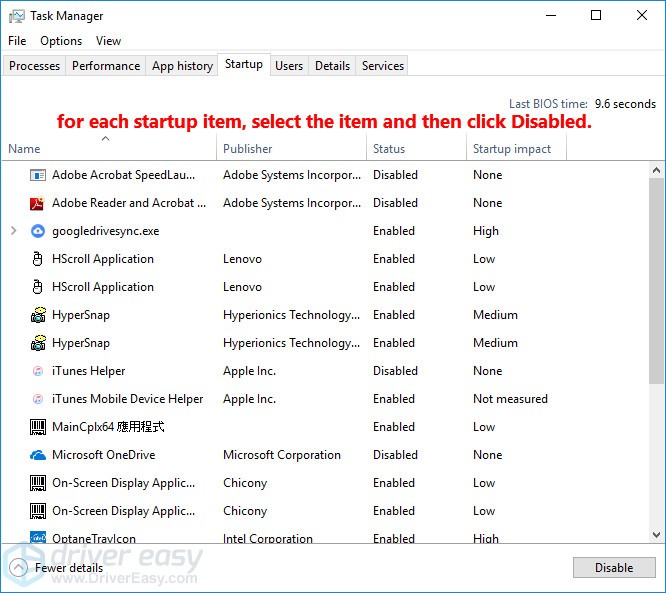
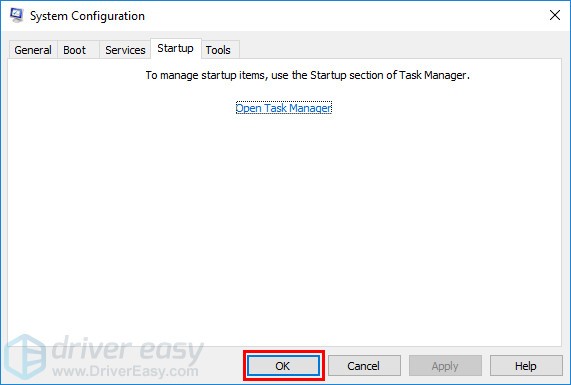
- Select the Startup tab and click Open Task Manager.
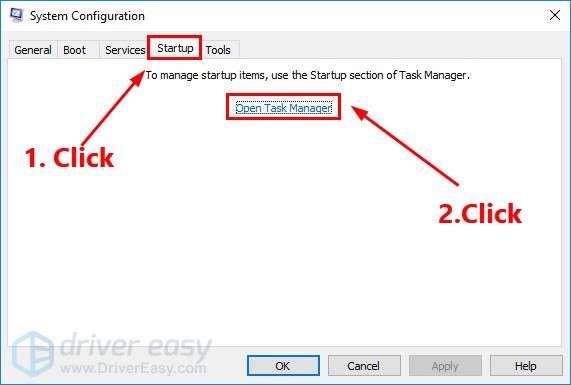
- On the Startup tab in Task Manager, for each startup item, select the item and then click Disabled.
- Go back to the System Configuration window and click OK.
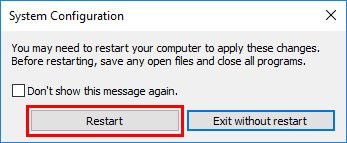
- Click Restart to restart your PC.
- Perform a Windows update again after restarting Windows.
- On your keyboard, press the Windows logo key and type windows update. In the list of search results, select Check for updates.
- In the pop-up window, click Check for updates.
- Wait until Windows downloads and installs all the updates.
- On your keyboard, press the Windows logo key and type windows update. In the list of search results, select Check for updates.
- Restart your PC when Windows installed all the updates to see if this issue persists.
If your PC won’t get stuck on the screen of “Preparing to configure Windows”, you’ve resolve this issue. Then go to the System Configuration window to enable the services you disabled before. After enabling each service, you need to restart your PC to apply the changes. If this annoying issue reappears, you may need to restore your system.
Restore your Windows system
This annoying issue can be resolved by restoring your Windows system to a previous state. Follow the instructions below to restore your Windows system:
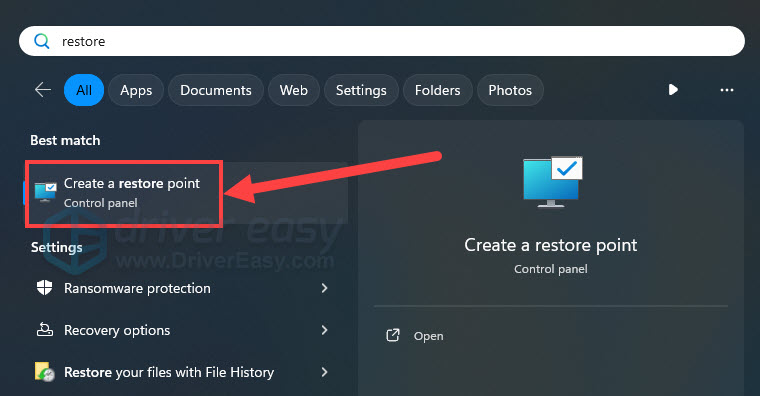
- On your keyboard, press the Windows logo key and type restore, in the list of search results, select Create a restore point. You will be prompted for permission. Click Yes to open the System Protection settings.
- Ensure the Protection status of the local disk drive that has your Windows system installed on is On. Then click System Restore….
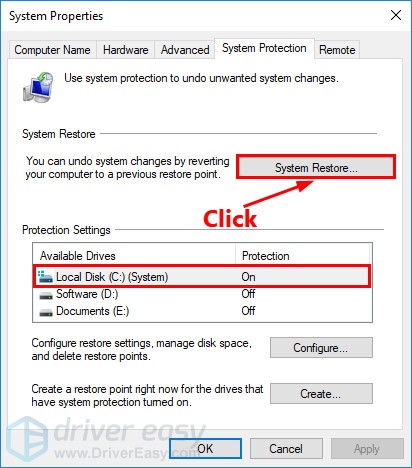 If the Protection status of the local drive that has your Windows system installed on is Off, it indicates that you have disabled the system restore feature on this drive.
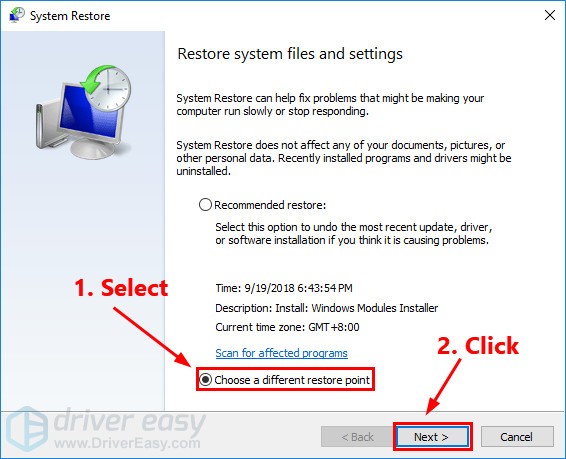
 - Select Choose a different restore point and click Next.
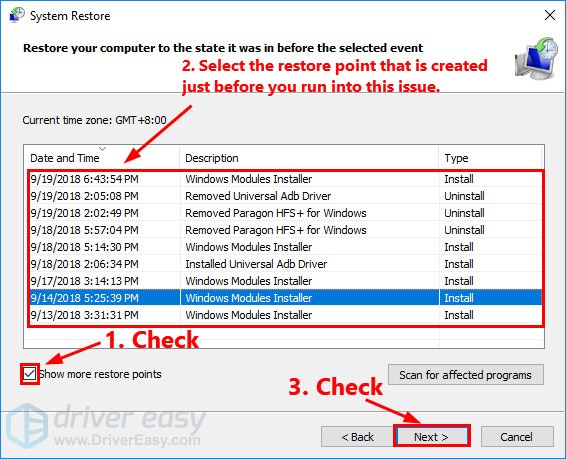
- Check the box next to Show more restore points. Select the restore point that is created just before you run into this issue and then click Next.
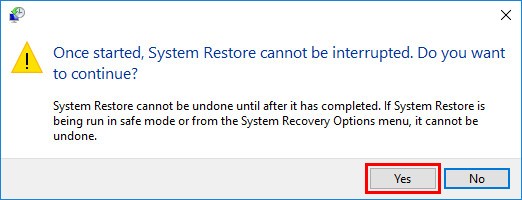
- Click Finish to confirm your restore point.

- Click Yes to start restoring your Windows system.
After restoring your Windows system, this annoying issue should be resolved.
Bonus tip: Update your driver to the latest version
To reduce such annoying problems, in most cases, it is a good idea to update your drivers to the latest version. There are two ways to update your drivers: manually and automatically.
Update your drivers manually – You can update your drivers manually by going to the manufacturer’s website, and searching for the latest driver for your device. Be sure to choose the driver that is compatible with your Windows system.
or
Update your drivers automatically – If you don’t have the time, patience or computer skills to update your drivers manually, you can, instead, do it automatically with Driver Easy. You don’t need to know exactly what system your computer is running, you don’t need to risk downloading and installing the wrong driver, and you don’t need to worry about making a mistake when installing.
You can update your drivers automatically with either the FREE or the Pro version of Driver Easy. But with the Pro version it takes just 2 clicks (and you get full support and a 30-day money back guarantee):
- Download and install Driver Easy.
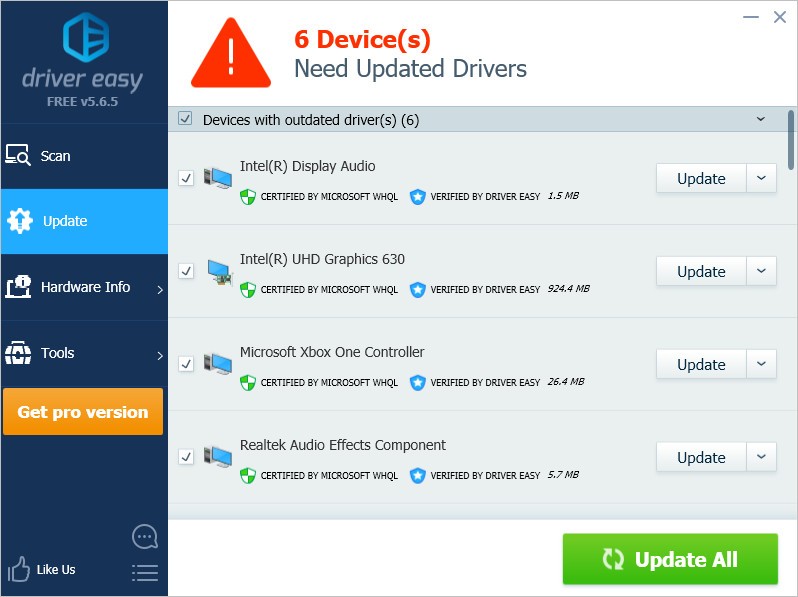
- Run Driver Easy and click the Scan Now button. Driver Easy will then scan your computer and detect any problem drivers.

- Click Update next to your device to automatically download the correct version of this driver, then you can install it manually. Or click Update All to automatically download and install the correct version of all the drivers that are missing or out of date on your system (this requires the Pro version – you’ll be prompted to upgrade when you click Update All).
Hopefully one of the fixes above can help you resolve this annoying issue. Please leave your comment below if you have any questions.