


It’s quite annoying to find the external hard drive keeps disconnecting when you’re copying or transferring files. But don’t worry. Here are 5 easy and effective solutions to help you get out of this situation.
Here’re the fixes:
You may not try them all; just work your way down the list until you find the one that solves the problem.
- Try different USB ports
- Turn off USB selective suspend
- Change the power management settings
- Reinstall the USB controller driver
- Update the USB controller driver
Fix 1 – Try different USB ports
Sometimes, the external hard drive disconnection only happens with specific USB ports. To test this, simply connect the external hard drive to another USB port on your PC.
If the same disconnecting problem occurs whichever ports you use, the causes are in somewhere else, and there’re more workarounds below.
Fix 2 – Turn off USB selective suspend
USB selective suspend is a Windows feature that puts certain USB ports in the suspend state to save your computer from using unnecessary power. If you find the external hard drive disconnects and reconnects randomly, it’s better to disable this feature.
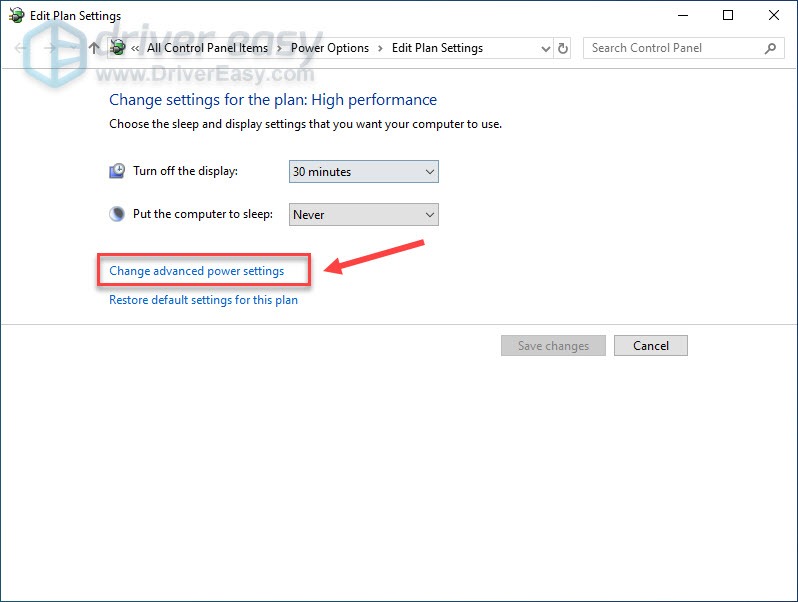
- Click the Start button. Then, type power plan in the search box and click Edit power plan.

- Click Change advanced power settings.
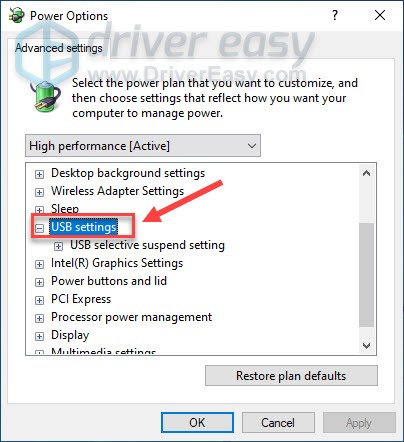
- Double-click USB settings to expand this category.
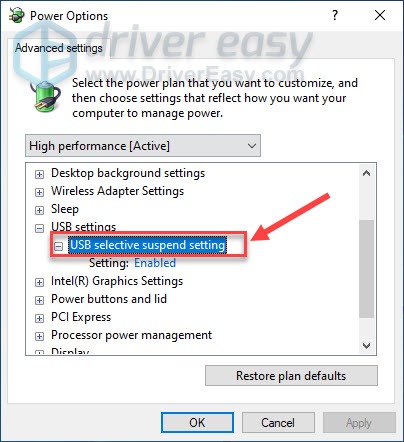
- Double-click USB selective suspend setting.
- Select Disabled from the drop-down menu next to Setting.
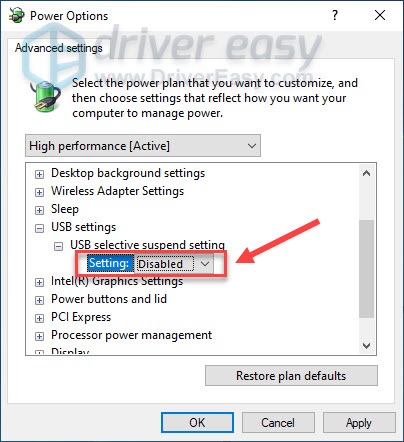
- Click OK.

Reboot your computer and check if the external hard drive keeps disconnecting issue is resolved. If not, you can go for the next fix below.
Fix 3 – Change the power management settings
It’s likely that Windows has automatically turned off the USB Root hub to save power, which caused your external hard drives to connect wobbly. Tweak the power management to see if this gets the problem fixed.
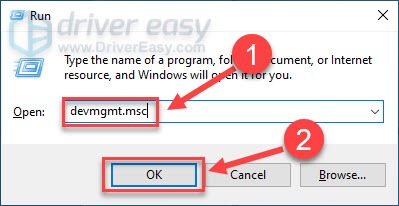
- On your keyboard, press the Windows logo key and R at the same time to open the Run command. Then, type devmgmt.msc in the field and click OK.
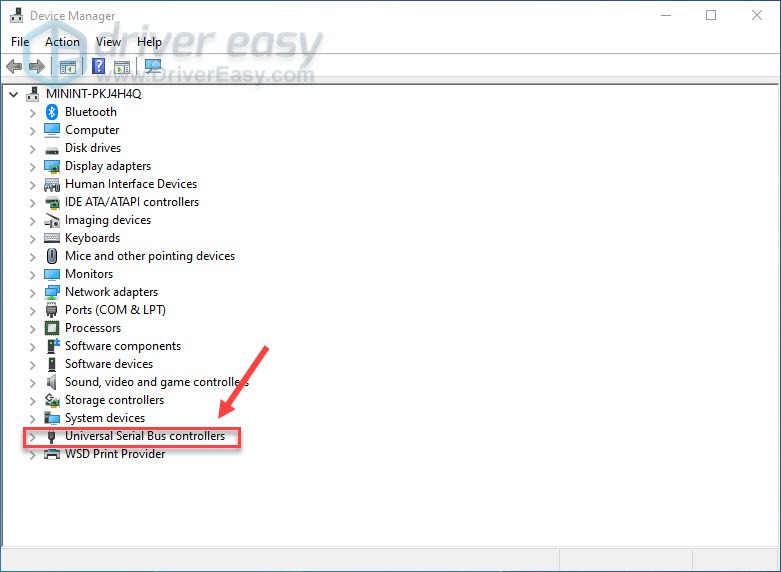
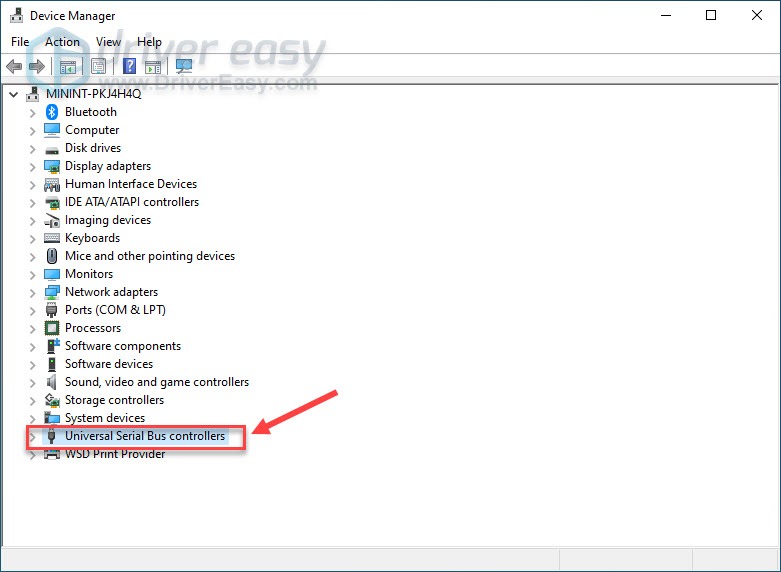
- Double-click Universal Serial Bus controllers to expand the list.
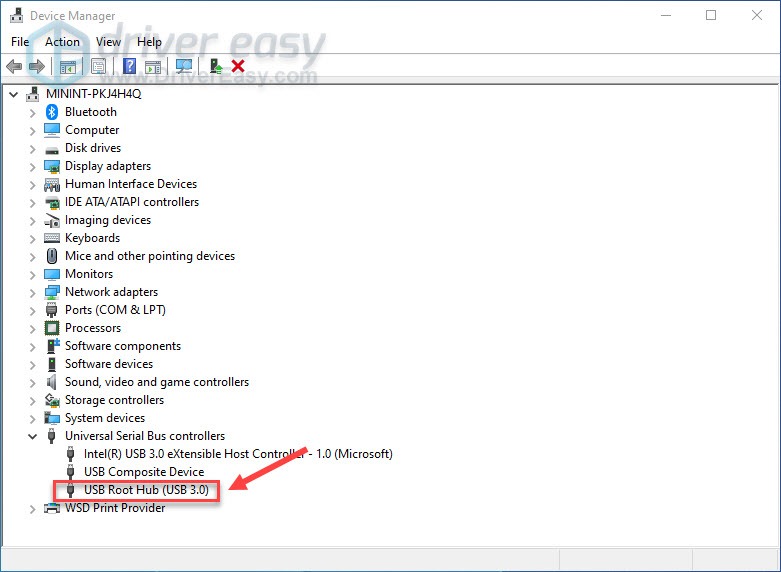
- Double-click USB Root Hub.
- Click the Power Management tab. Then, untick the box next to Allow the computer to turn off this device to save power, and click OK.
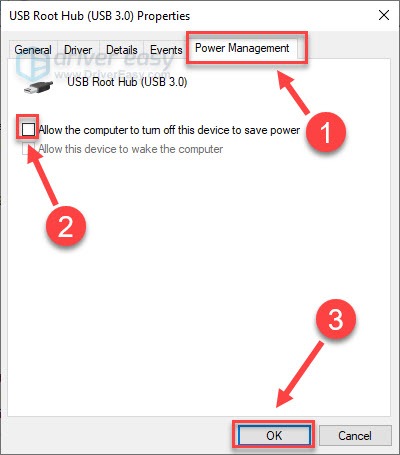
If there are more than one USB Root Hubs shown in the list, you should repeat the steps above to modify the power management setting for all of them. Then, reconnect the external hard drive to your PC and see if the connection issues go away.
Fix 4 – Reinstall the USB controller driver
Most of device connection failure or instability is caused by the driver issues. If your USB controller driver is wrong, incompatible or corrupted, the external hard drive won’t function as normal. To fix this, you can let Windows reinstall the appropriate driver for you.
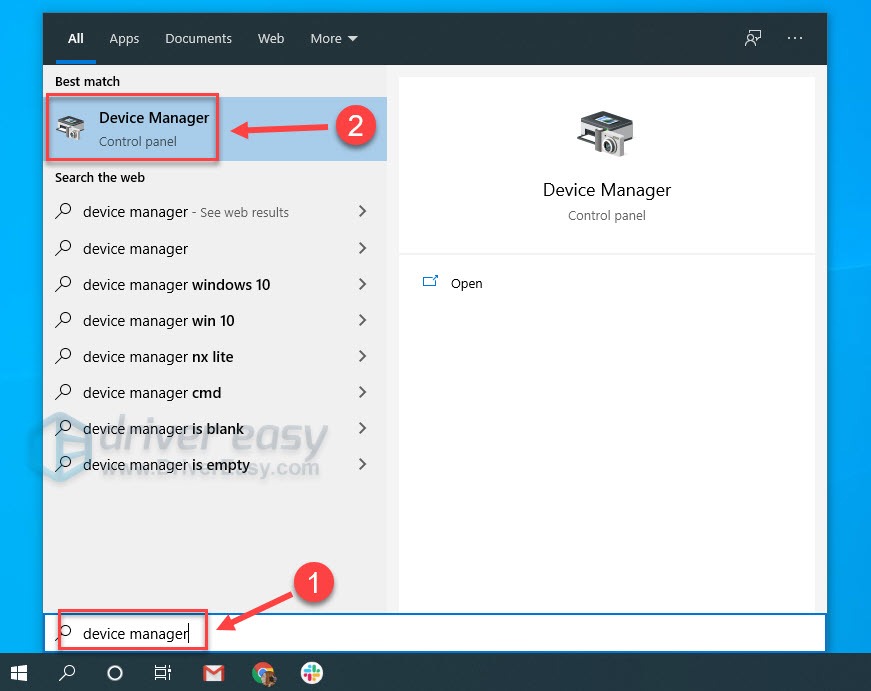
- Type device manager in the search box and click Device Manager.
- Double-click Universal Serial Bus controllers to expand the list.
- Right-click USB Root Hub and click Uninstall device.
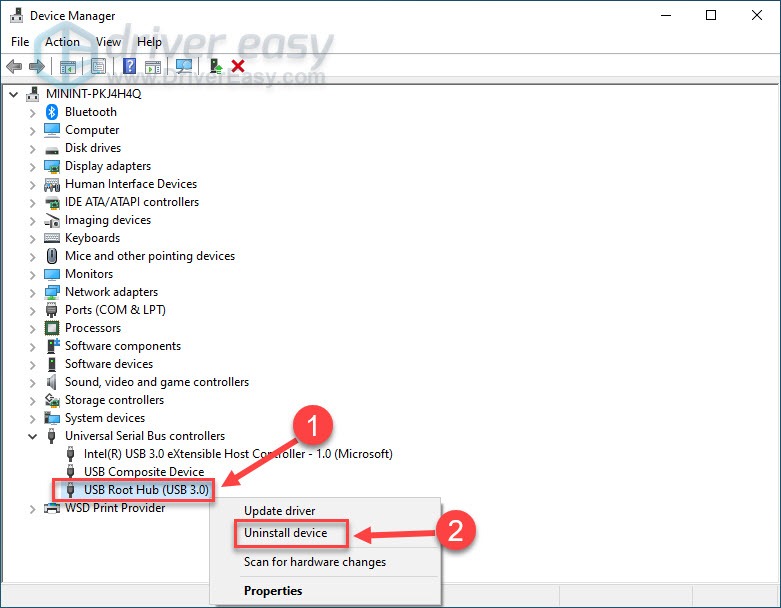
- Click Uninstall.
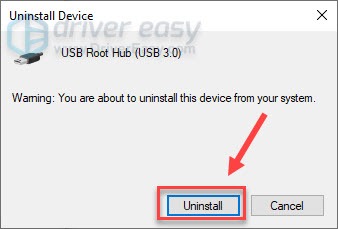
- Repeat the step above to uninstall all the devices under Universal Serial Bus controllers.
Restart your PC. Windows will automatically reinstall the drivers for your USB controllers and your external hard driver should be working. If this method isn’t helpful, continue with the next fix.
Fix 5 – Update the USB controller driver
If you’ve reinstalled the USB controller driver but the external hard drive keeps disconnecting, the next solution to take it to update the driver. There are two options you can update the USB controller driver:
Manual driver update – You can update your USB drivers manually by going to the computer manufacturer’s website, searching for the most recent correct driver, and downloading it. Be sure to choose only drivers that are compatible with your Windows version.
Automatic driver update – If you don’t have the time, patience or computer skills to update your USB controller driver manually, you can, instead, do it automatically with Driver Easy.
Driver Easy will automatically recognize your system and find the correct drivers for your exact devices, and your Windows version, and it will download and install them correctly:
- Download and install Driver Easy.
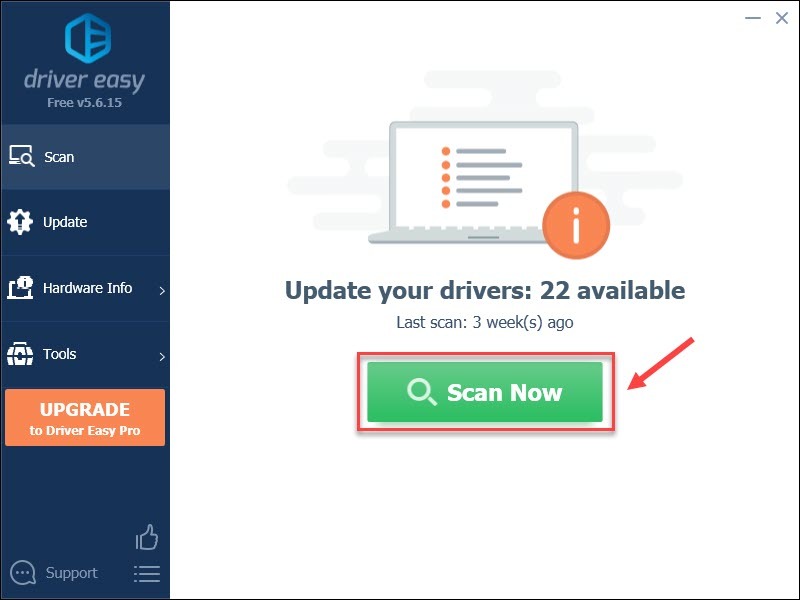
- Run Driver Easy and click the Scan Now button. Driver Easy will then scan your computer and detect any problem drivers.
- Click the Update button next to the flagged USB driver to automatically download the correct version of that driver, then you can manually install it (you can do this with the FREE version).
Or click Update All to automatically download and install the correct version of all the drivers that are missing or out of date on your system. (This requires the Pro version which comes with full support and a 30-day money back guarantee. You’ll be prompted to upgrade when you click Update All.)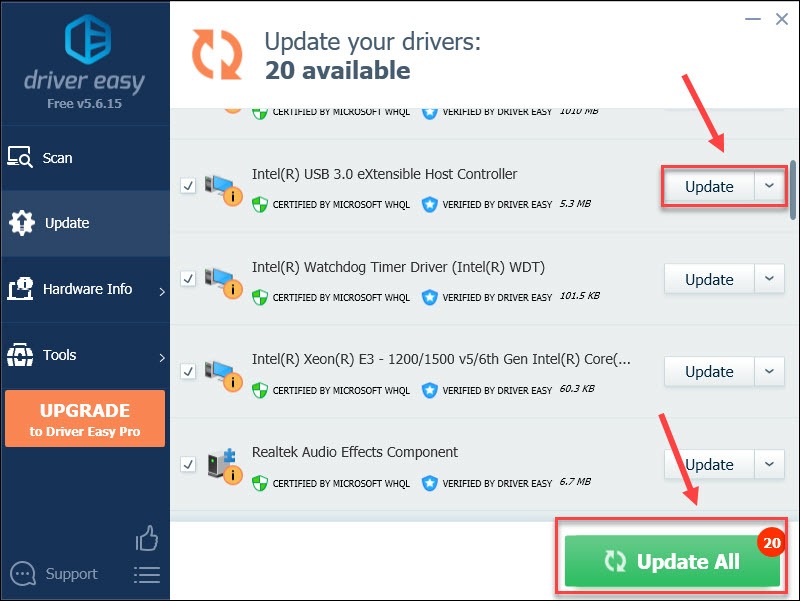
If you need assistance, please contact Driver Easy’s support team at support@drivereasy.com.
Now reconnect your external hard drive and it should work well after the USB driver is updated.
Hopefully one of the fixes above resolves your external hard drive keeps disconnecting problem. If you have further questions, please feel free to leave a comment below and we’ll be glad to help.