


The Fn keys play an important role in saving both time and energy, especially for those who often work with Excel, PowerPoint and suchlike. That’s why it can drive you nuts when you find the Fn keys not working on your Lenovo computer. But rest assured that you’re not alone – in this post, you’ll be greeted with 3 useful methods that have helped many Windows users solve their problems.
3 fixes for Lenovo Fn key not working
Here are the 3 fixes provided for you to solve the issue. You don’t need to try them all; just work your way down the list until you find the one that works for you.
Fix 2: Roll back Lenovo PM Driver
Fix 3: Update your chipset/keyboard drivers
Fix 1: Modify BIOS settings
The first thing you should do is to modify your BIOS settings. If you’re not so familiar with BIOS (Basic Input and Output System), you may refer to this post for further details or simply do some online searching.
Some third-party applications may have claimed a usage of your function keys, hence the reason for your Fn keys not working. To reverse these unwanted changes, you can enter BIOS and tweak the relevant system settings.
The following steps have covered two different versions of BIOS. Just check them out one by one and see which suits you better.
Version 1:
1) Restart your PC.
2) Focus on your screen during the boot process. When the Lenovo logo shows up, press and hold the button on your keyboard that allows you to enter BIOS. Usually the access key varies among different brands of computers: for HP laptops, it may be ESC; for others however, it becomes F1, F2, F3, Delete, or Enter….
In case you’re using a notebook, you’ll be likely to see an instruction at the bottom of the Lenovo startup screen (one that displays the Lenovo logo) that tells you which key to press in order to enter BIOS. If otherwise, please consult your PC manufacturer or go through your user manual to figure out the exact button.
3) Do not release the BIOS access key until you finally enter the BIOS configuration.
For notebook users, click here.
For desktop computer users (Windows 10), click here.
4) Once you enter BIOS Setup Utility, press the right arrow key on your keyboard to select the Config tab.
5) Use the down arrow key to highlight Keyboard/Mouse. Then, hit Enter.
6) In the next window, locate this item: F1-F12 as Primary Function. Use the down arrow key to highlight it, and then change its setting to Enabled.
7) Once you complete the tweak, press F10 to save the changes and exit BIOS. When prompted for confirmation, select Yes.
Version 2:
In another version of BIOS, the procedure may go like this:
1) Repeat Step 1 through Step 3 in Version 1. Then, press the right arrow key on your keyboard to select the Configuration tab.
2) In the following section, use the down arrow key to highlight HotKey Mode and switch its status to Disabled.
3) Press the Exit button on your keyboard to save the changes and exit BIOS. When prompted for confirmation, select Yes.
Will till your PC gets fully restarted. After that, check to see if your problem has been solved. If not, you may proceed to the next fix.
Fix 2: Roll back Lenovo PM Driver
As many Windows 7 users reported, their Fn keys stop working right after a Windows update. If that’s the case for you, you should try to roll back your Lenovo PM (Power Management) driver. Here’s how:
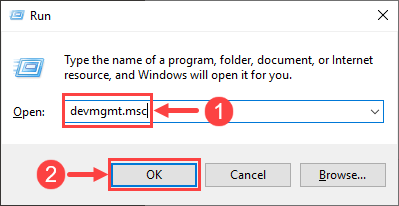
1) On your keyboard, press the Windows Logo key and R at the same time to invoke the Run dialog box. Then, type in devmgmt.msc and click OK.
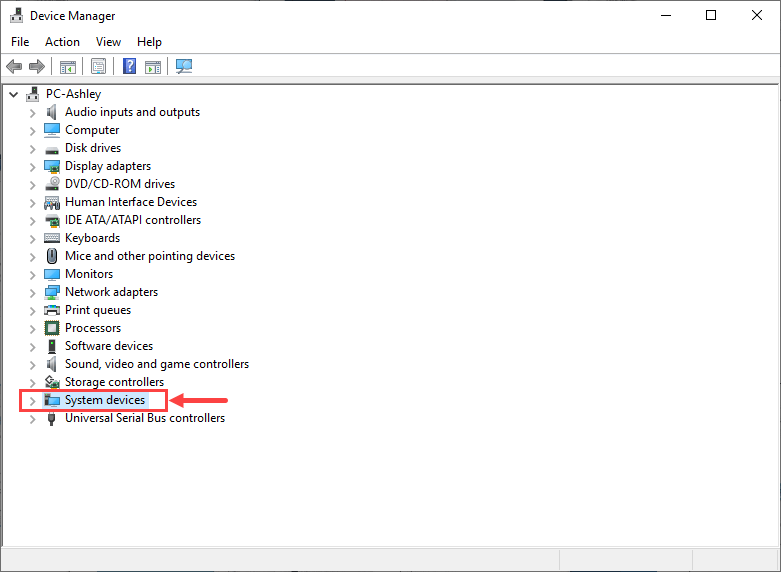
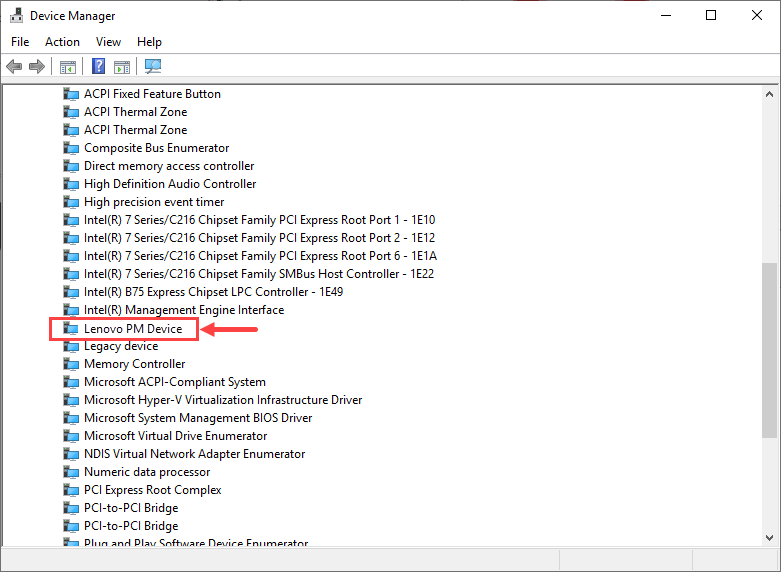
2) In Device Manager, double-click on the System devices node to expand its drop-down list. Next, locate Lenovo PM Device and right-click on it. From the context menu, select Properties.
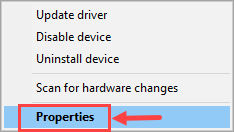
3) Go to the Driver tab and click Roll Back Driver.
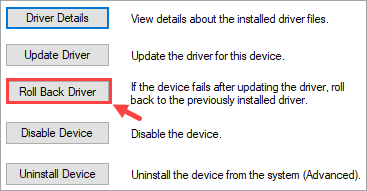
If the option appears dimmed, that means there’s no previous driver for you to roll back to. In this case, you should try out the next method instead.
4) Follow the onscreen instructions to roll back your driver. Don’t forget to reboot your computer for the changes to take effect.
Now it’s time to check whether your function keys have gone back to normal. If not, proceed to the next fix below.
Fix 3: Update your chipset/keyboard drivers
Sometimes an outdated or corrupt driver may cause you trouble, like preventing the Fn keys from working properly. To cure the issue, you should consider updating both your chipset and keyboard drivers that are closely related to the normal functioning of Fn keys.
There’re two ways you can update the drivers:
Option 1 – Update drivers via Device Manager – It’s the most common method but sometimes Windows may not detect or provide you with the latest drivers.
OR
Option 2 – Update drivers automatically with Driver Easy (Recommended) – This is the quickest and easiest option. It’s all done with just a couple of mouse clicks – easy even if you’re a computer newbie.
Option 1 – Update drivers via Device Manager
If you feel like updating your chipset and keyboard drivers via Device Manager, here are the steps:
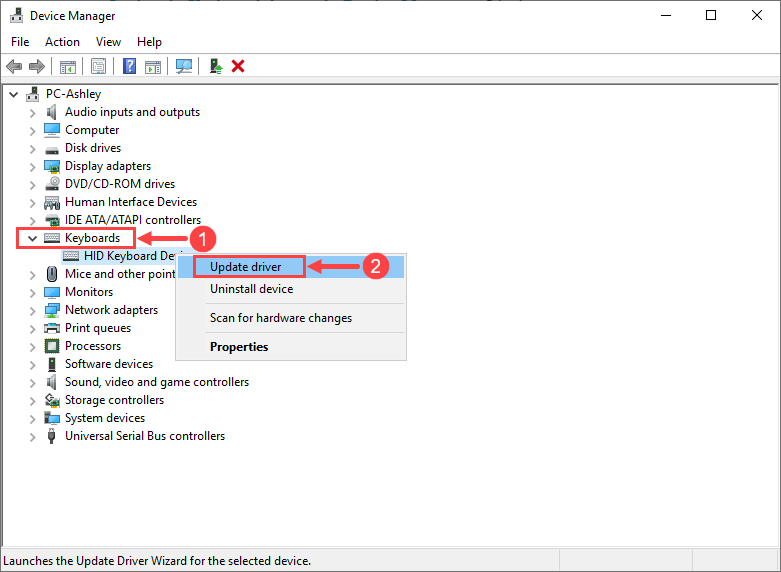
1) Press the Windows Logo key and R at the same time to invoke the Run dialog box. Then, type in devmgmt.msc and click OK.

2) In the pop-up Device Manager window, double-click on the Keyboards node to expand its drop-down list. Then right-click on your keyboard device and select Update driver.
3) Click Search automatically for updated driver software.
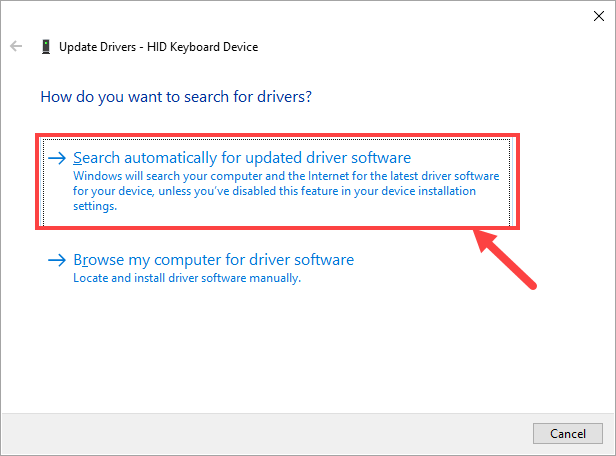
4) Follow the onscreen instructions to download and install your keyboard drivers.
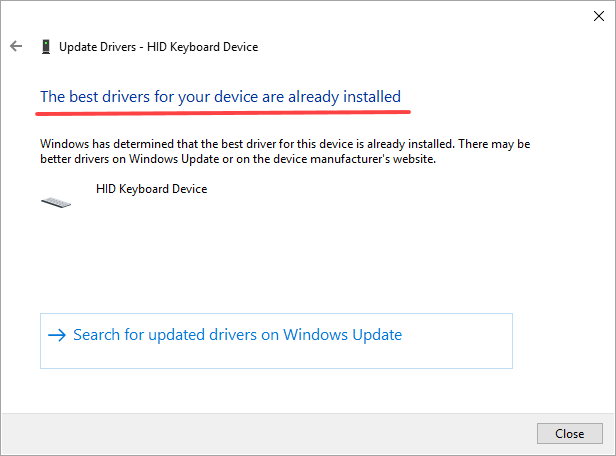
Note that Windows may not be able to download and install the latest drivers for you. If you receive a notification (as shown below) that reads “The best drivers for your device are already installed,” it doesn’t necessarily mean your keyboard driver is up-to-date. Perhaps you should look to the manufacturer’s website for any lately released versions, if possible.
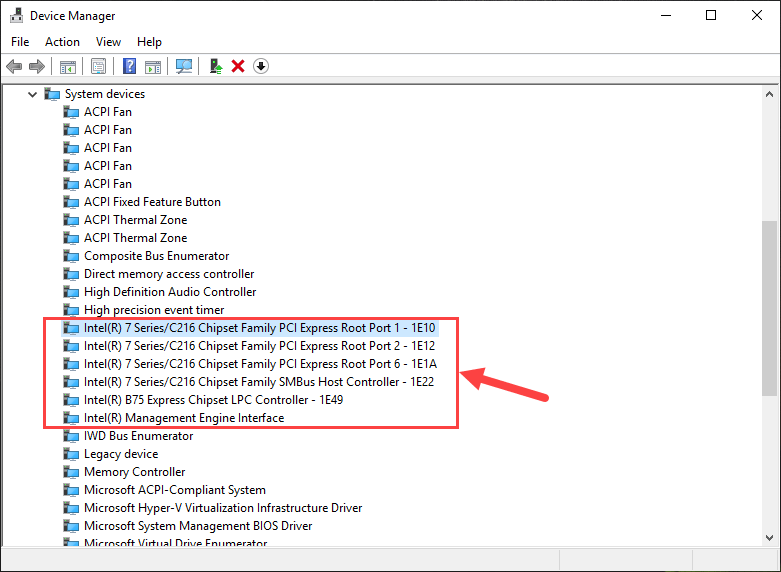
5) After updating your keyboard drivers, you should now make similar changes to the chipset drivers. In Device Manager, double-click System devices to expand its drop-down list.
6) Scroll through the list to locate the items related to your motherboard chipsets, as illustrated below. (Your devices may not be exactly the same as those shown in the following screenshot. In this case, simply update the items of similar titles.)
7) Right-click on each of these devices and select Update driver.
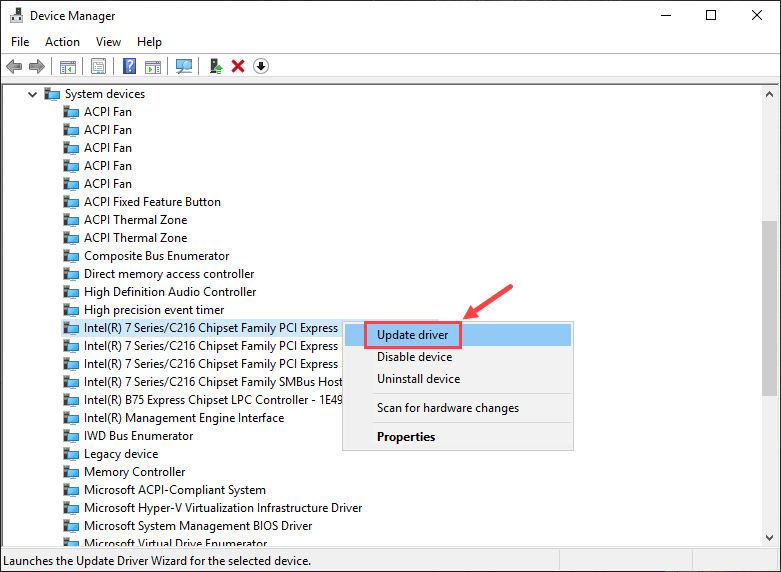
8) Repeat Step3 through Step 4 to update your chipset driver.
9) Make sure all of the chipset drivers are up-to-date. Now check to see if your Fn keys are functioning well.
Feeling reluctant to perform all these time-consuming updates? Try out the next option if you’d like to save your time and energy.
Option 2 – Update drivers automatically with Driver Easy
If you don’t have the time, patience or computer skills to update your chipset and keyboard drivers manually, you can do it automatically with Driver Easy.
Driver Easy will automatically recognize your system and find the correct drivers for it. You don’t need to know exactly what system your computer is running, you don’t need to risk downloading and installing the wrong driver, and you don’t need to worry about making a mistake when installing. Driver Easy takes care of everything.
You can update your drivers automatically with either the FREE or the Pro version of Driver Easy. But with the Pro version it takes just 2 clicks (and you get full support and a 30-day money back guarantee):
1) Download and install Driver Easy.
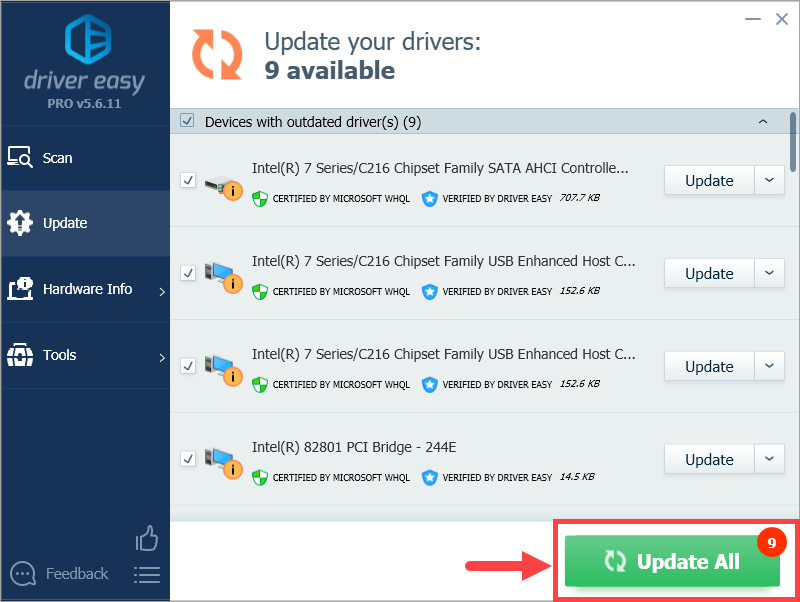
2) Run Driver Easy and click the Scan Now button. Driver Easy will then scan your computer and detect any problem drivers.

3) Click Update All to automatically download and install the correct version of all the drivers that are missing or out of date on your system (this requires the Pro version – you’ll be prompted to upgrade when you click Update All).
Note: you can do it for free if you like, but it’s partly manual.
So far, have you managed to solve your Fn keys issue? Please feel free to leave your comments below if you have follow-up questions or ideas. We’ll be more than glad to help you in any ways. Thanks for reading, and good luck to you all!