


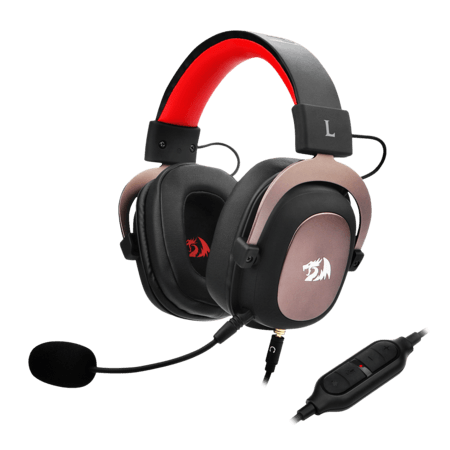
Having an issue of your microphone not working could be quite frustrating especially when you’re lost as to what is going on. In this post, we’ve put together a list of methods for you to try below and with a bit of luck, you’ll be able to get your Redragon headset microphone, such as the H510 Zeus back to work.
Before going any further, we suggest you initiate a restart. Sometimes a simple restart may fix the issue. If the problem persists, then try plugging your headset into another computer and try recording your voice, if it isn’t working, then there’s a chance that your headset is broken. In this situation, you may need to contact Redragon for a repair or replacement if it’s under warranty.
However, if your headset works on other devices except your own PC, try these fixes:
- Set your microphone as the default device
- Turn on app permissions for your microphone
- Update your audio driver
- Run the audio troubleshooter
1. Set your microphone as the default device
Oftentimes, when your microphone is connected, Windows can automatically detect it and set it as the default input device. But you may have multiple input or recording devices connected. It would occur to you that your computer is using another device instead of the one you’re attempting to use. In order to set your Redragon microphone as your input device, follow the instructions below:
1) At the bottom-right corner of your taskbar, right-click your speaker icon and select Open Sound settings.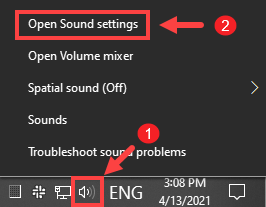
2) Scroll down to the section of Related Settings and click Sound Control Panel.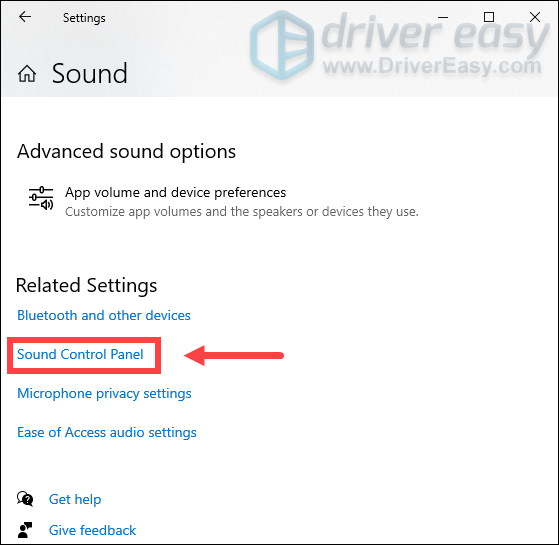
3) When the Sound window opens, select the Recording tab. Click on your microphone and then click Set Default > OK.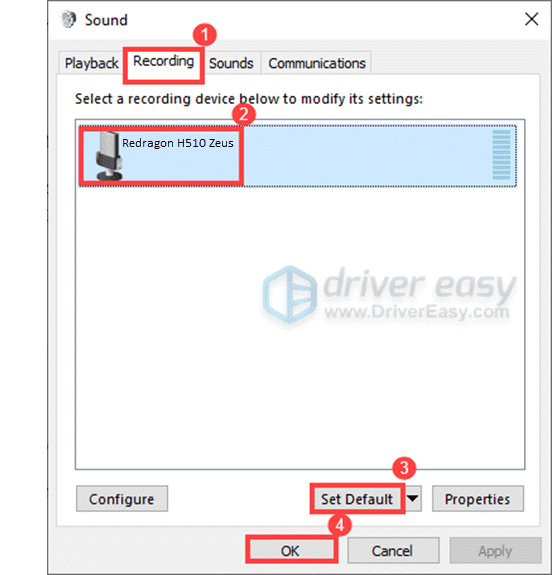
If that didn’t help, proceed to the next fix.
2. Turn on app permissions for your microphone
Normally, when your headset is plugged in, your system will detect it and your apps can access the microphone. But for some reasons, it may fail to do that. To check if your apps have access to your microphone, follow these steps:
1) Press the Windows + R keys simultaneously to open the Run box.
2) Click Privacy.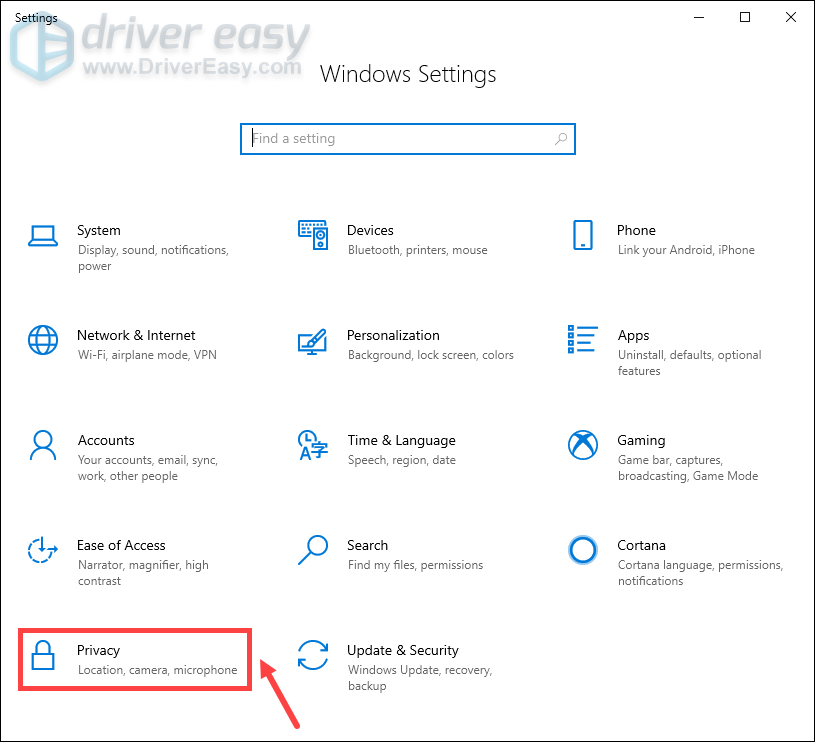
3) Click Microphone from the left pane. Then click on the Change button and click the toggle to make sure Microphone access for this device is turned on.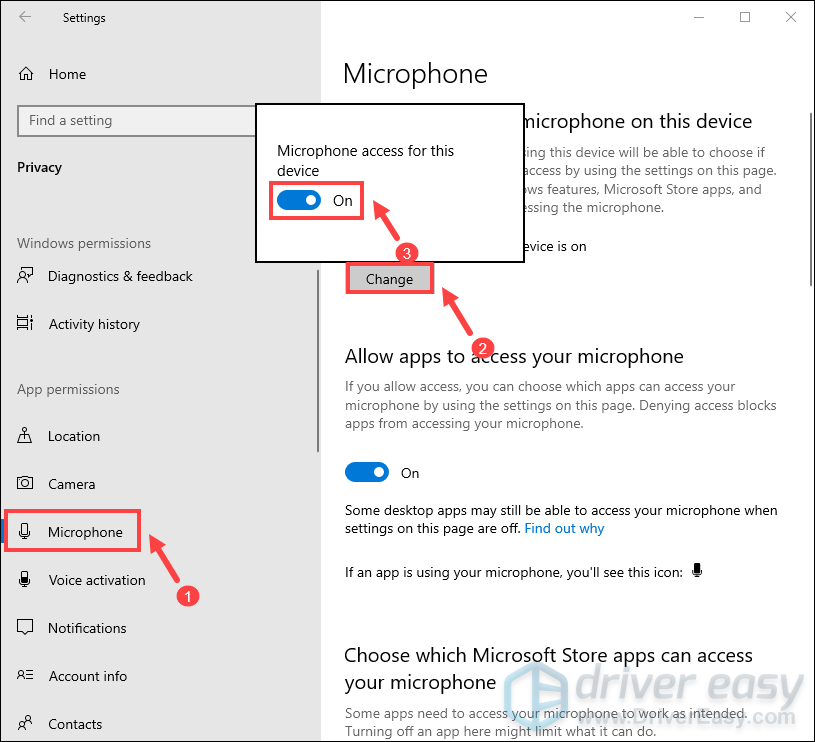
4) Under the Allow apps to access your microphone section, make sure it’s turned On.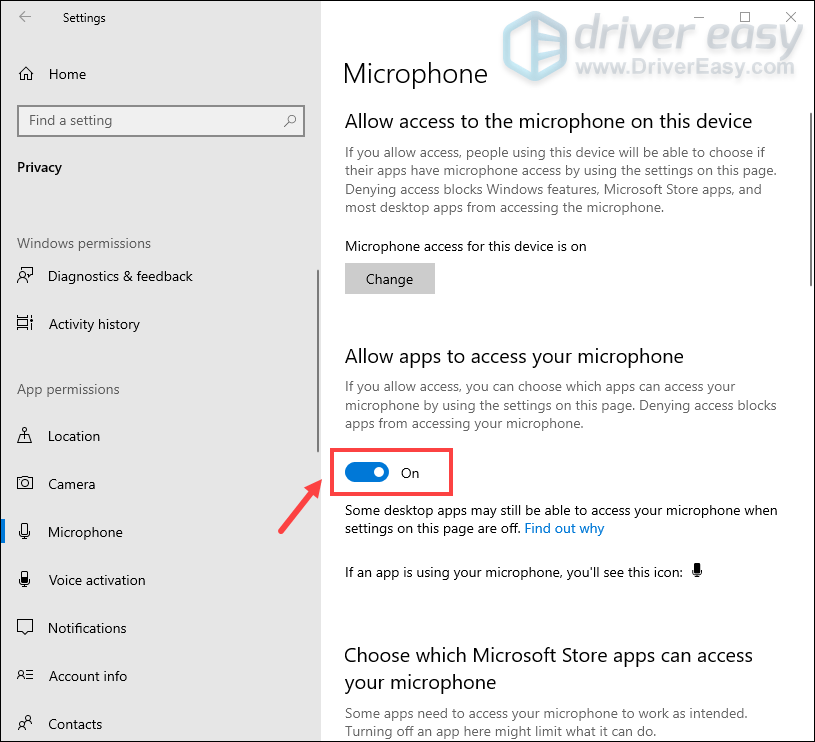
5) Once you’ve allowed microphone access to your apps, you can change the settings for each app. Simply head to the Choose which Microsoft apps can access your microphone, and turn on apps you want to use with it. For desktop apps, make sure that Allow desktop apps to access your microphone is turned On.
After you’ve done these, do a mic test. If it’s not functioning, try the next fix below.
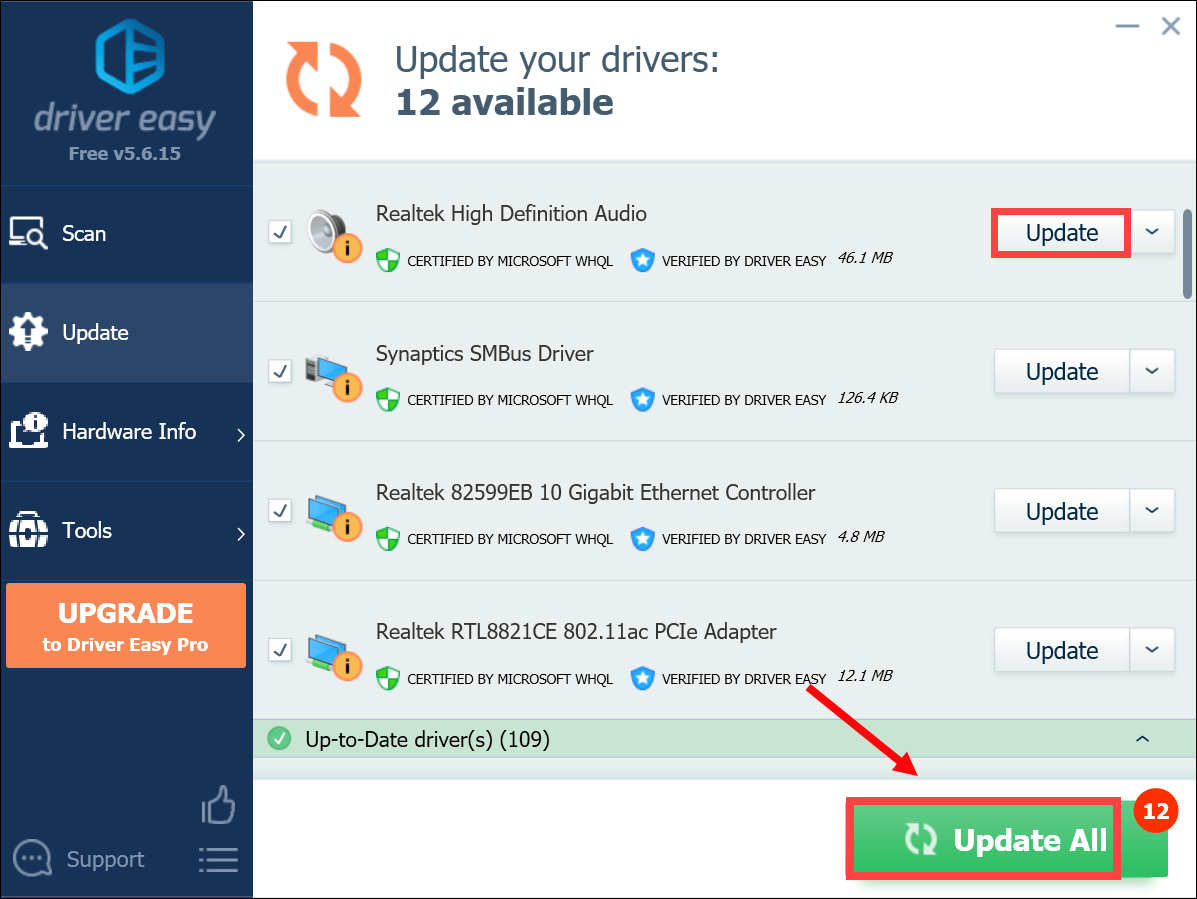
3. Update your audio driver
Your audio driver is an essential piece of software that lets your system communicate with the sound card. If it is outdated or misconfigured, it would cause noticeable performance problems. To solve your problems, you need to update your audio driver.
To update your audio driver, you can either do it manually via the Device Manager or head to the manufacturer’s driver download page to download and install the exact driver for your system. Or you can do this automatically with Driver Easy. It’ll help detect any outdated drivers, then download and install the latest drivers for your system.
Here’s how to update drivers with Driver Easy:
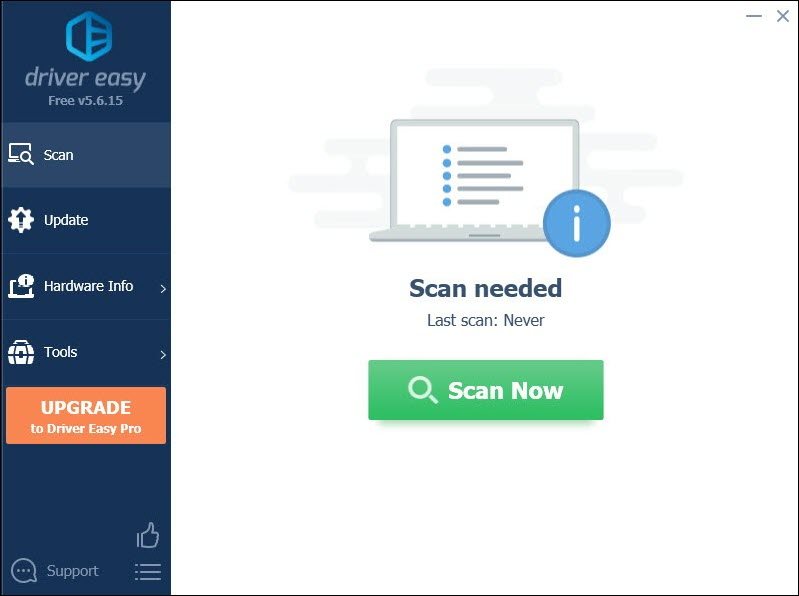
1) Download and install Driver Easy.
2) Run Driver Easy and click the Scan Now button. Driver Easy will then scan your computer and detect any devices with missing or outdated drivers.
3) Click Update All. Driver Easy will then download and update all your outdated and missing device drivers, giving you the latest version of each, direct from the device manufacturer.
(This requires the Pro version which comes with full support and a 30-day money-back guarantee. You’ll be prompted to upgrade when you click Update All. If you don’t want to upgrade to the Pro version, you can also update your drivers with the FREE version. All you need to do is to download them one at a time and manually install them. )
After updating your audio driver, restart your PC and do a mic test. If it isn’t functioning properly, try the next fix below.
4. Run the audio troubleshooter
When you run into audio or sound issues, using the troubleshooting tool can help you identify what’s going on. To run the audio troubleshooter, follow the instructions below.
1) In the search box on the taskbar, type audio troubleshooter. Then click Find and fix problems with playing sound from the results.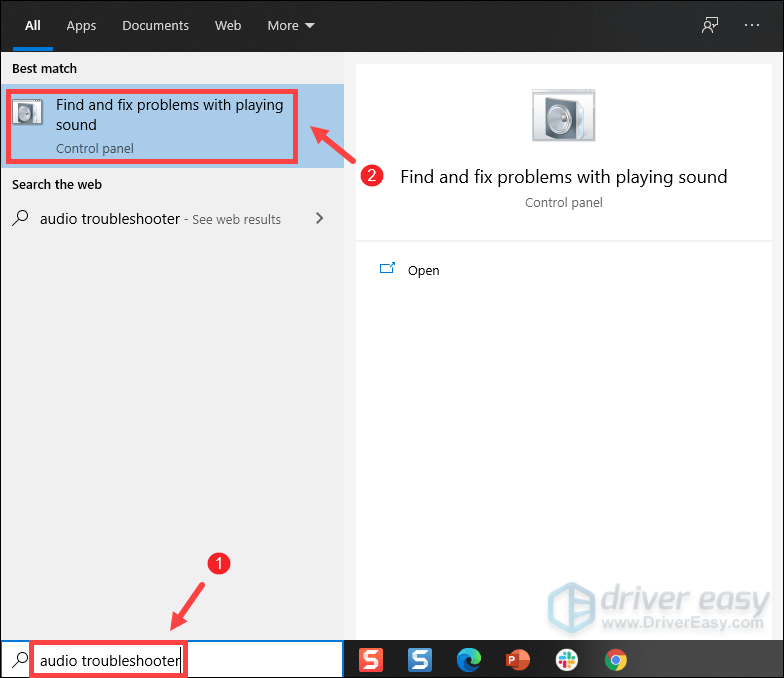
2) Select your device and click Next to start the troubleshooting process. Then wait for it to complete and you may be required to restart your computer.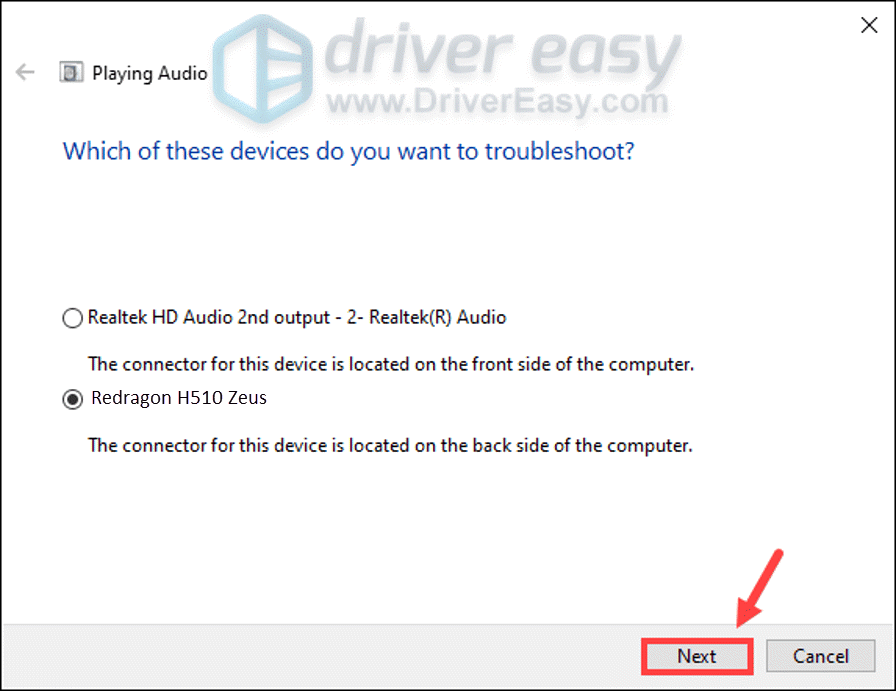
After the reboot, use your microphone and it should be working properly.
That’s it. Feel free to drop a comment below to let us know any fixes listed above worked for you. We also welcome alternate methods in case you’ve found one that worked for you.