


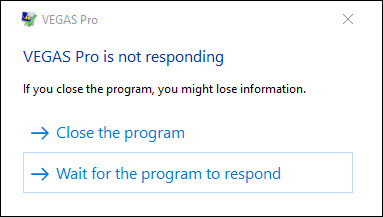
Many users have been reporting Vegas Pro keeps crashing while in use. Sometimes people may lose hours of work. The good news is, there are some known fixes available. Read on and find out what they are…
How do I fix it?
You don’t have to try all the fixes; just work your way down the list until you find the one that gives you luck!
- Delete temporary files in Windows
- Set priority to high for Vegas Pro
- Scan and repair system files
- Update your graphics card driver
- Import your footage via the Explorer window
- Customize Vegas Pro Settings
- Disable a CPU processor for Vegas Pro
Fix 1: Delete temporary files in Windows
Excessive temporary files in your system can sometimes take up a large space on your computer. Deleting all the temporary files in Windows could speed up your PC and help Vegas Pro run more stably. Here’s how:
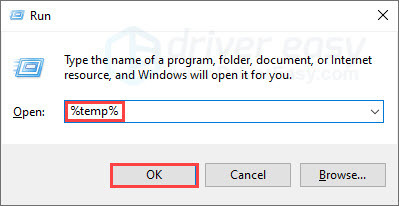
- On your keyboard, press Win+R (the Windows logo key and the R key) to invoke the Run box. Type or paste %temp% and click OK.
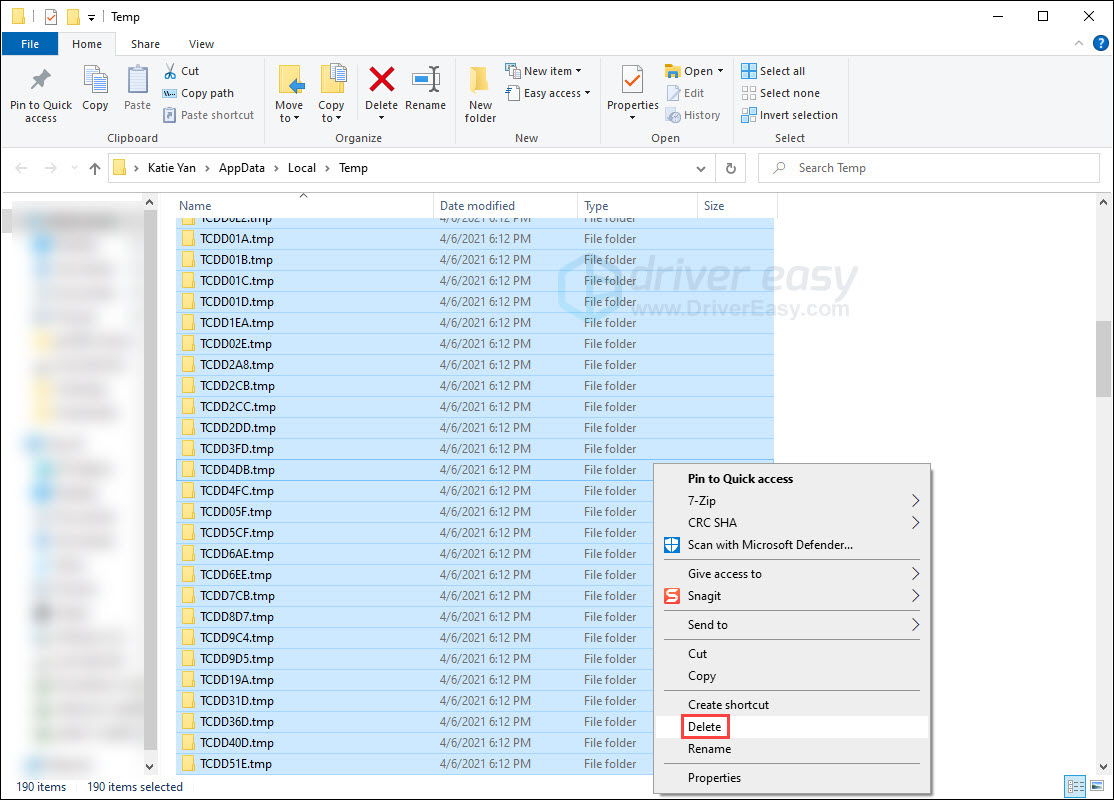
- In the pop-up window, press Ctrl and A to select all the temporary files. Then right-click the selected files and click Delete.
- Restart your PC.
Check if your Vegas Pro still crashes. If this doesn’t help, simply try the next solution.
Fix 2: Set priority to high for Vegas Pro
Assigning a higher priority to Vegas Pro will allow it to utilize more resources it needs. Also your PC will make sure the program is running in a stable environment, making it less likely to crash.
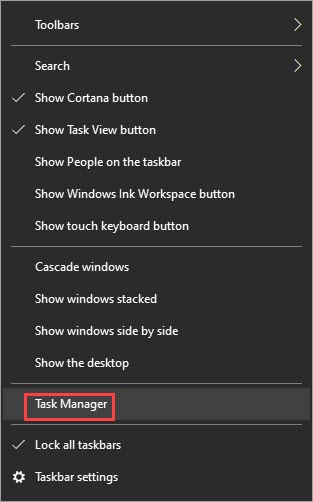
- Right-click anywhere empty on your taskbar, then click Task Manager.
- Switch to the Details tab, and scroll to find Vegas Pro. Then right-click the process and Set priority to high.
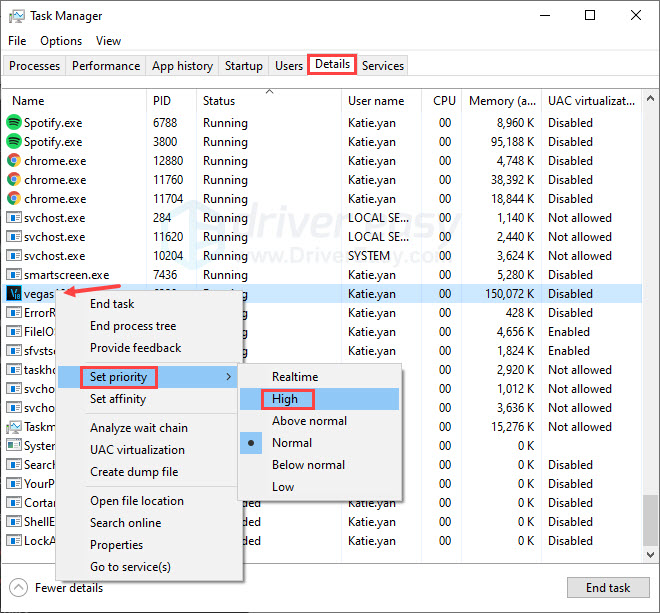
Run Vegas Pro to see if the problem persists. If it does, move on to the solution below.
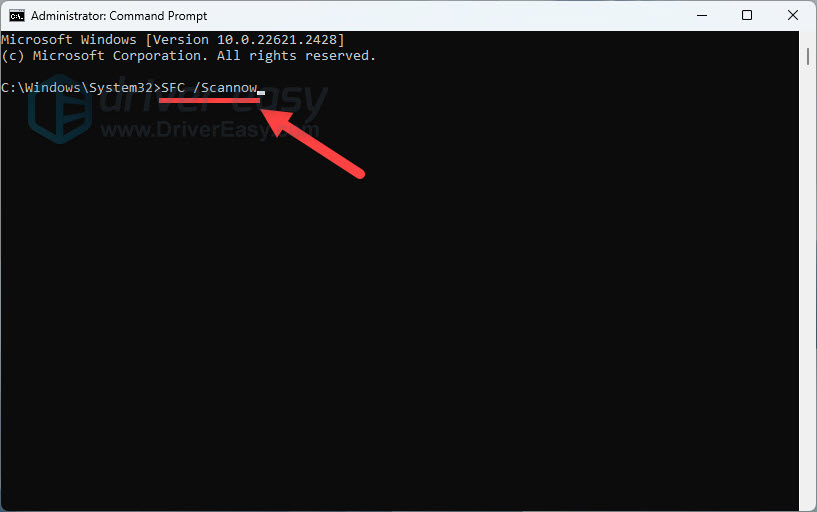
Fix 3: Scan and repair system files
The Sony Vegas Pro crashing issue could be triggered by corrupted Windows files. For basic troubleshooting, you can try running the sfc /scannnow command.
To do this, follow these steps:
- On your keyboard, press the Windows Logo key
 , type in command prompt, and select Run as administrator. (If Windows prompts for permission, click OK to continue.)
- Type in SFC /Scannow, and then press Enter.
- It’ll take some time for the SFC to repair the corrupted system files if it detects any.
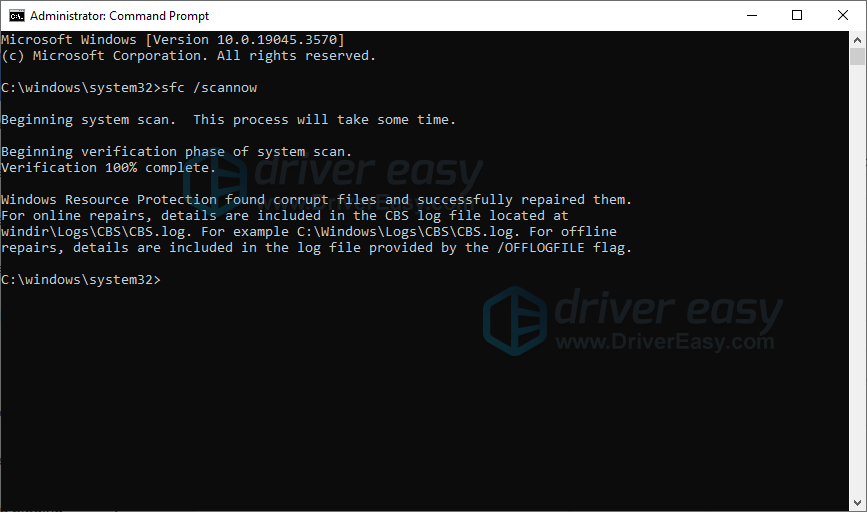
- When the process is completed, reboot your computer and test if the issue still exists.
Once done, restart your PC and check if Vegas crashes again.
If the issue is still there, you can move on to the next fix.
Fix 4: Update your graphics card driver
An outdated or faulty driver can cause a lot of problems including program crashing. In our case, you may want to update your graphics card driver, to make sure it’s functioning properly.
There are two ways you can get the right driver for your graphics card: manually or automatically.
Manual driver update – You can update your video card driver via Device Manager. If Windows doesn’t detect the latest available update for you, you can also search on the manufacturer’s website. Be sure to choose only the driver that is compatible with your Windows version.
Automatic driver update – If you don’t have the time, patience, or computer skills to update your drivers manually, you can, instead, do it automatically with Driver Easy. Driver Easy will automatically recognize your system and find the correct driver for your exact video card, and your Windows version and it will download and install the driver correctly:
- Download and install Driver Easy.
- Run Driver Easy and click the Scan Now button. Driver Easy will then scan your computer and detect any problem drivers.

- Click the Update button next to the flagged graphics card driver to automatically download the correct version of the driver, then you can manually install it (you can do this with the FREE version).
Or click Update All to automatically download and install the correct version of all the drivers that are missing or out of date on your system. (This requires the Pro version which comes with full support and a 30-day money-back guarantee. You’ll be prompted to upgrade when you click Update All.)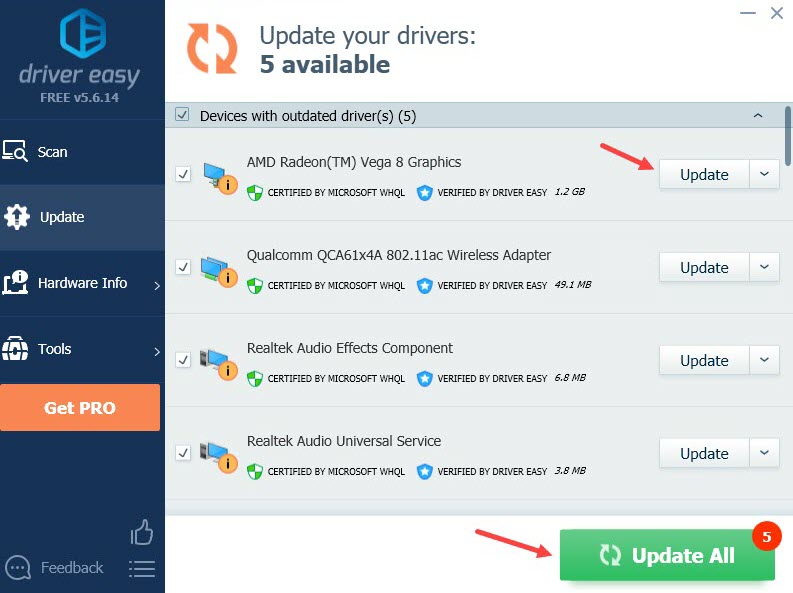
Restart your PC for the new driver to take effect. Run Vegas Pro to see if the problem persists. If this doesn’t work in your case, try the next solution.
Fix 5: Import your footage via the Explorer window
If you normally would import your footage from the Explorer window, then feel free to skip to the next fix. If not, and your Vegas Pro often crashes as you try to drag the clips from the folders directly onto the timeline, try this quick fix:
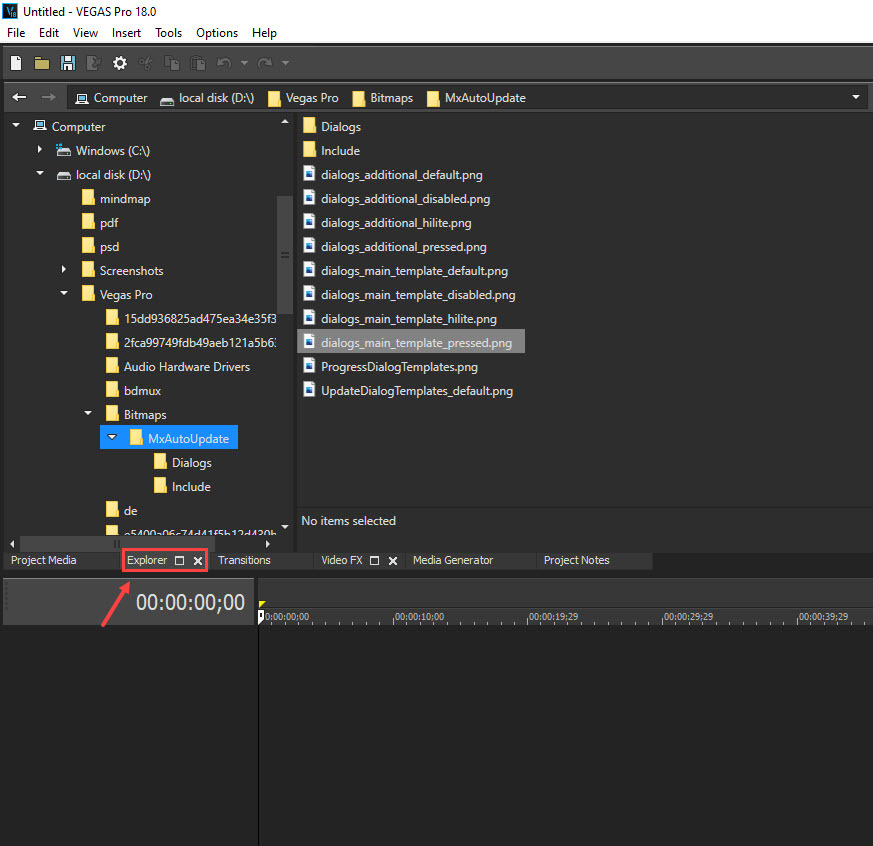
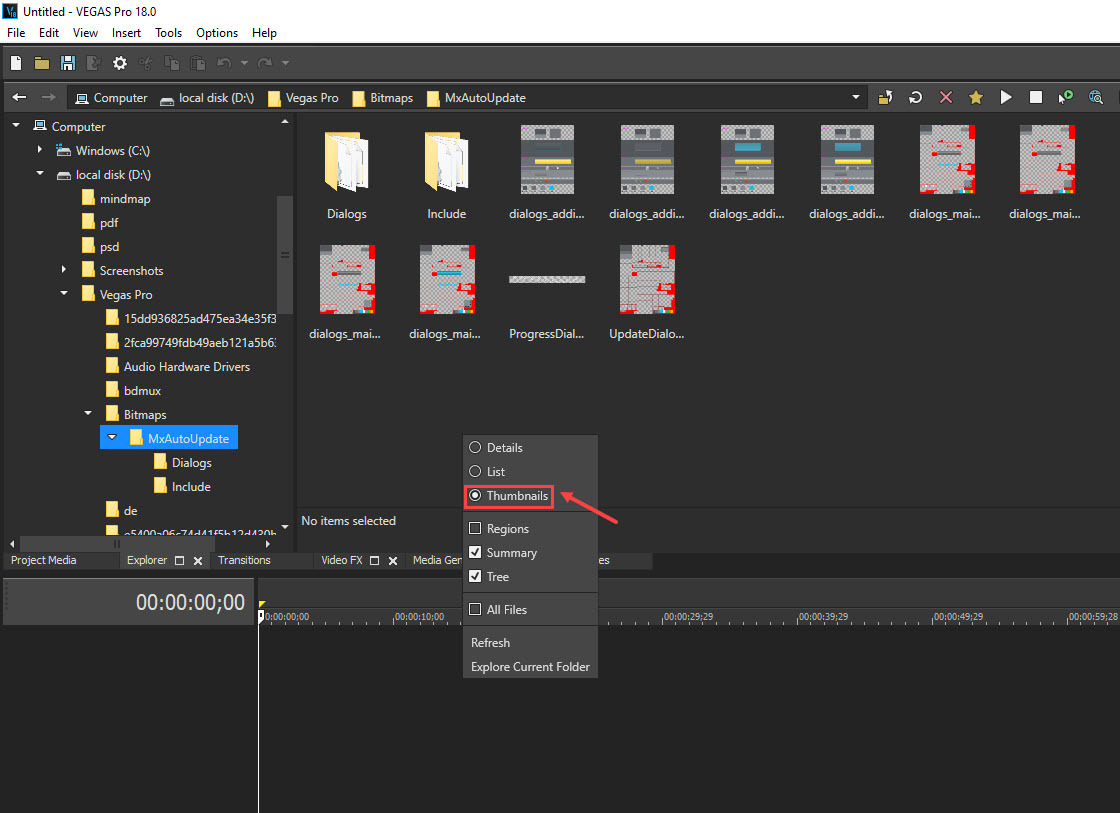
- Click Explorer, then you’ll be able to search files on your PC via the left-side navigation panel. (If you can’t find the Explorer button, press Alt and 1 to enable the Explorer window.)
- Right-click an empty area in which the files are displayed, then select Thumbnails. You’ll be able to view all the files clearly and drag your clips onto the timeline as well.
This is a useful tip to avoid possible crashes, at least you won’t have to wait long for the import to complete when the files are large. However, if your Vegas Pro still won’t run properly, move on to the next solution.
Fix 6: Customize Vegas Pro Settings
There are a few settings within Vegas Pro that you can customize which may reduce the possibility of crashing. You don’t have to touch every single setting here if adjusting some of them could solve your problem, but there would be no harm in trying them all.
1: Adjust hardware-related settings
2: Disable multi-core rendering
1: Adjust hardware-related settings
You can modify these settings based on your PC specifications, and they would usually help the program run smoother even if your Vegas Pro doesn’t crash a lot.
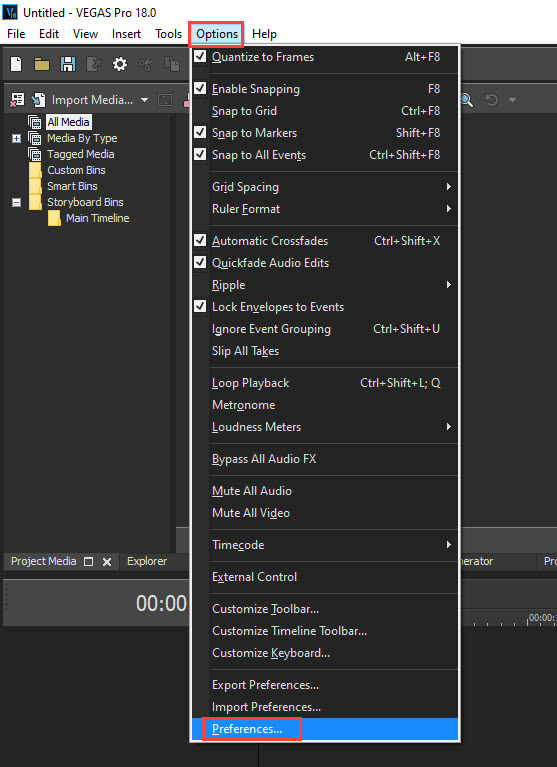
- On the toolbar, click Options then select Preferences.
- Switch to the Video tab, adjust the Dynamic RAM Preview max (MB) value. You can set a value that’s between 1/3 to 1/2 of your maximum RAM available.
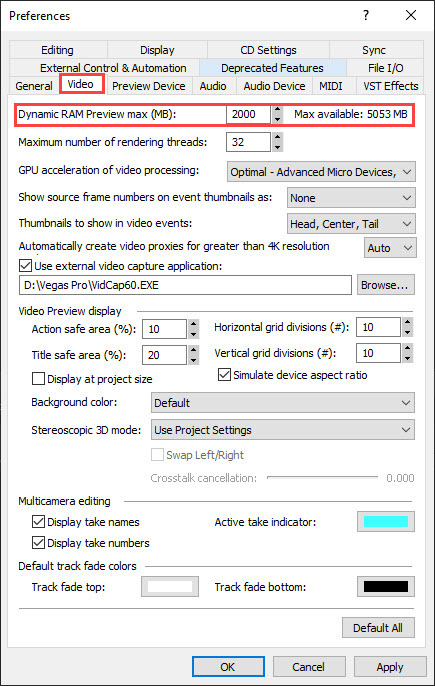
- Turn Off the GPU acceleration of video processing. Click Apply then OK.
Note that GPU acceleration does make things faster, but it could also increase system instability. So it’s not a good idea to turn it on if you experience constant crashes. However, if you have a powerful GPU, you could try to turn the acceleration on and off to see which way works better in your case.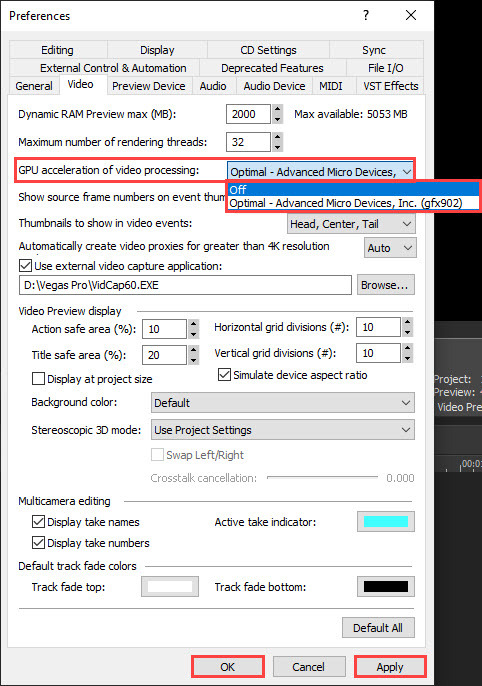
If you’re only trying to adjust this part of the settings, restart Vegas Pro to test if the issue returns. Or you could move on to work with other settings below.
2: Disable multi-core rendering
Vegas Pro is CPU-intensive, and it’s set to default so that the program can use all cores to process. But if it’s crashing constantly, you could try to disable multi-core rendering. Some users have reported that modifying this option is particularly helpful for Vegas Pro crashing when they try to render their video.
- On the left side of your keyboard, hold Ctrl and Shift, and click Options. Then click Internal.
(For versions before Vegas Pro 18, you may first click Options. Then hold Ctrl and Shift and click Preferences. You’ll see the Internal tab in the Preferences window.)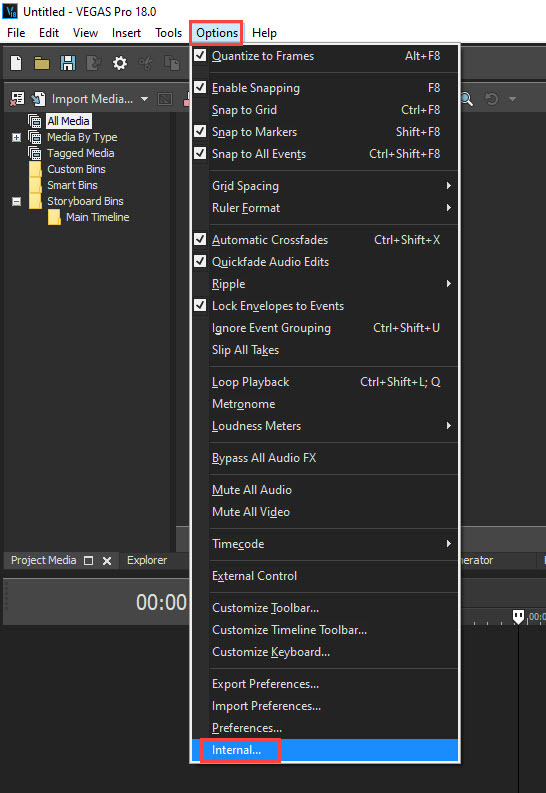
- Type multi-core in the search bar at the bottom.

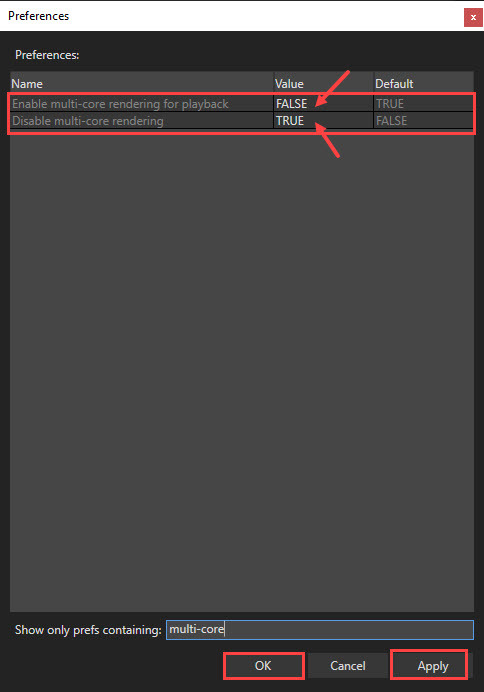
- For Enable multi-core rendering for playback, change the value to FALSE; for Disable multi-core rendering, set the value to TRUE. Then click Apply and OK.
Restart Vegas Pro to make sure the changes are saved, then check if your problem persists. If this doesn’t seem to help, try the next fix.
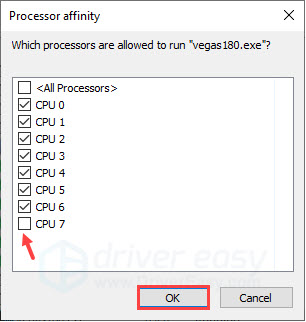
Fix 7: Disable a CPU processor for Vegas Pro
As we mentioned above, video editing programs like Vegas Pro require intensive CPU resources. Normally we’d want to allocate as many resources as possible to Vegas Pro, but it’s not the case if the program keeps crashing and you can’t identify the cause. Instead, you can try to disable one CPU core for Vegas Pro to see if it helps:
- Right-click on your taskbar, then click Task Manager.
- Switch to the Details tab and scroll to find Vegas Pro. Right-click the process then select Set affinity.
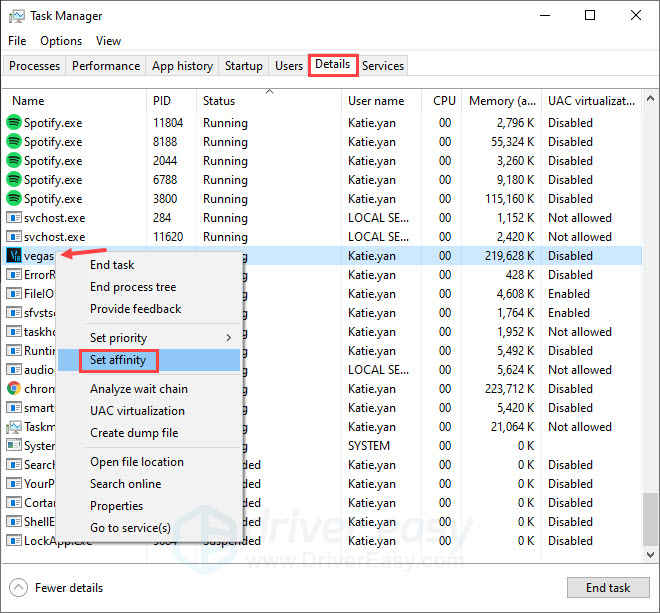
- Uncheck any one box of the CPU processor, then click OK.
Run Vegas Pro to see if the problem is solved.
Hopefully, this article helps! Please feel free to leave a comment if you have any questions or suggestions.