With Fortnite new season available, players have so much fun completing a mission in exchange for some bars. But when the audio is delayed or cutting out, it definitely affects the gameplay. To help rule out the causes, we’ve gathered some fixes in this post.
Try these fixes
You may not need to try them all; simply work your way down the list until you find the one that helps you solve the issue.
- Disable audio enhancements in Windows
- Update your audio driver
- Verify your game files
- Disable fullscreen optimizations & high DPI scaling
- Set priority to normal

Fix 1: Disable audio enhancements in Windows
Audio enhancement packages are aimed to enhance your audio performance. But this feature sometimes causes problems with audio and sound. If you encounter any audio issues, you can try disabling audio enhancements.
Here’s how:
1) In the right-bottom toolbar, right-click on the volume icon and select Open Sound settings.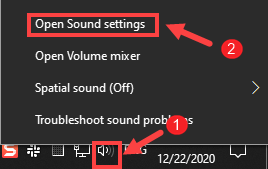
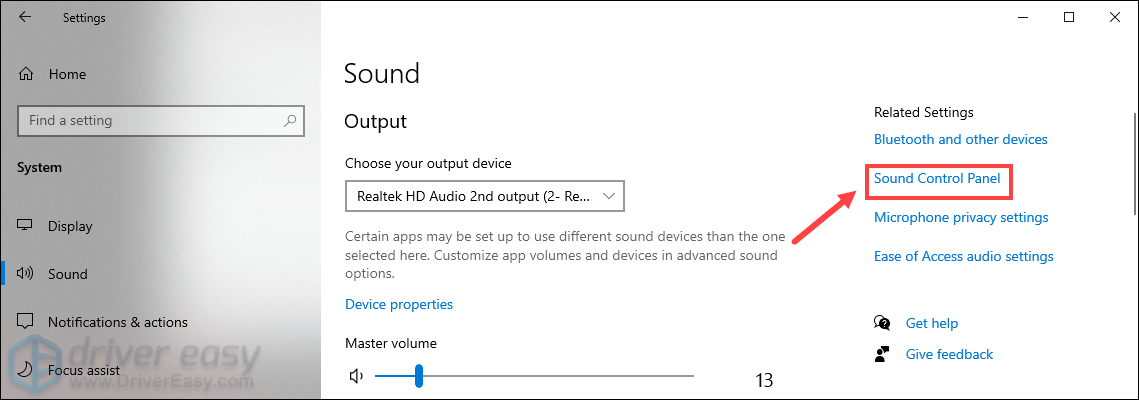
2) Click Sound Control Panel on the right side of the window.
3) In the Playback tab, double-click on the speaker you’re currently using.
(Or you can choose the device and then click Properties.)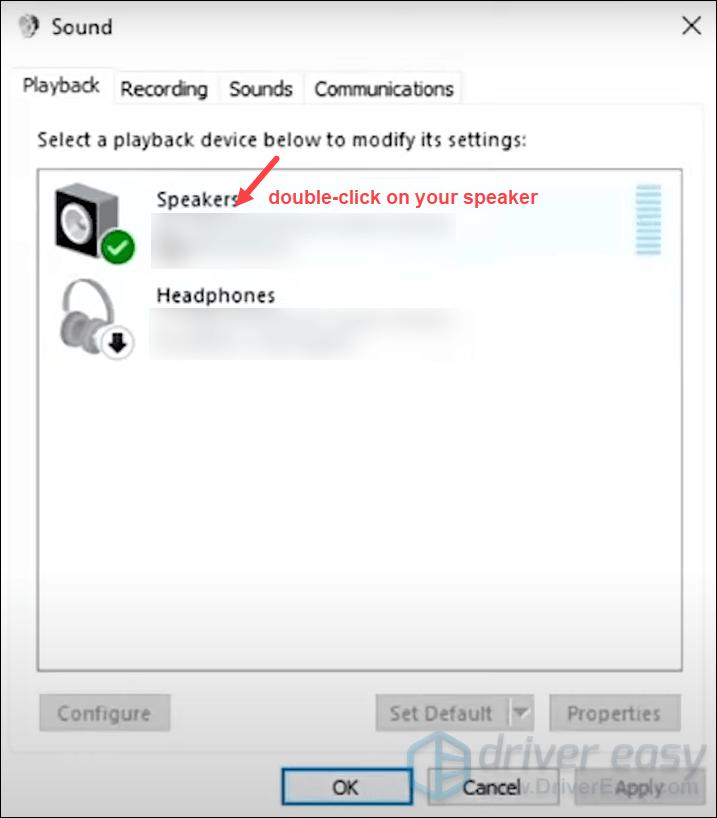
4) In the Properties window, select the Enhancements tab. Then check the option Disable all enhancements.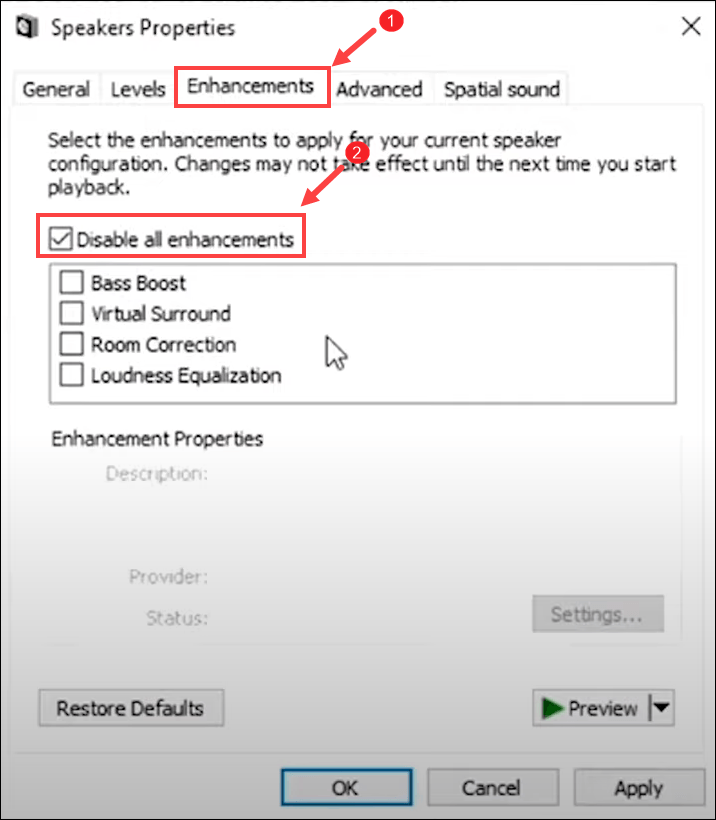
5) Select the Advanced tab. Click on the down arrow and choose the first value 16 bit, 44100 Hz (CD Quality) on the list.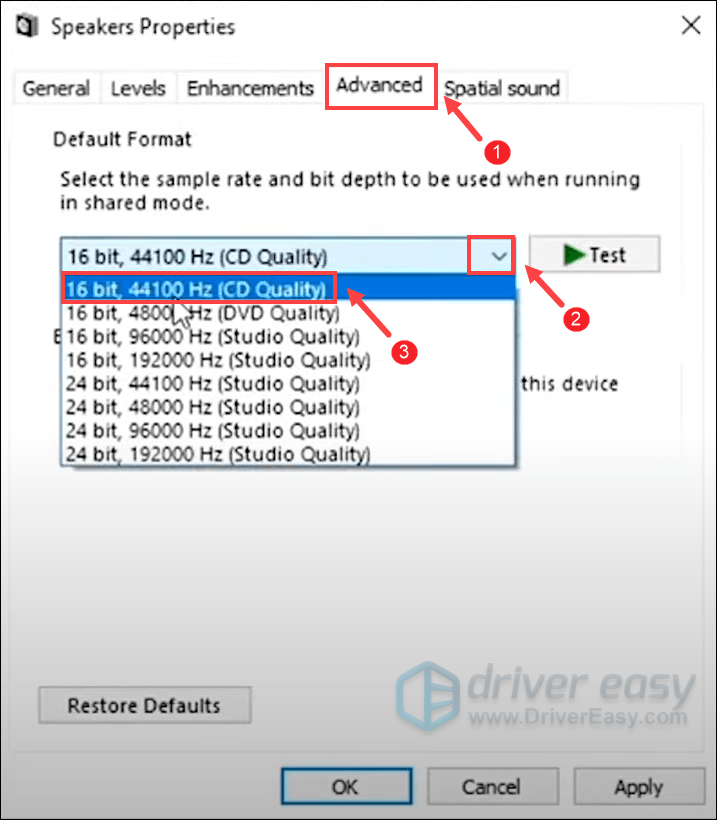
Once done, simply click Apply > OK. This should reduce audio dropouts. If it didn’t help you solve the issue, proceed to the next fix.
Fix 2: Update your audio driver
The audio issue in your game may indicate that you’re using an audio driver that is out of date. If you can’t remember when was the last time you updated your drivers, then definitely do it now as this would fix your issue right away.
There are mainly two ways you can update your graphics driver: manually and automatically.
Option 1: Manually update your audio driver
You can update your audio driver manually via Device Manager or go to your device’s manufacturer’s official website to download and install the correct driver for your system.
Option 2: Automatically update your audio driver (recommended)
Updating drivers manually can be time-consuming because you need to find out the correct driver corresponding with your system. So if you are not comfortable doing this on your own, we recommend Driver Easy as your great pick.
It’s a useful tool that automatically detects any outdated drivers, then downloads and installs the latest drivers for your system. You don’t need to know exactly what system your computer is running or risk downloading and installing the wrong driver.
Here’s how it works:
1) Download and install Driver Easy.
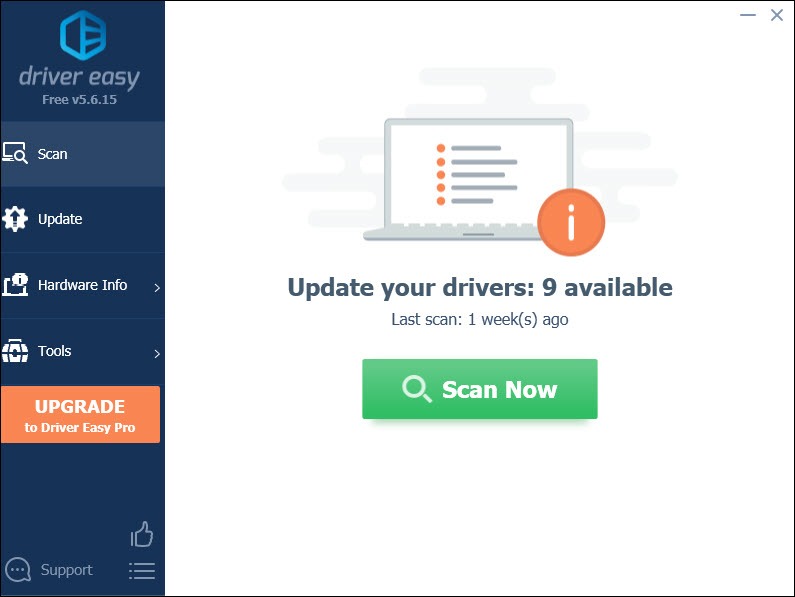
2) Run Driver Easy and click the Scan Now button. Driver Easy will then scan your computer and detect any problem drivers.
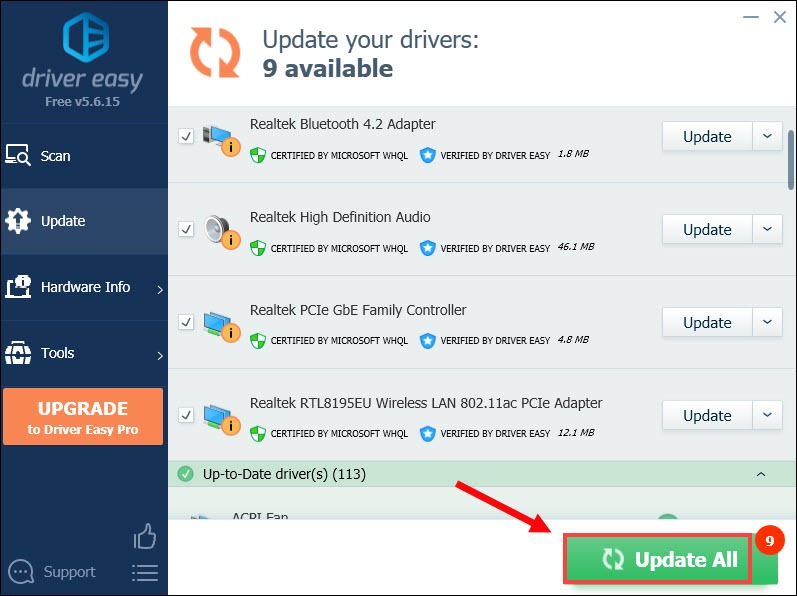
3) Click Update All to automatically download and install the correct version of all the drivers that are missing or out of date on your system.
(This requires the Pro version which comes with full support and a 30-day money-back guarantee. You’ll be prompted to upgrade when you click Update All. If you don’t want to upgrade to the Pro version, you can also update your drivers with the FREE version. All you need to do is to download them one at a time and manually install them.)
After updating your drives, restart your computer for them to take effects. Then you can play your game and test if updating drivers helps you fix the issue.
Fix 3: Verify your game files
If updating the audio driver didn’t help you solve the issue, it could be that your game files are corrupted. This would happen either on an update installation for Fortnite or even just when changing your rendering mode. So to ensure this isn’t the case, you should verify your game files.
1) Navigate to the game in your Library. Then click on the three dots. Once open, click Verify in the drop-down navigation.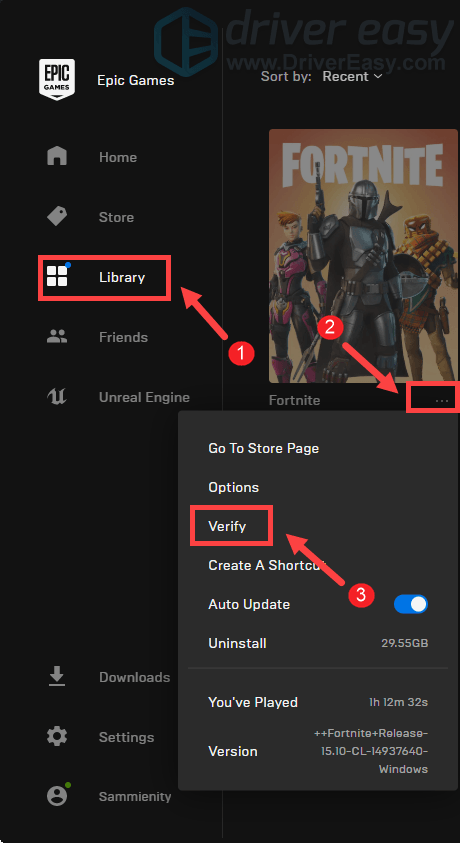
Depending on the size of the game, it may take a few minutes to verify all your files. Once it completes, click Launch to start your game. 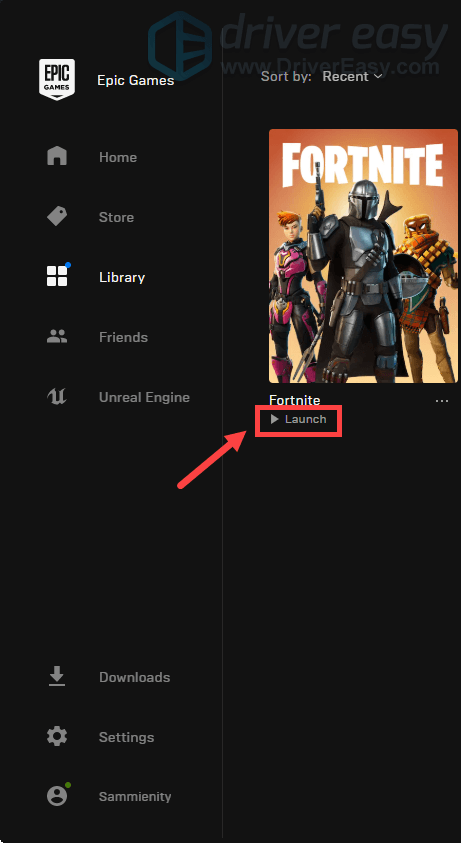
Fix 4: Disable fullscreen optimizations & high DPI scaling
Fullscreen optimization is a Windows 10 feature designed to improve your PCs performance during gaming sessions. But there are certain games that are particularly affected by low FPS issues when players enable fullscreen optimizations. And when this feature is enabled, you may encounter other issues including the delayed audio or audio cutting out. To fix it, you should disable it.
1) Open your game’s installation folder. It should be in C: drive > Program Files > Epic Games > Fortnite > Binaries > Win64.
2) Navigate to FortniteClient-Win64-Shipping.dll. Right-click it and select Properties.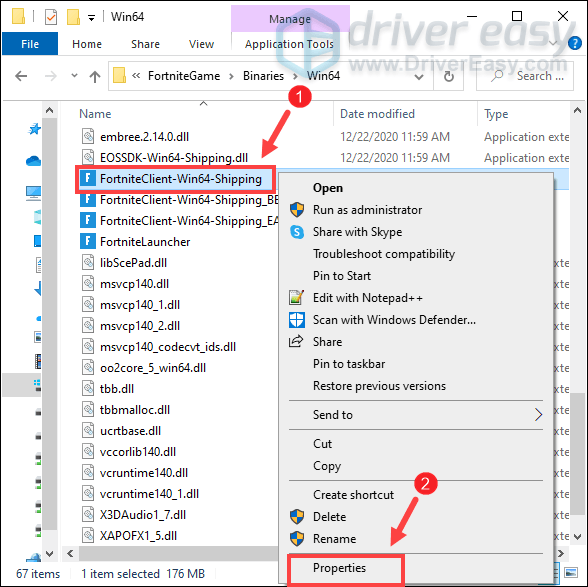
3) Select the tab Compatibility tab. Check the option Disable fullscreen optimizations. Then click Change high DPI settings.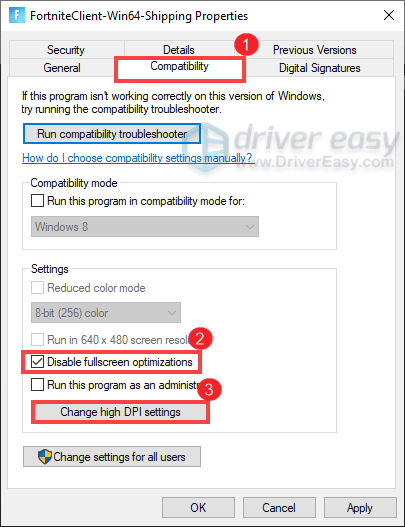
4) Check the option Override high DPI scaling behavior and then click OK.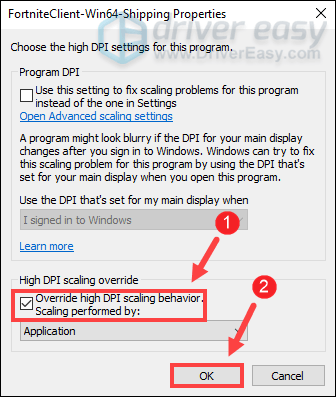
5) Click Apply > OK to save the changes.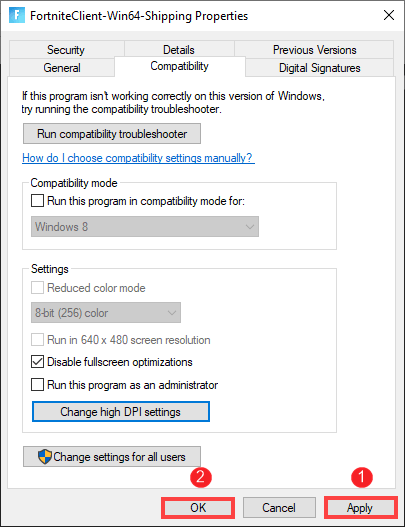
Now do the same with FortniteClient-Win64-Shipping_BE, FortniteClient-Win64-Shipping_EAC and FortniteLauncher.

Fix 5: Set priority to normal
To fix the audio issues in the game, you need to ensure that Fortnite is running at a normal priority. If you set the priority to high, your game would probably be stuttering and it can induce audio dropouts. To make sure that’s not your case, take these steps:
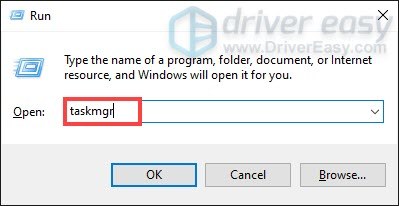
1) On your keyboard, press the Windows logo key and R at the same time to open the Run dialog box.
2) Type taskmgr and press Enter.
3) Under the Processes tab, navigate to the Fortnite application. Right-click it and select Go to details. (Make sure that you have the game open, otherwise you won’t be able to see the Fortnite application under the tab.)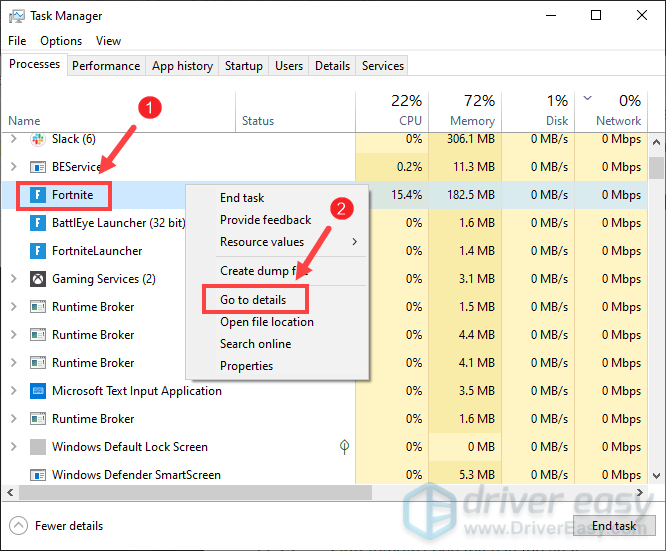
4) You’ll be directed to the Details tab and FortniteClient-Win64 is highlighted. Right-click it and select Set priority > Normal.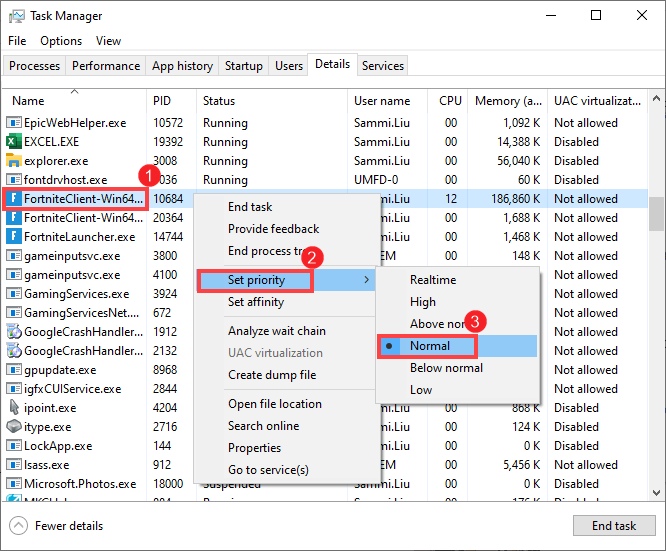
Once you’ve done these, launch your game and test if this stops the delayed audio and the audio cutouts.
Found this post helpful? Then don’t forget to support us by using the creator code DRIVEREASY. In connection with Epic Games’ Support-A-Creator Program, we may earn a commission from your in-game purchases, with no additional cost to you.
How can you support us?
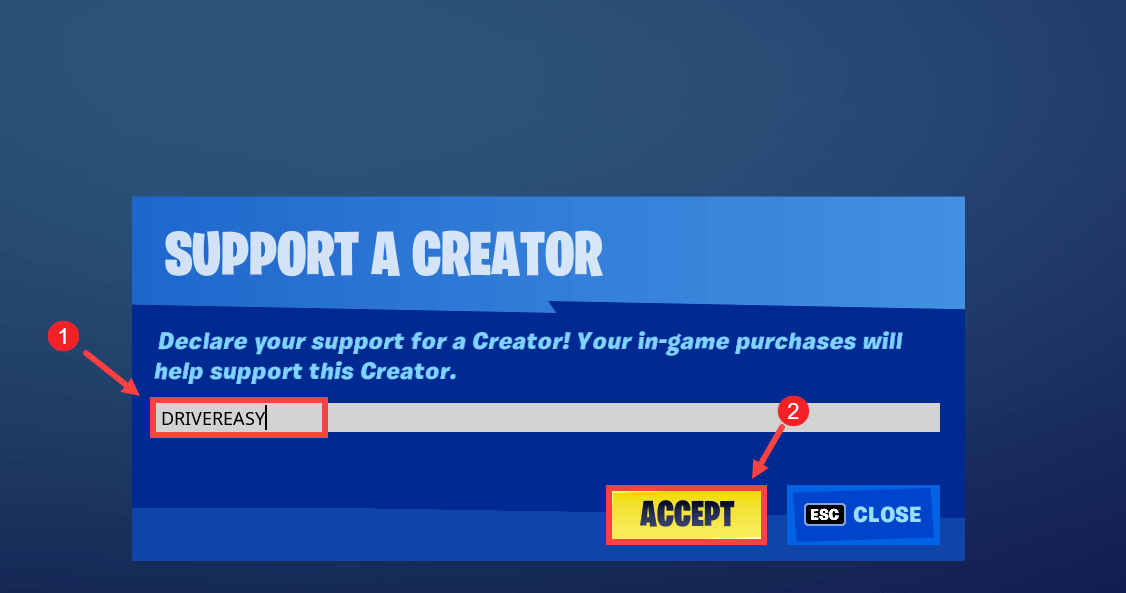
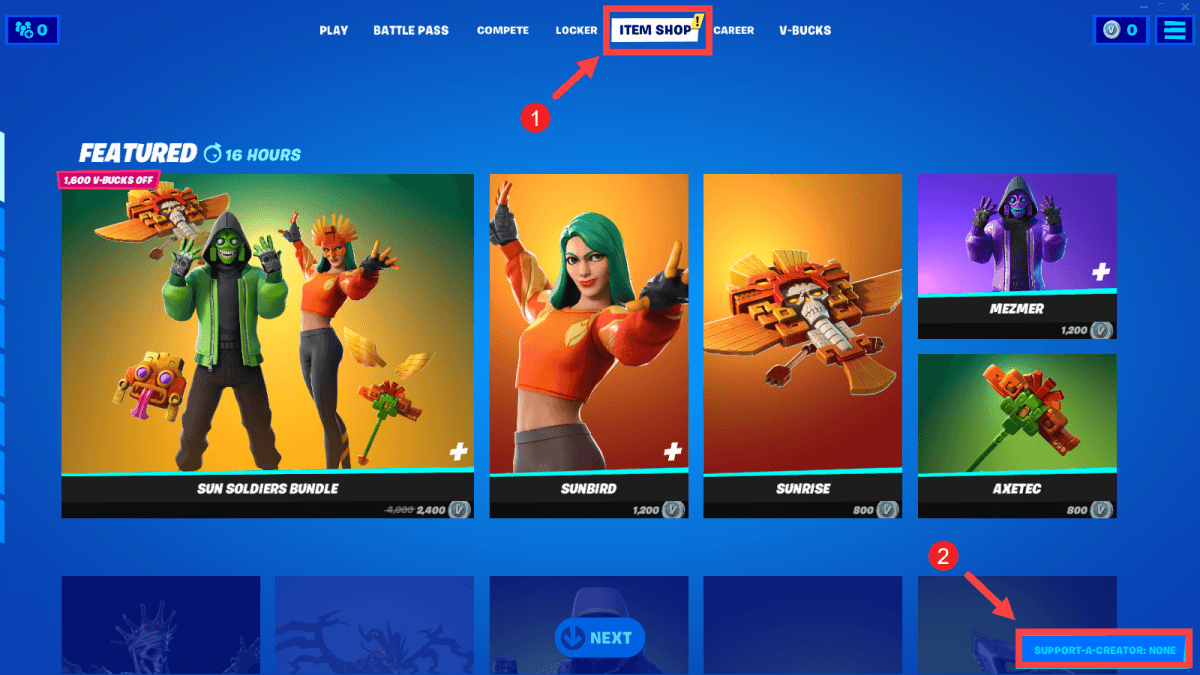
1) Launch Fortnite. Select ITEM SHOP. Then, from the bottom-right corner of the screen, click SUPPORT-A-CREATOR.
2) Type or paste DRIVEREASY into the dialogue box and then click ACCEPT.
That’s it! Your support is much appreciated!