


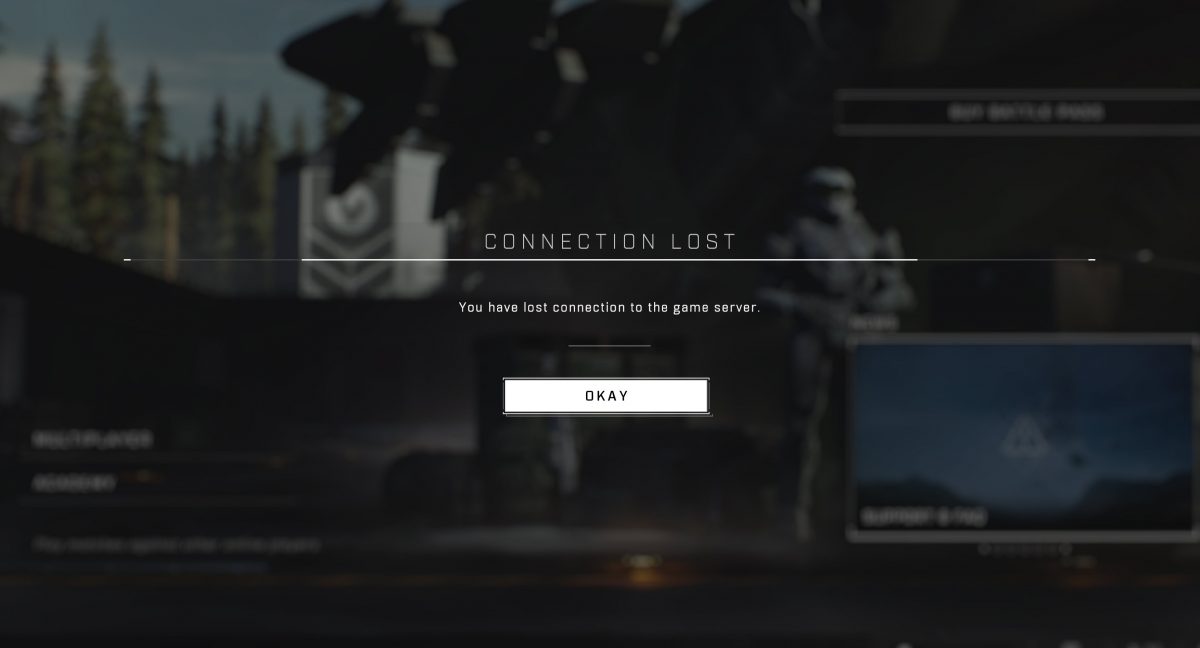
Many Halo Infinite players are reporting that they get the connection lost error when they try to join a multiplayer match. If you’re facing the same issue, don’t worry. Here we’ll walk you through the steps to fix your server connection problem.
Try these fixes
You don’t have to try them all. Simply work your way down the list until you find the one that does the trick.
- Check server status
- Reboot your network
- Update your network driver
- Use a VPN
- Try a different DNS
- Check NAT type status
Fix 1: Check server status
The Halo Infinite connection lost error could be either caused by the servers or by your Internet connection. So before you begin to troubleshoot the issue, make sure the servers are not down. You can check the server status on Halo Infinite official support Twitter page @HaloSupport or Downdetector site.
If the servers are down, there’s little you can do but wait until 343 Industries fix things up.
After confirming the servers are up, proceed to the following fixes.
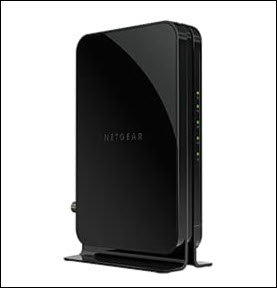
Fix 2: Reboot your network
If you’re having trouble connecting to game servers, the quickest way you can do is to restart your network devices. This helps create a new connection to your internet service provider (ISP). Here’s how:
- Unplug your modem and router.
modem
- Wait at least 30 seconds.
- Plug the modem back in followed by the router.
Once the indicators are back to their normal state, restart your PC and check If you’re able to connect to the game server.
If the issue persists, move on to the next fix.
Fix 3: Update your network driver
If your network adapter driver is faulty or outdated, you’ll possibly encounter the ‘Connection Lost’ error in Halo Infinite. To fix the potential problem and enjoy less lagging, you should install the latest network driver on your computer.
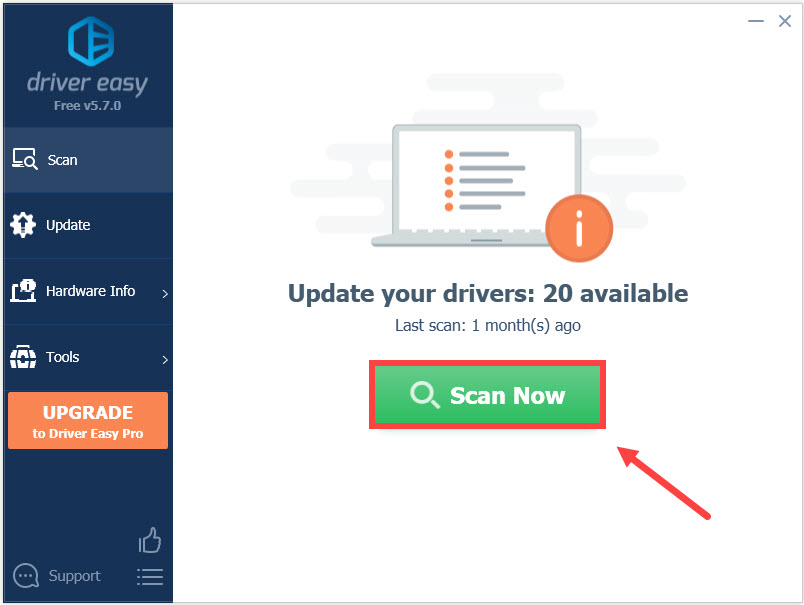
One way to do that is to visit the motherboard manufacturer’s website and search for your model, then download and install the network driver manually. But if you don’t have the time, patience or computer skills to update the driver manually, you can do it automatically with Driver Easy.
Driver Easy will automatically recognize your system and find the correct drivers for your exact network card, and your Windows version, and it will download and install them correctly:
- Download and install Driver Easy.
- Run Driver Easy and click the Scan Now button. Driver Easy will then scan your computer and detect any problem drivers.
- Click Update All to automatically download and install the correct version of all the drivers that are missing or out of date on your system. (This requires the Pro version — you’ll be prompted to upgrade when you click Update All.)
Or click the Update button next to the flagged network driver to automatically download the correct version of that driver, then you can manually install it (you can do this with the FREE version).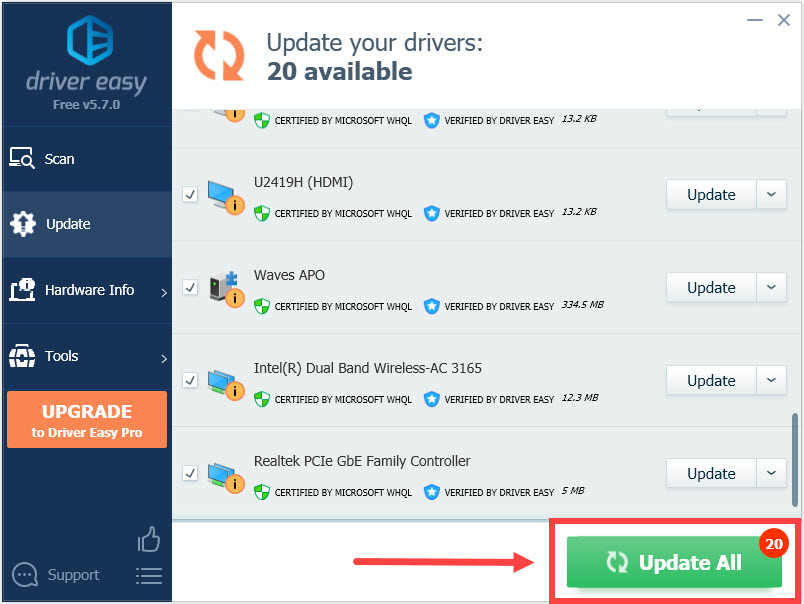
Once you’ve updated your network driver, restart your PC and check if you can connect to the game server.
If your problem persists, continue with the next fix.
Fix 4: Use a VPN
Your Internet Service Provider may limit your bandwidth during peak hours and cause you unable to connect to the game server. If that’s the case, consider using a VPN. A VPN can help you bypass bandwidth throttling and establish a stable and fast connection between your PC and game servers.
Here’re some gaming VPNs we recommend:
- NordVPN (The fastest VPN on the market)
- CyberGhost VPN (45-day money-back guarantee)
- SurfShark VPN (7-day free trial)
If you’ve already used a VPN and still get the ‘Connection Lost’ error message, try the next fix.
Fix 5: Try a different DNS
The Domain Name System or DNS is the phonebook of your Internet, which can turn domain names into IP addresses. If something goes wrong with the DNS you’re using, you may have trouble connecting to the Internet. To fix it, you can switch your DNS to a different one, like Google Public DNS. Here’s how:
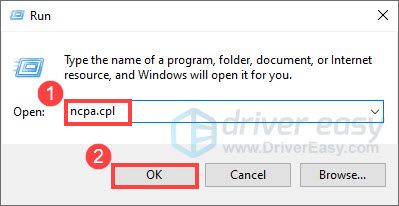
- On your keyboard, press the Windows logo key and R at the same time to invoke the Run dialog. Then type ncpa.cpl and click OK.
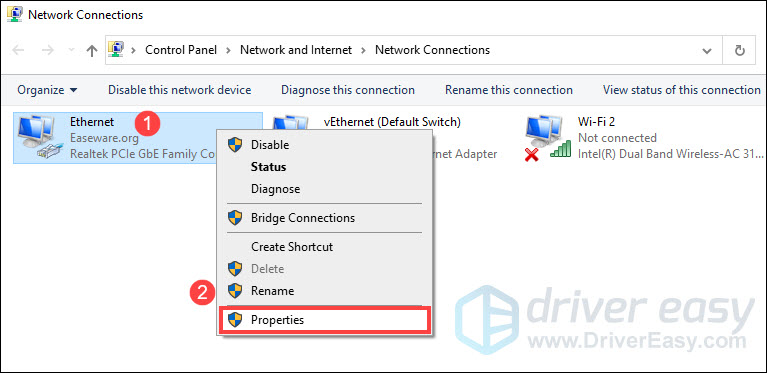
- Right-click your current network and select Properties.
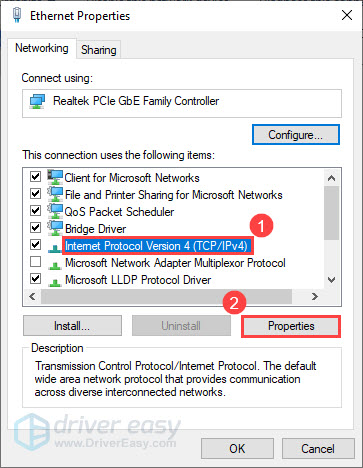
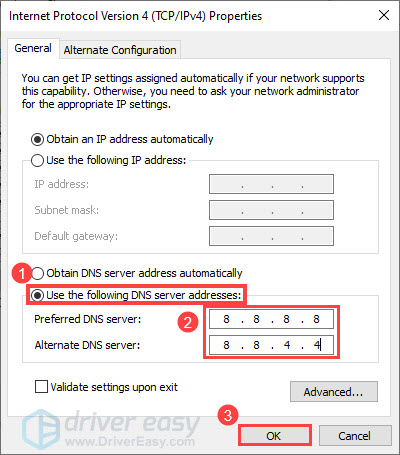
- Select Internet Protocol Version 4 (TCP/IPv4) and click Properties.
- Select Use the following DNS server addresses:. For Preferred DNS server, type 8.8.8.8; and for Alternate DNS server, type 8.8.4.4. Click OK to save the changes.
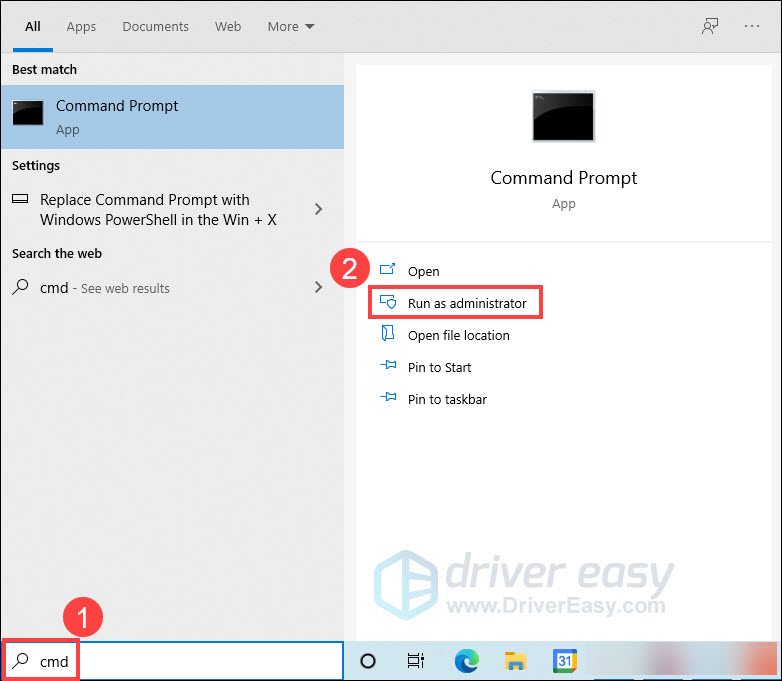
- Then you have to clear the DNS cache for the changes to apply. On your keyboard, press the Windows logo key and type cmd. Select Run as administrator.
- In the pop-up window, type in ipconfig /flushdns. Press Enter.
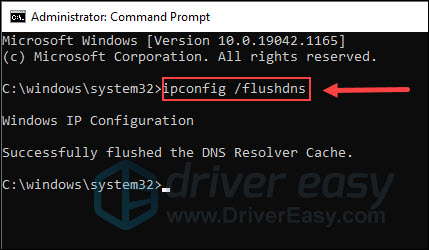
Once done, try launching Halo Infinite again and check if you can connect to the game server.
If this method doesn’t solve your problem, check out the last fix.
Fix 6: Check NAT type status
Some players found that you may encounter server connection issues in Halo Infinite if your Network Address Translation(NAT) type says Teredo is unable to qualify. To view your NAT type, you can follow these steps:
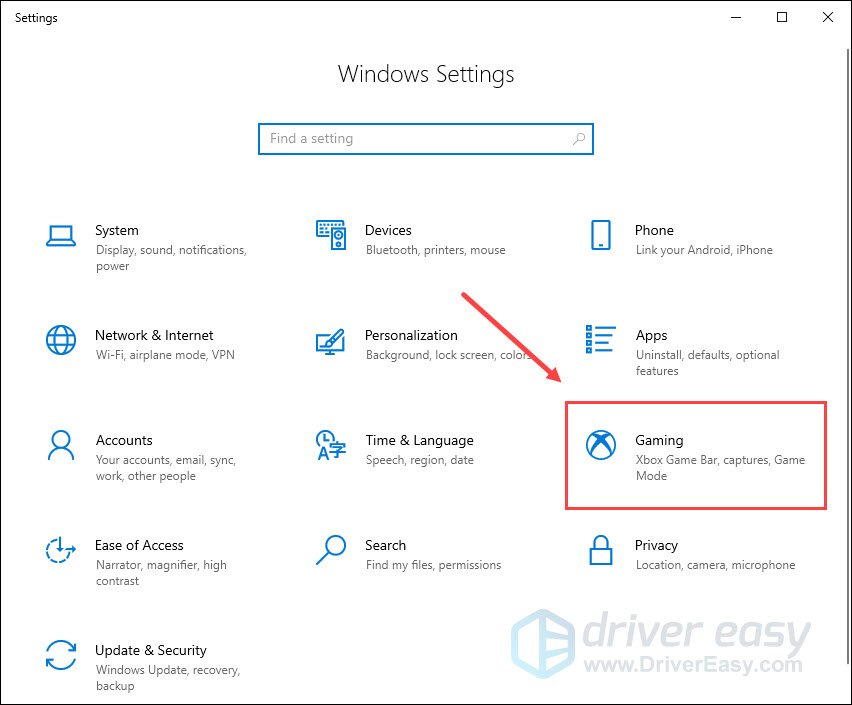
- On your keyboard, press the Windows logo key and I together to open Windows Settings. Then select Gaming.
- Click Xbox Networking. Windows will begin to check your connection status.
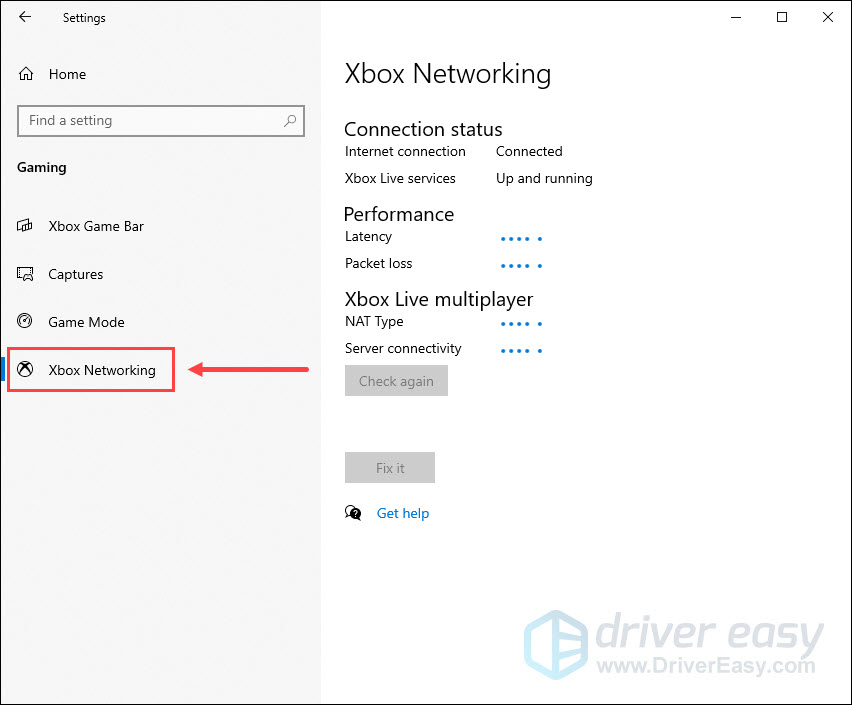
- Under Xbox Live multiplayer, you can check the NAT type status.
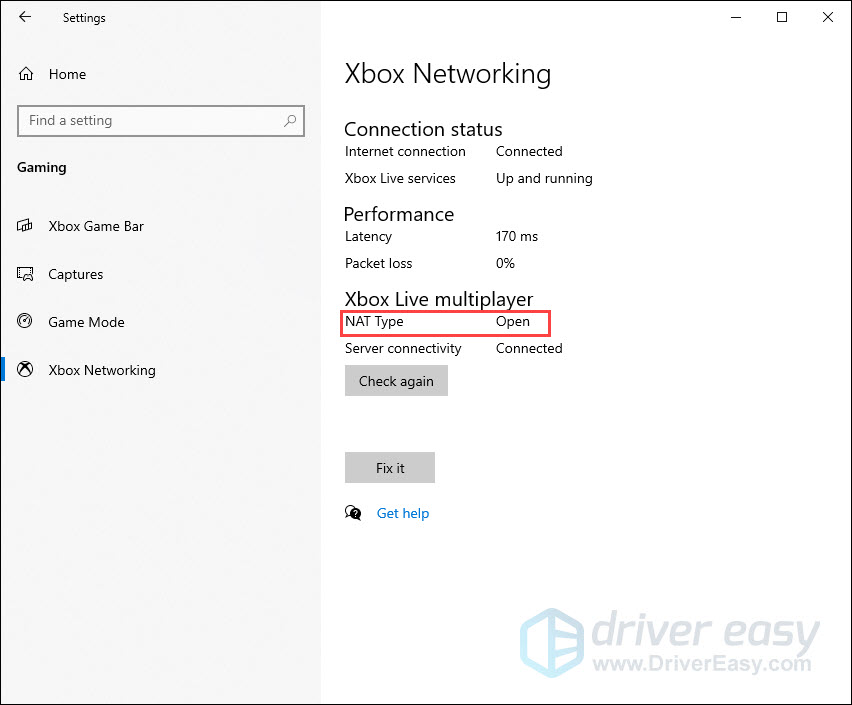
If the status is Open, the connection lost problem is probably not related to your home network. If the status says Teredo is unable to qualify, you may not be able to play multiplayer games. To fix the issue, you can press the Fix it button (Windows 10 Only). Windows will try to detect and fix known issues with Teredo. 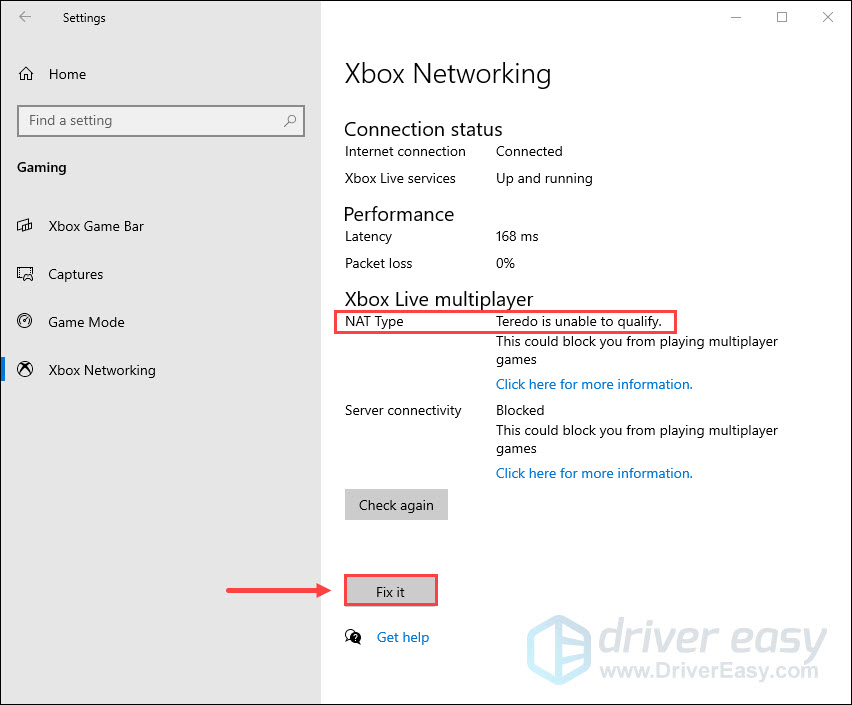
Once the fixing process is finished, restart your PC for changes to take effect.
If the Fix it button doesn’t help, you can try the following method.
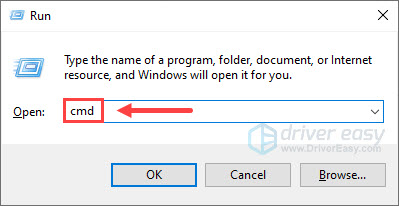
- On your keyboard, press the Windows logo key and R at the same time to open the Run dialog box. Type cmd and press Ctrl + Shift + Enter to run Command Prompt as administrator.
- At the command prompt, type the following command one after the other and press Enter after each command.
netsh int teredo set state disablenetsh int teredo set state type=defaultnetsh int teredo set state enterpriseclientnetsh int teredo set state servername=teredo.remlab.net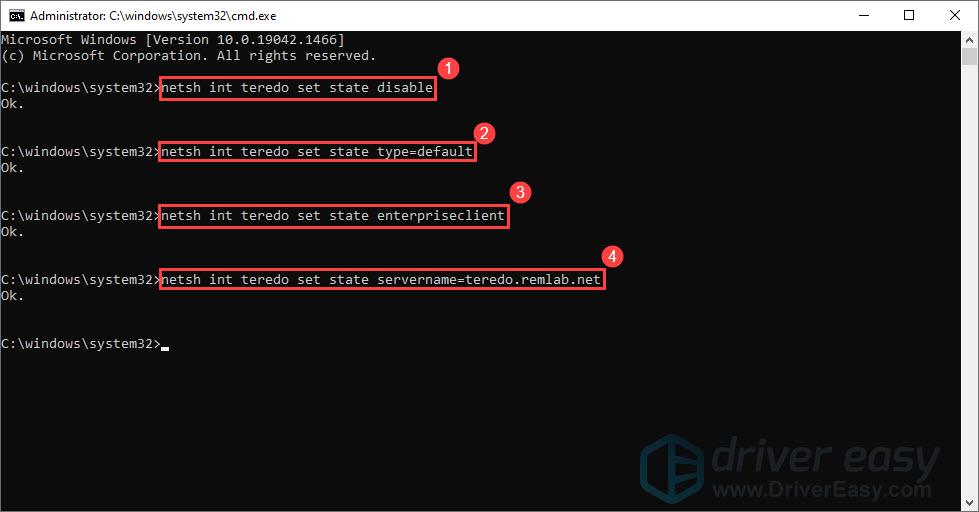
Once done, check your NAT type status again and see if your server connection issue has been resolved.
That’s it. Hopefully, this post helped you fix the Halo Infinite connection lost issues. If you have any questions or suggestions, feel free to leave us a comment below.