


NVIDIA keeps releasing updates for NVIDIA drivers, to fix bugs and improve performance. This post shows you how to check the NVIDIA driver version quickly and easily.
Try these methods
Here are the methods to check the driver versions for NVIDIA graphics cards.
- Check NVIDIA driver version in Device Manager
- Check NVIDIA driver version in NVIDIA Control Panel
- Bonus Tip
Method 1: Check NVIDIA driver version in Device Manager
Device Manager allows you to view and manage the hardware devices and driver software information in your computer, so you can check the driver version for your NVIDIA graphics card here.
To do so:
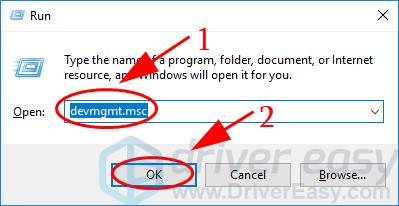
- On your keyboard, press the Windows logo key
 and R at the same time to invoke the Run box.
 - Type devmgmt.msc and click OK.
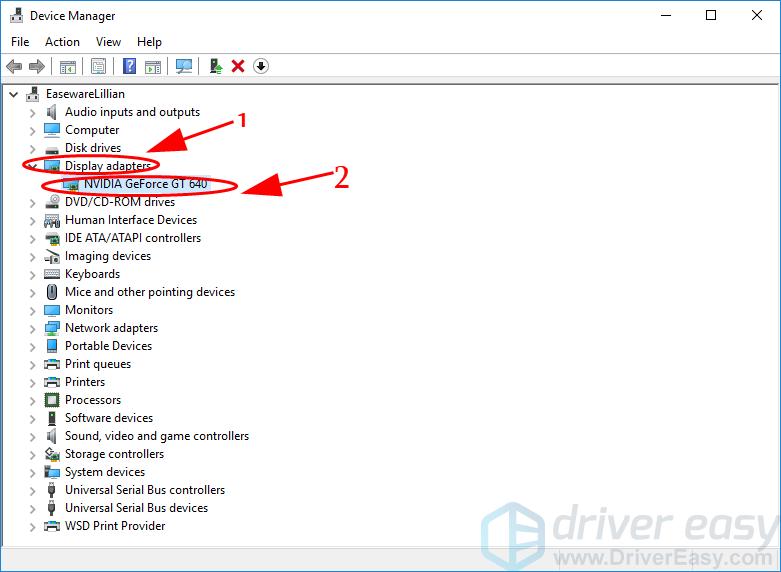
- In Device Manager, double-click Display adapters to expand it. Then double click on your NVIDIA graphics card to open the properties pane.
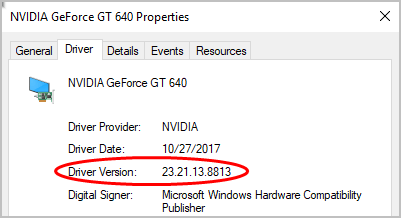
- Click the Driver tab, and you can see the Driver Version here, and also other information like Driver Provider, Driver Date.
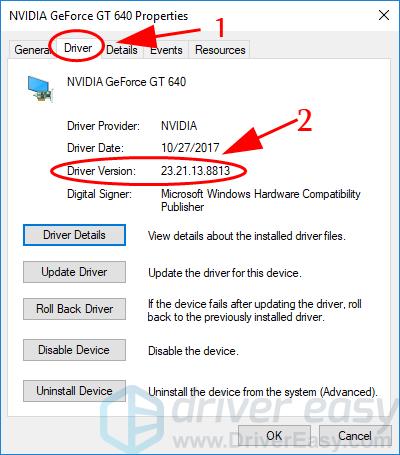
Note: the Driver Version number is the full version number.
If this method doesn’t work for you, don’t worry. There are other solutions to try.
Method 2: Check NVIDIA driver version in NVIDIA Control Panel
Generally speaking, if you’re using the NVIDIA video cards, NVIDIA Control Panel will be installed on your computer, which is an application that manages the features of NVIDIA drivers.
In addition, you can go to the Nvidia website to detect your graphics card and driver here.
Here’s how to do it:
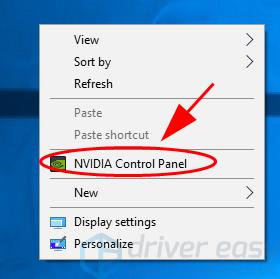
- Right-click any empty area on your desktop screen, and select NVIDIA Control Panel.
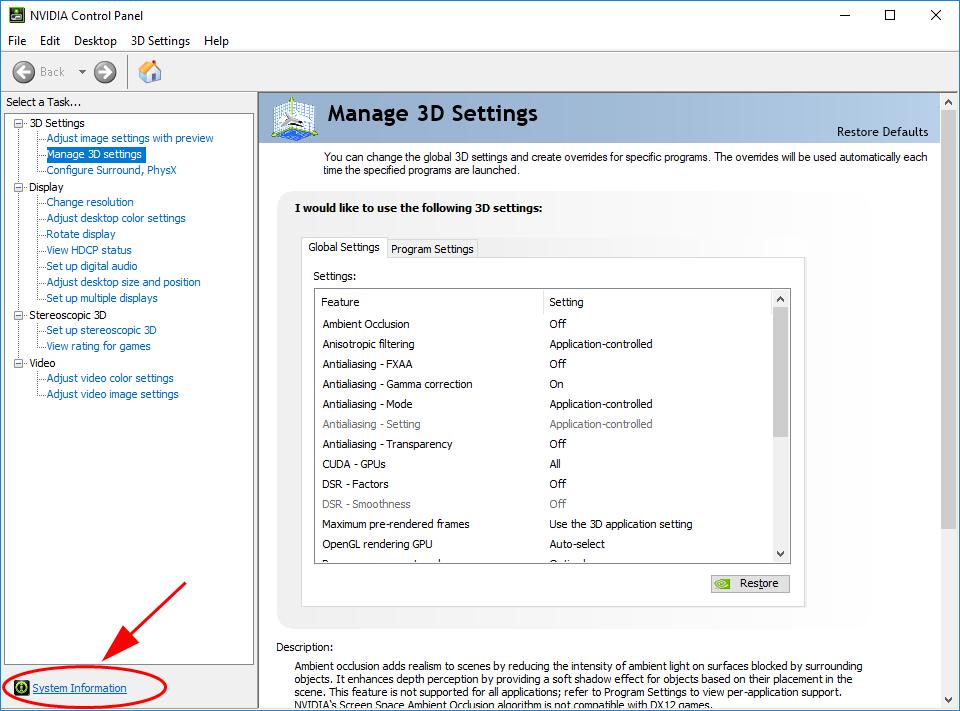
- Click System Information to open the driver information.
- There you can see the Driver version in the Details section.
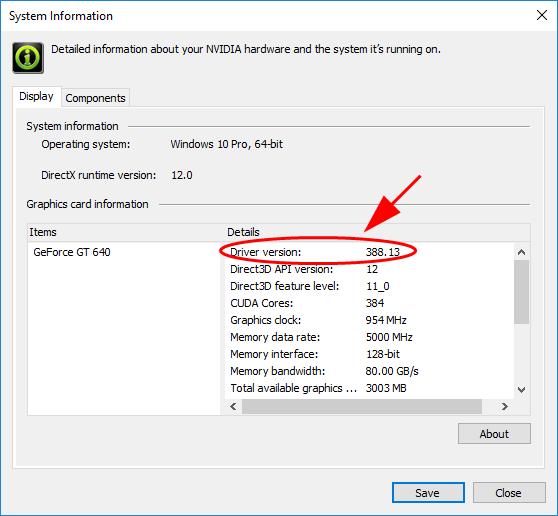
Note: the Driver version number comes from the driver installation package on the NVIDIA website, and it usually shows the last five numbers of the driver version’s full number.
Method 3: Bonus Tip – Check Driver Version and Update Driver Automatically
A missing or outdated device driver can bring various problems to your computer, so updating device drivers should always be a go-to option to prevent your computer from further issues.
You can update your drivers manually or automatically. The manual process is time-consuming, technical, and risky, so we won’t cover it here. Nor do we recommend it unless you have excellent computer knowledge.
Updating your drivers automatically, on the other hand, is very easy. Simply install and run Driver Easy, and it will automatically find all the devices on your PC that need new drivers, and install them for you. Here’s how to use it.
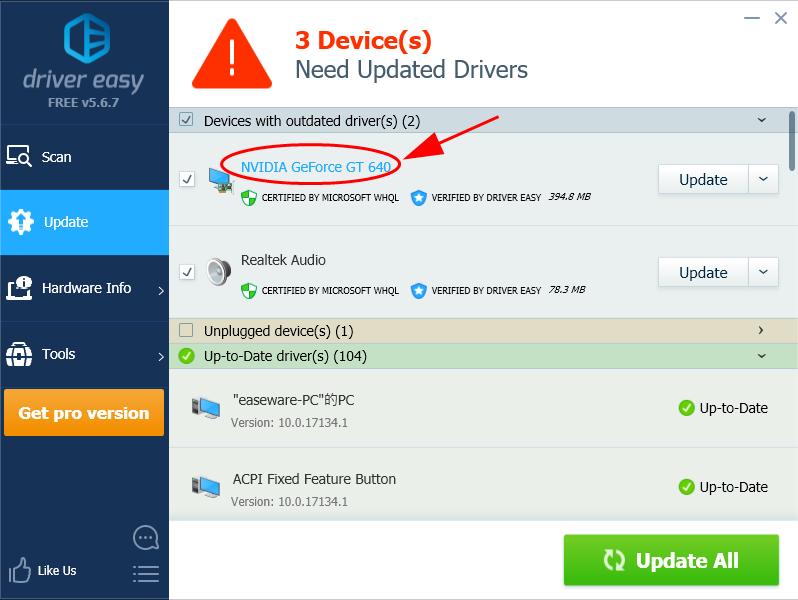
- Download and install Driver Easy.
- Run Driver Easy and click Scan Now. Driver Easy will now scan your computer and detect any problem drivers.

- If you have the Free version of Driver Easy, click the Update button next to a flagged driver to automatically download the correct driver, then install it in your computer.
But if you have the Pro version you can click Update All to automatically download and install all missing or outdated drivers.
(If you click the Update All button in the Free version you’ll be asked if you want to upgrade to the Pro version.)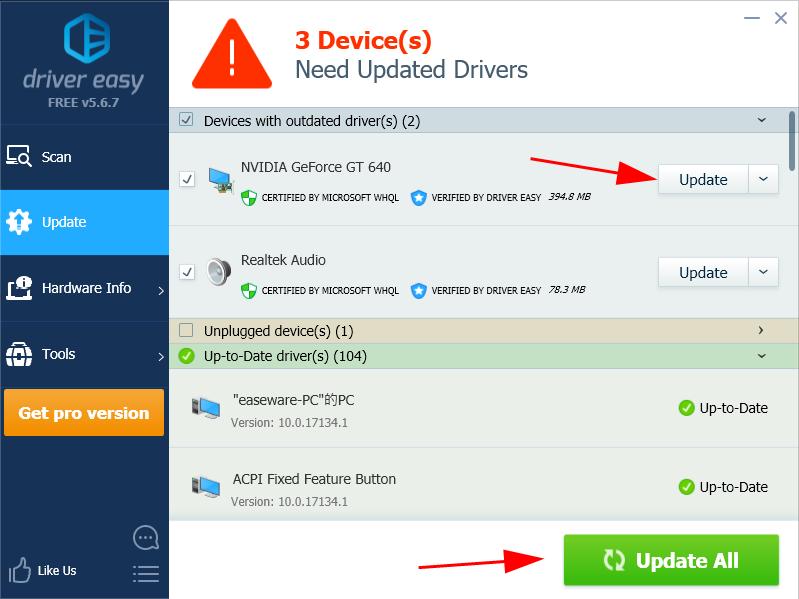
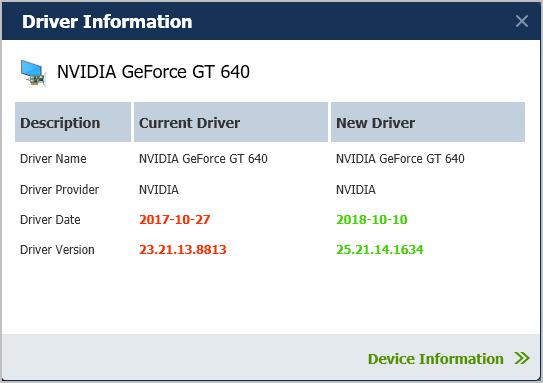
INFORMATION: You can also check the current driver for your driver by clicking the device name.
There you have it – the easy methods to check the NVIDIA driver version on your Windows computer. If you have any questions, feel free to leave a comment below and let us know.