


Want to access your printer on the laptop but don’t know how? Don’t worry! In this post, we’ll walk you through how to connect your printer to the laptop in just a few simple steps.
Before we get started, you’ll need to decide how you’d like your printer to be set up: via a cable or wirelessly.
- Option 1 – Connect the printer to your laptop wirelessly
- Option 2 – Connect the printer to your laptop via a cable
Option 1 – Connect the printer to your laptop wirelessly
Step 1: Connect your printer to your Wi-Fi
To connect your printer to the wireless network, follow the instructions below:

If your printer and router both have a WPS pairing button, press the WPS button on your printer and then press the corresponding button on your router.
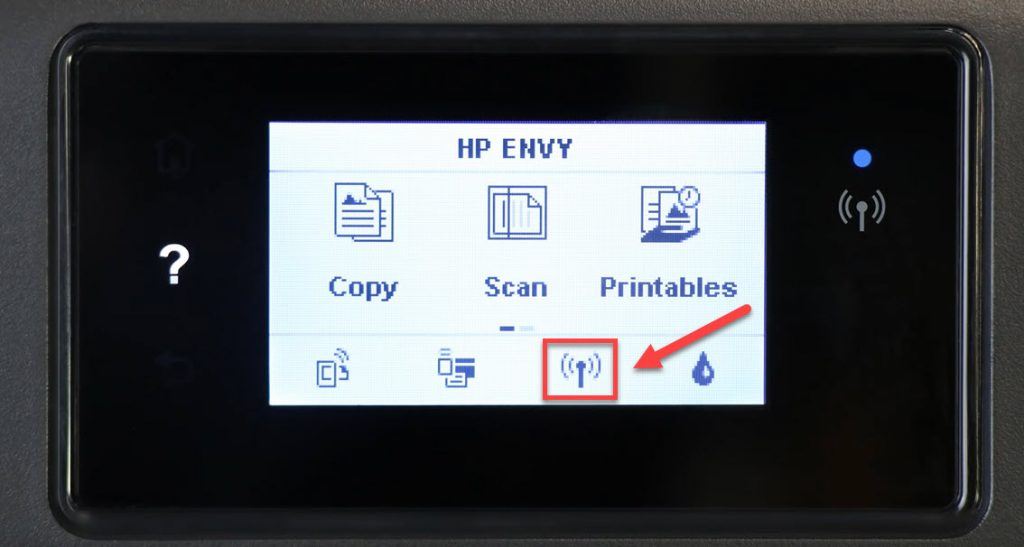
If you don’t have a WPS button your printer, on the printer’s control panel, go to the Wireless settings. Then, follow the on-screen instructions to enter the Wi-Fi network name and password.
Make sure your printer is connected to the network, then move on to Step 2.
Step 2: Configure your printer on your laptop
Check which Windows operating system you’re in, then follow the corresponding way below to configure your printer on your laptop:
Add a printer to your laptop on Windows 7
1) On your keyboard, press the Windows logo key and select Devices and Printers.
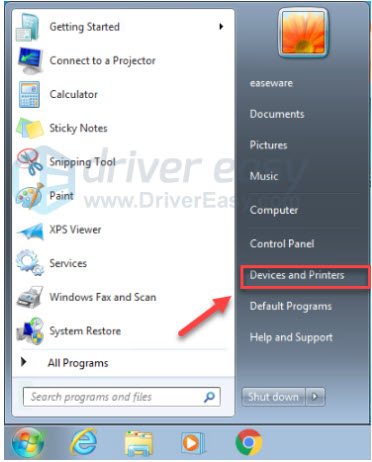
2) Click Add a printer.
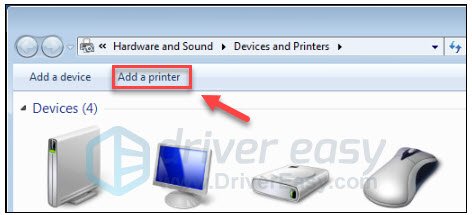
3) Select Add a network, wireless or Bluetooth printer.

4) Select the printer you want, then click Next.
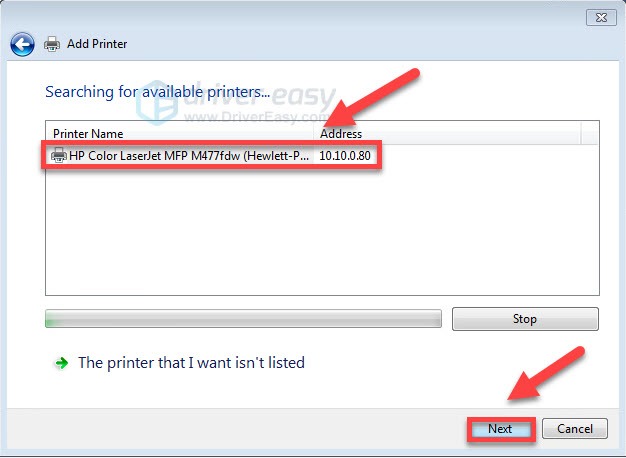
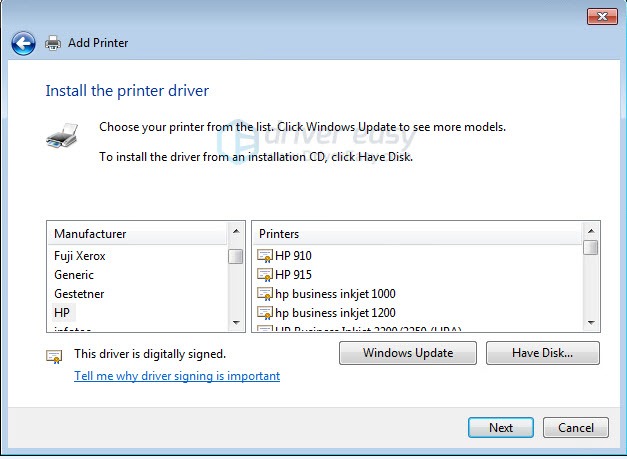
5) Select your printer from the list, then click Next to install the driver for it.
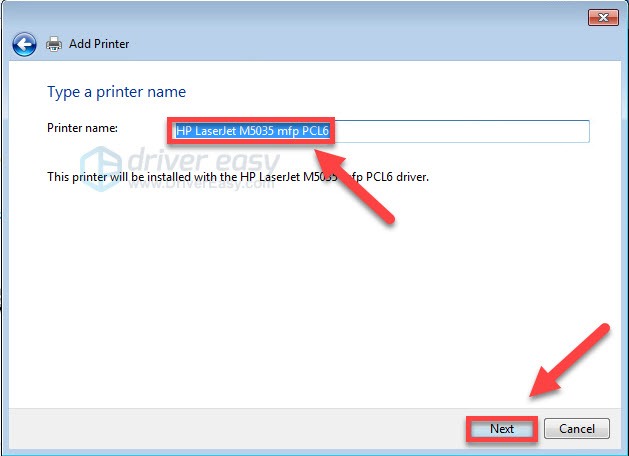
6) Type a printer name and click Next.
After you finish this step, your printer will be added to your laptop successfully.
Add a printer to your laptop on Windows 10
1) Turn on your printer.
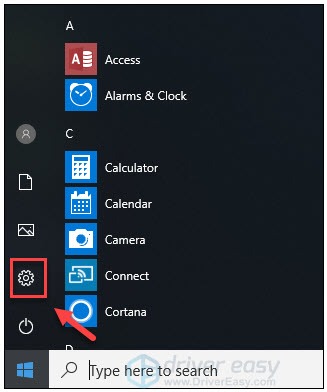
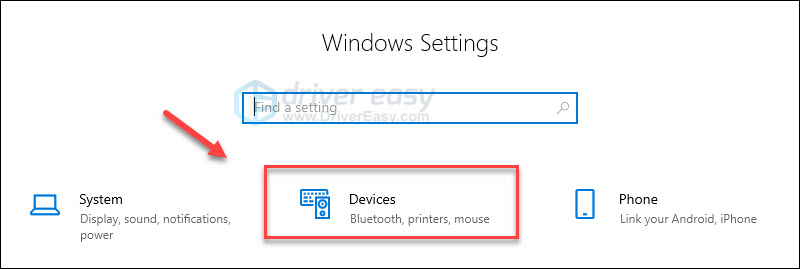
2)On your keyboard, press the Windows logo key and click the Settings button.
3) Select Devices.
4) Select Printers & scanners, then click Add a printer or scanner.
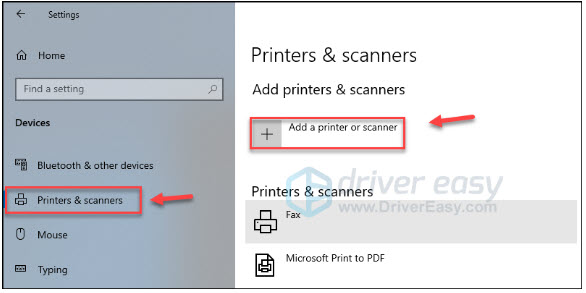
5) Select the printer you want and click Add device.

Step 3: Update your printer driver
Printer problems, such as blank page printing, may occur if you’re using the wrong printer driver or it’s outdated. To keep your printer running smoothly, it is essential that you have the latest correct driver at all times.
There are two ways you can get the right drivers for your devices: manually or automatically.
Manual driver update – You can update drivers manually by going to the manufacturer’s website for each of your devices, and searching for the most recent correct driver. Be sure to choose only drivers that are compatible with your Windows version.
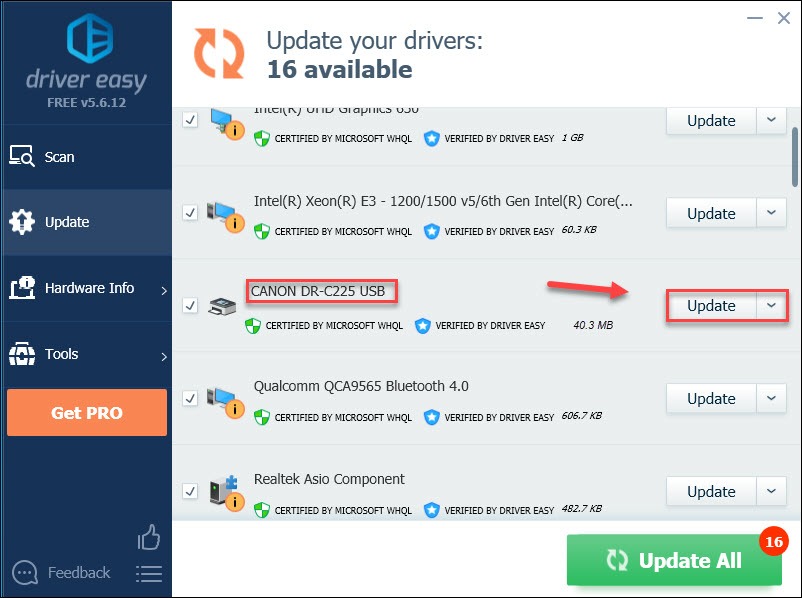
Automatic driver update – If you don’t have the time, patience or computer skills to update drivers manually, you can, instead, do it automatically with Driver Easy. Driver Easy will automatically recognize your system and find the correct drivers for your devices, and your Windows version, and it will download and install them correctly:
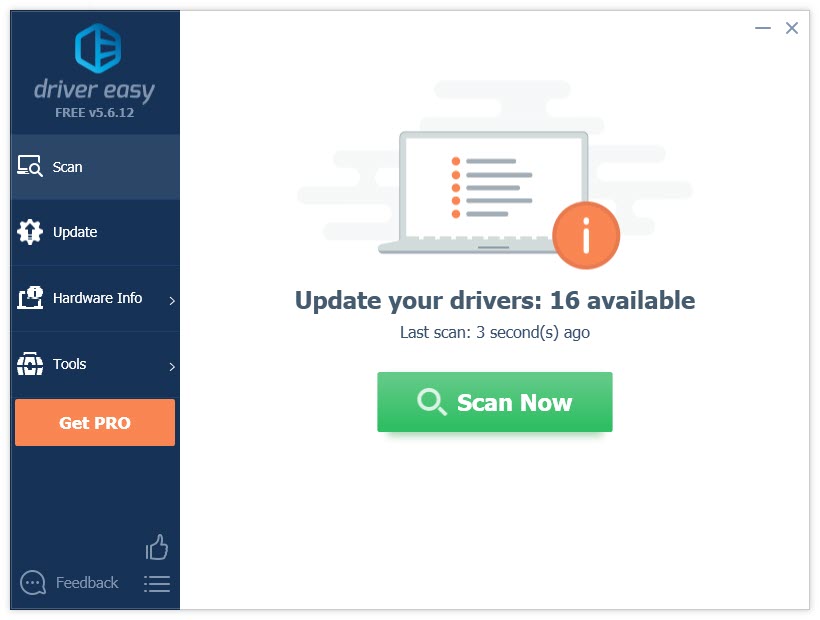
1) Download and install Driver Easy.
2) Run Driver Easy and click the Scan Now button. Driver Easy will then scan your computer and detect any problem drivers.

3) Click Update All to automatically download and install the correct version of all the drivers that are missing or out of date on your system (this requires the Pro version – you’ll be prompted to upgrade when you click Update All).

Option 2 – Connect the printer to your laptop via a cable
If you have the right printer cable, you can connect your printer to your laptop via the cable.
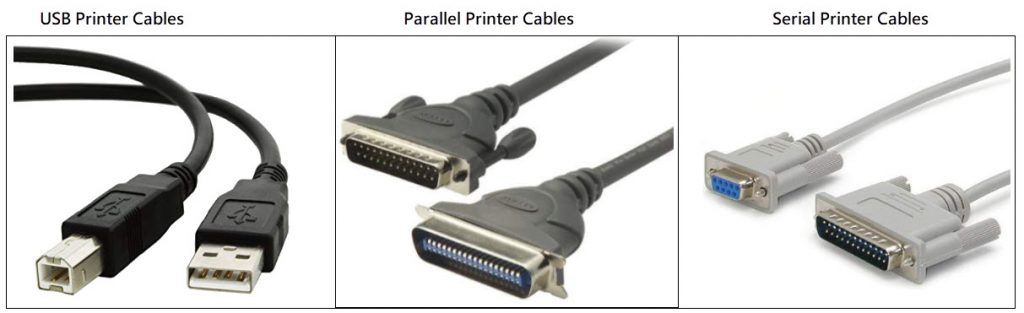
Step 1: Identify the right cable to connect the printer to your laptop
Check the port on your printer and your laptop to see which type of cable can be used to connect your printer to your laptop.
Here are the most common types of printer cables:
Step 2: Attach the cable to your printer and to the laptop
Connect your printer to your laptop with the cable, and your Windows system will automatically install the right driver for your printer. Then you should be able to use your printer on your laptop.
To keep your printer running smoothly, it is important to update drivers for it. Check Step 3 to see how to update printer drivers automatically.
Step 3: Update your printer driver
Printer problems, such as blank page printing, may occur if you’re using the wrong printer driver or it’s outdated. To keep your printer running smoothly, it is essential that you have the latest correct driver at all times.
There are two ways you can get the right drivers for your devices: manually or automatically.
Manual driver update – You can update drivers manually by going to the manufacturer’s website for each of your devices, and searching for the most recent correct driver. Be sure to choose only drivers that are compatible with your Windows version.
Automatic driver update – If you don’t have the time, patience or computer skills to update drivers manually, you can, instead, do it automatically with Driver Easy. Driver Easy will automatically recognize your system and find the correct drivers for your devices, and your Windows version, and it will download and install them correctly:
1) Download and install Driver Easy.
2) Run Driver Easy and click the Scan Now button. Driver Easy will then scan your computer and detect any problem drivers.
3) Click Update All to automatically download and install the correct version of all the drivers that are missing or out of date on your system (this requires the Pro version – you’ll be prompted to upgrade when you click Update All).
Hopefully, this article helped! Please feel free to leave a comment below if you have any questions and suggestions.