


- Connect the wireless printer to WiFi
- Add the wireless printer to computer
- Windows can’t find my printer?
1. Connect your wireless printer to WiFi
Assuming that you have WiFi available in your office or house, we can start connecting your WiFi printer to your WiFi network. 1) Unpack your printer, run the startup routine for your printer, including plug in, turn on your printer, and install cartridges, etc. 2) After the startup routine, connect your WiFi printer to your WiFi network. This varies not only from manufacturer to manufacturer, but from printer to printer as well, so you can refer to the printer manual to connect it to your WiFi network step by step. Generally you’d need your SSID, network name and password to connect. Many printers now can directly search for your network name, so you can just select your WiFi network, and enter your WiFi password in your printer network settings.Note: Make sure that your printer is within your WiFi network range when processing.
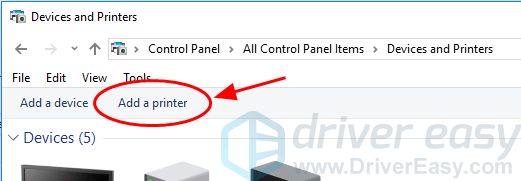
2. Add the wireless printer to computer
Now you’ve connected your WiFi printer to your wireless network, you can start adding it to your computer to print. To do so, follow these steps:Note: All the screenshots below come from Windows 10, but the fixes work well on Windows 8 & 7.
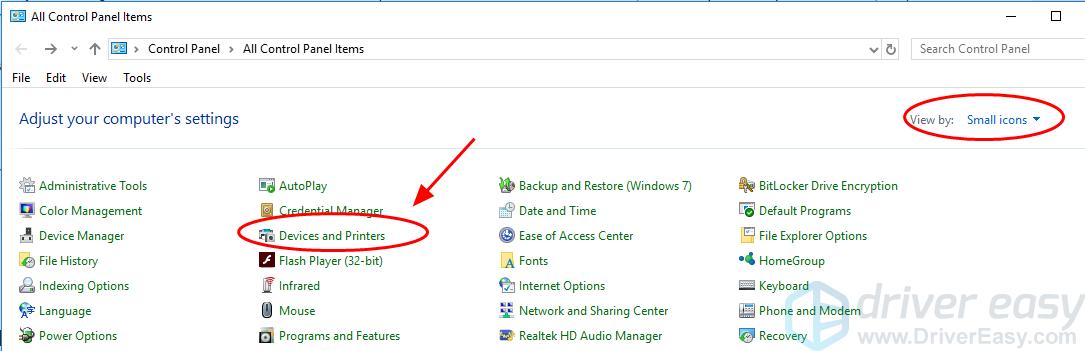
1) On your computer, open Control Panel.
2) Click Devices and Printers. Kindly note that you need to view by small icons in Control Panel.

Windows can’t find my printer?
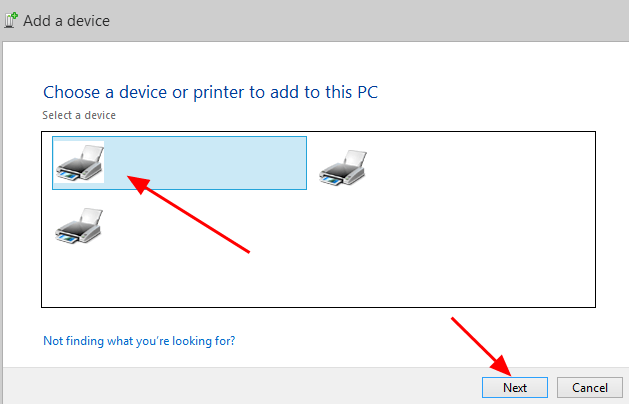
It’s possible that Windows can’t find your WiFi printer or you may fail to connect your WiFi printer to your computer, but don’t worry. There’re fixes to solve the issue. Way 1: The printer that I want isn’t listed Way 2: Update your printer driverWay 1: The printer that I want isn’t listed
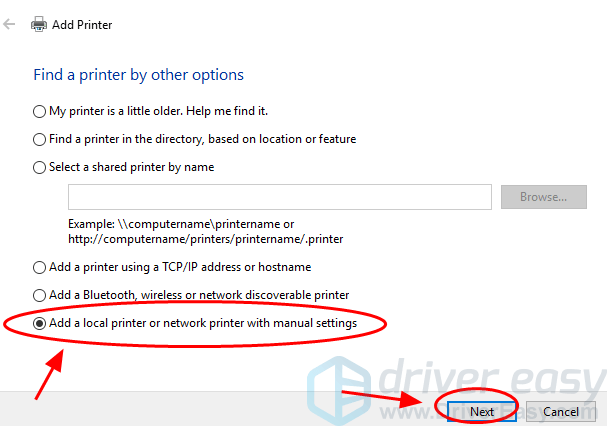
Wait for a while for Windows to search for your printer, until you see No device found: 1) Click The printer that I want isn’t listed.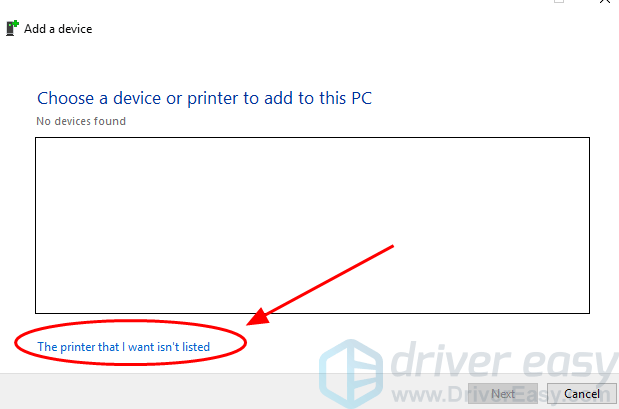
Way 2: Update your printer driver
The missing or outdated printer driver can cause the issue, so you should update your printer driver to fix it. There are two ways to update drivers: manually and automatically. Manually – You can manually update the printer driver by searching the correct driver that is matched with your Windows OS on the manufacturer’s website, and install it in your computer. This requires the time and computer skills. Automatically – If you don’t have time or patience to manually update drivers, you can do that automatically with Driver Easy. Driver Easy will automatically recognizes your system after scanning, then find and install automatically the latest drivers for you, which saves your time – It only takes 2 clicks to automatically update your printer driver with Pro version and you’ll have a 30-day money back guarantee. 1) Download and install Driver Easy. 2) Run Driver Easy and click Scan Now. Driver Easy will then scan your computer and detect any problem drivers.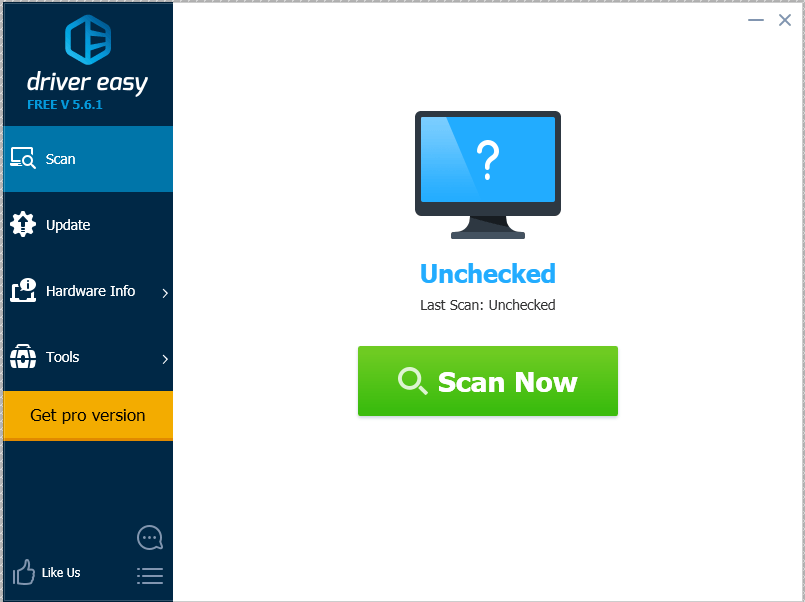 3) Click the Update button next to a flagged printer driver to automatically download and install the latest printer driver (you can do this with the FREE version).
Or click Update All to automatically download and install the all the latest correct drivers that is missing or outdated in your system (This requires the Pro version. You will be prompted to upgrade when you click Update All).
3) Click the Update button next to a flagged printer driver to automatically download and install the latest printer driver (you can do this with the FREE version).
Or click Update All to automatically download and install the all the latest correct drivers that is missing or outdated in your system (This requires the Pro version. You will be prompted to upgrade when you click Update All).

1
1 people found this helpful
0 Comments
Most Voted