


Don’t know how to connect your Windows 10 PC to WiFi? You’ve come to the right place! It’s very, very easy! You should be able to connect your Windows 10 PC to WiFi easily and quickly after reading this article.
Follow these steps
- Check if your PC has a wireless network adapter
- Update the driver for your wireless network adapter
- Enable WiFi on your Windows 10 PC
- Connect your Windows 10 PC to WiFi
Step 1: Check if your PC has a wireless network adapter
To connect your Windows 10 PC to WiFi, you need to check if your PC has a wireless network adapter first. Without the wireless network adapter, your PC is not supported to connect to WiFi. Follow the instructions below to check if your PC has a wireless network adapter or not:
- On your keyboard, press the Windows logo key and R at the same time to open the Run dialog. Type devmgmt.msc and press Enter. You’ll be prompted for permission. Click Yes to open Device Manager.
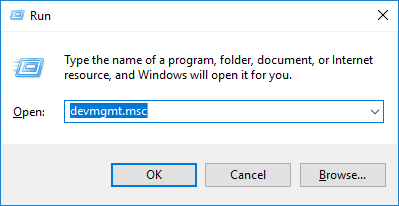
- Double-click Network adapters to expand the list. If there is a network adapter whose name contains “wireless”, it suggests that your PC has a wireless network adapter.
 If you can’t find a wireless network adapter in Device Manager, it indicates that your PC doesn’t have one. You need to buy a USB wireless network adapter to allow your PC to connect to WiFi.
Step 2: Update the driver for your wireless network adapter
Before you connect your PC to WiFi, you need to ensure the driver for your wireless network adapter functions well. It is a good idea to update the driver for your wireless network adapter to the latest version. By doing that, you can avoid many unexpected network issues.
There are two ways to update the driver for your wireless network adapter: manually or automatically.
Update the driver for your wireless network adapter manually – You can update the driver for your wireless network adapter manually by going to the manufacturer’s website, and searching for the latest driver for your wireless network driver. Be sure to choose the driver that’s compatible with the model of your wireless network adapter and your version of Windows.
Or
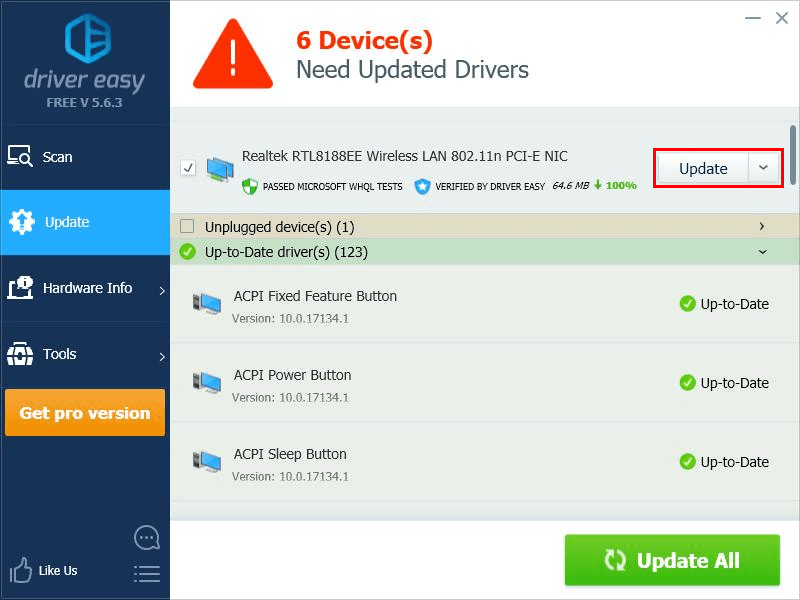
Update the driver for your wireless network adapter automatically – If you don’t have the time, patience or computer skills to update the driver for your wireless network adapter manually, you can, instead, do it automatically with Driver Easy. You don’t need to know exactly what system your PC is running, you don’t need to risk downloading and installing the wrong driver, and you don’t need to worry about making a mistake when installing. Driver Easy handles it all.
- Download and install Driver Easy.
- Run Driver Easy and click Scan Now. Driver Easy will then scan your computer and detect any problem drivers.

- Click Update next to your wireless network adapter to automatically download the correct version of its driver, then you can install it manually. Or click Update All to automatically download and install the correct version of all the drivers that are missing or out of date on your system (This requires the Pro version – you’ll be prompted to upgrade when you click Update All. You get full support and a 30-day money back guarantee).
You can do it for free if you like, but it’s partly manual. If you need assistance, please contact Driver Easy’s support team at support@drivereasy.com.
Step 3: Enable WiFi on your Windows 10 PC
You also need to enable WiFi on your Windows 10 PC before you connect it to WiFi. Here is how to do it:
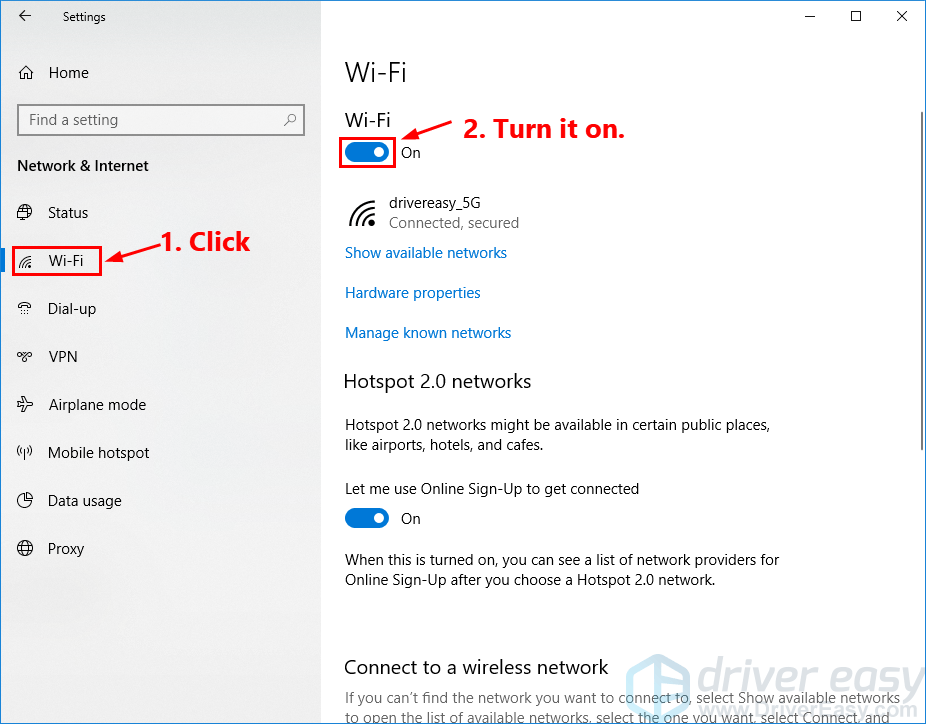
- On your keyboard, press the Windows logo key and I to open Windows Settings. Then click Network & Internet.
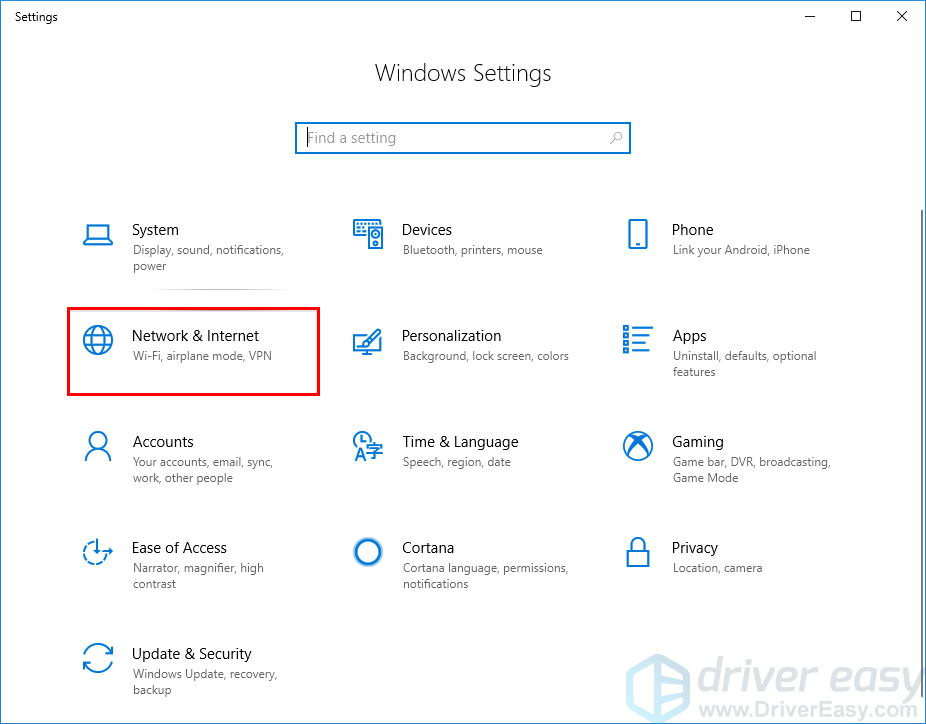
- On the left panel, click Wi-Fi. Then turn on the toggle under Wi-Fi.
Step 4: Connect your Windows 10 PC to WiFi
After you enabled Wi-Fi on your Windows 10 PC, you now can begin to connect your Windows 10 PC to WiFi. Here is how to do it:
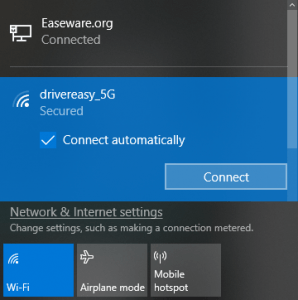
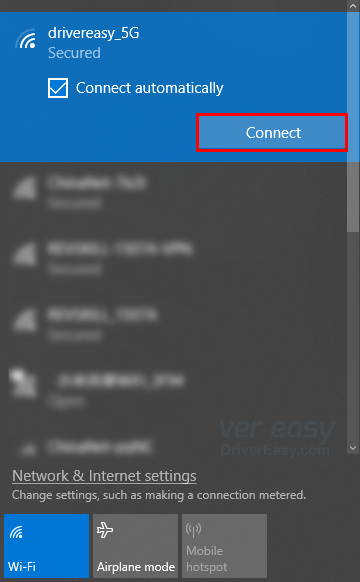
- Click the WiFi icon in the notification area.

- Windows 10 will automatically search for available WiFi networks. Click the WiFi network you want to connect from the list, then Click Connect.
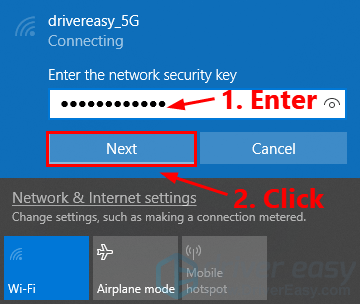
- Enter the correct network security key and click Next.
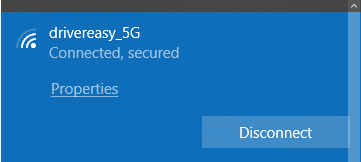
- If the security key you entered is correct, your PC is now connected to WiFi.
If you have any questions or suggestions, please leave your comment below.