


If you want to connect your laptop to a projector but don’t know how to do it, don’t worry! You’ve come to the right place! Just follow the steps below and you’ll be able to connect your laptop to the projector easily and quickly!
Here are the steps:
- Turn off your laptop and the projector
- Connect your laptop to the projector
- Turn on your laptop and the projector
- Update your graphics driver to the latest version
- Configure the display settings on your laptop
Step 1: Turn off your laptop and the projector
Make sure your laptop and the projector are both turned off before you connect your laptop to the projector.
Step 2: Connect your laptop to the projector
Before connecting your laptop to the projector, you need to know what ports your laptop and the projector have.
- Please ensure that the video port on your PC matches an available video port on the projector, like DisplayPort (DP), HDMI, VGA, and DVI. If not, you may need a video output adapter cable to convert one type of video signal to another.

- Connect your laptop to the projector firmly with a compatible video cable.
Step 3: Turn on the projector and your laptop
After connecting your laptop to the projector, turn on your laptop, and then press the power button to turn on the projector.
Normally the projector will project the screen of your laptop. If not, make sure the signal source of the projector is consistent with the video output signal of your laptop.
For example, if you connect your laptop to the projector using a VGA cable, then you should switch the signal source of the projector to VGA or Computer with the projector remote control; if you are using an HDMI cable to connect your laptop to the projector, then switch the signal source of the projector to HDMI.
Step 4: Update your graphics driver to the latest version
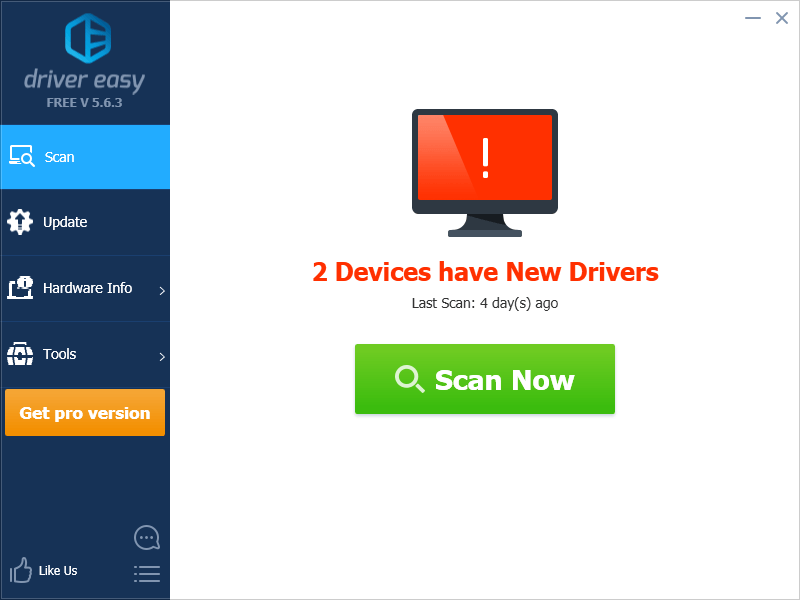
It is important to ensure that your graphics driver has been updated to the latest version. If not, please update your graphics driver to ensure stability and the best performance. It is recommended that you update your graphics driver with Driver Easy.
Driver Easy will automatically recognize your system and find the correct drivers for it. You don’t need to know exactly what system your computer is running, you don’t need to risk downloading and installing the wrong driver, and you don’t need to worry about making a mistake when installing.
You can update your drivers automatically with either the FREE or the Pro version of Driver Easy. But with the Pro version, it takes just 2 clicks (and you get full support and a 30-day money-back guarantee):
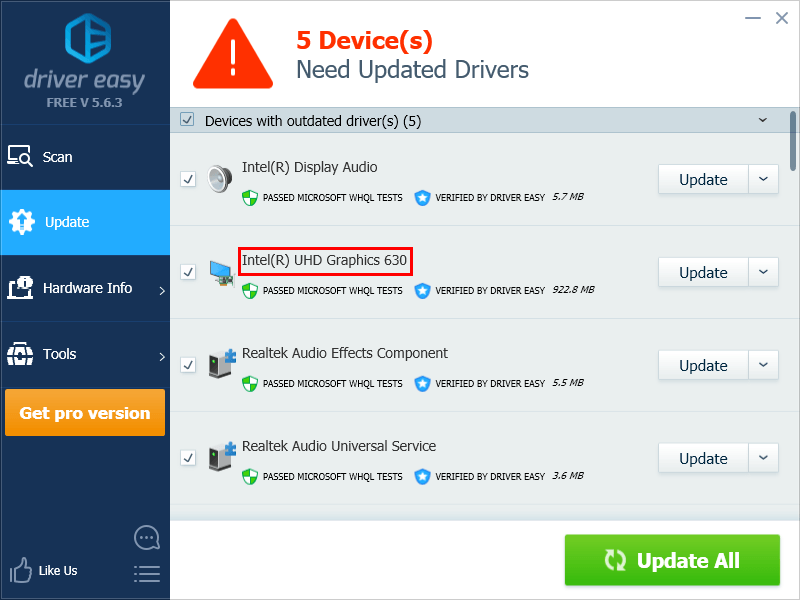
- Download and install Driver Easy.
- Run Driver Easy and click Scan Now. Driver Easy will then scan your computer and detect any problem drivers.
- Click Update next to your graphics card to automatically download the correct version of this driver, then you can install it manually. Or click Update All to automatically download and install the correct version of all the drivers that are missing or out of date on your system (this requires the Pro version – you’ll be prompted to upgrade when you click Update All).
Step 5: Configure the display settings on your laptop
Once you’ve connected your laptop to the projector, Windows will automatically detect the projector and adjust for the different screen sizes of your laptop and the projector. Then you can begin to configure the display settings.
In this step, instructions for Windows 10 and Windows 7 & 8 are a little different.
- When your current operating system is Windows 7 or Windows 8
- When your current operating system is Windows 10
If your current operating system is Windows 7 or Windows 8:
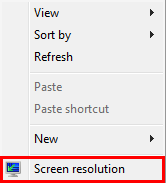
- Right-click an empty area of the desktop and select Screen resolution.
- In the pop-up window, click the drop-down lists of Display and Multiple displays to configure the display settings. Normally, you don’t have to change the Resolution setting.

If Windows doesn’t detect the projector, then click Detect. If it still doesn’t work, restart your PC and then repeat the two steps above.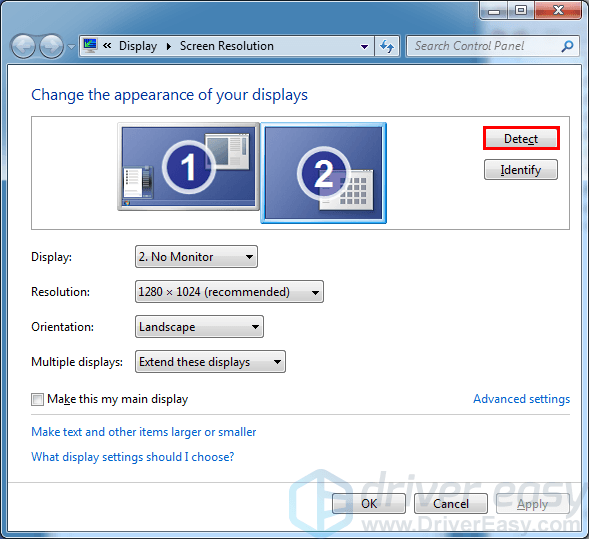
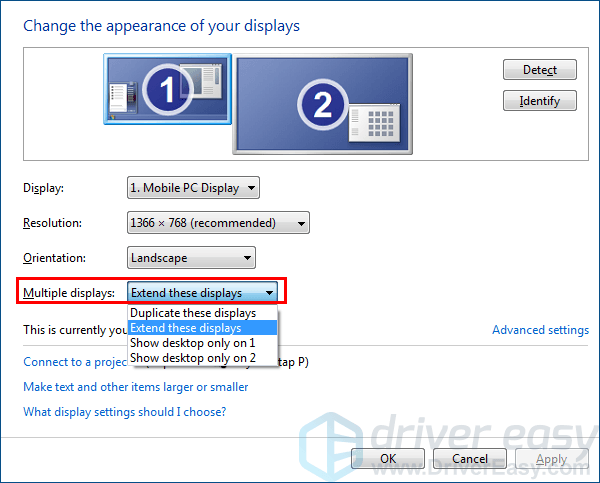
- Select a display mode from the drop-down list of Multiple displays according to your preference.
- Duplicate these displays: the projector projects the screen of your laptop with the monitor of your laptop turned on.
- Extend these displays: to treat the displays on your laptop and the projector as one contiguous screen (this option is usually for setting up your second monitor).
- Show desktop only on 1: to show your screen only on your laptop (the display on the projector is disabled).
- Show desktop only on 2: to show your screen only on the projector (the monitor of your laptop is disabled).
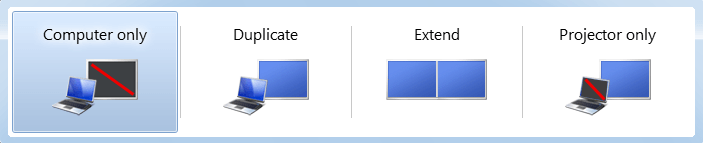
To switch the multiple displays mode quickly, on your keyboard, press the Windows logo key and P on your keyboard at the same time.
- Click Apply and then click Keep changes to save the new settings if you’re prompted to do so.
- Click OK to save the setting and close the window.
If your current operating system is Windows 10:
- Right-click an empty area of the Desktop and select Display settings.

- In the pop-up window, click the drop-down lists of Scale and layout and Multiple displays to configure the display settings. Normally, you don’t have to change the Resolution setting.
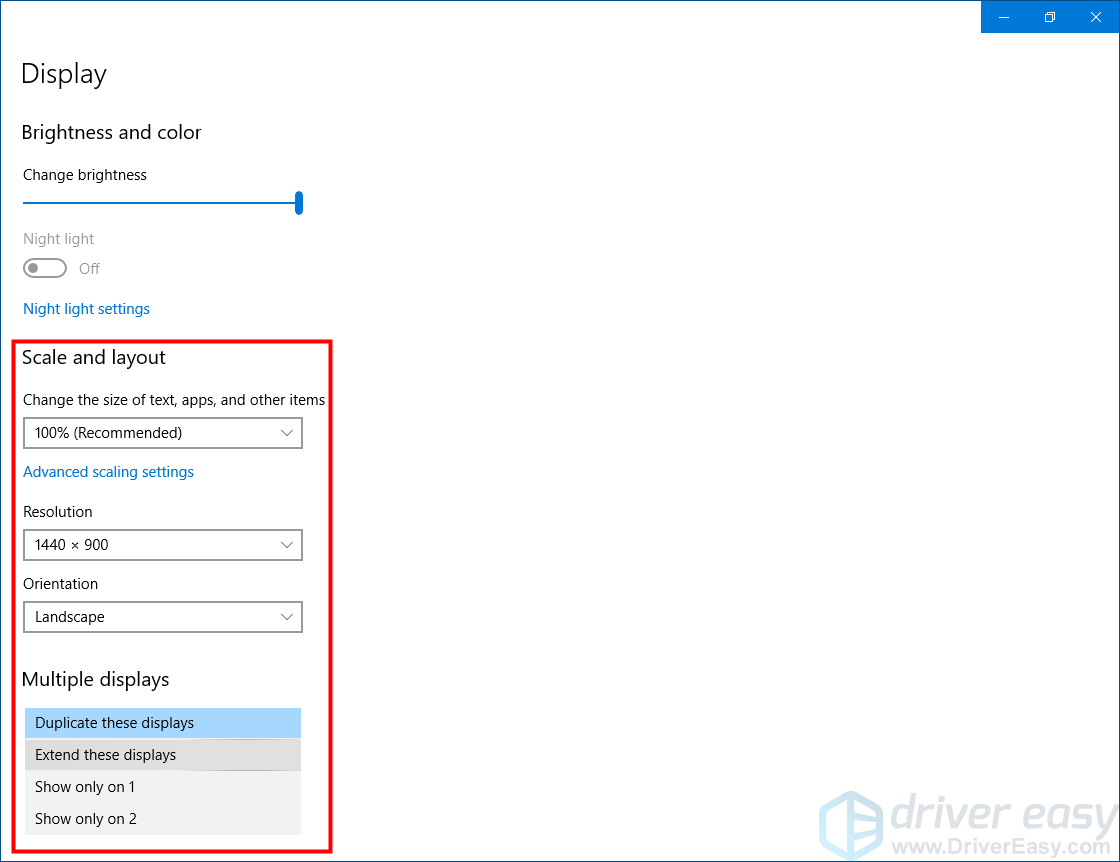
If Windows doesn’t detect the projector, then click Detect. If it still doesn’t work, restart your PC and then repeat the two steps above.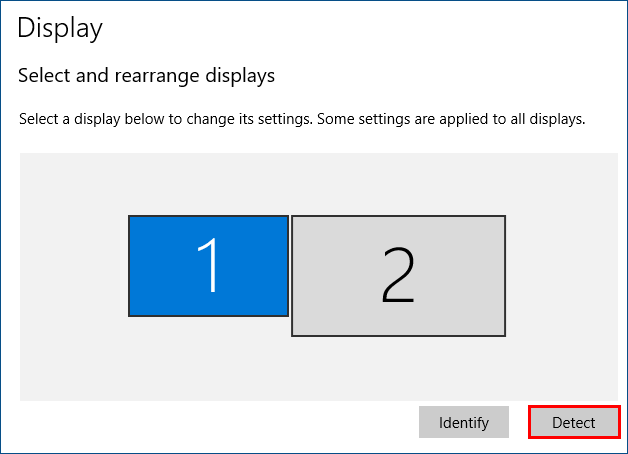
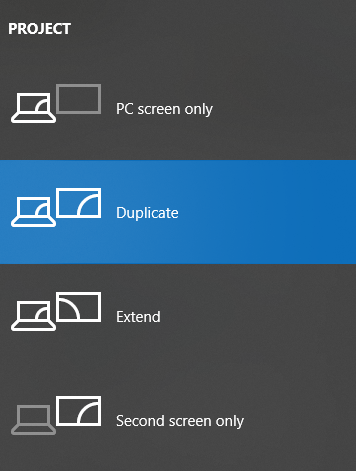
- Select a display mode from the drop-down list of Multiple displays according to your preference.
- Duplicate these displays: to show the same screen on your laptop and the projector.
- Extend these displays: to treat the display on your laptop and the projector as one contiguous screen (this option is usually for setting up your second monitor).
- Show desktop only on 1: to show your screen only on your laptop (the display on the projector is disabled).
- Show desktop only on 2: to show your screen only on the projector (the monitor of your laptop is disabled).

To switch the multiple displays mode quickly, on your keyboard, press the Windows logo key and P at the same time.
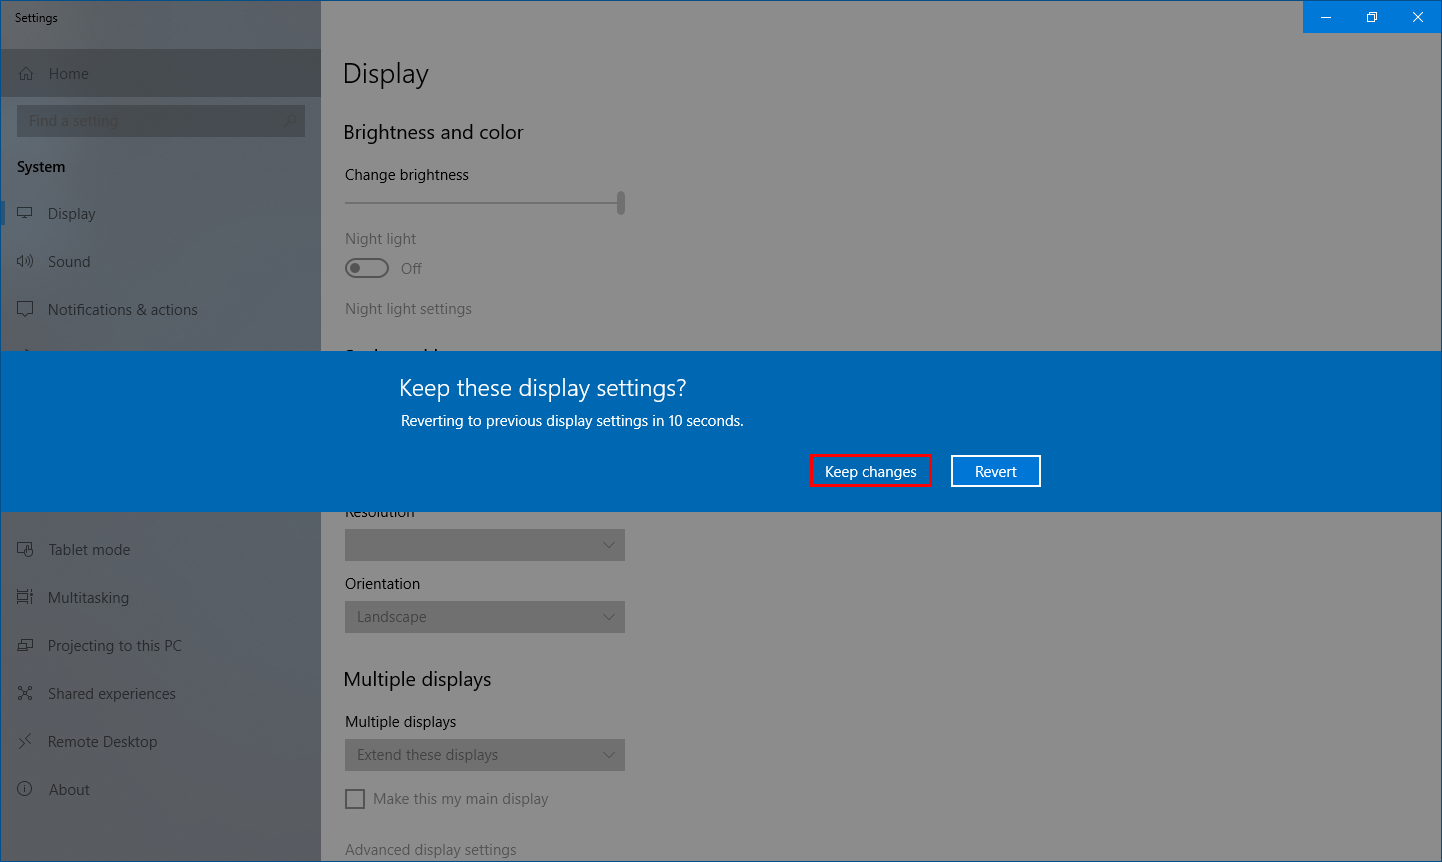
- Click Keep changes to save the new settings if you’re prompted to do so.
Now, it’s time to enjoy the amazing screen of the projector! Please leave a comment if you have any questions!