


You may have heard of CPU overclocking — the process of increasing the clock speed of a CPU (Central Processing Unit). Basically, it can squeeze more power out of your processor and boost the performance of your computer. That means you can have a more powerful CPU without paying extra money.
Sounds appealing! You may want to give it a try, but you may also consider it a very complicated job. And you would probably ask if it is possible to do this without advanced computer skills.
Don’t worry. It is possible, and it’s not as complicated as it used to be. Here is a detailed (and safe!) guide to CPU overclocking for even absolute beginners. Follow the steps through, and you will master the basic knowledge of overclocking your CPU.
What you’ll read in this post:
Should I overclock my CPU?
Before starting to overclock your CPU, there are two important questions to consider: why do you need to overclock the CPU, and can your CPU be overclocked?
Is CPU overclocking worth it?
CPU overclocking means running your processor at a higher frequency than its factory settings. A successful overclock can improve performance in:
- PC gaming (especially CPU-bound games)
- Video editing
- 3D rendering
- Code compilation
- Content creation
- Virtual machines
Can my CPU be overclocked?
Not every processor supports manual overclocking. To make sure
If you are using an AMD processor, you are in luck because most modern AMD chips are unlocked. Intel, on the other hand, have locked the multiplier of their models except those with a letter “K” or “X” following their model number (like i5-7600K, i7-7740X, etc). That means you can’t get too much from these Intel CPUs or you will face some risks.
If you are unclear about which CPU model you are using, you can check your system properties to find it out. To do so:
1) Right-click on This PC or Computer on your desktop, and then select Properties.
2) In the System window, you will find the information on your CPU at the Processor entry in the System section.
Also, you should know that the motherboard you use should have overclocking settings built in in order to overclock your CPU. To know your motherboard model number:
1) Click on the Start menu on the taskbar, and type “cmd“. Then when you see Command Prompt appear in the menu above, right click on it and then select Run as administrator.
2) In Command Prompt, type “wmic baseboard get product,manufacturer” and press Enter.
3) The manufacturer and the model number of your motherboard will show in Command Prompt.
If you are not sure whether your CPU and motherboard support overclocking, you can search the model numbers of your devices on the Internet or go to the official website of the manufacturers to discover more related information.
Is it safe to overclock my CPU?
In many cases, yes.
If you are using a laptop, it is not recommended that you overclock your CPU. Most laptop cooling systems aren’t designed to handle the additional heat generated by sustained overclocking.
For a desktop PC, there are still risks, though. The processor you use is not designed to run at a higher speed after all. Its temperature will go up, and its life will be shortened. If you don’t operate reasonably, you will instantly kill your CPU and even other components because of the high temperature or voltage.
In fact, you can avoid those risks. If you watch the temperature of your CPU carefully and use a good heat sink, it won’t generate excessive heat to damage your computer. The life of your CPU will surely be shortened after overclocking, but it will still have a longer lifespan than you can imagine.
What you’ll need before overclocking
Before you start to overclock your CPU, there are a few things you should get prepared.
1. Good CPU cooling
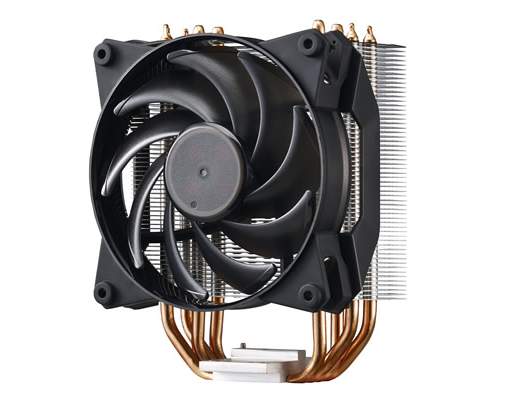
As what is said above, your CPU will generate more heat with the increased clock speed. You will need a good cooling system to control the temperature of your CPU. A heat sink may be enough if you raise the speed by, say, below or around 10%. If you want to go further up, you will need to watch the temperature carefully and, when necessary, use a more powerful cooling system, like a water cooling system.
2. A reliable power supply
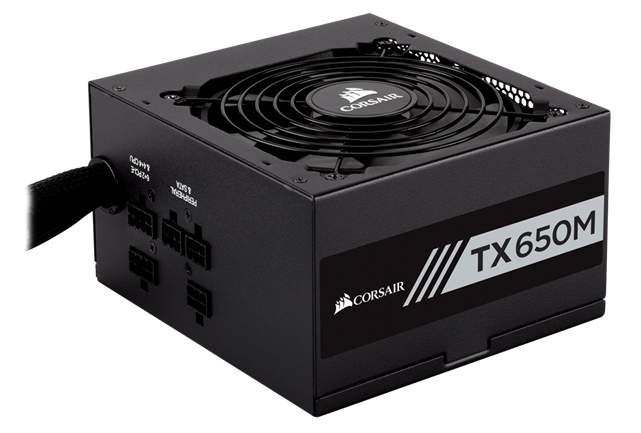
An overclocked CPU can possibly use up the power supply of your computer. You should use a power supply unit that can supply enough and steady power to your computer in order for your CPU to run normally.
3. Monitoring software
You will need these tools to test the overclocking results as well as the processor stability and temperature. If your motherboard software contains these features, you can use it to test your CPU and check its temperature. You can also use some free tools, like CPU-Z (to monitor your CPU), Prime95 (to run stress tests), and Core Temp (to monitor the temperature).
4. Update your drivers.
You can have a better support and less risks from your hardware if you are using the correct and updated device drivers. It is suggested that you update your drivers before overclocking. If you don’t have the time, patience and skills to update your drivers manually, you can do it automatically with Driver Easy.
Driver Easy will automatically recognize your system and find the correct drivers for it. You don’t need to know exactly what system your computer is running, you don’t need to risk downloading and installing the wrong driver, and you don’t need to worry about making a mistake when installing.
You can download and install your drivers by using either Free or Pro version of Driver Easy. But with the Pro version it takes only 2 clicks (and you get full support and a 30-day money back guarantee):
1) Download and Install Driver Easy.
2) Run Driver Easy and hit the Scan Now button. Driver Easy will then scan your computer and detect any problem drivers.
3) Click on the Update button next to each of the devices to download the latest and reliable driver for it. You can also hit Update All button at the bottom right to automatically update all outdated or missing drivers on your computer (this requires the Pro version — you will be prompted to upgrade when you click on Update All).
5.
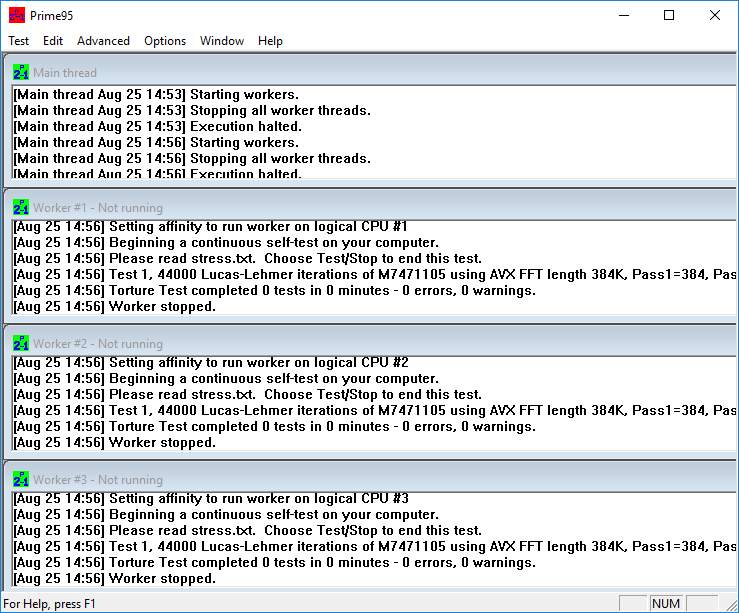
5. Run a stress test.
You need to run a stress test at first to check the status of your CPU.
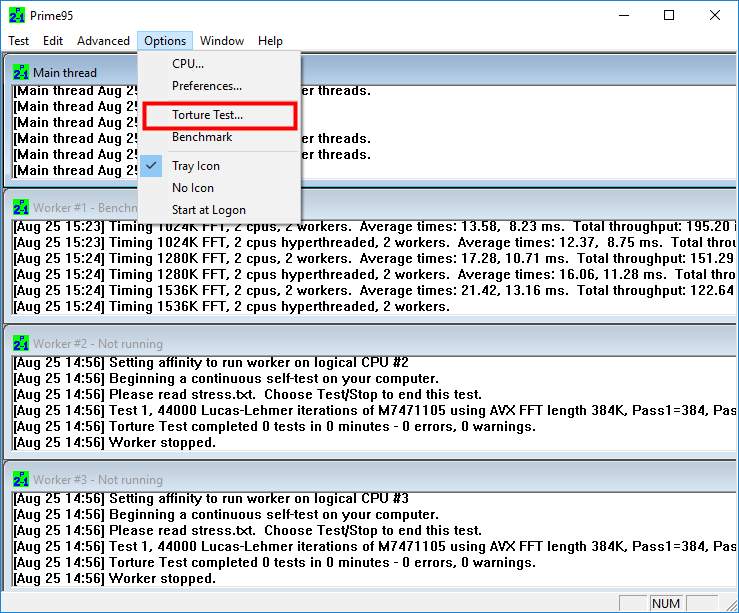
You can use Prime95 to run a stress test. To do so:
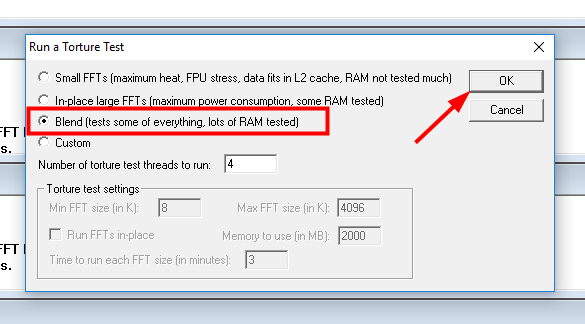
1) Open Prime95 and select Options. Then select Torture Test.
2) In the window popping up, select Blend and then hit OK.
3) Keep it running for about 10 minutes and monitor the temperature of your CPU at the same time. If the temperature reaches too high (over 70°C) or your computer crashes, your CPU cooler may not be powerful enough or there may be issues on your hardware. You should get these issues fixed before you begin overclocking.
If you have done all the things above, you are good to go.
How to overclock your CPU
Now let’s begin to overclock your CPU.
1) Restart your computer and enter BIOS (Basic Input/Output System). (Please check this guide to learn how to enter BIOS.)
* Note that every BIOS is different, and the names and the locations of the entries or items mentioned below can also be different. You should carefully read the user’s manual of your motherboard to figure out where to find these settings.
2) In BIOS, press arrow keys on your keyboard to highlight MB Intelligent Tweaker (M.I.T.) and press Enter to enter this setting.
3) In M.I.T. settings, press arrow keys to highlight Advanced Frequency Settings and then press Enter to enter its setting.
4) First we are going to change the Base Clock (BCLK, or FSB Frequency) and the Multiplier (or CPU Clock Ratio). Press arrow keys to highlight each of these items and then press Enter to configure it.


Your CPU frequency equals Base Clock multiplied by Clock Ratio. You can increase either of them to raise the clock speed. Note that, as mentioned above, the Clock Ratio or Multiplier of many Intel CPU is locked and you can only increase the Base Clock. (Raising Base Clock is in fact riskier in that it will affect your memory, chipset and more.)
You should raise the number of these items with a small increment (like 10% for the Base Clock and 0.5 for the Multiplier) each time. And every time you change a setting, save and exit BIOS and reboot your computer to the operating system. Then run a stress test for around 10 minutes to check the temperature and stability of your computer.
If the temperature is safe and your computer is normal, you can choose either to go on or to stop now. If you want to overclock as high as possible within the stable limit, you can repeat the steps above until the temperature of your computer is out of control, you encounter an error, or your computer crashes.
Getting an error sometimes means you have reached the limit, and you should lower either the Base Clock or the Clock Ratio. But in other cases, this means your CPU is getting short of power supply, and you should increase the CPU voltage.
5) Enter BIOS and go to M.I.T. settings. In M.I.T. settings, press arrow keys to highlight Advanced Voltage Settings and then press Enter to enter its settings.
6) Increase the CPU Core Voltage (or Vcore Voltage) in 0.025 increments. Leave BIOS and run a stress test after each change. If your computer is unstable, change it back to a safe setting.

7) After you finish overclocking and the stress tests, test your overclocked CPU with some intensive programs or games. Make sure that your CPU can deal with the uncertainties in these real-time situations.
If everything is fine after overclocking, congratulations! You’ve already had a faster and more powerful computer now!