


Windows 11 users still encounter several issues including the mouse lagging and stuttering. If you’re in the same boat, no worries. We’ll walk you through the troubleshooting steps in this guide.
Before tweaking any advanced settings on your computer, you should first restart your PC and use your mouse. Then reconnect your mouse to your PC and see if it works again.
If you’re using a wired mouse…
If you’re using a Bluetooth mouse…
If you’re using a wired mouse
If you’re using a wired mouse, try to connect it using another USB port, as the USB port you’re connecting your mouse to may not be functioning properly.
If you’re using a Bluetooth mouse
If you’re using a Bluetooth wireless mouse, try removing and reconnecting it to your PC.
- On your keyboard, press the Windows logo + I keys to open Settings.
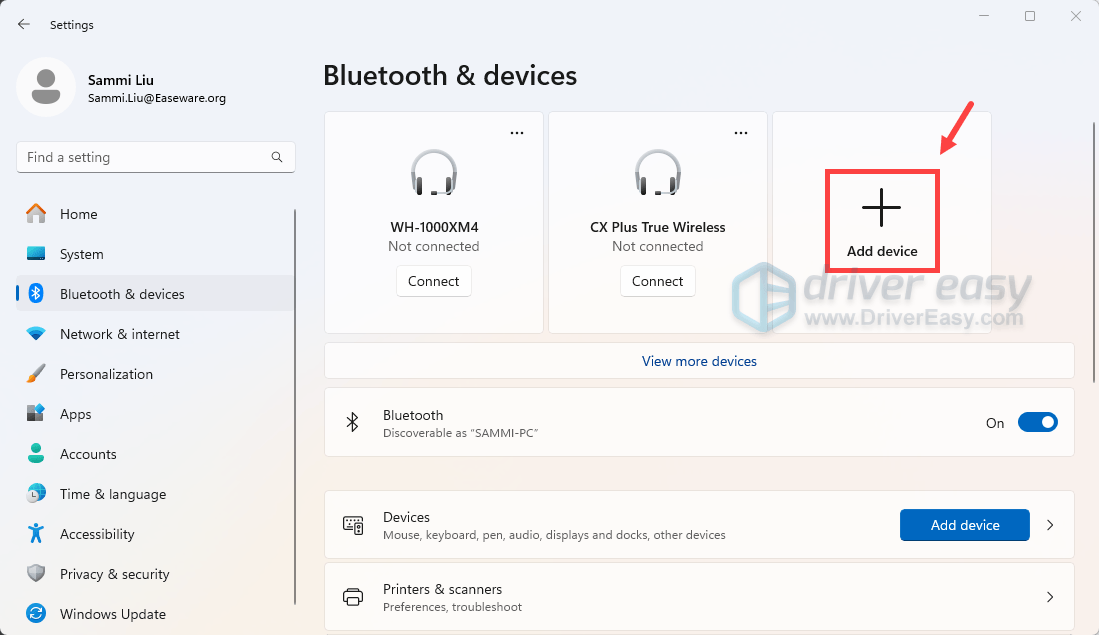
- Select Bluetooth & devices. Find your device. Click on the three-dots and click Remove device. If you can’t find see your device, click View more devices.
- Now turn on your mouse to make sure it’s ready for connecting. Then click Add device from the settings.
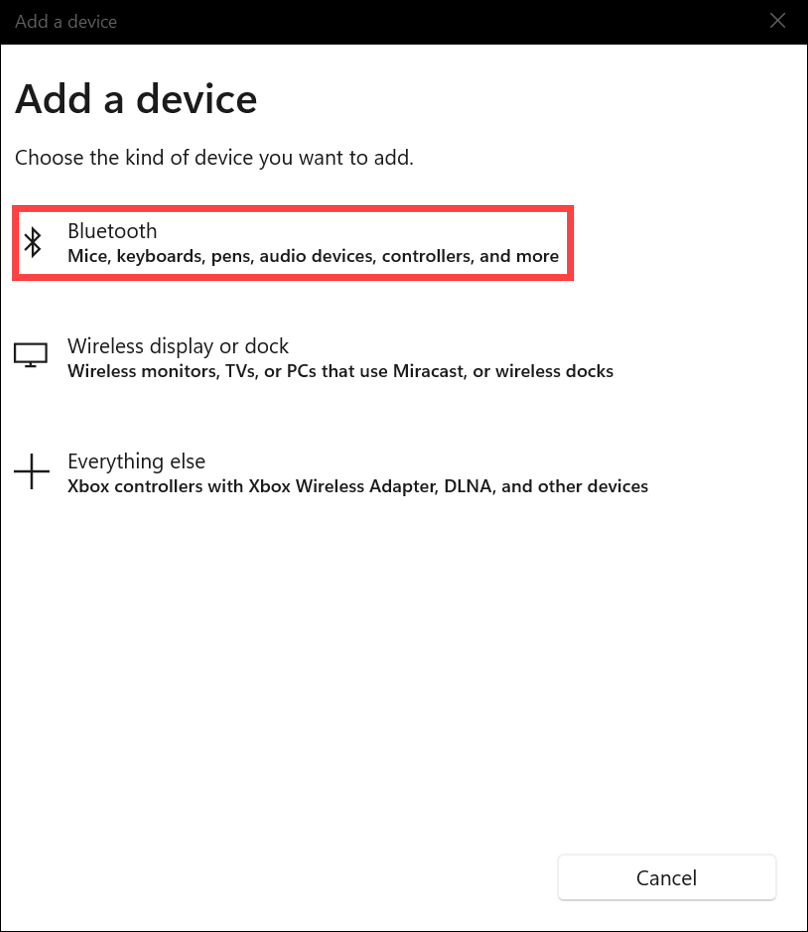
- Click Bluetooth and find your device to connect it.
If the problem persists after performing these steps, you should try the fixes below.
- Download & install all Windows updates
- Disable mouse trails
- Enable/ Disable Scroll Inactive
- Update your device drivers
- Disable Adaptive Sync Settings
- Check for interference for wireless mouse
- Check valuable memory
1. Download & install all Windows updates
Windows updates usually come with bug fixes and bring new features. When you encounter any issues on Windows, try installing Windows updates. This may be the best shot you can take without much troubleshooting. Follow the steps below to do so.
- On your keyboard, press the Windows logo + I keys simultaneously to open Settings.
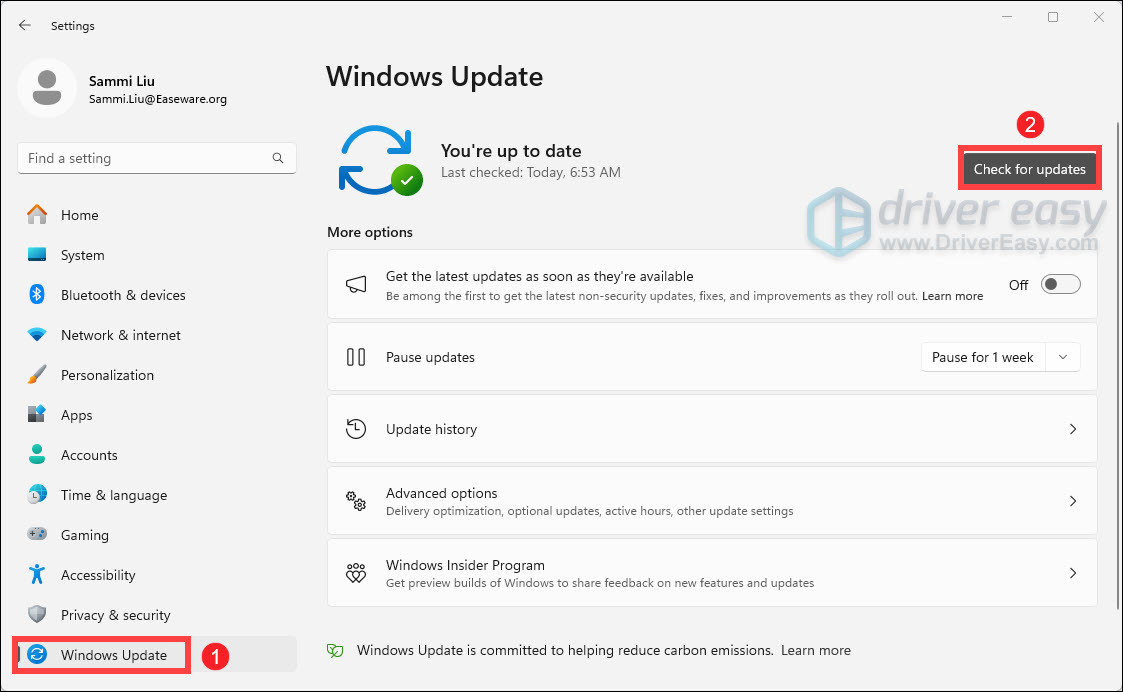
- Click Windows Update.
- Click Check for updates. Then Windows will start downloading the updates if they are available.
- When the process is finished, click Restart now to restart your PC. Or you can Schedule the restart.
After the reboot, use your mouse to do a test. If your problem persists, try the next fix below.
2. Disable mouse trails
A mouse with a trail is an accessibility feature known as a pointer trail, which makes it easier to track the mouse pointer’s movement. But users who have mouse trails enabled are more likely to face the mouse lagging and stuttering issues, which seems like a bug with this feature. While disabling mouse trails doesn’t fix the issues entirely, it makes things slightly better. To do this, follow the instructions below.
- On your keyboard, press the Windows + R keys simultaneously to open the Run box.
- Type main.cpl and hit Enter.

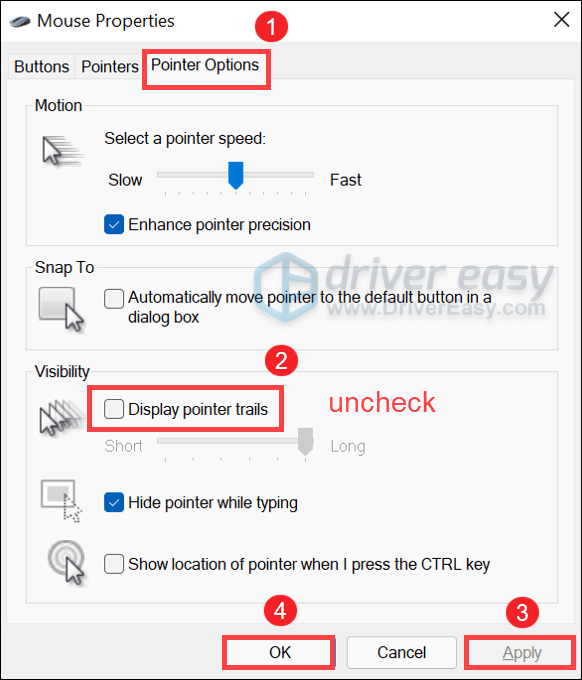
- Select the Pointer Options tab. Uncheck Display pointer trails and click Apply > OK.
Now restart your Windows PC and check if your problem is solved.
3. Enable/ Disable Scroll Inactive
Windows Scroll Inactive is a feature that allows you to scroll a non-focused window without clicking on it. But some users found that when it’s enabled, the mouse will lag and stutter. In this case, you can try enabling and then disabling this option and check if it works for you.
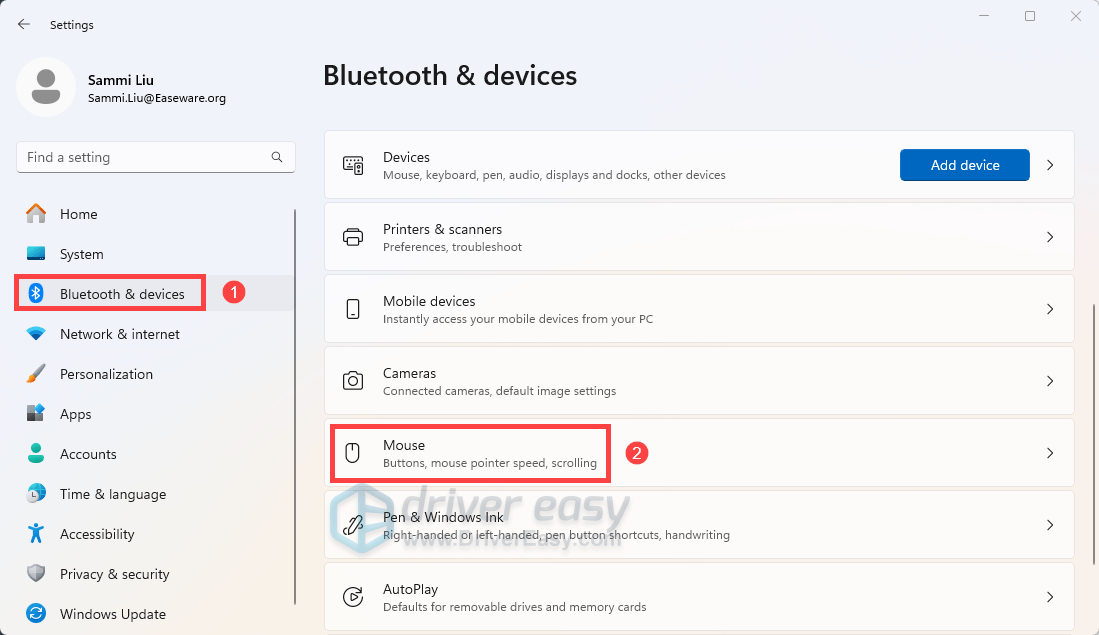
- On your keyboard, press the Windows logo + I keys simultaneously to open Settings.
- Select Bluetooth and devices. Scroll down. Find the Mouse option and click on it.
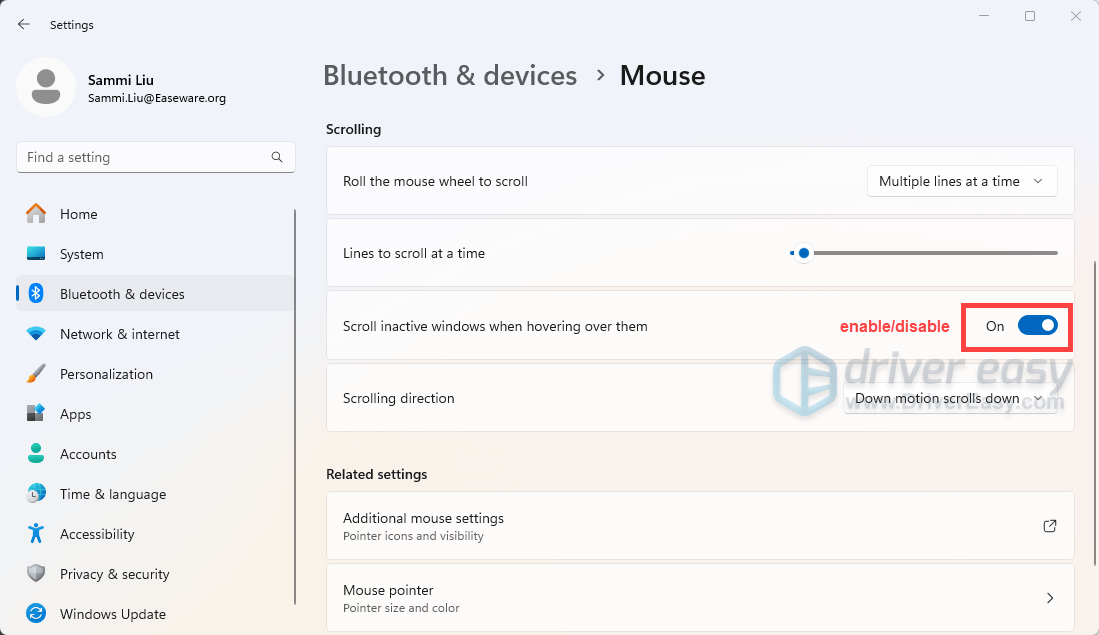
- Now drag on and off the Scroll inactive windows when hovering over them option for a few times.
If this doesn’t work for you, proceed to the next fix.
4. Update your device drivers
Drivers make it possible to use accessories and core computer parts on your device. If you’re using an outdated mouse or bluetooth driver, there’s no doubt you’re not getting top performance. To fix it, you should try updating your drivers.
You can do this manually via the Device Manager or by going to your device’s manufacturer’s driver download page to download and install the latest driver compatible with your system version. Or you can do it automatically with Driver Easy. It’s a useful driver updater tool that helps detect any outdated drivers, then download and install the latest drivers for your system.
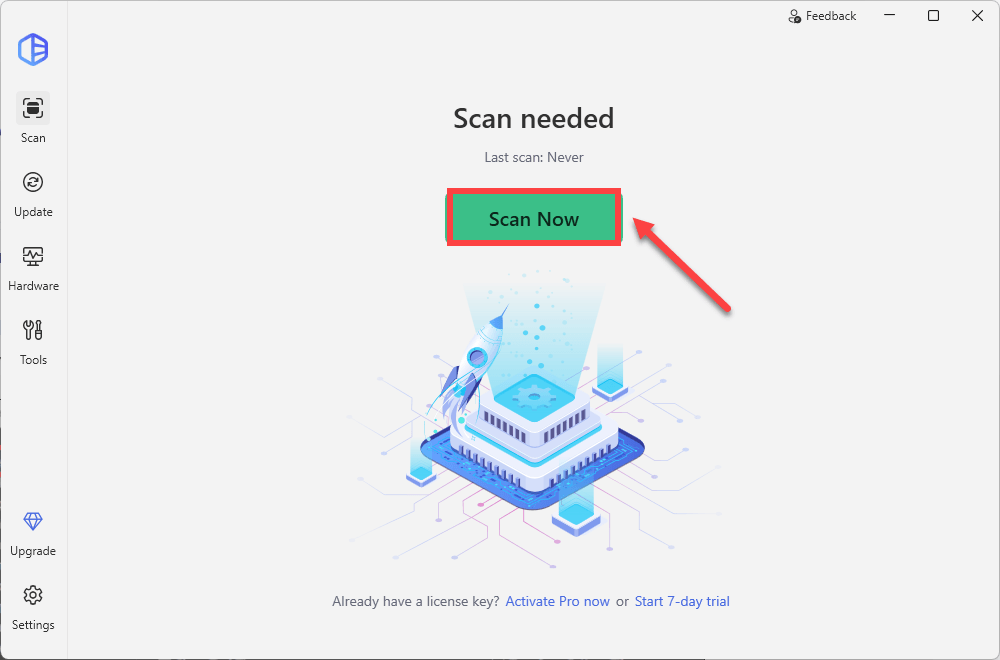
- Download and install Driver Easy.
- Run Driver Easy and click the Scan Now button. Driver Easy will then scan your computer and detect any problem drivers.
- Click Update All to automatically download and install the correct version of all the drivers that are missing or out of date on your system. (This requires the Pro version which comes with full support and a 30-day money-back guarantee. You’ll be prompted to upgrade when you click Update All. If you’re not ready to buy the Pro version, Driver Easy offers a 7-day free trial which includes access to all the Pro features such as high-speed download and one-click install. You won’t be charged anything until your 7-day trial has ended.)

After updating drivers, restart your PC and check if the mouse lagging and stuttering issue persists.
5. Disable Adaptive Sync Settings
If you’re using a monitor that supports NVIDIA Adaptive Sync, you may be more likely to encounter these lagging and stuttering issues. It’s available for users who have 10 series NVIDIA graphics cards and above that’s capable of supporting G-Sync. But enabling this feature would trigger some errors. To locate your problems, you should try disabling the Adaptive Sync settings. Here is how you can do this.
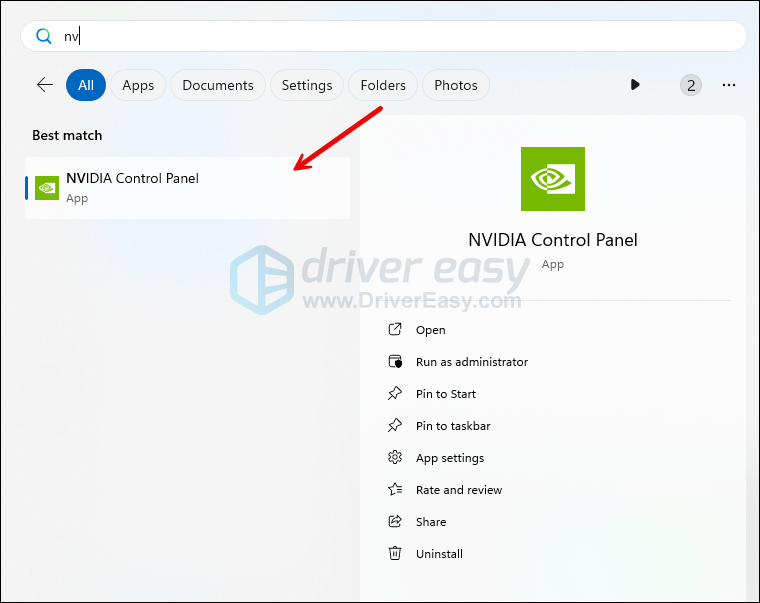
- In your search box, type or paste NVIDIA Control Panel. Then click it from the results.
- Under the Display tab, click Set up G-SYNC. Then uncheck Enable G-SYNC, G-SYNC Compatible.
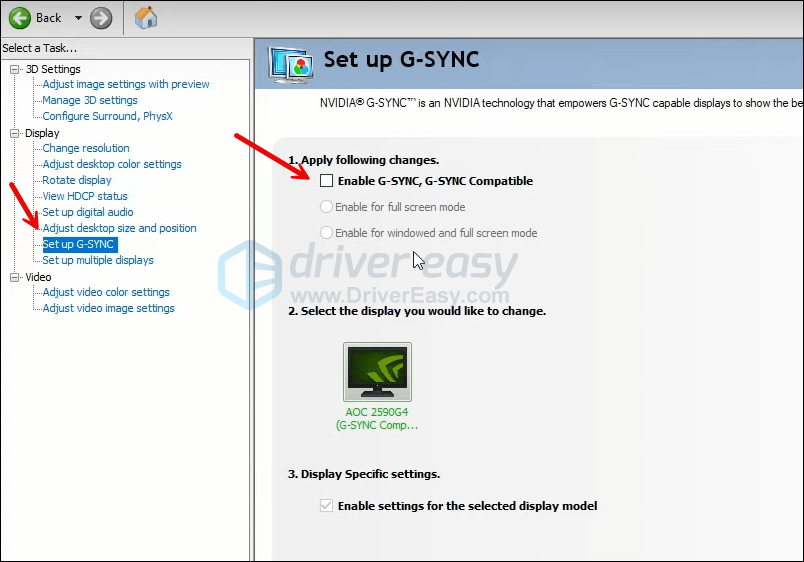
- Restart your PC to let the change take full effect.
6. Check for interference for wireless mouse
In some cases you are looking at a hardware problem, or the mouse lagging is caused by interference. If you’re using a wireless mouse, whether through Bluetooth or a USB receiver, you can check if the signal is being interfered:
- Move the mouse closer to your PC, and check if the mouse lag improves.
- Try moving the Bluetooth dongle or the USB receiver to the front panel of your PC. For laptops, simply try changing the USB ports.
- It’s a known issue that USB 3.0 may interfere with wireless devices. So you can try to remove all other USB devices and check if lagging issue is still there.
7. Check valuable memory
Too many programs running in the background may also be the root of mouse lagging. Follow the steps below to check if you valuable memory is less than 10%.
- Press Ctrl + Shift + Esc simultaneously to open Task Manager directly.
- Click Performance from the left panel, and click Memory.
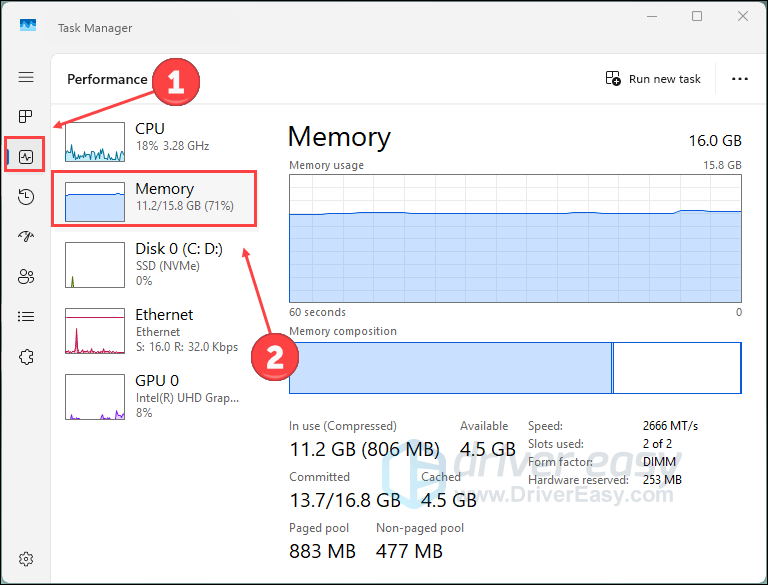
- Check how much memory is in use. If the available memory is less than 10%, you need to follow step 4 to end some unnecessary programs to free up the memory.
- Click Processes from the left panel. Right-click on the apps or background processes you want to close, and click End task.
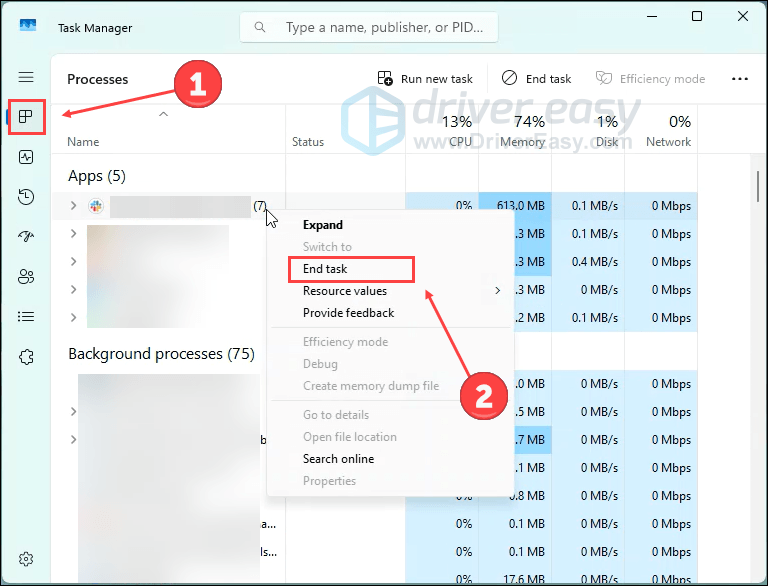
- Check for any improvement in the mouse.
Hopefully, you can use your mouse smoothly after walking through the steps above. If you have any ideas or questions, feel free to drop us a line in the comment section below.