


Having two monitors for your PC setup is a common practice to improve productivity and enhance the experience. However, it’s not error-free. Sometimes issues like the second monitor lagging or freezing would occur, especially when playing demanding games. If you’re in the same boat, don’t fret! We’ve got some ideas on how to fix it.
Try these fixes
Not all methods are necessary; simply work your way down the list until you find the one that works for you.
- Change your monitor’s refresh rate
- Close bandwidth-hogging and graphics-intensive applications
- Download and install all Windows updates
- Update your graphics and monitor drivers
- Turn off hardware acceleration on Chrome & Firefox
- Turn off hardware-accelerated GPU scheduling
1. Change your monitor’s refresh rate
This issue seems to be plaguing users who have dual monitors with 144hz and 60hz refresh rate setups. If that’s also your case, try changing the 144hz monitor to 60hz, which has proven to be working for many users. You can follow the steps below to change your monitor’s refresh rate.
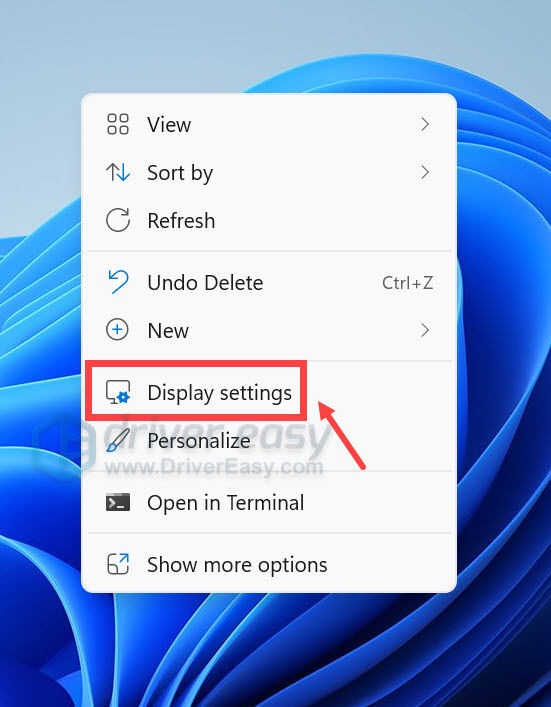
- Right-click on an empty space on the desktop and select Display Settings.
- Then go to Advanced display. If you’re on Windows 10, it will be Advanced display settings.
- Next to Choose a refresh rate (Refresh rate if you’re on Windows 10), select 60 Hertz from the drop-down. Then save your changes.
2. Close bandwidth-hogging and graphics-intensive applications
It’s more demanding for the GPU to display two monitors at once. Therefore, if you have too many applications, especially the ones that are bandwidth-hogging and graphics-intensive running in the background, you’re more likely to encounter lagging and stuttering issues. To prevent these from happening, follow the instructions below to disable them while playing games.
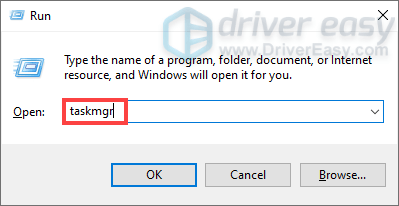
- On your keyboard, press the Windows logo key + R simultaneously to open the Run box.
- Type taskmgr and press Enter.
- Under the Processes tab, right-click the applications that are eating up your resources. Then select End task.
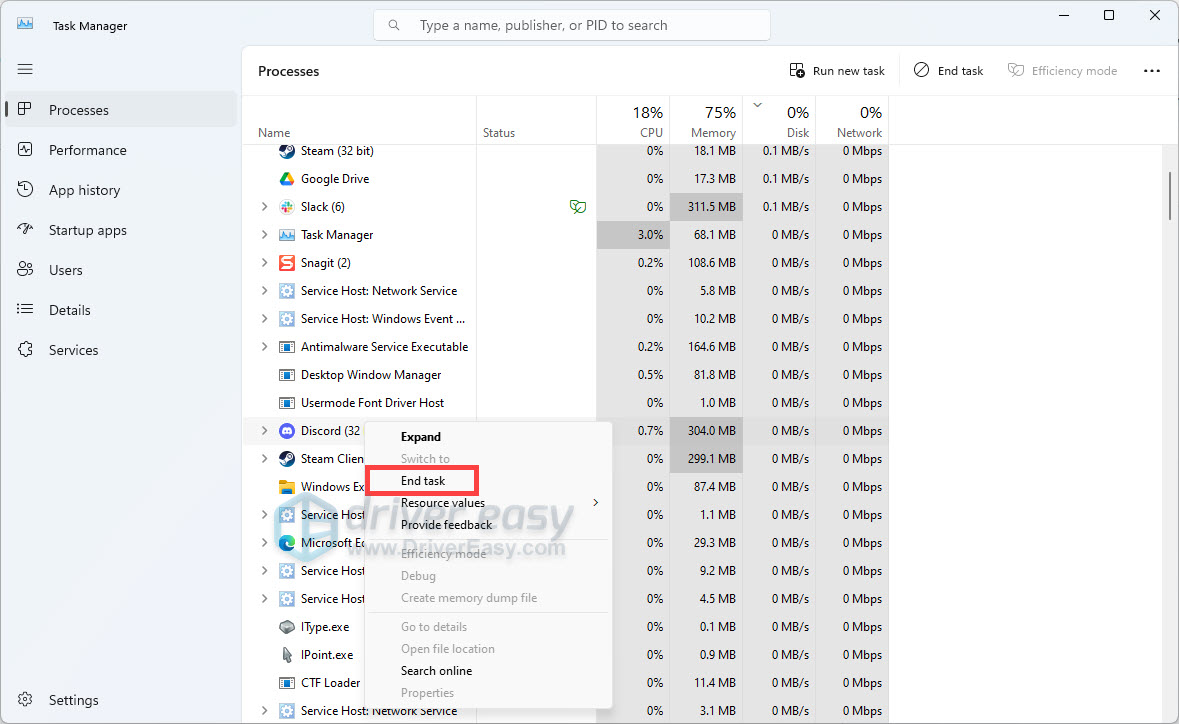
You can click Network or GPU to sort the processes by network usage or GPU usage to decide which applications you should close.
Once you’re done, play your game and check if your problem has been solved. If you can’t see any improvements, try the next fix below.
3. Download and install all Windows updates
Windows updates usually come with bug fixes and bring new features. So it’s reasonable to take advantage of them to receive the utmost performance and probably fix your issues. To get the latest updates, take the steps as follows.
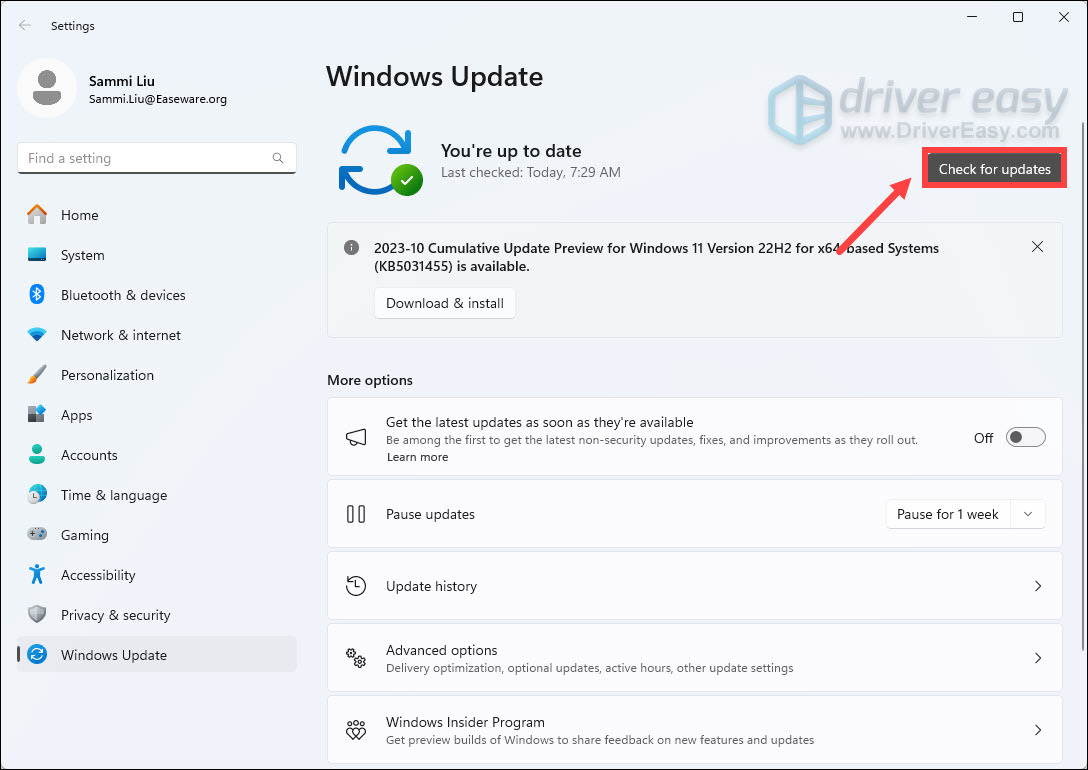
- In the Search box, type check for updates. Then click Check for updates from the list of results.
- Click on Check for updates. If updates are available, follow the on-screen instructions to download and install the updates for your system.
After updates are installed successfully, restart your computer and then check whether what you have done can do the trick. If your problem persists, proceed to the next fix.
4. Update your graphics and monitor drivers
Next, you should check for driver updates, especially your graphics and monitor drivers. Manufacturers usually release new drivers to make sure users can get the best performance. Besides, from time to time, your device drivers can get corrupted, which would undoubtedly cause a wide range of issues, ranging from minor graphics glitches to critical system errors.
There are mainly two ways to update your graphics and monitor drivers: manually and automatically.
Option 1: Manually update your drivers
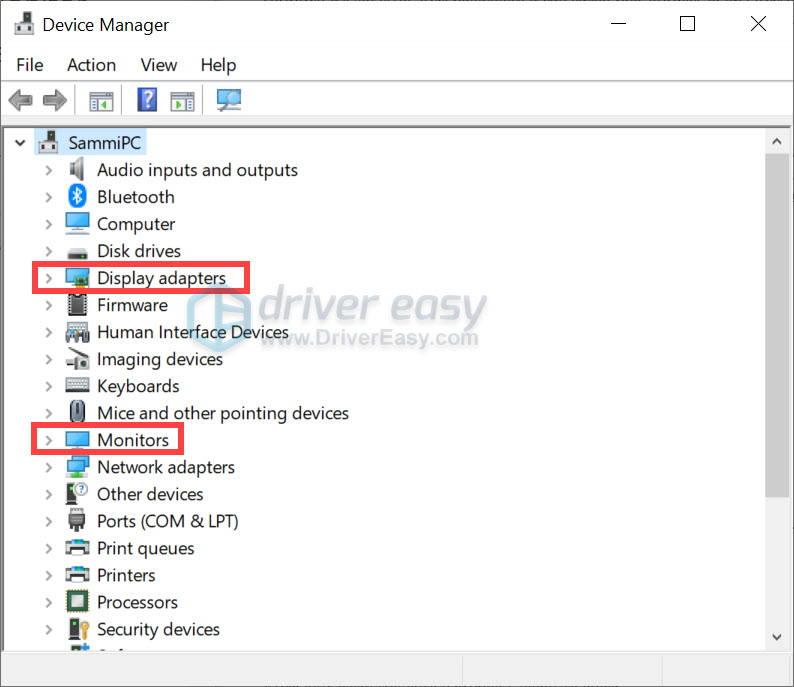
You can update your device drivers via the Device Manager:
- On your keyboard, press the Windows + R keys simultaneously to open the Run box.
- Enter devmgmt.msc and hit Enter.
.png)
- Double-click to expand the list for your devices. Then right-click on each of them and select Update driver.
Then follow the on-screen instructions to download and install the latest drivers.
However, if Windows fails to find the latest drivers for you, you may need to navigate to the manufacturers’ websites to search for, download, and install the correct drivers for your system.
To get the latest driver for your graphics card, you can click on the link below.
Option 2: Automatically update your drivers
Manually updating your drivers can be a tedious task. And when you encounter any issues during this process, you’ll need some tech knowledge to solve them. In this situation, we suggest you use a dedicated updater tool like Driver Easy to help automatically detect any outdated drivers, then download and install the latest drivers for your system.
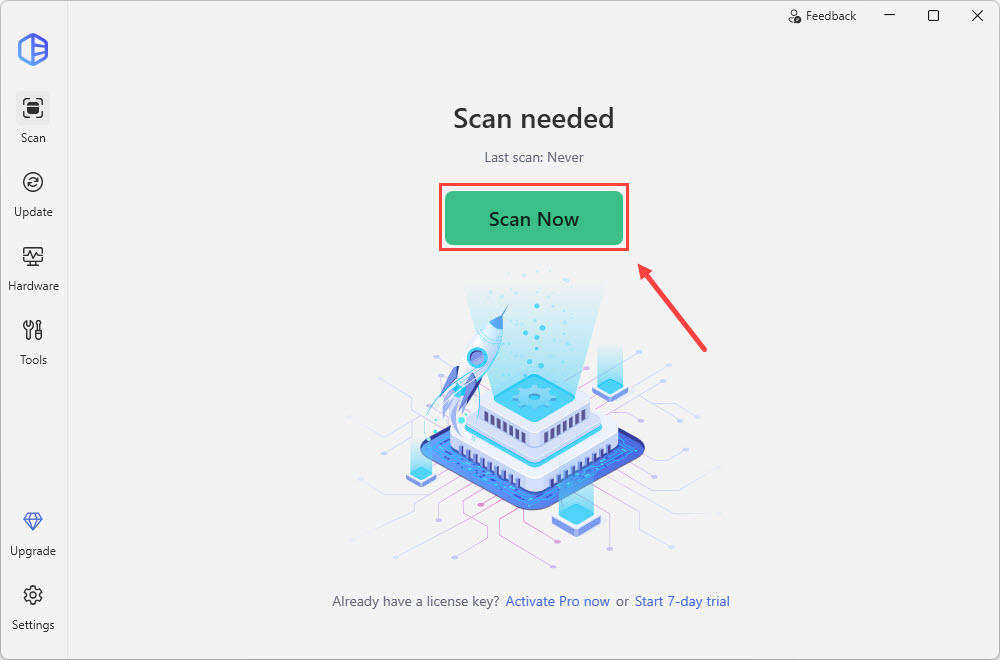
- Download and install Driver Easy.
- Run Driver Easy and click on the Scan Now button. Driver Easy will then scan your computer and detect any devices with outdated drivers.
- Click Update All to automatically download and install the correct version of all the drivers that are missing or out of date on your system.
This requires the Pro version which comes with full support and a 30-day money-back guarantee. You’ll be prompted to upgrade when you click Update All. If you’re not ready to commit to the Pro version, Driver Easy offers a complimentary 7-day trial with full access to all Pro features, including high-speed downloads and one-click installations. Your payment will only be processed once the trial period concludes.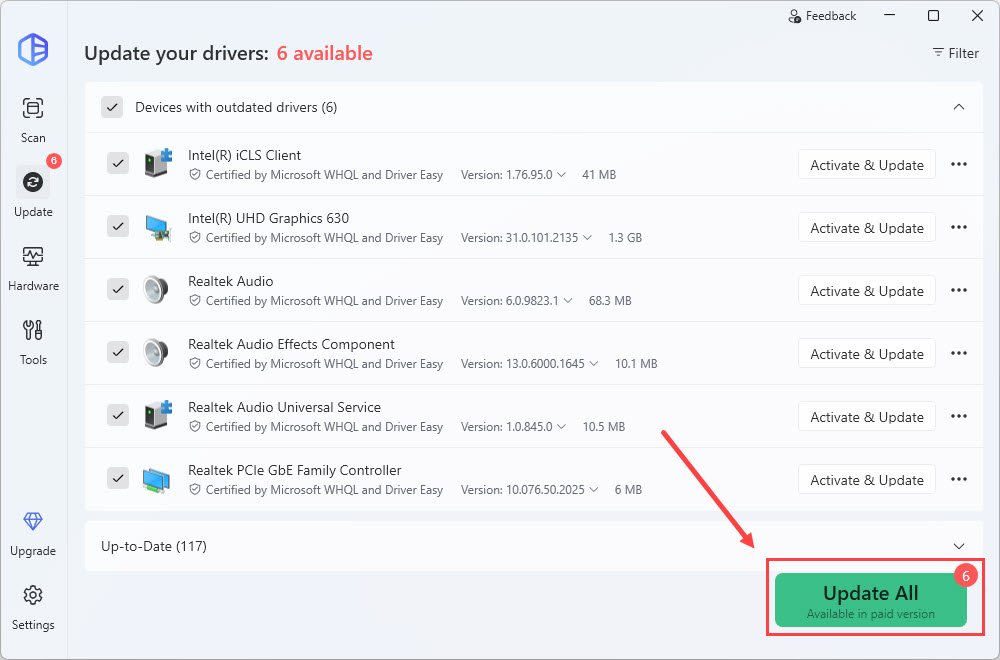
After updating your device drivers, restart your device. If your second monitor is still lagging while playing games, proceed to the next fix.
5. Turn off hardware acceleration on Chrome & Firefox
By default, hardware acceleration is enabled to utilize your computer’s graphics processing unit (GPU) to tackle graphics-intensive tasks. However, it’s not error-free. Sometimes it can cause your browser to lag, freeze, or even crash. In addition, turning on hardware acceleration can drain your computer’s battery. To troubleshoot the issues you’re having, try turning it off on Chrome and Firefox. Then see how things go.
On Chrome
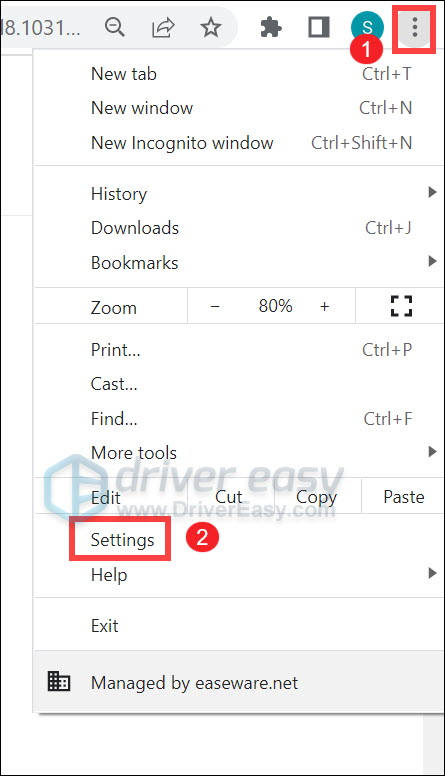
- On the top-right, click on the three-dot and select Settings.
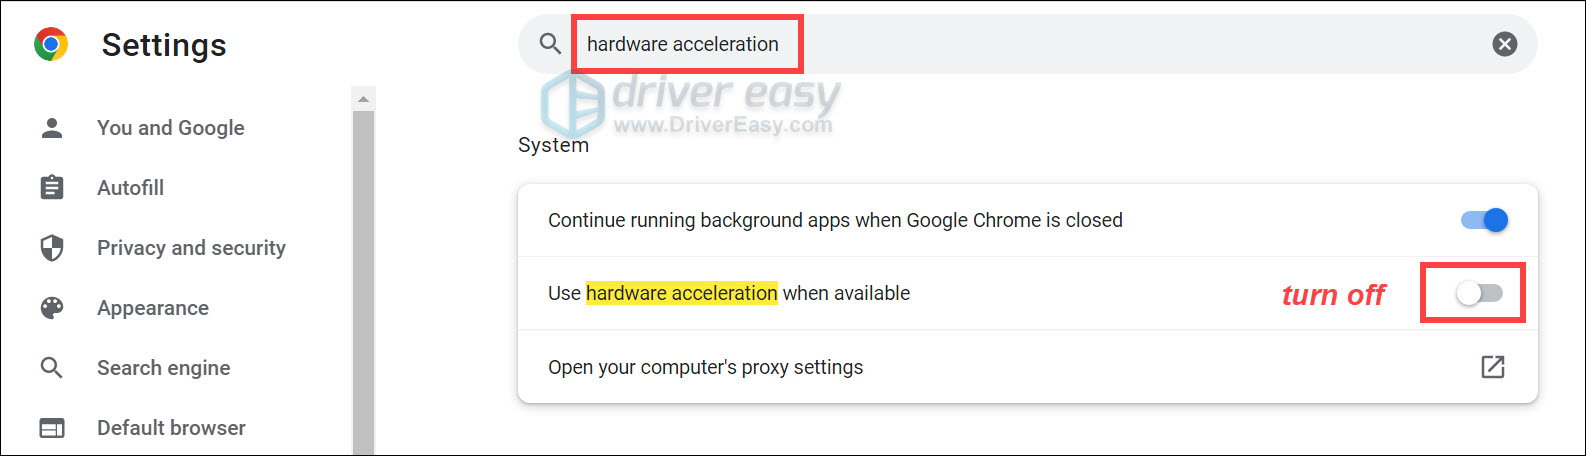
- On the search box, enter hardware acceleration. Then you’ll see the option Use hardware acceleration when available. Switch off the toggle button.
On FireFox
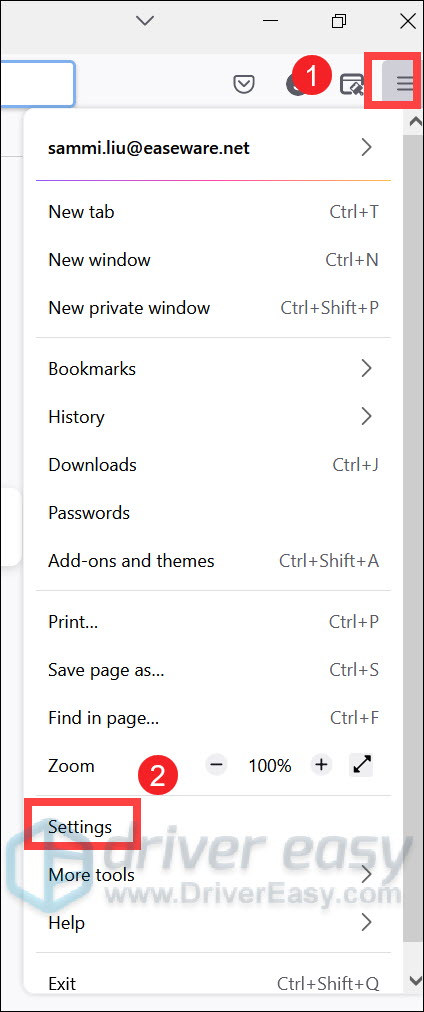
- On the top right, click on the menu button (three lines). Then select Settings.
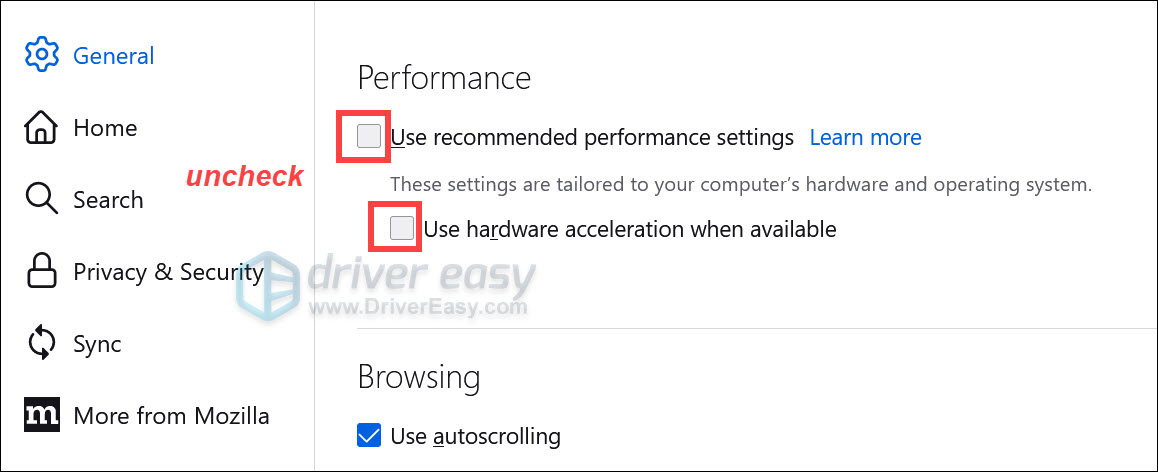
- Select General from the left navigation pane. Scroll down to the Performance section, uncheck User recommended performance settings to display additional settings. Uncheck Use hardware acceleration when available.
After applying the changes, play your game and check if there are any improvements. If this doesn’t make a difference, try the next fix below.
6. Turn off Hardware-accelerated GPU scheduling
If you’re running Windows 10 2004 or a newer version and have a supported GPU installed on your PC, you probably have enabled the Hardware-accelerated GPU scheduling. It is a feature that allows more efficient sharing of GPU resources in Windows. However, it can sometimes cause compatibility and performance issues. Turning it off may help fix your issues.
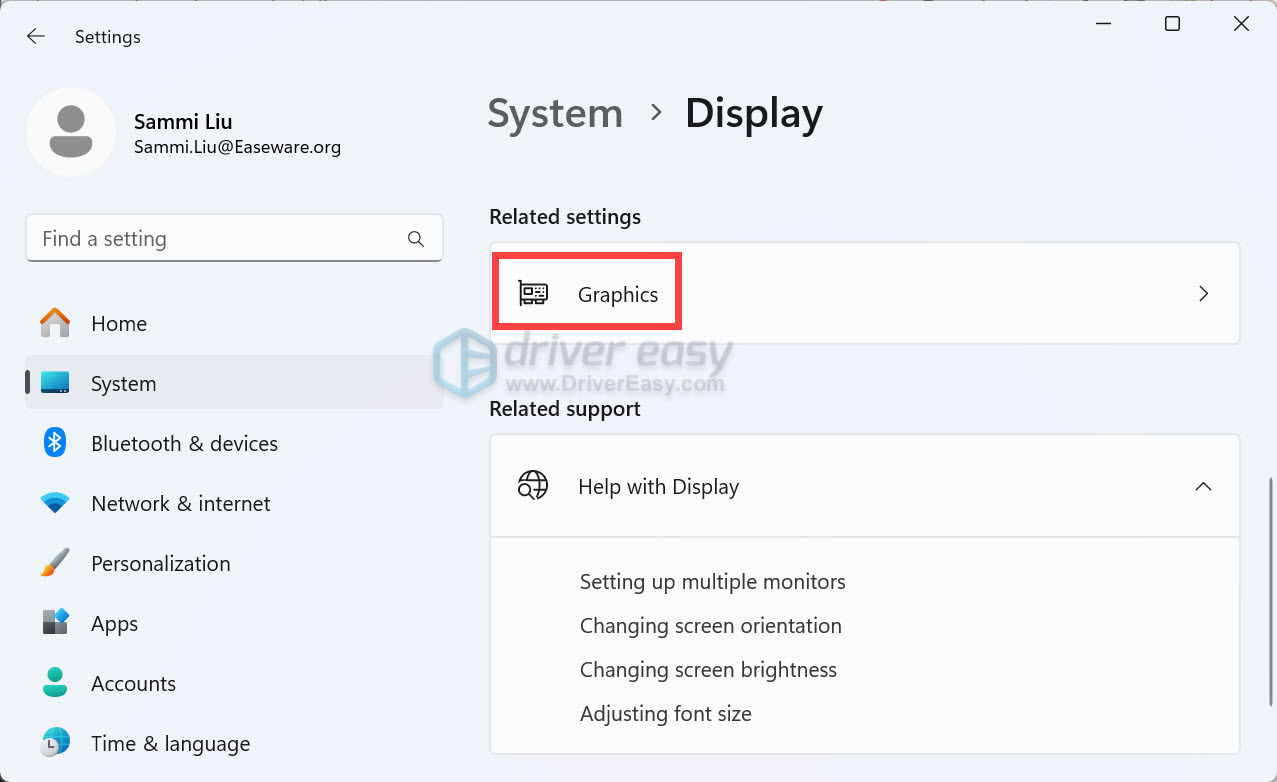
- Right-click on the empty space on your desktop, then select Display settings.
- Scroll down and select Graphics.
- Click Change default graphics settings.
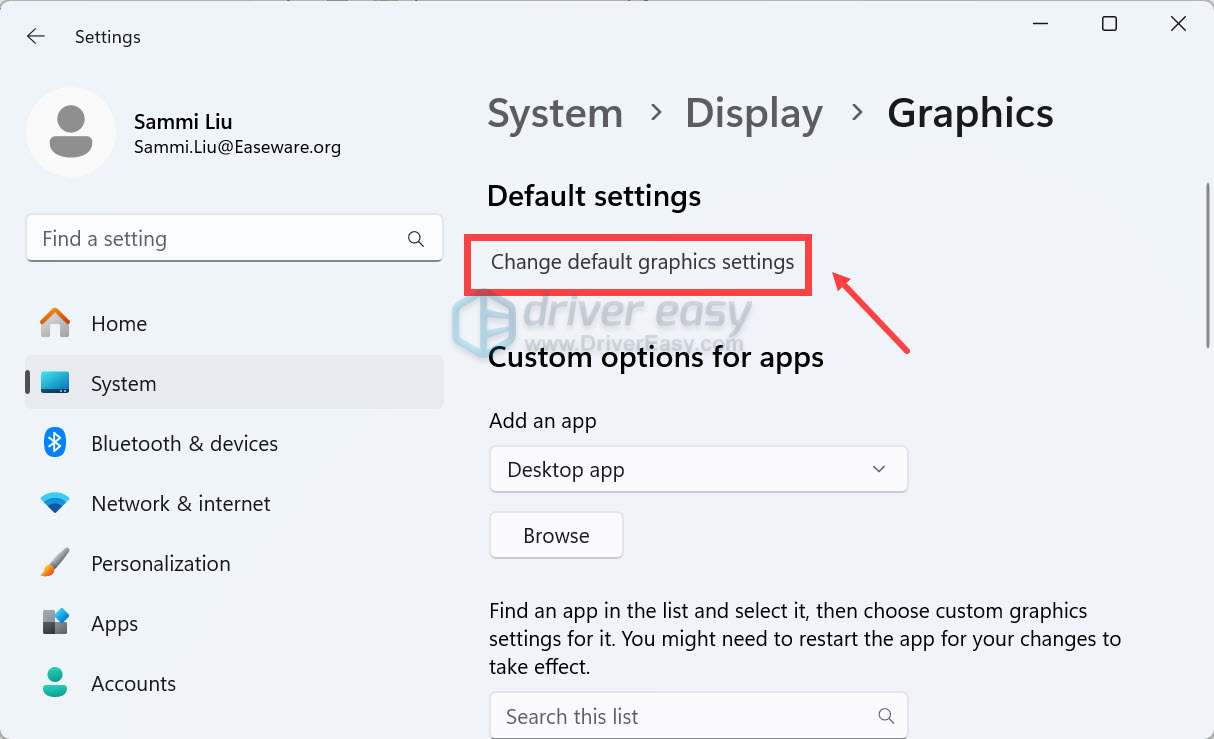
- Toggle off the Hardware-accelerated GPU scheduling option.
After applying the changes, restart your PC and test your gameplay.
Hope this guide helped! If you need any assistance, write them down in the comment section below. We’ll be happy to help you with your question.