


Headphones are essential when you need a full-on PC experience. However, something’s bothering users. Their headphones are not detected or working on Windows 11. This issue can be caused by physical damage, operating glitches, and even incorrect settings being selected. This guide is for you to troubleshoot your issue.
Before trying the fixes below, we suggest you restart your computer. Sometimes a quick restart may fix your problem. Then try to connect your headphones to the computer. If you’re using wired headphones, make sure they are properly plugged in. If you’re using bluetooth headphones, ensure they are ready to pair.
Then you’ll also need to check if your headphones work with another device. If they are not working, chances are they are broken or damaged. In this case, send a request for repair or replacement if your headphones are under warranty.
If situations mentioned above aren’t your case, you can try the fixes below for troubleshooting.
- Run the troubleshooter
- Make sure your headphones are set as the default
- Update your drivers
- Check for and download Windows updates
1. Run the troubleshooter
When you have audio-related issues, one thing you can try is to run the audio troubleshooter. Windows comes with a bunch of different troubleshooters that can be used to potentially fix problems on your Windows.
To see if running the audio troubleshooter nets you any results, follow the steps below.
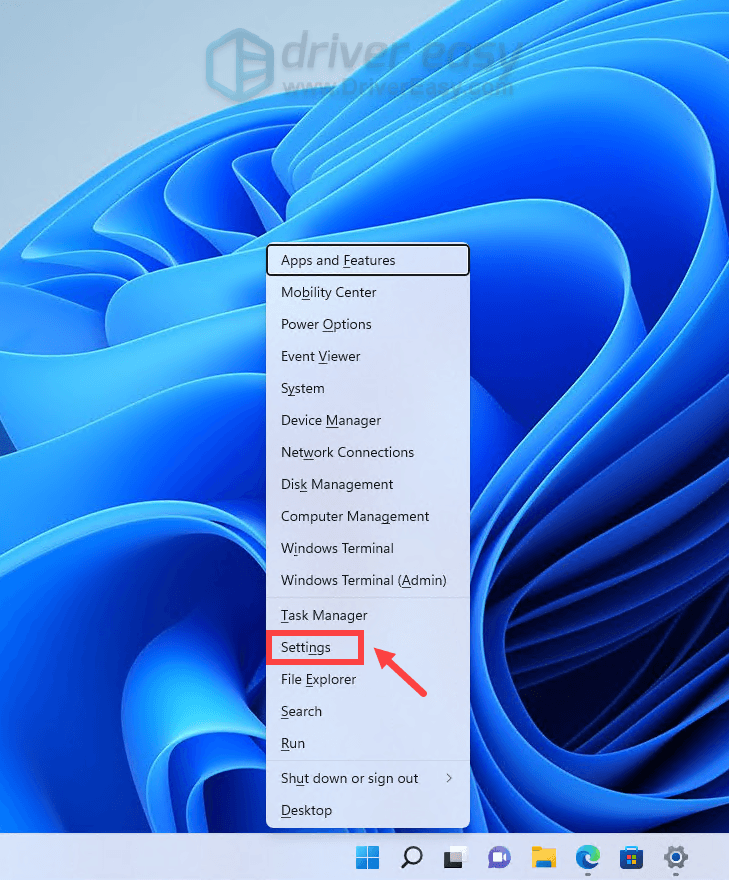
- On your keyboard, press the Windows + X keys simultaneously.
- Select Settings from the pop-up that appears.
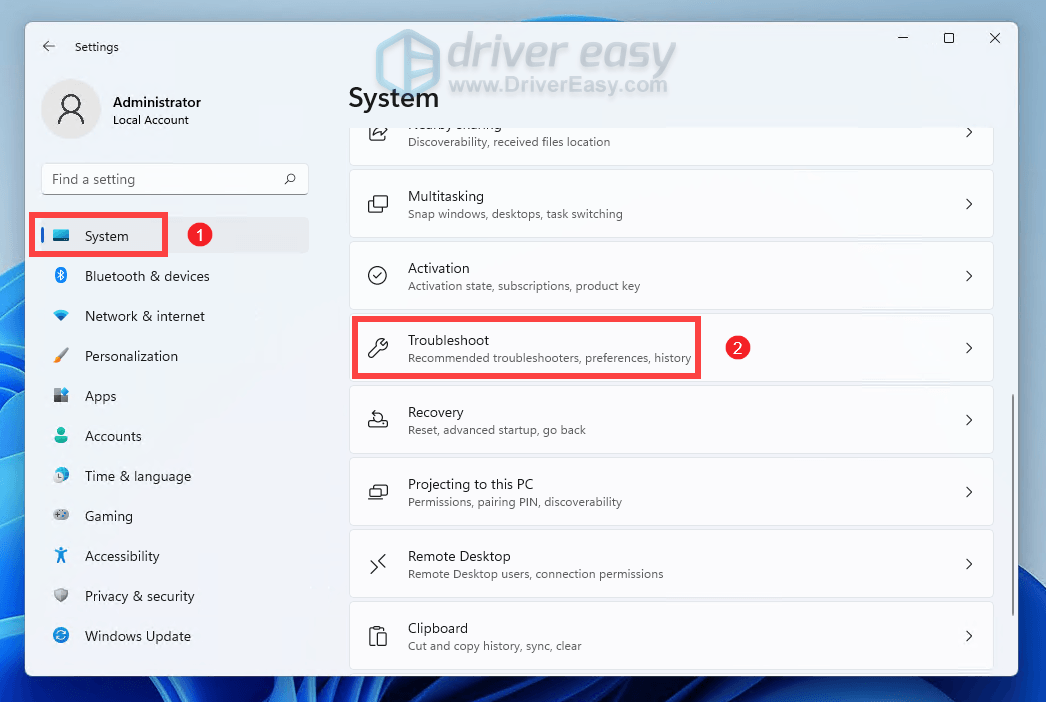
- Select System. Then click on Troubleshoot.
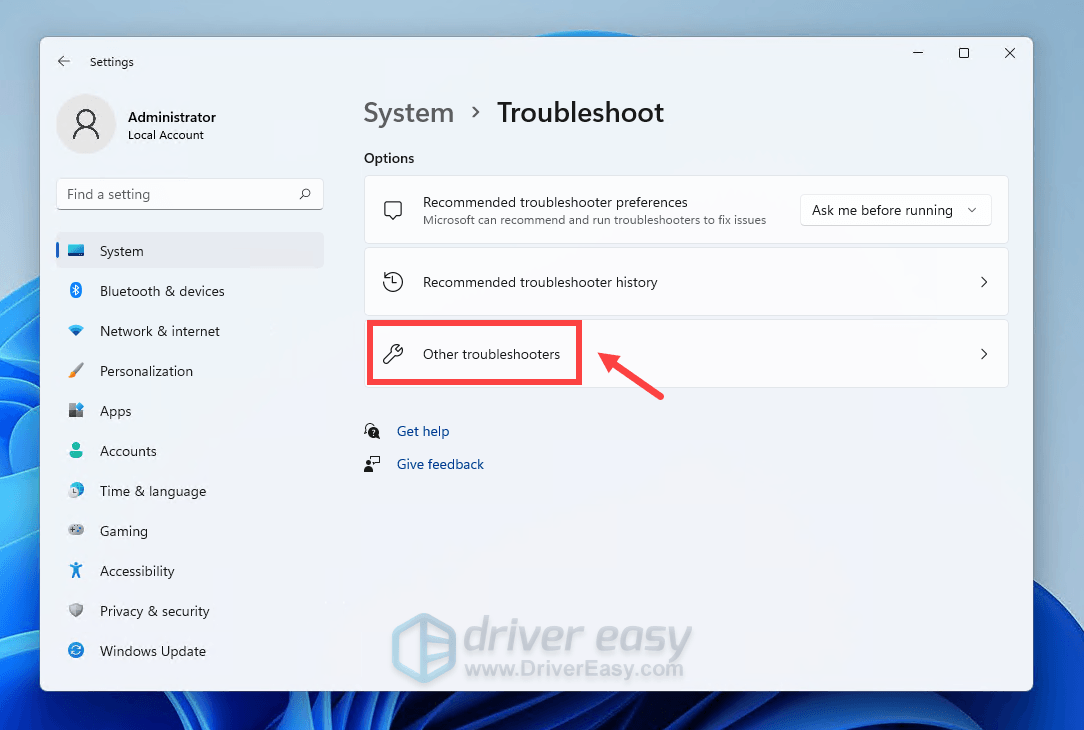
- Select Other troubleshooters.
- Find Playing Audio. Then click on the Run button.

Then follow the on-screen instructions and wait for it to detect and fix your issues. If it fails to do so, you may need to try other methods listed below.
2. Make sure your headphones are set as the default
In some cases, your headphones are not working because they disabled and not set as the default device. Therefore, you need to double check it by taking the steps below.
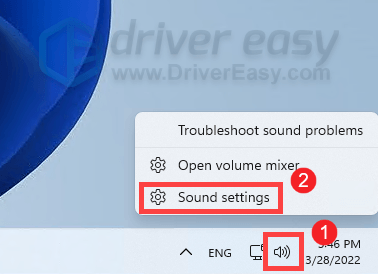
- On your taskbar, right-click on the sound icon. Then select Sound settings.
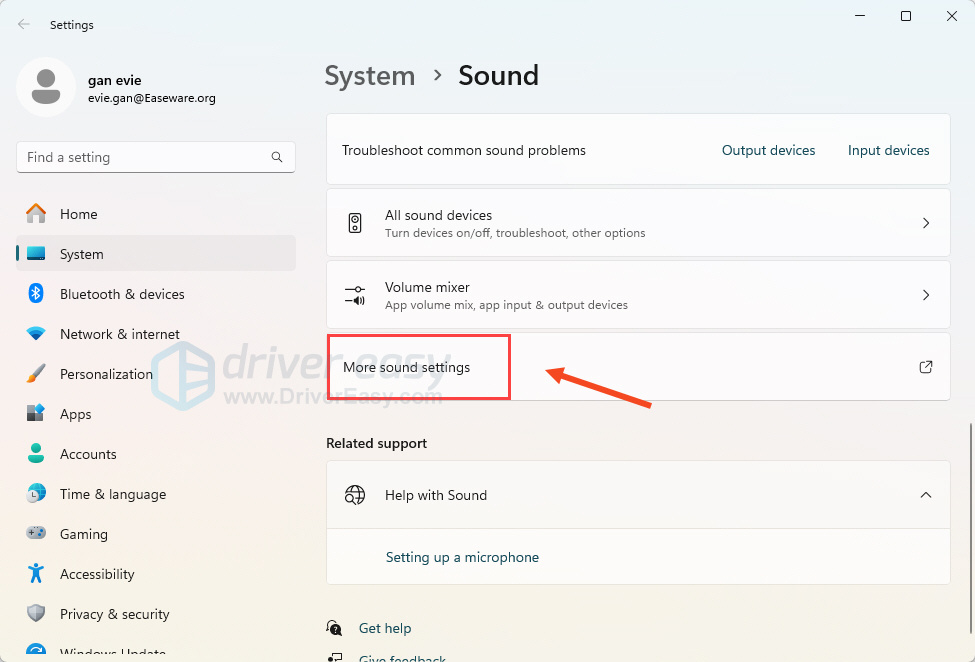
- On the right pane, click More sound settings.
- In the Sound window that opens, right-click your device and select Enable. Then you’ll also need to click Set as Default Device.
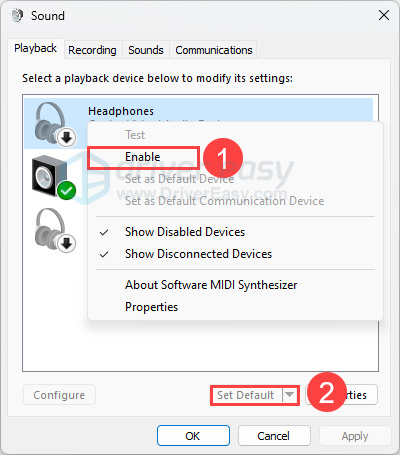
Then click OK to apply the changes. If your headphones are properly connected but you still can’t hear any sound, proceed to the next fix.
3. Update your drivers
If you run into problems trying to connect to your Bluetooth headphones, or you’re using USB headphones but cannot hear any sound, it’s high time you check if your drivers, especially Bluetooth, USB, and audio drivers are misconfigured or outdated.
To update your drivers, you can do it automatically by going to the manufacturers’ support page to download and install the correct drivers for your system.
However, if you don’t have the time or patience to update drivers manually, you can do it automatically with Driver Easy. It’s an automatic driver updater tool that helps you scan and detect any missing or outdated drivers, then download and install the latest drivers for your system, direct from the device provider. With Driver Easy, you don’t need to waste your hunting for driver updates.
- Download and install Driver Easy.
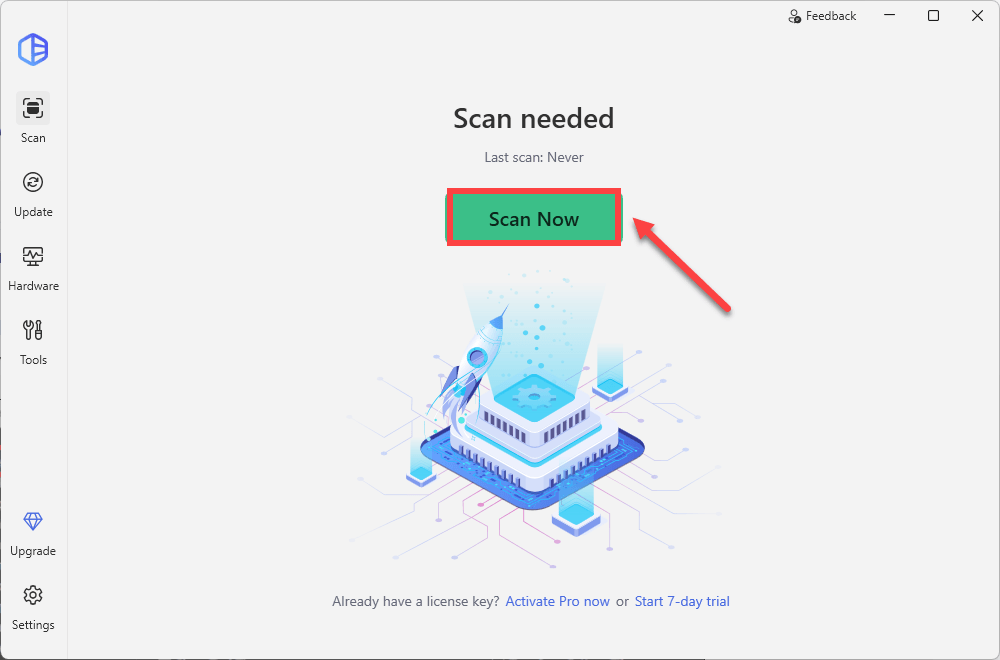
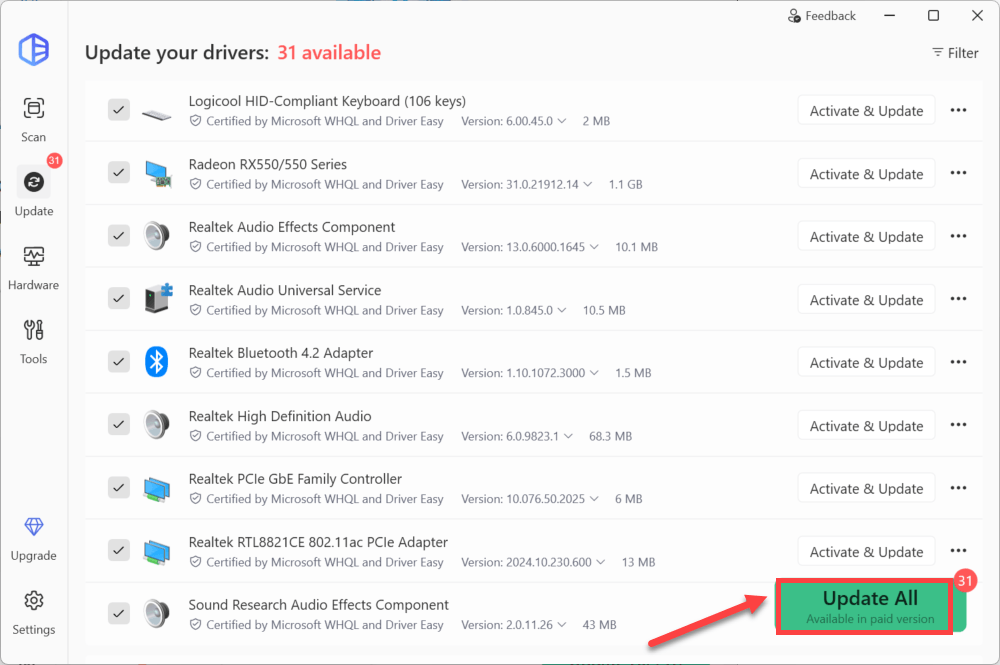
- Run Driver Easy and click the Scan Now button. Driver Easy will then scan your computer and detect any devices with outdated drivers.
- Click the Activate & Update button next to any flagged device or click Update All to update all the outdated drivers. You can sign up for the free trial to update drivers with no upfront cost.
After updating drivers, restart your computer and try to use your headphones to check if your problem has been solved.
4. Check for and download Windows updates
After installing the driver updates, you’re also supposed to download and install all Windows updates. They usually bring new features and come with bug fixes for the compatibility issue.
To check if there are any updates available, follow the instructions below.
- On your keyboard, press the Windows logo + I keys simultaneously to open Settings.
- Click Windows Update. Click Check for updates. Then Windows will start downloading the updates if they are available.
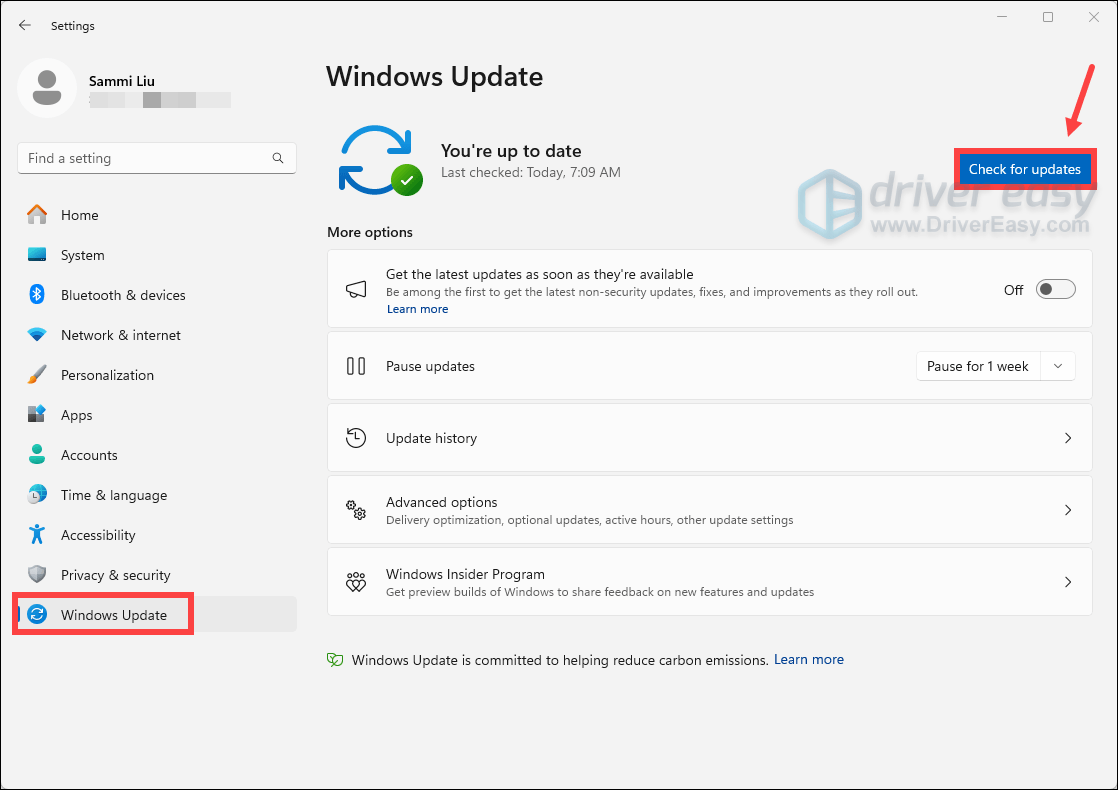
- When the process is finished, click Restart now to restart your PC. Or you can Schedule the restart.
After the reboot, use your headphones and check if they are working now.
Hope this post helped! If you have any ideas or questions regarding using headphones on your Windows 11, feel free to drop us a line in the comment section below.