


Trying to restore your Dell laptop to factory settings? It’s not hard at all! Follow this step-by-step instruction, and you’ll be able to factory reset your Windows 10 Dell laptop very easily.
To factory reset your Dell laptop
- Press the Windows logo key and i on your keyboard at the same time.
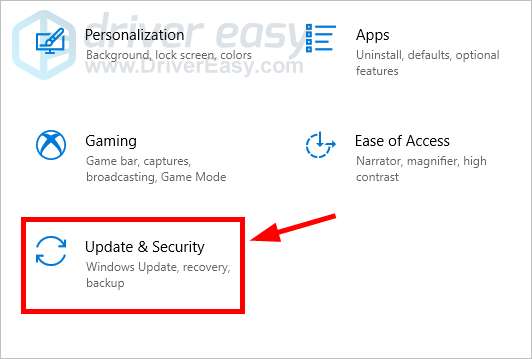
- Click Update & Security.
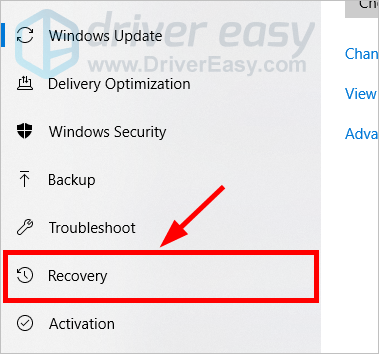
- Click Recovery.
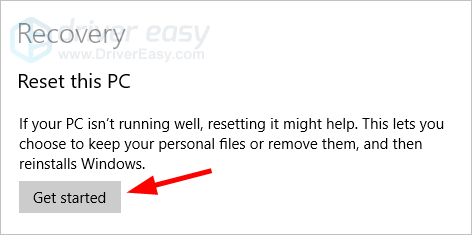
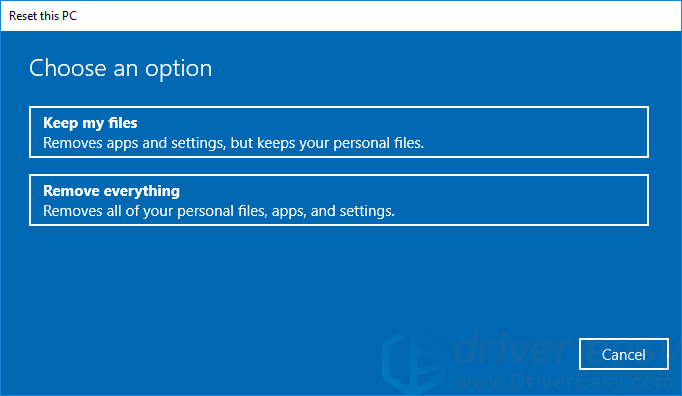
- Click the Get started button under Reset this PC.
- Click Keep my files if you want to keep your personal data, or click Remove everything to remove everything on your system.
- Follow the on-screen instructions to complete the reset process.
Now this should restore your Dell laptop to factory settings.
After a reset, it’s important to update your device drivers so your laptop is working properly. You can update your drivers manually, but it may take a lot of time and energy.
If you don’t have the time, patience or skills to update your drivers manually, you can do it automatically with Driver Easy.
You don’t need to know exactly what system your computer is running, you don’t need to risk downloading and installing the wrong driver, and you don’t need to worry about making a mistake when installing. Driver Easy handles it all.
- Download and install Driver Easy.
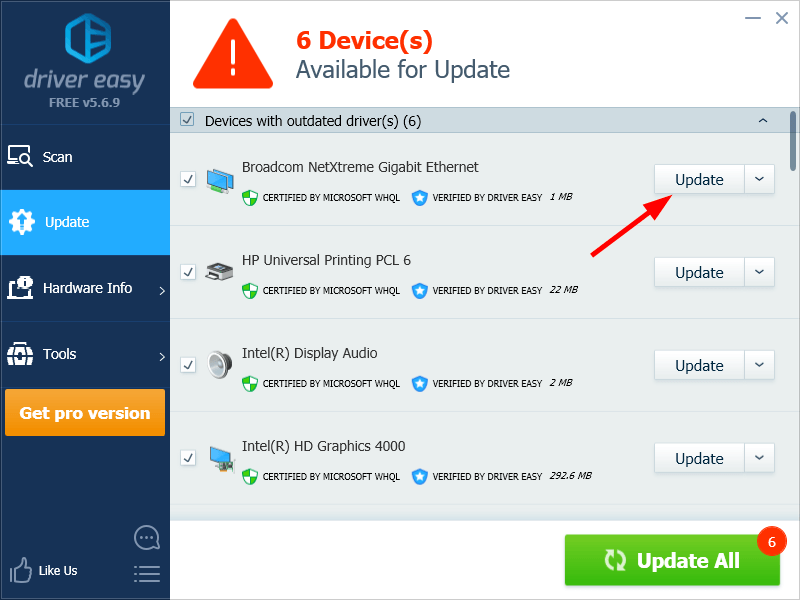
- Run Driver Easy and click the Scan Now button. Driver Easy will then scan your computer and detect any problem drivers.

- Click the Update button next to your device to download the correct version of its driver, then you can manually install it. Or click the Update All button at the bottom right to automatically update all the drivers. (This requires the Pro version — you will be prompted to upgrade when you click Update All. You get full support and a 30-day money back guarantee.)
You can do it for free if you like, but it’s partly manual.