


You may want to factory reset your Acer laptop, especially when you’re having serious problems with your Acer laptop. If that’s the case, you’ve come to the right place. This post will show you how to factory reset an Acer laptop easily.
Try these methods:
- Factory reset Acer laptop in Acer Care Center
- Factory reset Acer laptop when your laptop can’t boot normally
- Bonus Tip
Method 1: Factory reset Acer laptop in Acer Care Center
If you have Acer Care Center installed on your laptop, you can restore the system to factory settings via Acer Care Center.
Acer Care Center software enables you to backup and restore your system settings and networking drivers.
Here’s how to do it:
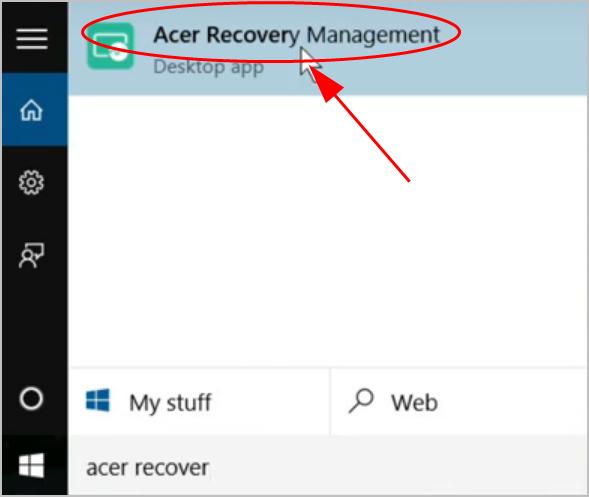
- In the search box on your laptop, type Recovery, then click Acer Recovery Management.
- Click Recovery Management.
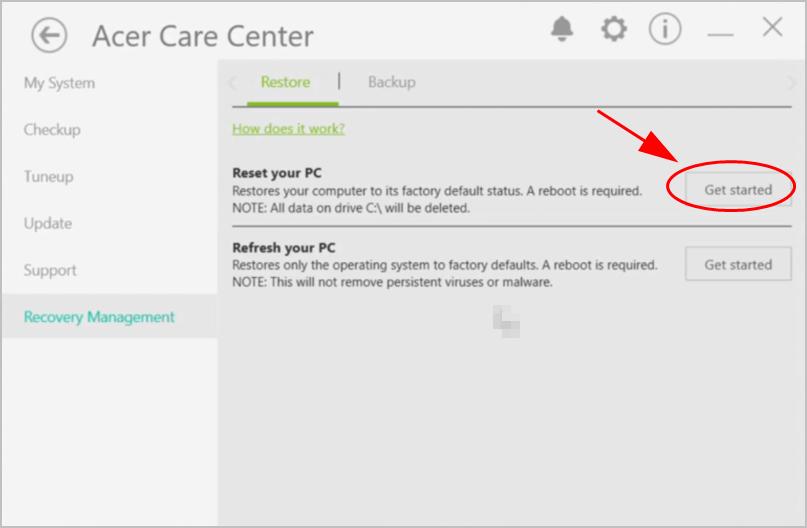
- In Acer Care Center, click Get started next to Reset your PC.
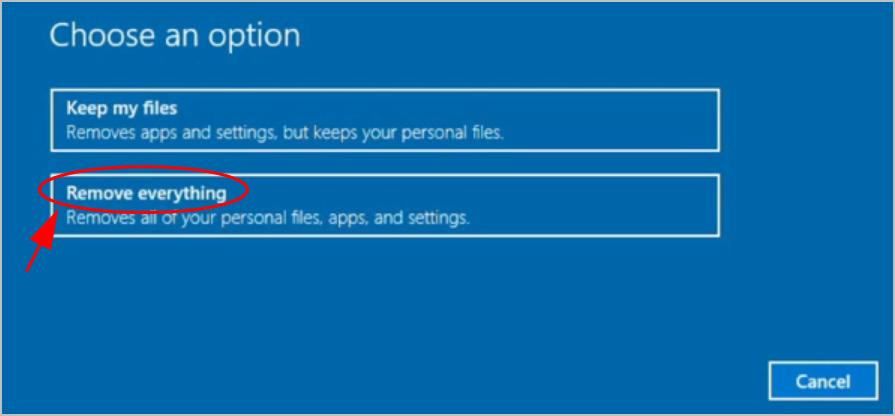
- Click Remove everything.
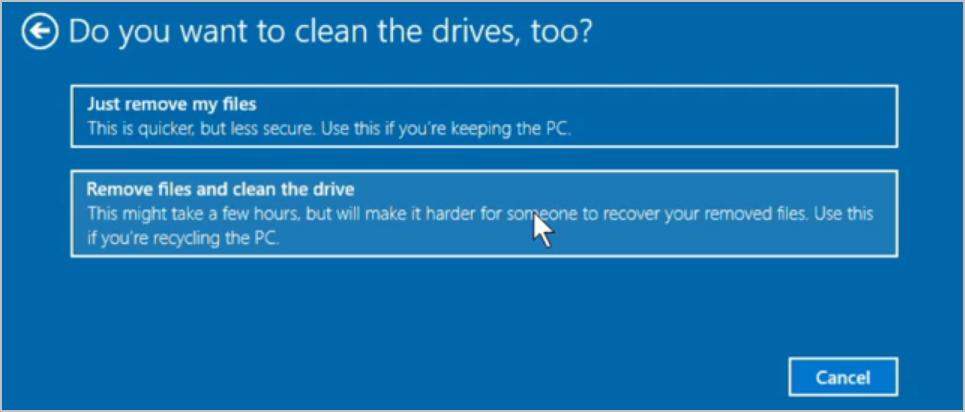
- Click Just remove my files or Remove files and clean the drive depending on your needs.
- Click Reset.
Then follow the on-screen instructions to finish the reset.

If this method doesn’t work for you, don’t worry. There’s something else to try.
Method 2: Factory reset Acer laptop when your laptop can’t boot normally
If you can’t boot your laptop as normal, you can factory reset your Acer laptop via Windows Recovery Environment.
- Make sure your laptop is turned off, and remove all external devices (USB drives, printers, etc.) from your laptop.
- Press the Power button.
- Press the Alt key and F10 key at the same time when the Acer logo pops up on your screen. This will boot your laptop to a page of Choose an option.
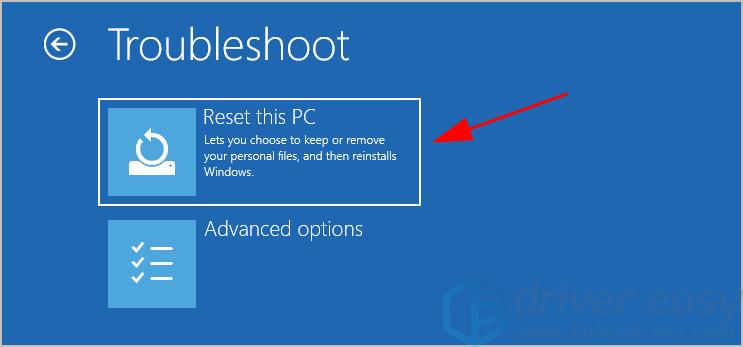
- Click Troubleshoot.

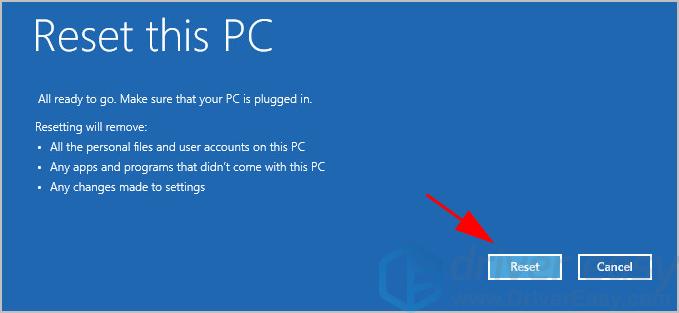
- Click Reset this PC.
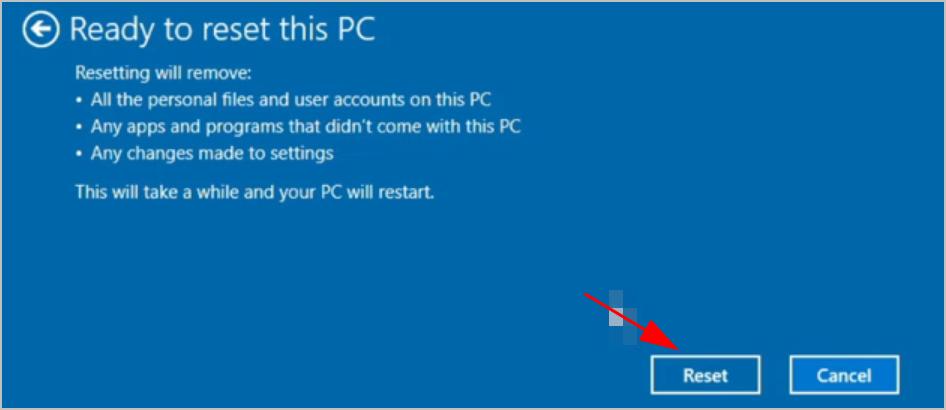
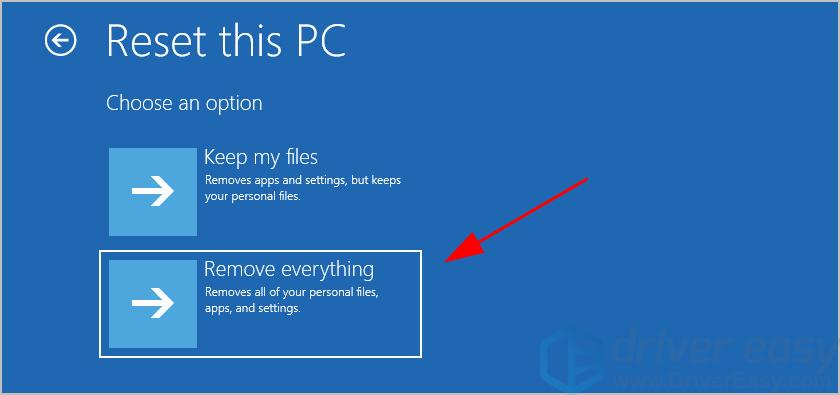
- Click Remove everything.
- Your laptop may restart and get your PC ready.
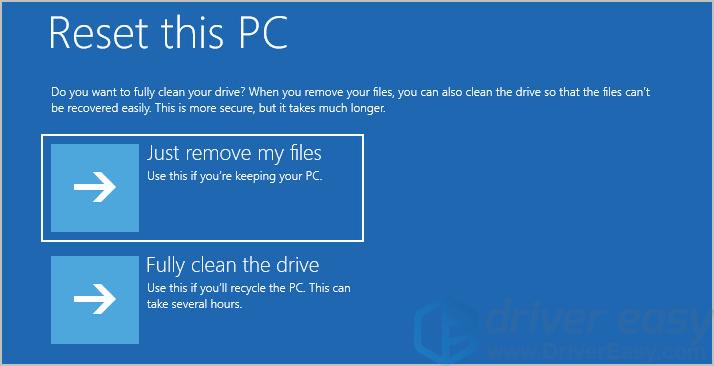
- You’ll see two options available on your screen: Just remove my files or Fully clean the drive. Select an option depending on your needs.
- Click Restart when you’re ready to do the reset.
- Your laptop will restart. Wait for some time until you see a screen for you to choose your region and language. Then follow the on-screen instructions to finish it.
Bonus Tip
The missing or outdated device drivers (such as your motherboard driver) can cause your laptop to randomly turn off itself. So you should make sure that your device drivers are up to date.
There are two ways to update drivers: manually and automatically.
Manually update drivers: you can update your device drivers manually by going to the manufacturer’s website, and searching for the most recent correct driver for each. Ensure to choose the drivers that are compatible with your Windows version.
Automatically update drivers: if you don’t have time or patience, you can do it automatically with Driver Easy.
Driver Easy will automatically recognize your system and find the correct drivers for it. You don’t need to know exactly what system your computer is running, you don’t need to risk downloading and installing the wrong driver, and you don’t need to worry about making mistakes when installing.
You can update your drivers automatically with either the FREE or the Pro version of Driver Easy. But with the Pro version, it takes just 2 clicks (and you will get full support and a 30-day money-back guarantee).
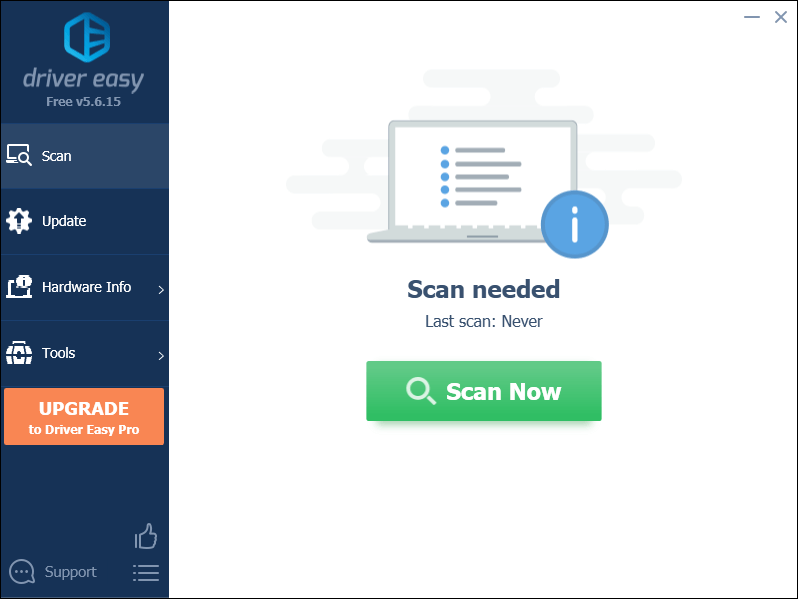
1) Download and install Driver Easy.
2) Run Driver Easy and click the Scan Now button. Driver Easy will then scan your computer and detect any problem drivers.
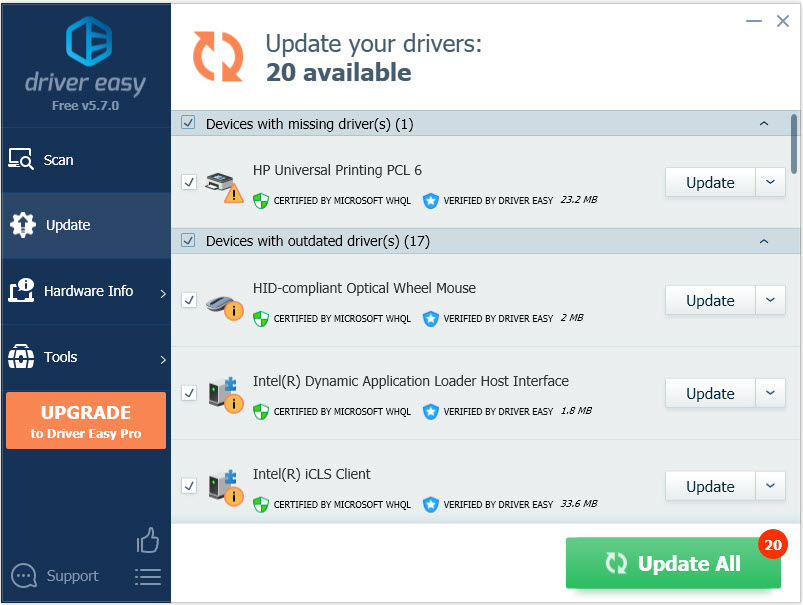
3) Click the Update button next to the flagged device to automatically download the correct version of the driver (you can do this with the FREE version), then install the driver on your computer.
Or click Update All to automatically download and install the correct version of all the drivers that are missing or out of date on your system (this requires the Pro version – you’ll be prompted to upgrade when you click Update All).
4) After updating, restart your computer to take effect.