You computer worked fine before. However, just now when you turn it on as usual, you don’t see the Windows logo; you see a black screen instead, and it’s telling you BOOTMGR is missing. Press Ctrl+Alt+Del to restart. So you restart your computer; unfortunately the error pops up again.
Don’t be nervous. You can work out this problem with this following tutorial:
What is BOOTMGR?
BOOTMGR(Windows Boot Manager), a very small software in your boot volume, can read your boot configuration data and display the Windows system selection menu. It is fully responsible and essential for starting your computer’s operating system.
How do I solve this problem?
This problem can be caused by different reasons. We gives you different solutions for you to try. You may not have to try them all; please work from Solution 1 until you find the one that work.
Solution 1: Remove all your connected media
Solution 2: Set your hard disk as the first boot device
Solution 3: Run Startup Repair
Solution 1: Remove all your connected media
If there are any non-bootable external media connected with your copmputer, your computer probably boot from these non-bootable devices. Then BOOTMGR is missing error shows up.
These media could be a DVD/USB flash drive or any other external storage hard drive. Remove your media and restart your computer to see if it works.
Solution 2: Set your hard disk as the first boot device
If the correct boot volume, usually the hard disk, isn’t set to first in your boot menu, this problem may also happen. Go with the following steps to set your hard disk as the first boot device.
1) Press Ctrl+Alt+Del to restart your computer.
2) Once you see the logo of your computer, press F12 continuously to get into boot menu.
Note: The boot menu varies from different computer manufacturers. The key to get into boot menu can also be different, usually it’s F2, F8, F10, F12, Esc or Del. If you are not sure, consult the manufacturer of your computer.
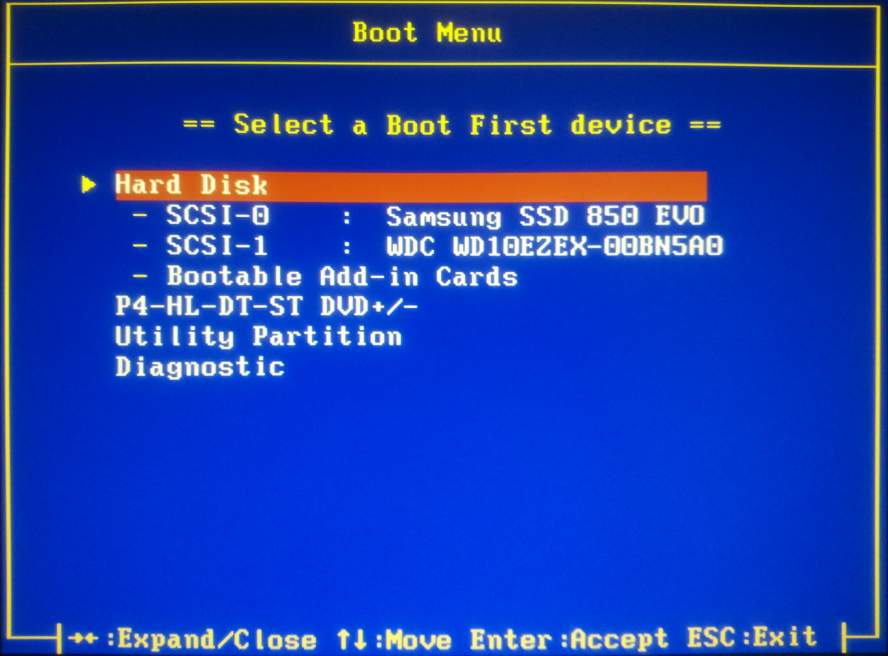
3) Under Boot tab, press arrow keys ↑ or ↓ to select your correct boot volume. Usually it’s Hard Disk or Hard Drive.
Then press + or – key to move your boot drive onto the top to be the first boot device.
Note: The image shown below is from Dell Windows 10 computer. Yours may look similar or different from it though, the methods also applies in your computer.
3) Press F10 to save your setting (Important).
4) Press Esc to exit boot menu.
Your computer will boot automatically then; check to see if it works.
Note: The next time you want to change your boot device, you can follow step 2) – 3) to get in the same boot menu page to set.
Solution 3: Run Startup Repair
This problem may also happen if your BOOTMGR file is corrupted or missing. Startup Repair can repair all your corrupted or missing files including BOOTMGR. See how to run Startup Repair on your computer:
Note: This solution requires a Windows System installation media, if you have none, create one following the guide for your system. For Windows 10 users: How to Burn Windows 10 ISO to USB; For Windows 7 users: How to Burn Windows 7 ISO to USB.
How to run Startup Repair on your Windows 10?
How to run Startup Repair on your Windows 7?
If you’re on Windows 10, follow these:
1) Insert your USB with Windows 10 ISO into your computer.
2) Press Ctrl+Alt+Del to restart your computer.
3) Once you see your computer’s logo, press F12 continuously to enter boot menu.
Note: The key to get into boot menu varies from different computer. Usually it’s F2, F8, F10, F12, Esc or Del. If you are not sure, consult the manufacturer of your computer.
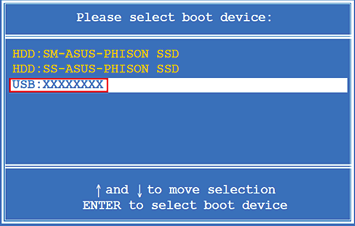
4) Press ↑ or ↓ key to choose your USB drive, then press Enter.
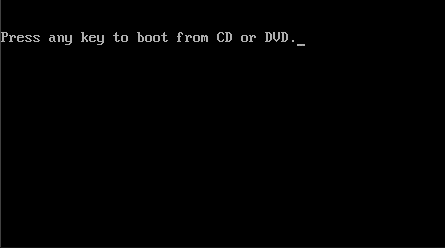
5) When you see a black screen saying Press any key to boot from CD or DVD, press Enter on your keyboard.
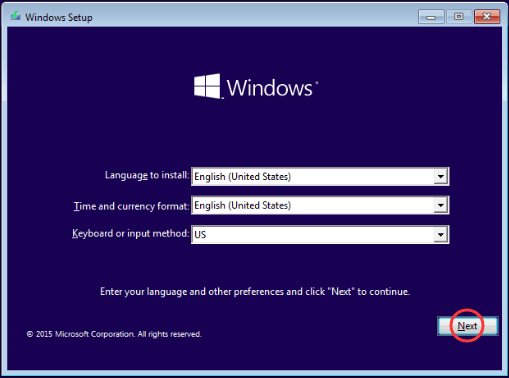
6) Select your language, time, and keyboard, then click Next.
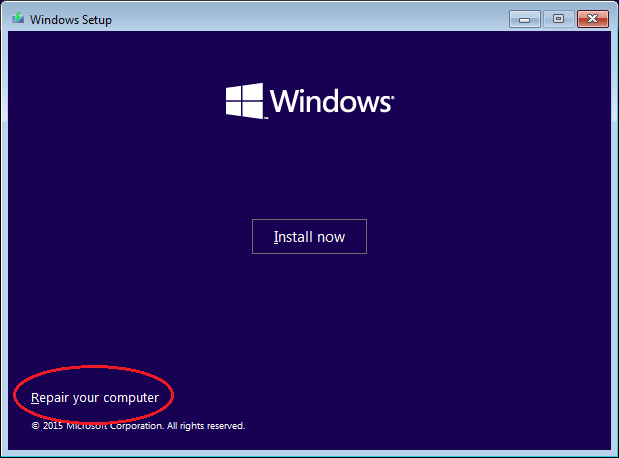
7) Click Repair your computer at the bottom left.
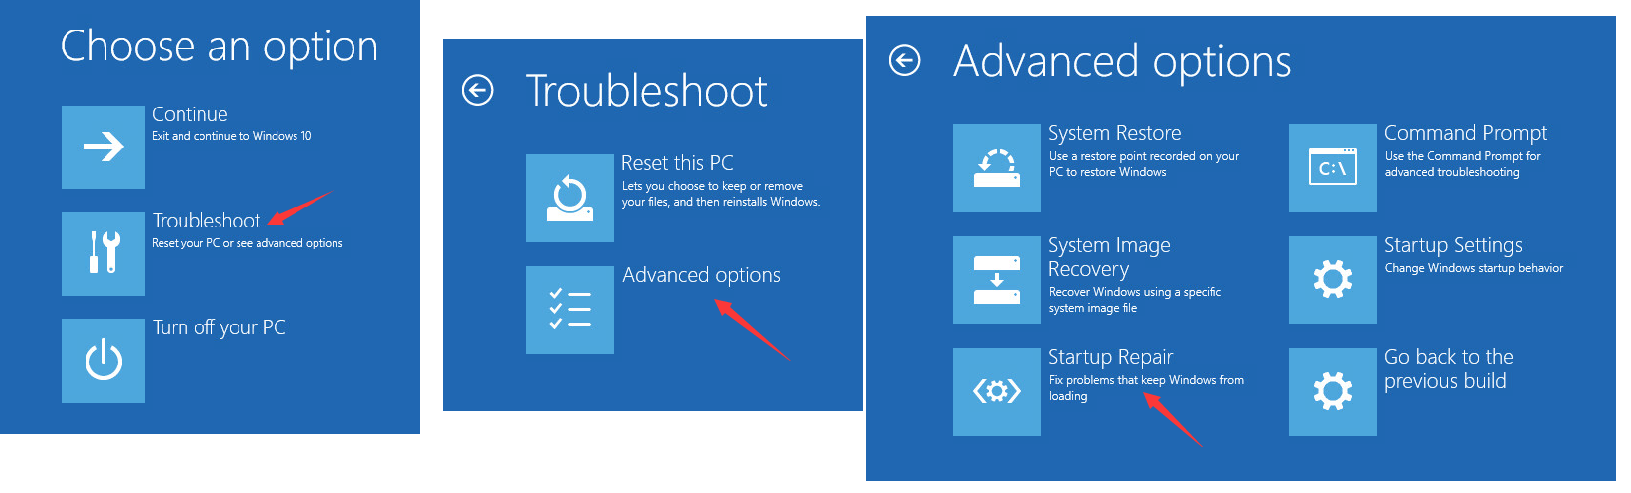
8) Click Troubleshoot > Advanced options > Startup Repair.
9) After it’s done, restart your computer to see if it works.
If you’re on Windows 7, follow these:
1) Insert your USB with Windows 7 ISO into your computer.
2) Press Ctrl+Alt+Del to restart your computer.
3) Once you see your computer’s logo, press F12 continuously to enter boot menu.
Note: The key to get into boot menu varies from different computer. Usually it’s F2, F8, F10, F12, Esc or Del. If you are not sure, consult the manufacturer of your computer.
4) Press ↑ or ↓ key to choose your USB drive, then press Enter.
5) When a black screen with “Press any key to boot from CD or DVD” message pops up, press Enter on your keyboard.
6) Select your language, time, and keyboard, then click Next.
7) Click Repair your computer at the bottom left.
8) Click Startup Repair.
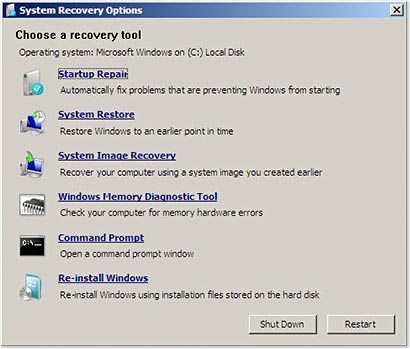
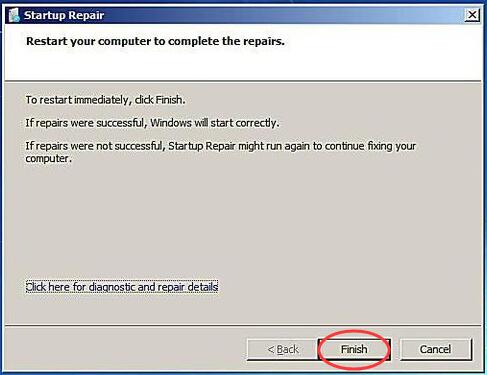
It should then start to scan your computer to detect any startup problems.
9) Click Finish to restart your Windows 7. Check to see if your computer can access Windows 7 successfully.