


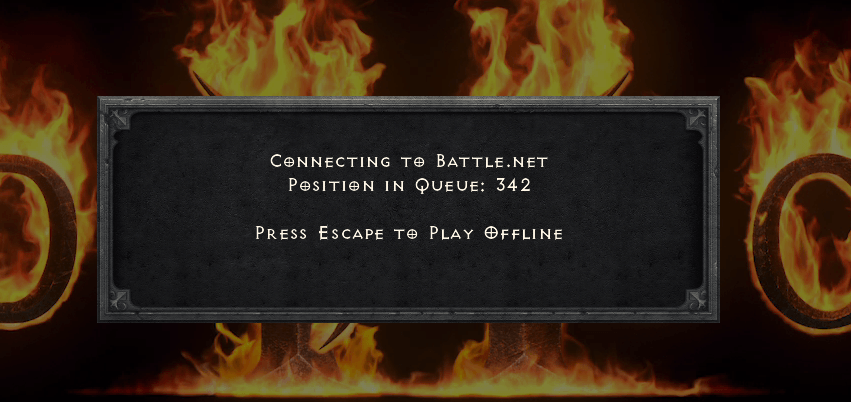
Recently, players are prevented from accessing their game contents as they receive the message CONNECTING TO BATTLE.NET POSITION IN QUEUE. If you’re trying to play Diablo II: Resurrected but receiving this error, don’t worry. In this post, we’ve rounded up some fixes.
Try these fixes
- Scan and repair your game
- Install all Windows updates
- Update your device drivers
- Perform a clean boot
- Select a different region
- Reset your network devices
- Release/ Renew IP and flush DNS
- Uninstall and reinstall the app
1. Scan and repair your game
Corrupted or damaged game files can cause a wide variety of problems and errors. You should use the repair tool within the app to redownload and repair corrupted files.
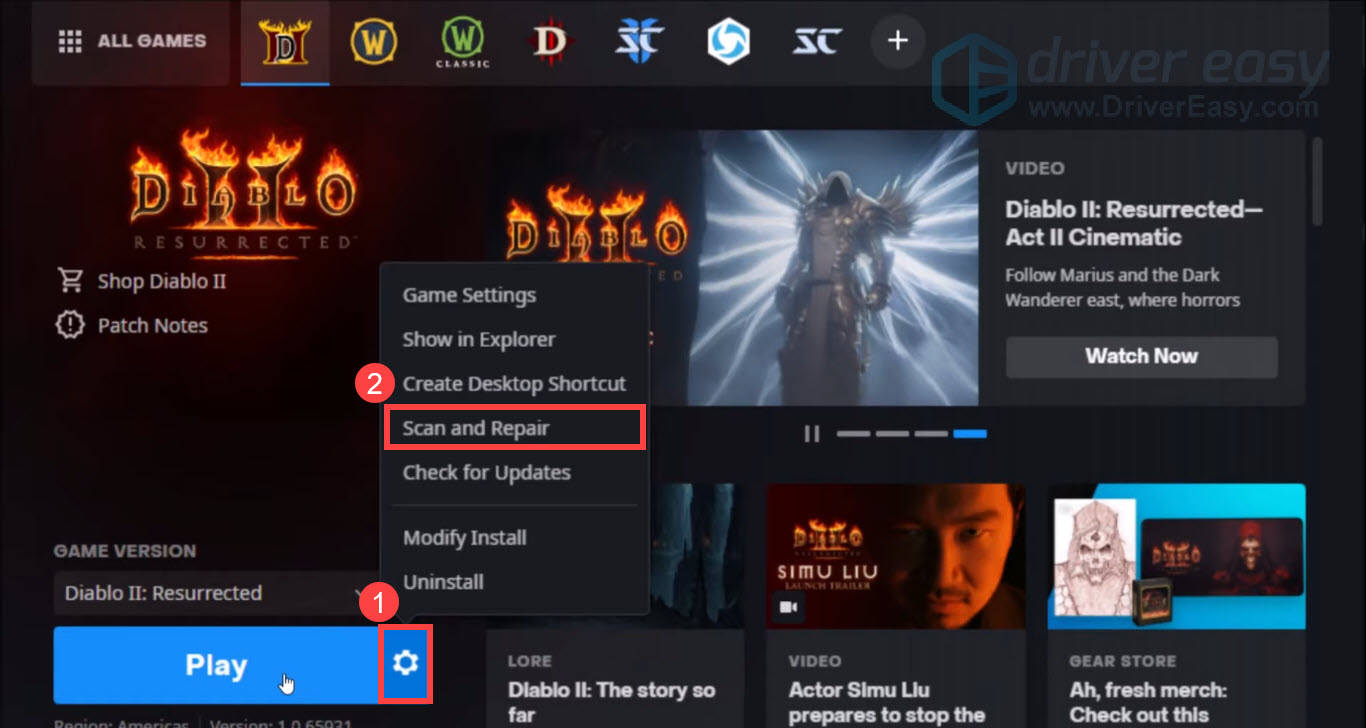
- Open your Battle.net desktop app.
- Click on the icon of the game you are trying to repair, eg. Diablo II: Resurrected.
- Click the cogwheel next to the Play button and select Scan and Repair.
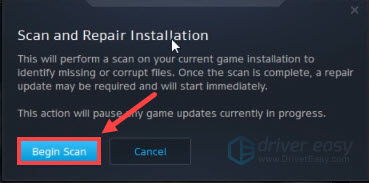
- Click Begin Scan and wait for the repair to finish.
If this doesn’t do the trick, try the next fix below.
2. Install all Windows updates
Outdated operating system can cause some compatibility issues, which might be the reason for the long queue time. In this case, you should download and install Windows updates, which come with bug fixes and bring new features.
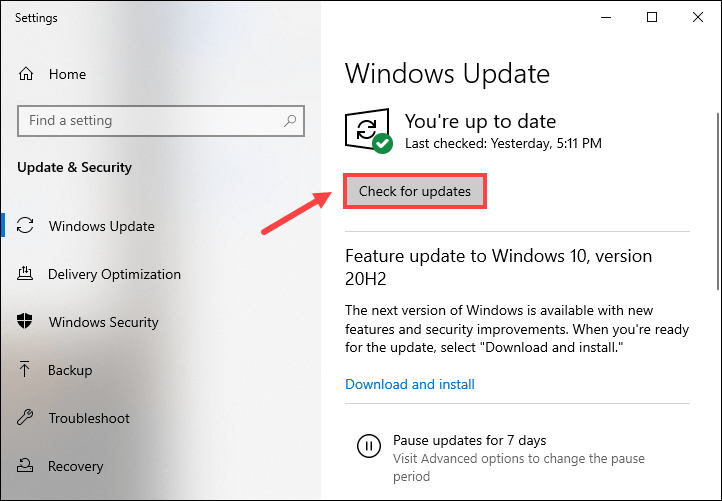
- In the Search box, type or paste check for updates. Click Check for updates from results.
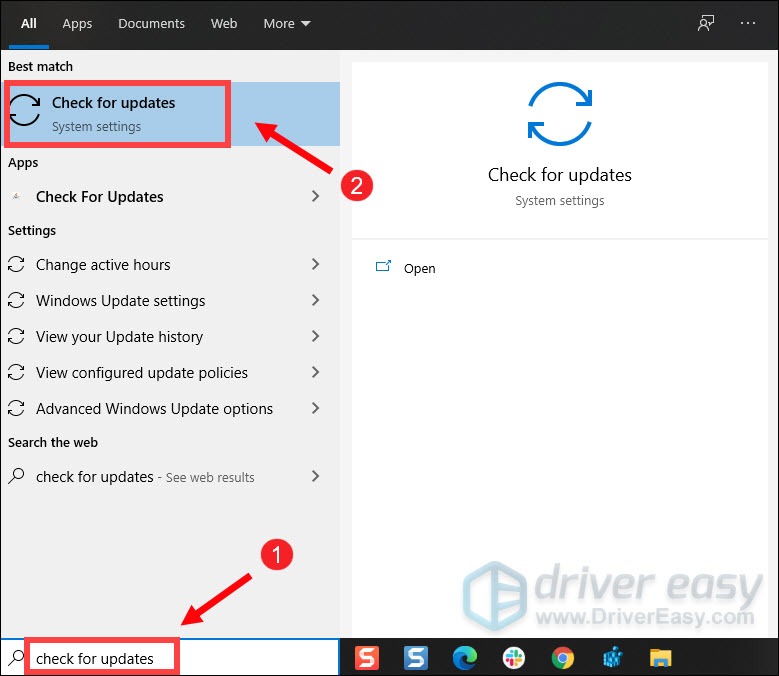
- Click on the Check for updates tab. If there are any updates available, it’ll automatically start to download and install it. Patiently wait for the process to complete and you will be asked to restart your computer.
When you finish installing Windows updates, launch your game to test if this works for you. If your problem persists, move on to the next fix.
3. Update your device drivers
Out-of-date drivers can cause a variety of issues. When you’re having problems with your game, one of the first things you should check is your device drivers, especially your network adapter driver. Additionally, even new computers can have outdated drivers because updates are released routinely.
There are mainly two ways you can update your device drivers: manually and automatically.
Option 1: Manually update your drivers
To manually update your device drivers, you can either go to the Device Manager to check for driver updates. Or head to your device’s manufacturers’ official websites to download and install new drivers. This will require a certain level of computer knowledge and can be a headache if you aren’t tech-savvy.
Option 2: Automatically update your drivers (recommended)
If you don’t have the time, patience and computer skills to update your drivers manually, you can do it automatically with Driver Easy. Driver Easy will automatically recognize your system and find the correct drivers for your exact device, and your Windows version, and it will download and install them correctly. With Driver Easy, you don’t need to hunt for driver updates as it will take care of all the busy work for you.
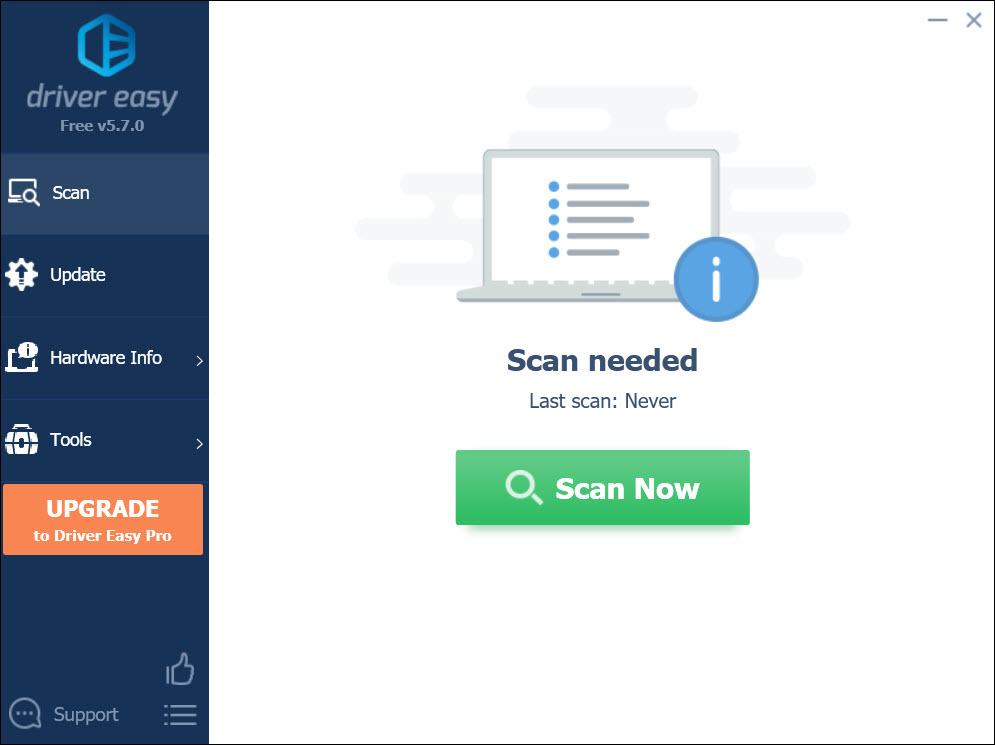
- Download and install Driver Easy.
- Run Driver Easy and click the Scan Now button. Driver Easy will then scan your computer and detect any devices with missing or outdated drivers.
- Click Update All. Driver Easy will then download and update all your outdated and missing device drivers, giving you the latest version of each, direct from the device manufacturer.
(This requires the Pro version which comes with full support and a 30-day money-back guarantee. You’ll be prompted to upgrade when you click Update All. If you don’t want to upgrade to the Pro version, you can also update your drivers with the FREE version. All you need to do is to download them one at a time and manually install them. )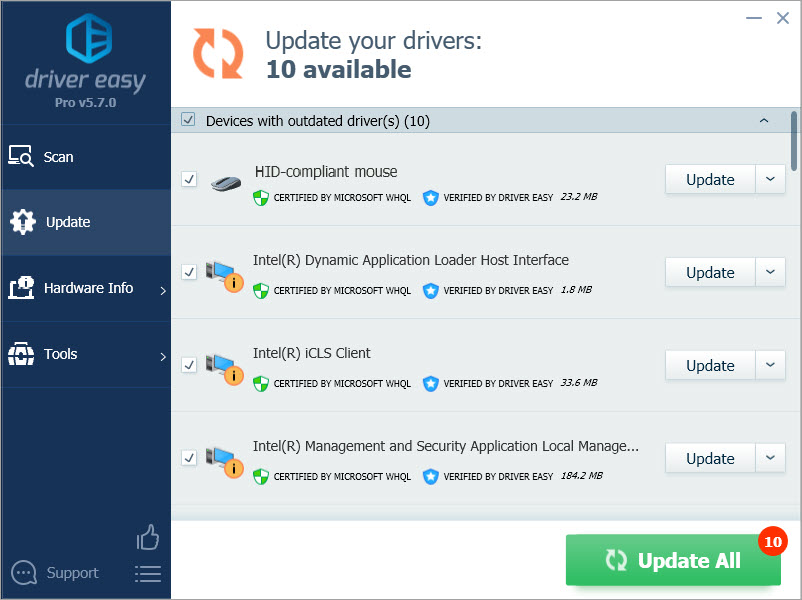
After updating drivers, restart your PC. Then launch your game to check if it still stucks on the CONNECTING TO BATTLE.NET screen. If your problem persists, try the next fix below.
4. Perform a clean boot
There are circumstances that some of your background processes and non-Microsoft services are interfering with the connection or game client. To identify your problem, try to perform a clean boot by following the instructions below.
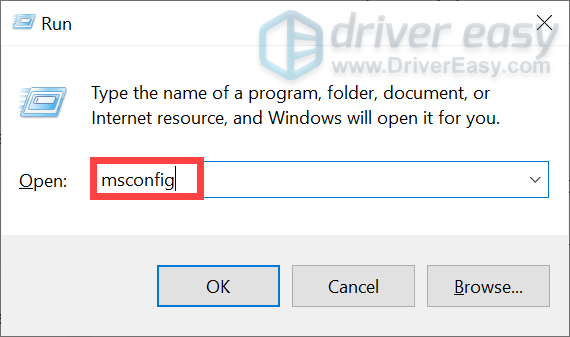
- On your keyboard, press the Windows logo + R keys simultaneously to open the Run box.
- Type or paste msconfig and press Enter.
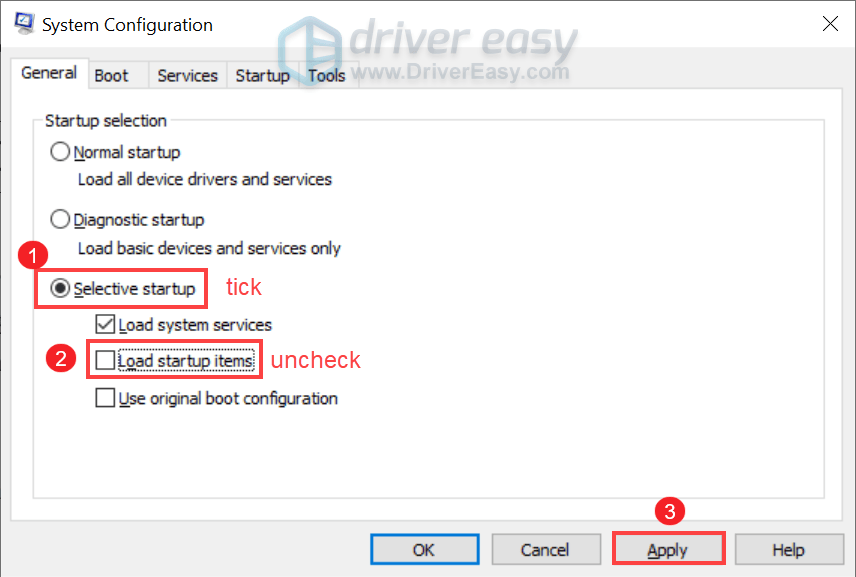
- Under the General tab, tick Selective startup. Then make sure you uncheck Load startup items. Then click Apply.
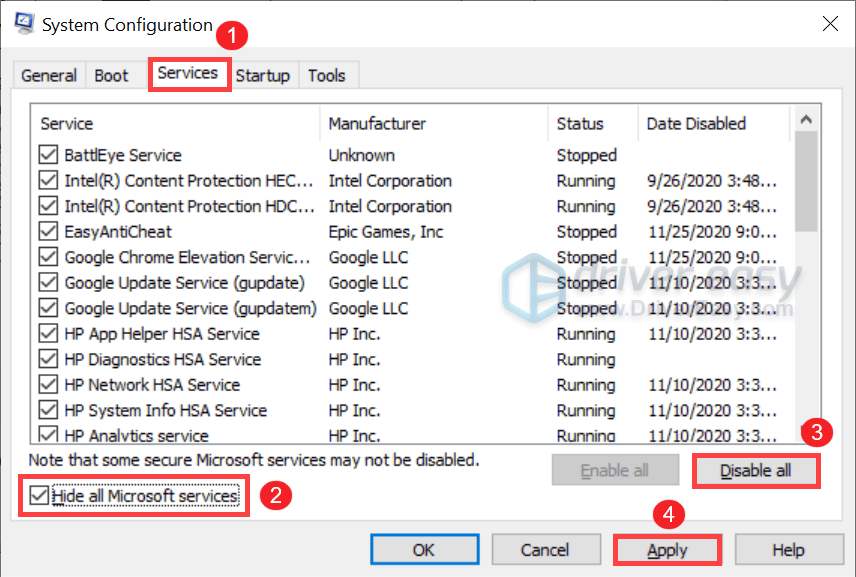
- Select the Services tab. Check the box next to Hide all Microsoft services. Then click Disable all > Apply.
- Then click OK > Restart.
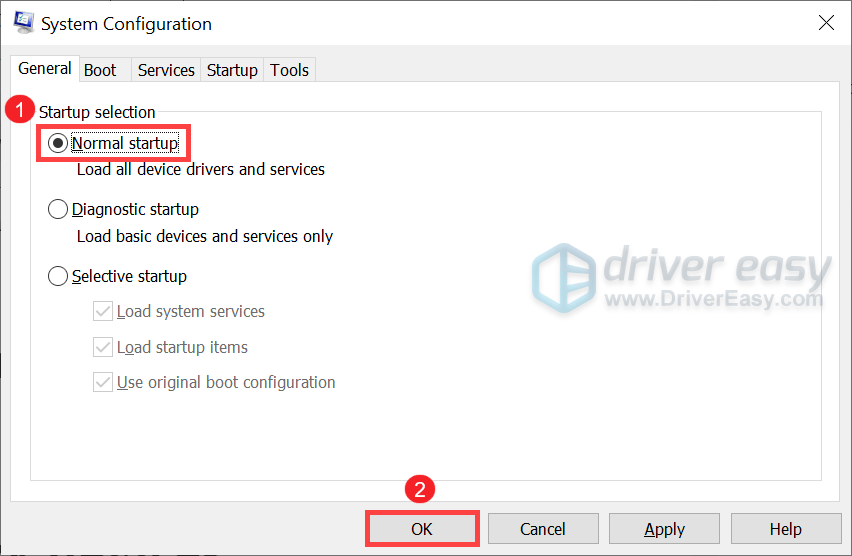
Upon restart, open your Battle.net desktop app and launch your game. If your problem has been resolved, reset the computer to start as usual by performing these steps:
- On your keyboard, press the Windows logo + R keys simultaneously to open the Run box.
- Type or paste msconfig and press Enter.
- Under the General tab, click the Normal Startup option, and then click OK.
However, if performing a clean boot doesn’t work for you, proceed to the next fix.
5. Select a different region
During peak hours, a certain server is more likely to be overloaded and it takes longer to connect to the server. Therefore, we suggest you avoid playing games during peak hours. Or you can change your server for all games or a specific game.
Change the server for all games
- Locate your profile picture on the upper-right corner. Then click on the down arrow next to it and click Log out.
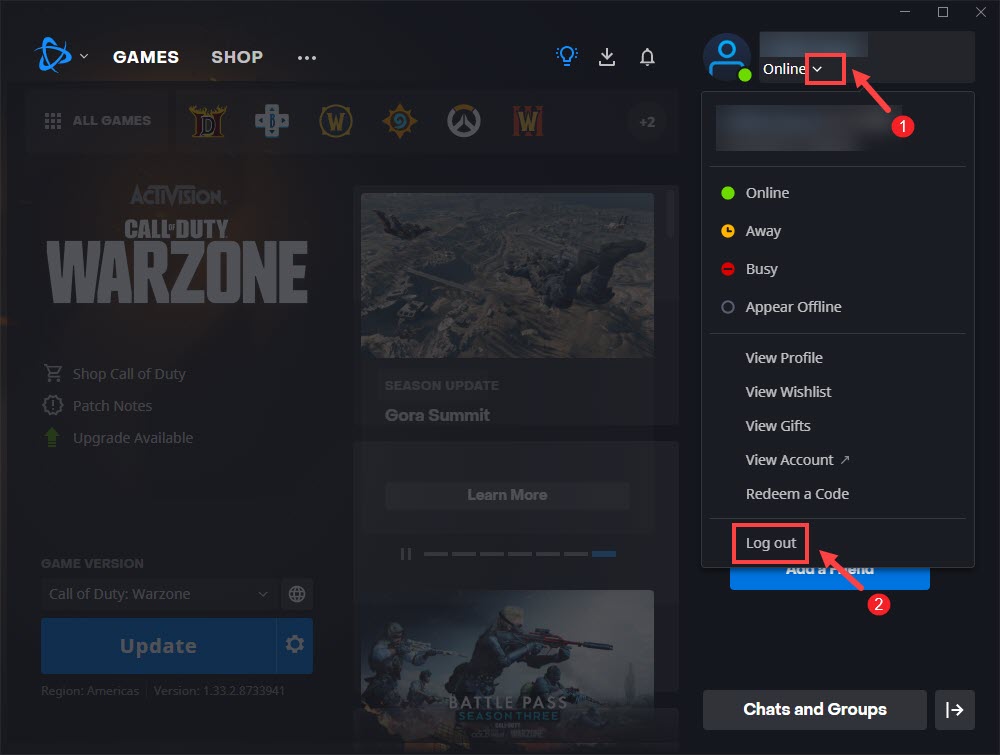
- Upon login, click the globe icon and select a different server.
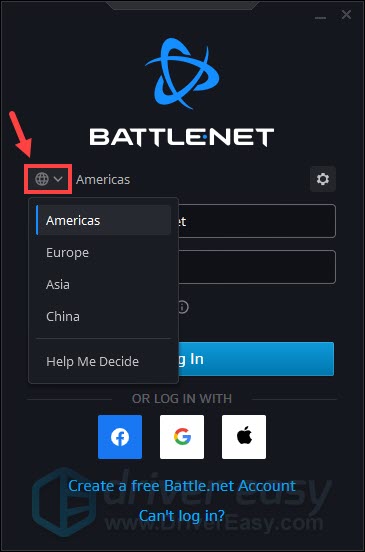
Then enter your account info and log in.
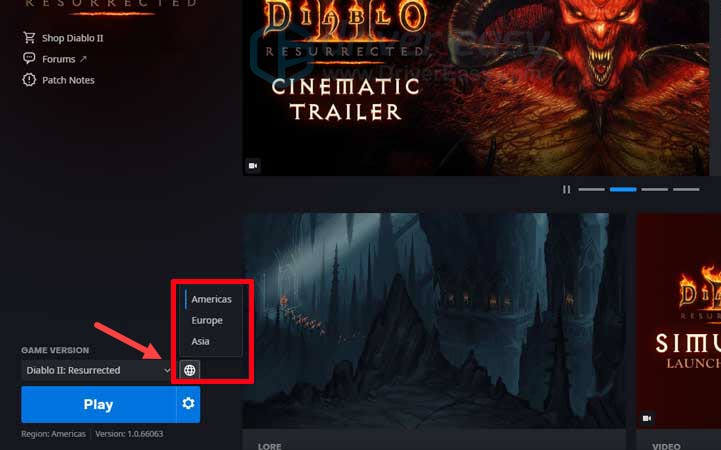
Change the server for a specific game
- Click on the globe icon next to your game (eg. Diablo II: Resurrected) and select a different server.
If changing a different server doesn’t do the trick, try the next fix below.
6. Reset your network devices
If switching to a different server doesn’t help fix your issue, it’s high time you take some steps to improve your internet connection and make sure your router hasn’t become flooded with data, which will affect your connectivity.
- First, shut down all devices that are connected to your modem/ router.
- Unplug the modem and router and wait for about 1 minute
- Plug back in and allow them to completely boot up.
- Start your computer and allow it to completely boot up.
Apart from taking these steps, you would need to shut down other programs that access the internet, such as other games or download programs to optimize your internet connection.
If this doesn’t do the trick, proceed to the next fix.
7. Release/ Renew IP and flush DNS
Your expired IP addresses or other issues with a computer’s current IP address could be the reason for network connectivity issues. To solve the problem, you can release and renew your IP and flush DNS by following the instructions below.
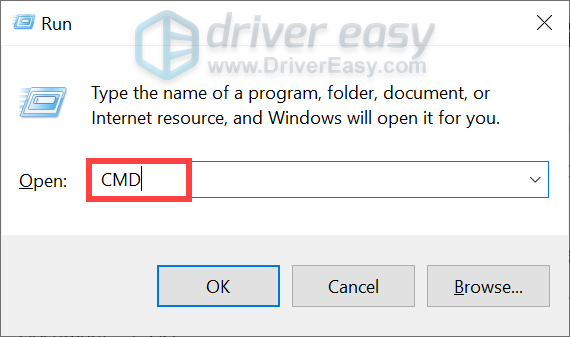
- On your keyboard, press the Windows logo + R keys simultaneously to open the Run box.
- Type in or paste CMD.
- Type or paste ipconfig /release in the command prompt and press Enter.
- Wait for a few seconds for a reply that the IP address has been released.
- Type or paste ipconfig /flushdns and press Enter.
- Then close the command prompt and attempt to make a connection.
If this doesn’t work for you, try the next fix below.
8. Uninstall and reinstall the app
If nothing else has worked, you may want to fully uninstall and reinstall your Battle.net app. To do this, follow the instructions below.
- Close all Blizzard processes.
- On your keyboard, press the Windows logo + R keys simultaneously to open the Run box.
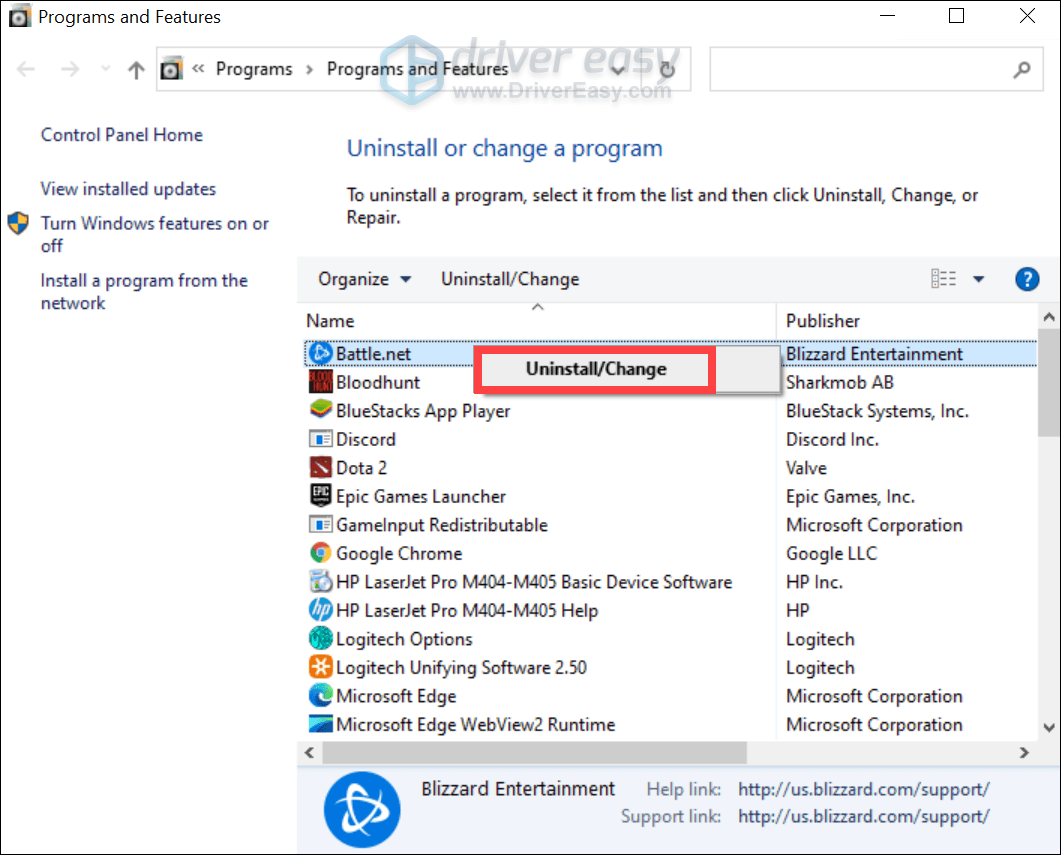
- Type or paste control appwiz.cpl and press Enter.

- Right-click on Battle.net and select Uninstall. This will begin the uninstallation process. (Uninstalling the Battle.net app doesn’t uninstall your game clients. )
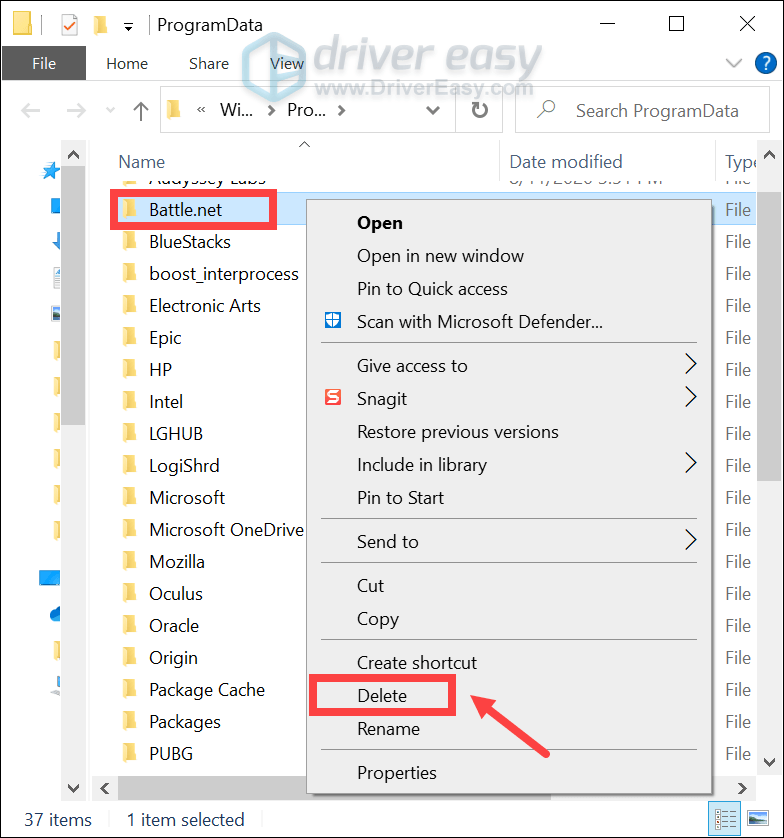
- Then you’ll need to delete the Battle.net Tools folder to remove any remaining Blizzard Battle.net app helper programs.
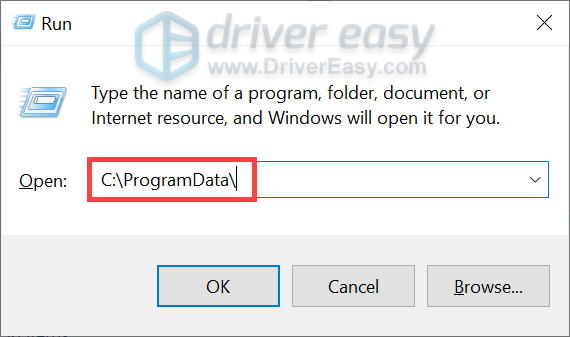
On your keyboard, press the Windows logo + R keys simultaneously to open the Run box. - Type or paste C:\ProgramData\ and press Enter.
- Delete the Battle.net folder.
- Now reinstall the app.

That’s it. Feel free to drop us a line in the comment section below. We’ll get back to you ASAP.