


Having high ping in CS:GO? Don’t worry – you’re not alone. This is a fairly common issue, and it’s usually not very hard to solve. Just follow this tutorial and try to fix the problem by yourself.
How to determine if my ping is high
Ping, also referred to as latency, measures the round-trip time for data sent from your computer to reach a central server and for the response to go back. The unit of ping or latency is milliseconds, or ms for short. Answers may vary if you’d like to know what is a good ping time and what is not. In the most generic sense, there’s no such standard for ping time because latency is largely determined by the distance between you and the game’s server. But if you’re experiencing noticeable lag spikes in games, that means your ping is very likely to be high.
Usually if your ping time is below 30 ms, you can play online games rather smoothly; but if it’s above 100 ms, lag issues will come along.
How to show ping time in CS:GO
If you’re not sure how to see ping time in CS:GO, here’s the tutorial:
1) Launch CS:GO. In the left pane, click the gear icon to open the Settings window. Then go to the Game Settings > Game tab. Scroll through the list below to locate Enable Developer Console (~) and select Yes.

2) Exit the Settings window. Press the ~ key on your keyboard (the one above Tab) to invoke the command-line window in CS:GO.
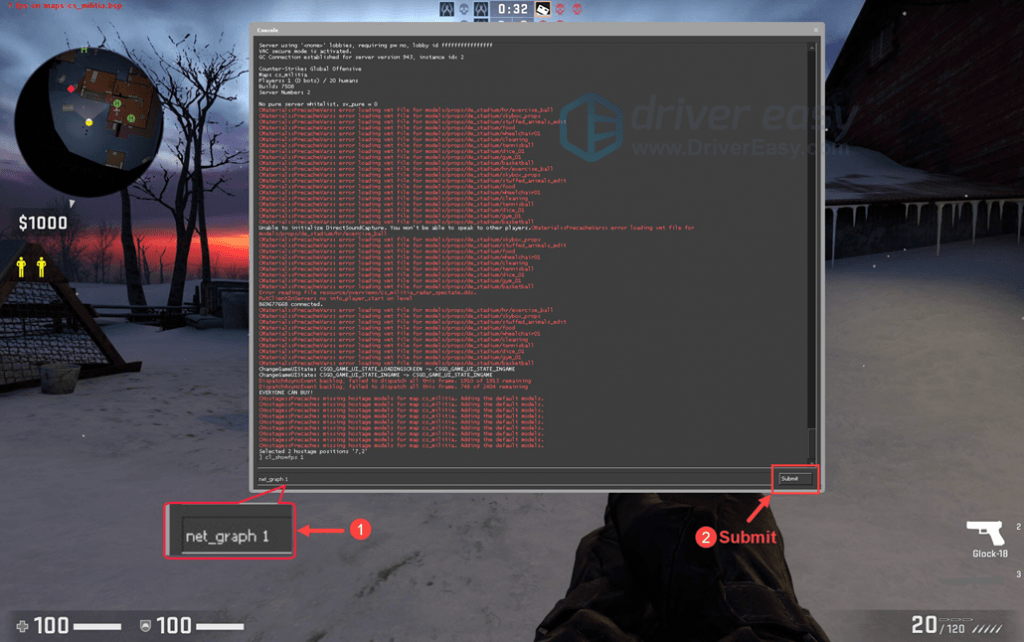
3) In the command-line window, type net_graph 1 and click Submit. (You may enter net_graph 0 to revert the change.)
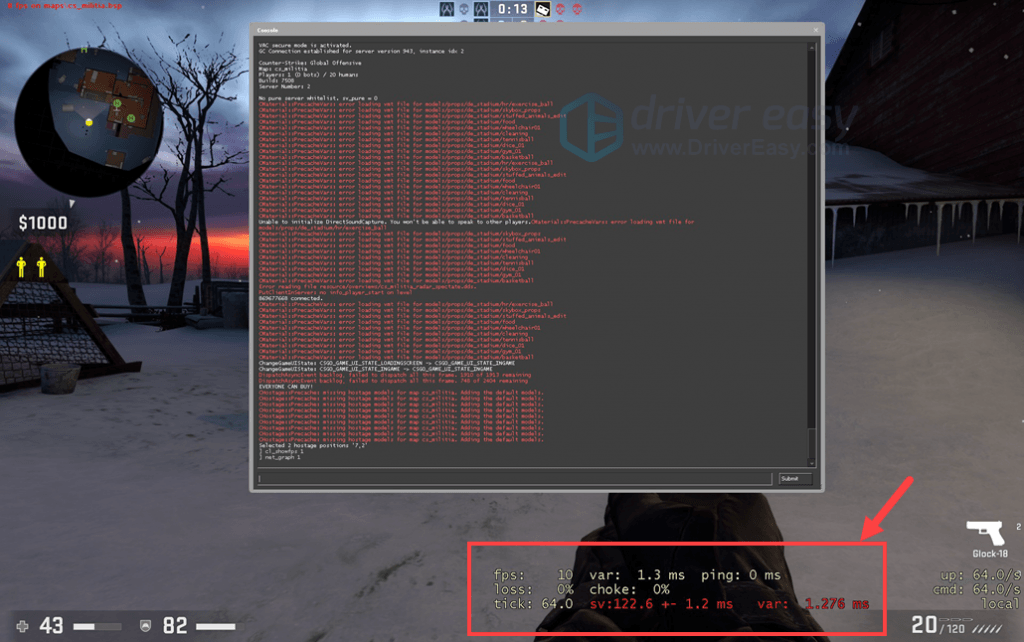
4) Now you can see a few indicators including ping at the bottom of your screen.
How to fix CS:GO high ping issues
Here are 9 fixes that have proved useful to many CS:GO players. You don’t have to try them all; just work your way from the top down until you find the one that works for you.
Fix 1: Restart your modem and router
Fix 2: Verify integrity of game cache files
Fix 3: Close bandwidth hogging applications
Fix 4: Update your device drivers
Fix 7: Modify registry settings
Fix 9: Swap Wi-Fi to an Ethernet connection
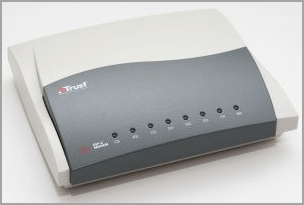
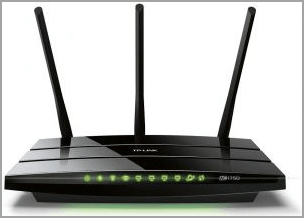
Fix 1: Restart your modem and router
You should restart your modem and router especially when they haven’t been switched off for a long time. Just give them some time to cool off and clear up the cache. Here’s how to do it:
1) Unplug both your router and modem.
2) Wait at least 30 seconds to let the two machines cool down a bit.
3) Plug the modem back in and wait until the indicator lights are back to their normal state.
4) Plug the router back in. Likewise, wait until the indicator lights are back to their normal state.
5) Now that your routers and modem have been restarted properly, you can launch CS:GO again to see if the high ping issue remains. If so, move on to the next fix.
Fix 2: Verify integrity of game cache files
This is a quick fix for most problems occurring in Steam games, so it not only applies to CS:GO but also to other games when necessary. Here are the steps for you to verify the integrity of CS:GO cache files:
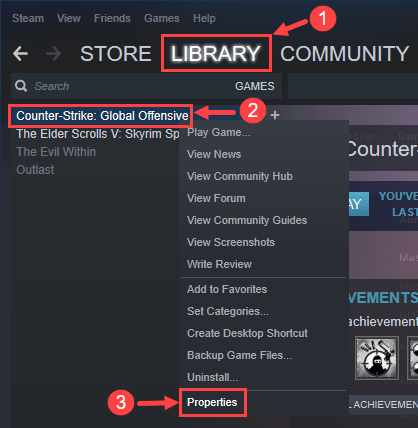
1) Log in Steam. Then, click LIBRARY. In your game list, right-click on Counter-Strike: Global Offensive and select Properties.
2) Go to the LOCAL FILES tab. Then click VERIFY INTEGRITY OF GAME FILES….
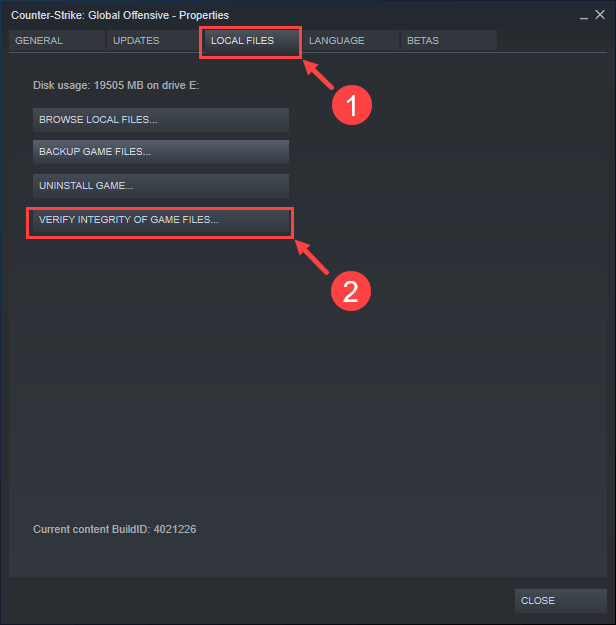
3) Wait for the validating process to complete. If there’s anything wrong with your game cache files, it should help you out with that.
Check to see if you still have high ping in CS:GO. If so, please proceed to the next fix, below.
Fix 3: Close bandwidth hogging applications
Having too many applications in the background may slow down your network and trigger high ping issues. If that’s the case, you should close the unnecessary programs before playing CS:GO. Here’s how:
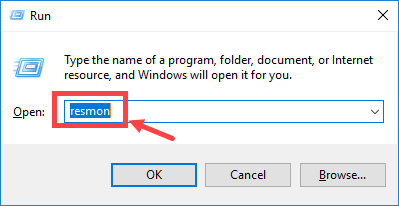
1) On your keyboard, press the Windows Logo key ![]() and R at the same time to invoke the Run dialog box. Type in resmon and hit Enter.
and R at the same time to invoke the Run dialog box. Type in resmon and hit Enter.
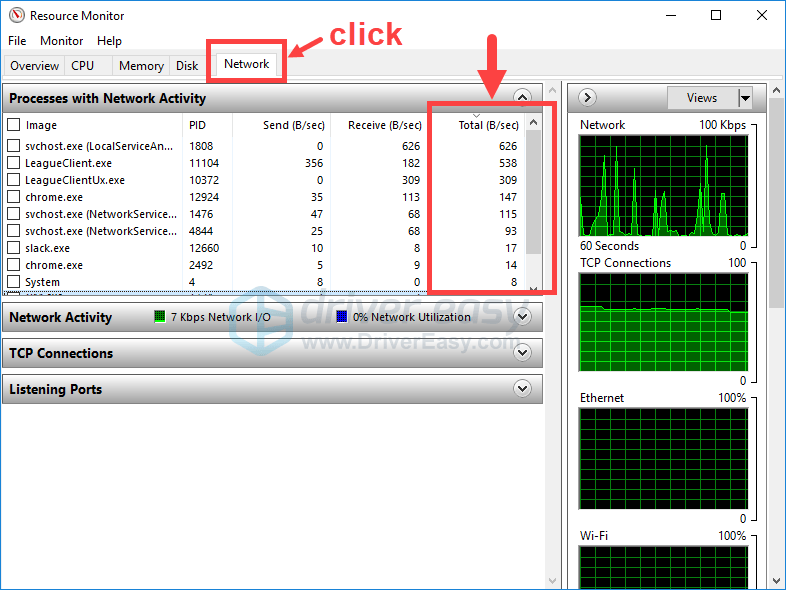
2) In the Resource Monitor window, click the Network tab and pay attention to the Total (B/sec) column. In this way, you’ll get an intuitive understanding of what process is now taking up the most of your network resources.
3) Right-click on the process that you want to disable and select End Process.
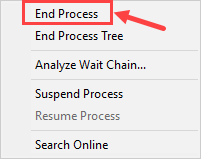
4) If prompted for permission, click End process.

5) Repeat the steps above until you’ve closed all the bandwidth hogging programs.
6) Your problem is sometimes caused by interference from antivirus software. To see if that’s the problem for you, temporarily disable your antivirus program and check if the problem persists. (Consult your antivirus documentation for instructions on disabling it.)
If your game works properly after you disable the antivirus software, contact the vendor of your antivirus software and ask them for advice, or install a different antivirus solution.
If this fix didn’t work, please try out the next one.
Fix 4: Update your device drivers
As reported by many players, their ping time in CS:GO has gone back to normal after they updated the device drivers. If you’re not sure whether all your device drivers (especially network card drivers) are up-to-date, you should check.
You can do this in Windows Device Manager, one device at a time. But this takes a lot of time and patience, and if any of your drivers do happen to be out of date, you’ll need to manually update them, which is difficult and risky. If you don’t have the time, patience or computer skills to update your device drivers manually, you can do it automatically with Driver Easy.
Driver Easy will automatically recognize your system and find the correct drivers for it. You don’t need to know exactly what system your computer is running, you don’t need to risk downloading and installing the wrong driver, and you don’t need to worry about making a mistake when installing. Driver Easy takes care of everything.
You can update your drivers automatically with either the FREE or the Pro version of Driver Easy. But with the Pro version it takes just 2 clicks (and you get full support and a 30-day money back guarantee):
1) Download and install Driver Easy.
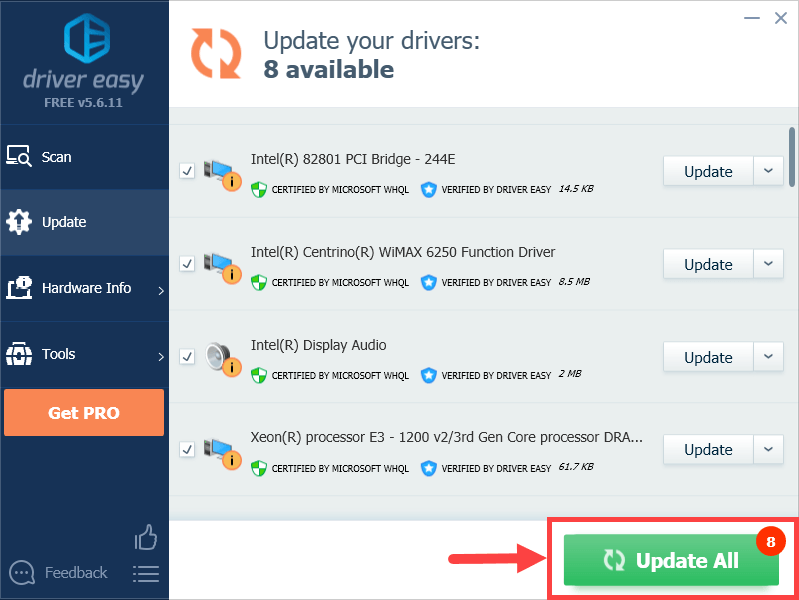
2) Run Driver Easy and click the Scan Now button. Driver Easy will then scan your computer and detect any problem drivers.

3) Click the Update button next to a flagged driver to automatically download the correct version of that driver, then you can manually install it (you can do this with the FREE version).
Or click Update All to automatically download and install the correct version of all the drivers that are missing or out of date on your system. (This requires the Pro version which comes with full support and a 30-day money back guarantee. You’ll be prompted to upgrade when you click Update All.)
After updating your drivers, check to see whether the high ping issue still remains. If it does, try out the next fix below.
Fix 5: Renew IP address
To renew your IP address, you should perform the following procedure:
1) On your taskbar, type command into the search box. Then right-click on the Command Prompt result and select Run as administrator.
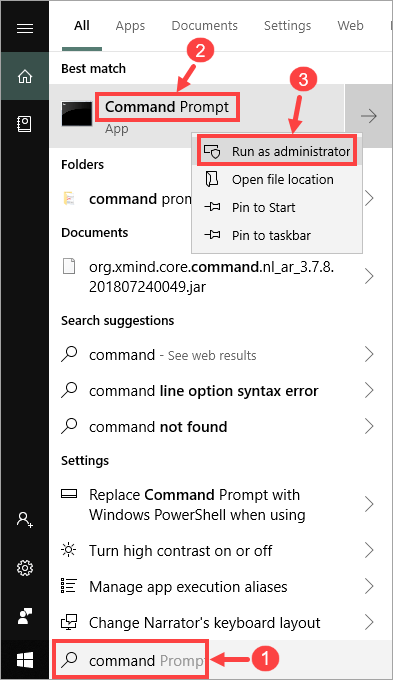
Click Yes if you’re prompted about permission.
2) In your command prompt window, enter the following command:
ipconfig /release
Note that there’s a space between “ipconfig” and “/”.
Press Enter on your keyboard and wait till the release is completed.
3) Then type the following command:
ipconfig /renew
Note that there’s a space between “ipconfig” and “/”.
Press Enter on your keyboard and wait till the renewal is completed.
4) This time, enter:
ipconfig /flushdns
Note that there’s a space between “ipconfig” and “/”.
Press Enter on your keyboard and wait till the process is completed.
Exit the Command Prompt window. Now check to see your ping time in CS:GO. If it’s still too high, move on to the next fix.
Fix 6: Change DNS server
Try to switch your ISP’s DNS server to the Google Public DNS address. This may improve the resolve time and provide you with more security online. Here are the steps:
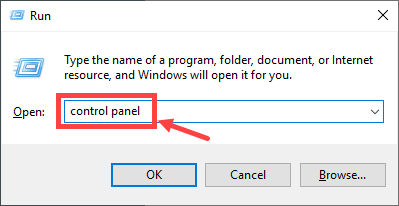
1) On your keyboard, press the Windows Logo key ![]() and R at the same time to open the Run dialog box. Type in control panel and press Enter.
and R at the same time to open the Run dialog box. Type in control panel and press Enter.
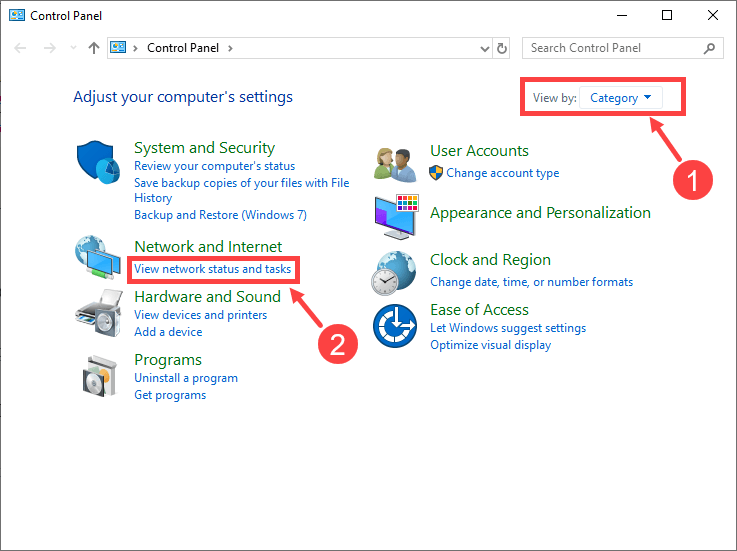
2) Expand View by: and select Category. Then, click View network status and tasks.
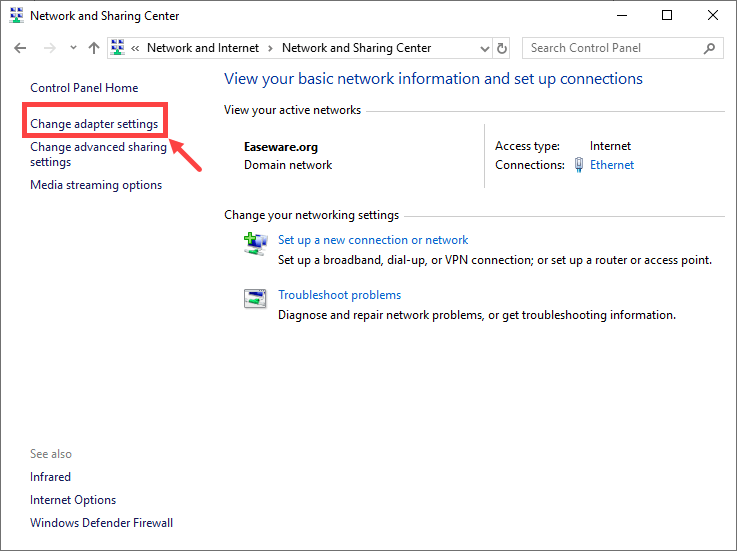
3) In the next window, click Change adapter settings.
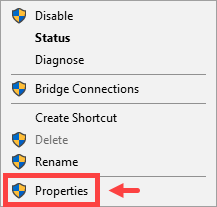
4) Right-click on your network and select Properties.
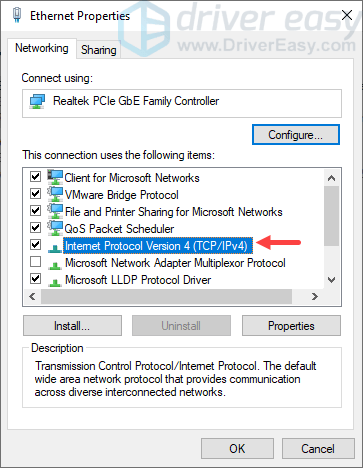
5) Double-click Internet Protocol Version 4 (TCP/IPv4) to view its properties.
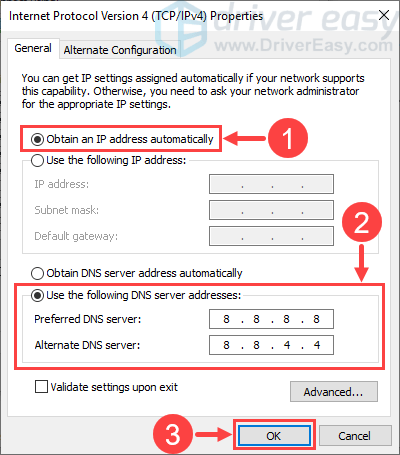
6) In the pop-up window, select these two options: Obtain an IP address automatically and Use the following DNS server addresses.
For the Preferred DNS server, enter 8.8.8.8 to replace the primary IP address; for the Alternate DNS server, enter 8.8.4.4. Then click OK.
Check to see if your high ping issue still persists. If so, try out the next method.
Fix 7: Modify registry settings
This fix may seem a bit complex, but it did solve the high ping problems for some players. Just be patient to complete the following steps and see if they do the trick. There’re three things you should do here:
Create a backup for Windows Registry
Before modifying your registry, you should create a backup for it. Here’re the steps:
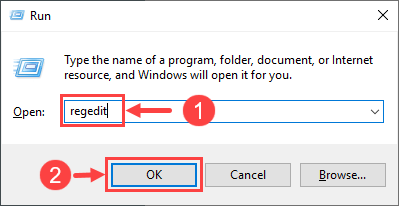
1) On your keyboard, press the Windows Logo key ![]() and R at the same time to invoke the Run dialog box. Type in regedit, and then click OK. If prompted for permission, click Yes to continue.
and R at the same time to invoke the Run dialog box. Type in regedit, and then click OK. If prompted for permission, click Yes to continue.
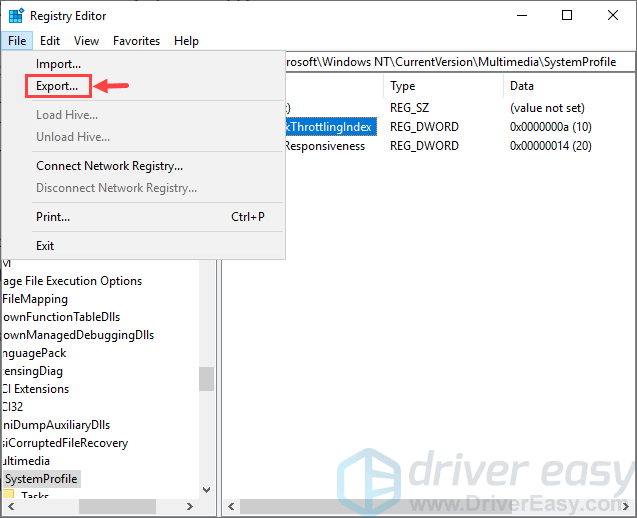
2) On the menu bar, select File. Then, click Export….
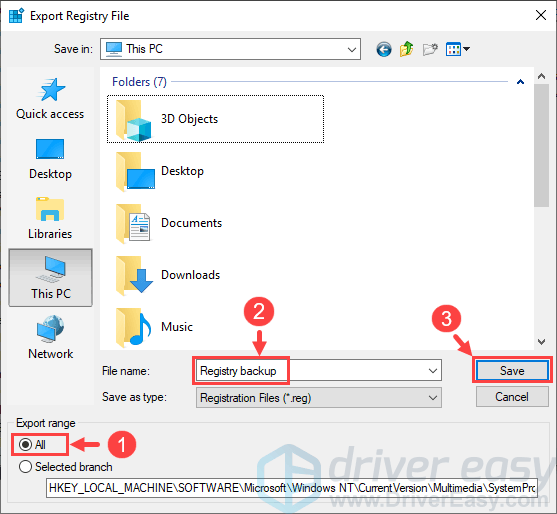
3) Under Export range, select All. Then, create a name for your backup file and choose a folder where you want to save that file. After that, click Save.
4) If your computer fails to run properly after you modify the registry, you can reverse all the changes with your backup file.
1) Repeat Step 1 to open Registry Editor.
2) Select File from the menu bar and click Import….
3) Locate the backup copy and open it.
So this is how you revert the registry to its previous version. For more information, please refer to this post from Windows Support.
After creating a backup file, now you can get down to modifying the Windows Registry.
Reset Network Throttling Index
1) In Registry Editor, copy the following path and paste it to the address bar. Then hit Enter to reach the desired registry key.
ComputerHKEY_LOCAL_MACHINESOFTWAREMicrosoftWindows NTCurrentVersionMultimediaSystemProfile
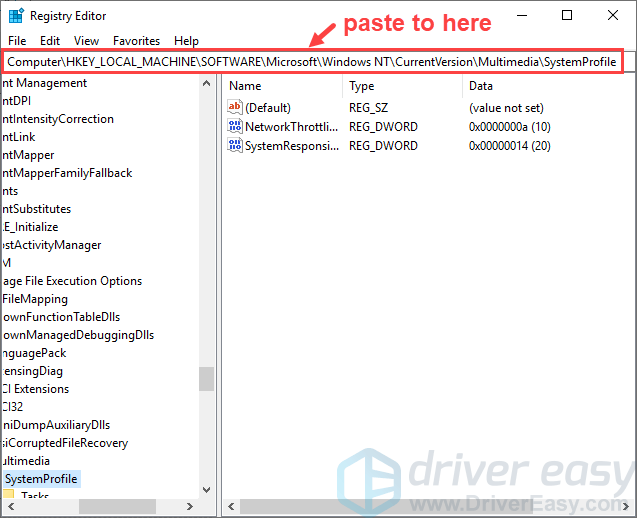
If you don’t want to use this path, you may also navigate to the key from the left pane in Registry Editor.
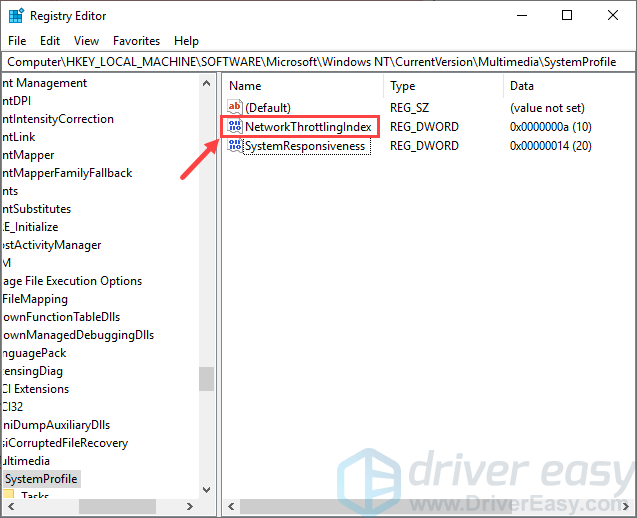
2) If a registry value named NetworkThrottlingIndex is already there on the right panel (as shown below), you can skip this step and head to the next one.
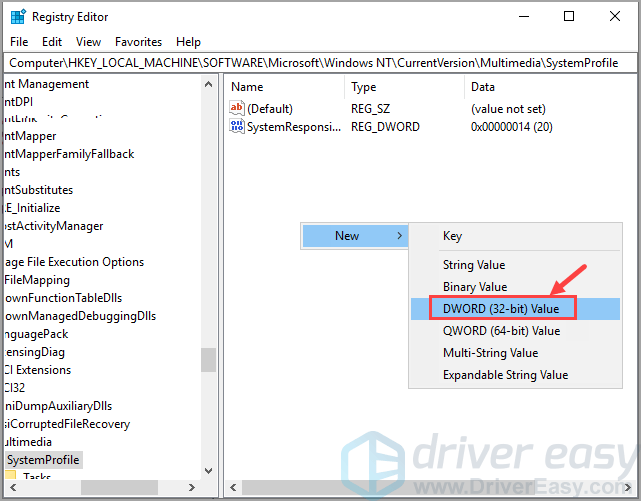
But if there’s no such thing on the right panel, simply right-click on an empty area and select New > DWORD (32 bit) Value. Then, name it NetworkThrottlingIndex.
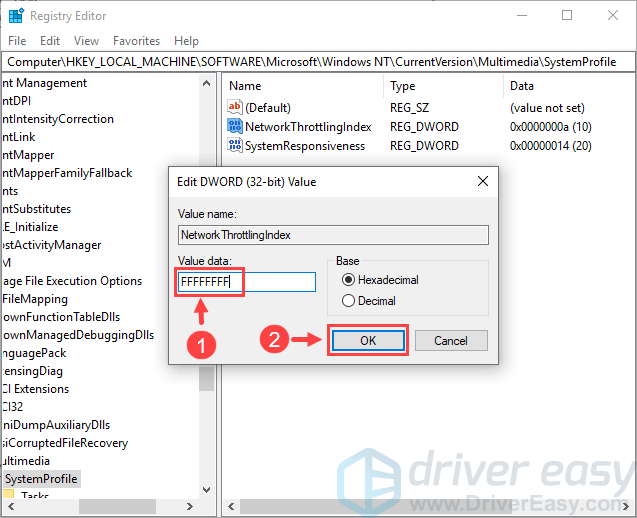
3) Double-click on NetworkThrottlingIndex and set its Value data to FFFFFFFF (8 digits). Then, click OK.
Disable Nagle Algorithm
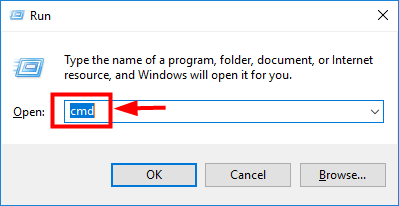
1) On your keyboard, press the Windows Logo key ![]() and R at the same time to invoke the Run dialog box. Type in cmd and then hit Enter.
and R at the same time to invoke the Run dialog box. Type in cmd and then hit Enter.
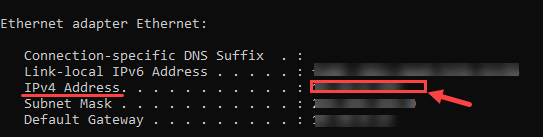
2) In the Command Prompt window, type ipconfig and press Enter. This command will display the IP address information of your computer.

3) Locate your network adapter and make a note of its IPv4 Address.
4) Go back to Registry Editor. Copy the following path and paste it to the address bar. Then hit Enter to reach the desired registry key.
ComputerHKEY_LOCAL_MACHINESYSTEMCurrentControlSetServicesTcpipParametersInterfaces
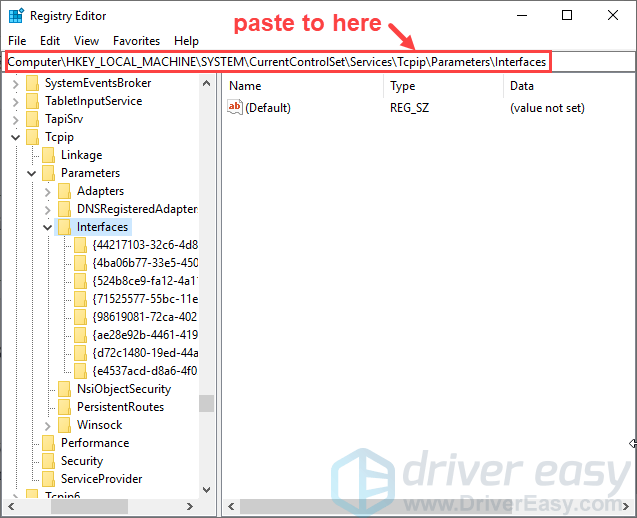
If you don’t want to use this path, you may also navigate to the key from the left pane in Registry Editor.
5) In the left navigation pane, there’s a list of registry keys under Interfaces. Open those keys one by one until you find the one that contains a registry value named DhcpIPAddress sharing the same data with your IPv4 address collected in Step 3.
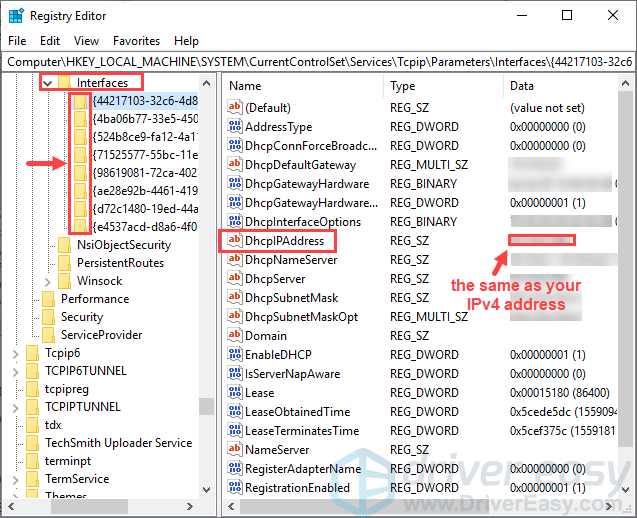
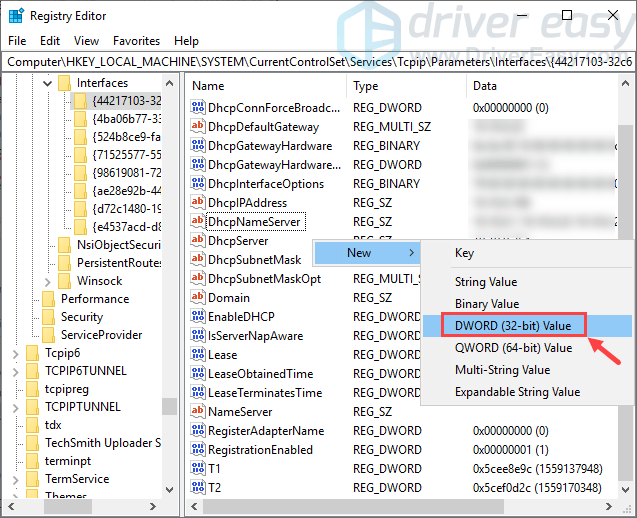
6) Once you’ve found the matched key, right-click on a blank area of that key and select New > DWORD (32 bit) Value. Then, name it TcpAckFrequency.
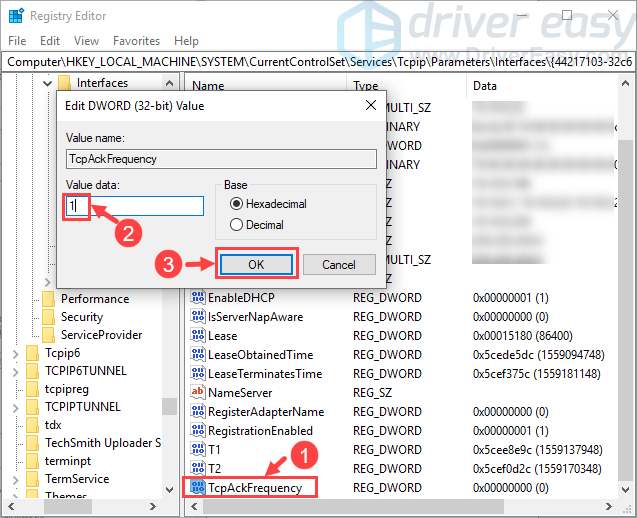
7) Double-click on TcpAckFrequency and set its Value data to 1. Then, click OK.
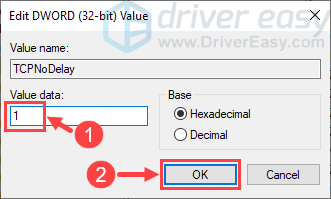
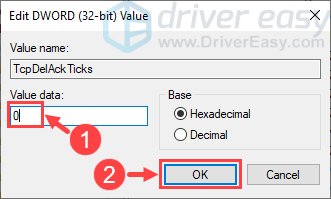
8) Repeat Step 6 to create two more values, then name them TCPNoDelay and TcpDelAckTicks respectively. Set the Value data of TCPNoDelay to 1 and TcpDelAckTicks to 0. After that, click OK to save the changes.
So this is what you should do to modify the registry. Relaunch CS:GO and check if your high ping issue still exists. If so, please proceed to the next fix.
Fix 8: Reinstall the game
If by all means the fixes above didn’t solve your problem, then you should reinstall CS:GO and see if that makes a difference. The process is quite simple – just uninstall the game and then reinstall it from Steam. When everything’s done, launch CS:GO and check your ping time. In case it’s still too high, there’s one last fix you can try.
Fix 9: Swap Wi-Fi to an Ethernet connection
Honestly, this fix is solely for Wi-Fi users. Since the wireless network is not as stable as the wired one, you’ll get more interruptions if your computer is connected to Wi-Fi. For example, when you’re playing CS:GO in a room far away from your router, the Wi-Fi signal received can be rather weak, hence the reason for a lag issue.
To solve this problem, you should swap Wi-Fi to an Ethernet connection, but this is not practical for everyone. Alternatively, you may buy a powerline Ethernet adapter which extends the reach of your home network to places with poor wireless coverage. Once your network problem is solved, the high ping issue in CS:GO may also be fixed once and for all.
Also, you should avoid possible wireless interference that weakens your Wi-Fi signal such as cordless phones and microwave ovens. Place them far away from your router, or simply move your laptop somewhere else.
Hopefully this post has solved your problem. Please feel free to leave a comment below if you have further questions or ideas. Thanks for reading!