


Since its launch, players are enjoying Cyberpunk 2077 immensely. But they’ve had some complaints. They notice a sheer amount of blurriness, which definitely affects the gameplay. If you happen to be one of them, don’t worry. Here are some quick fixes for you.
Try these fixes
You may not need to try them all; simply work your way down the list until you find the one that works for you.
- Change in-game settings
- Update graphics driver
- Enable NVIDIA Image Sharpening
- Disable fullscreen optimizations

Fix 1: Change in-game settings
Some settings by default may not give you the best performance. With some tweaks, you can reduce blurriness and boost the image quality in Cyberpunk 2077. Here are the settings you should change:
1) In your game menu, click SETTINGS.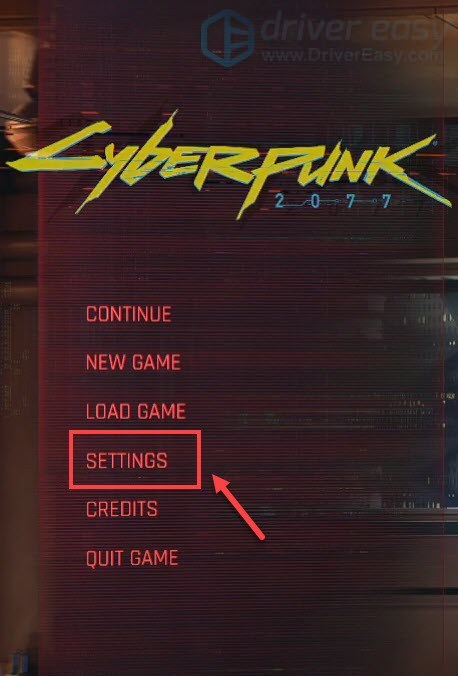
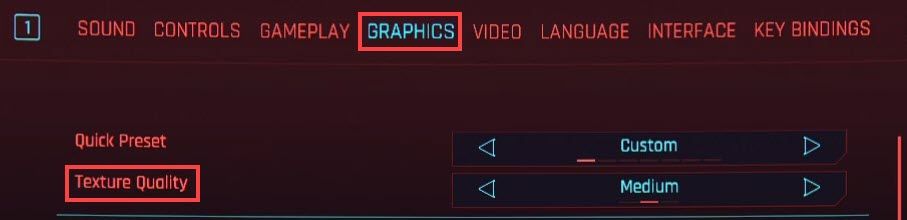
2) In the GRAPHICS tab, set the Texture Quality to Medium or High depending on your system specs.
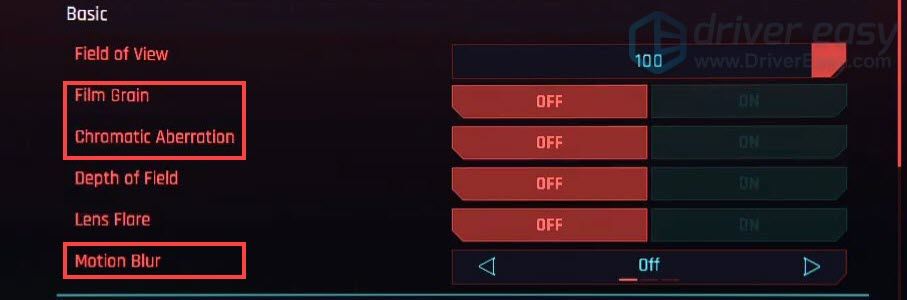
Then scroll down and turn off these three options:
Film Grain: it makes the picture look fuzzy.
Chromatic Aberation: it blurs the side of the screen and results in it looking weird.
Motion Blur: it can induce lag and even reduce the render quality of some textures.
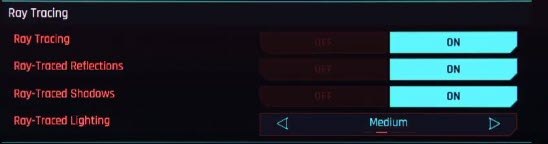
If you’re using a high-end GPU, you can take advantage of Ray Tracing. It makes a big difference in the game.
Fix 2: Update graphics driver
Your device drivers, the graphics driver in particular, are important components that greatly impact your computer’s performance. If your game looks blurry, one of the recommended troubleshooting steps you should take is to update your graphics driver especially you can’t remember when was the last time you had it updated.
There are mainly two ways you can update your graphics driver: manually and automatically.
Option 1: Manually update your graphics driver
To update your graphics driver manually, you can go to the official website:
Then find the driver corresponding with your Windows version and download it manually. Once you’ve downloaded the correct driver for your system, double-click on the downloaded file and follow the on-screen instructions to install it.
Option 2: Automatically update your graphics driver (recommended)
If you are not familiar with computer hardware, and if don’t have the time to update your graphics driver manually, you can, instead, do it automatically with Driver Easy. It’s a useful tool that automatically recognizes your system and find the correct drivers for it. You don’t need to know exactly what system your computer is running or risk downloading and installing the wrong driver.
Here’s how it works:
1) Download and install Driver Easy.
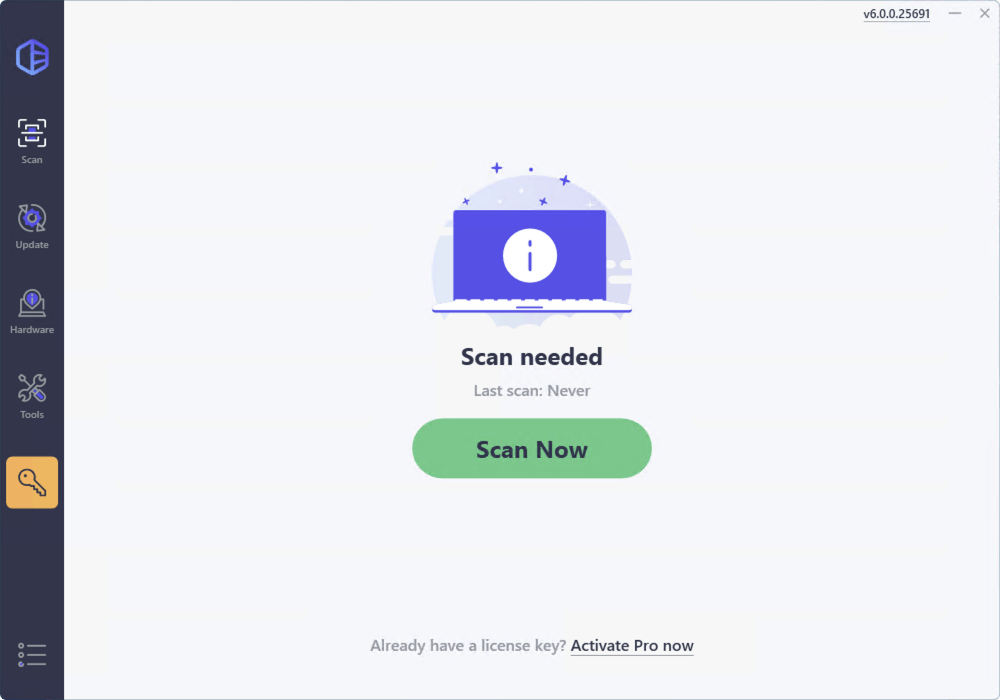
2) Run Driver Easy and click the Scan Now button. Driver Easy will then scan your computer and detect any problem drivers.
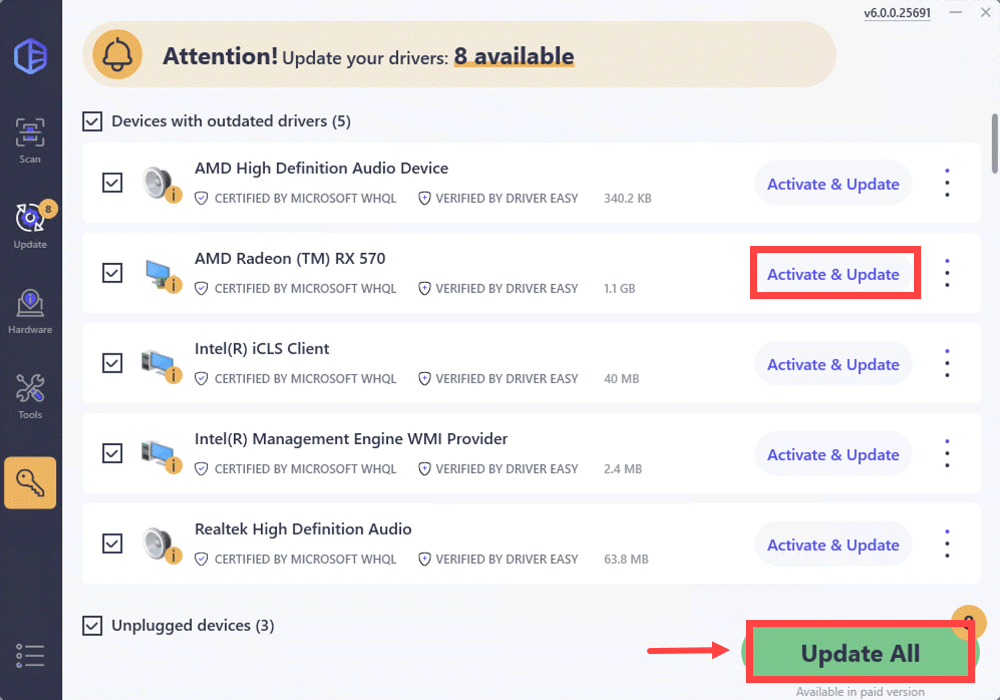
3) Click the Activate & Update button next to any flagged device or click Update All to update all the outdated drivers. You can sign up for the free trial to update drivers with no upfront cost.
After updating your drivers, restart your computer and play your game to see if it looks much better.
Fix 3: Enable NVIDIA Image Sharpening
If you’ve got an NVIDIA card, there is another way you can boost the image quality even more. That is to enable the image sharpening.
1) From your desktop, right-click on the empty space and select NVIDIA Control Panel.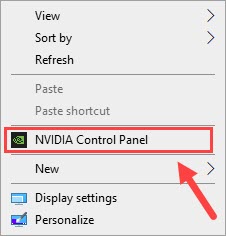
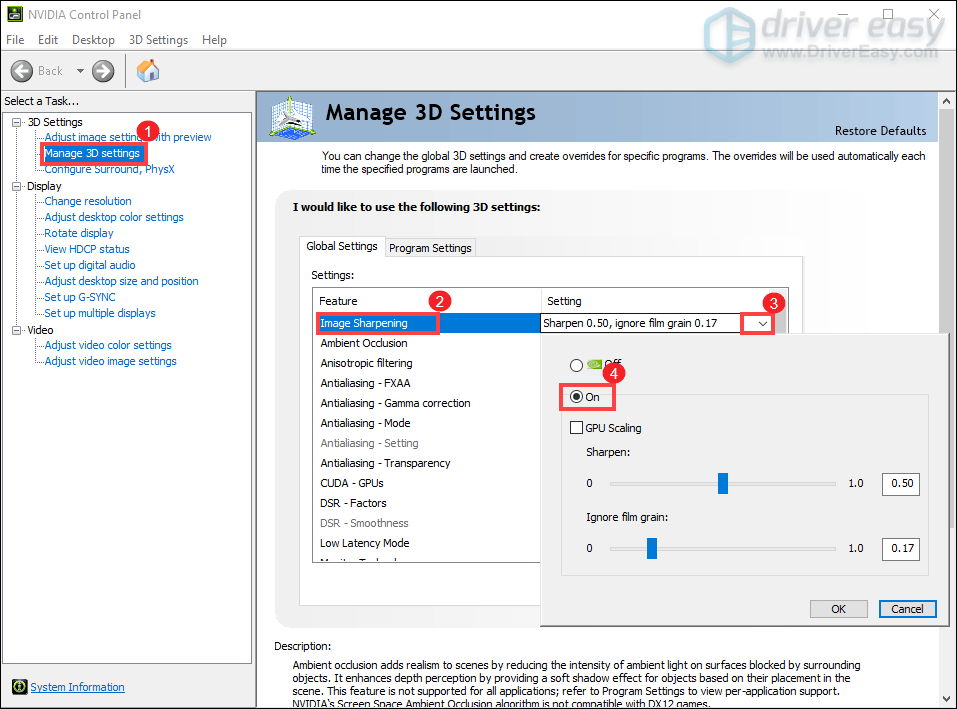
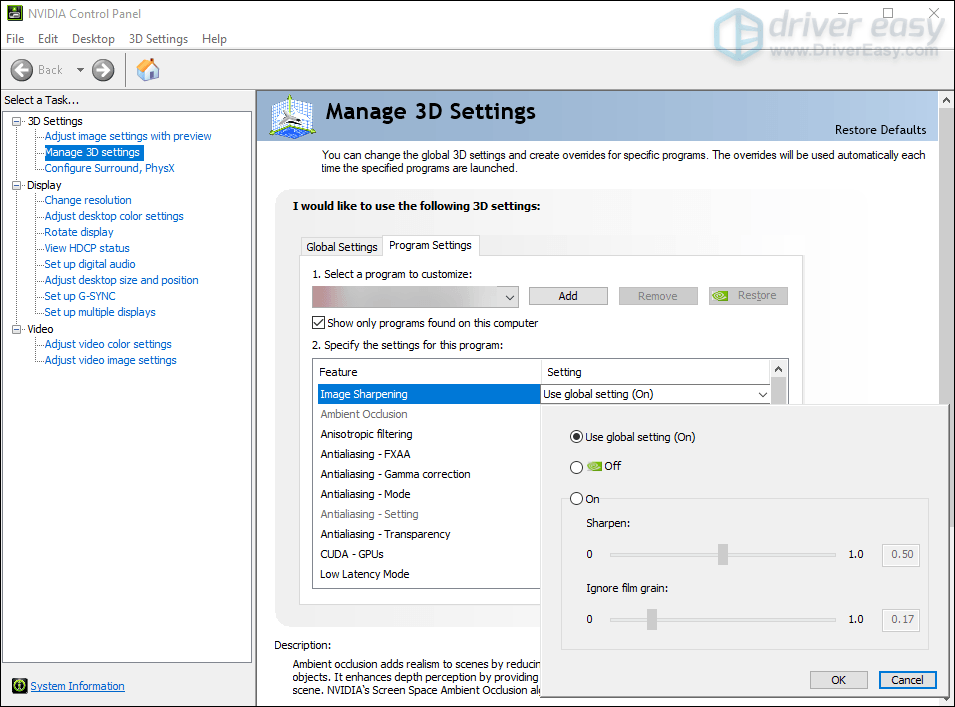
2) Select Manage 3D Settings from the left menu. Then select Global Settings. From the list, click on Image Sharpening. In the drop-down menu, tick On. For the values, leave them at default. After this, simply click OK to apply the changes.
Note that this action is to set up image sharpening globally for all games. To enable image sharpening only for your game Cyberpunk 2077, you can select the Program Settings tab. Then select your game from the drop-menu and apply the desired settings.
(If you are unable to find the program, click on Add and choose your game.)
Once done, there should be a noticeable improvement in the image quality.
Fix 4: Disable fullscreen optimizations
To further prevent your system from changing the visual quality of the game, you can make a small change in the game’s compatibility options.
1) Quit your game.
2) Press the Windows logo key and E at the same time to open File Explorer.
3) Head to your drive (where you install your game, it could be C: drive). Then open the folder
4) Open the folder Program Files (x86) > Steam > steamapps > common > Cyberpunk 2077 > bin > x64. Then you’ll find Cyberpunk2077.exe. Right-click it and select Properties.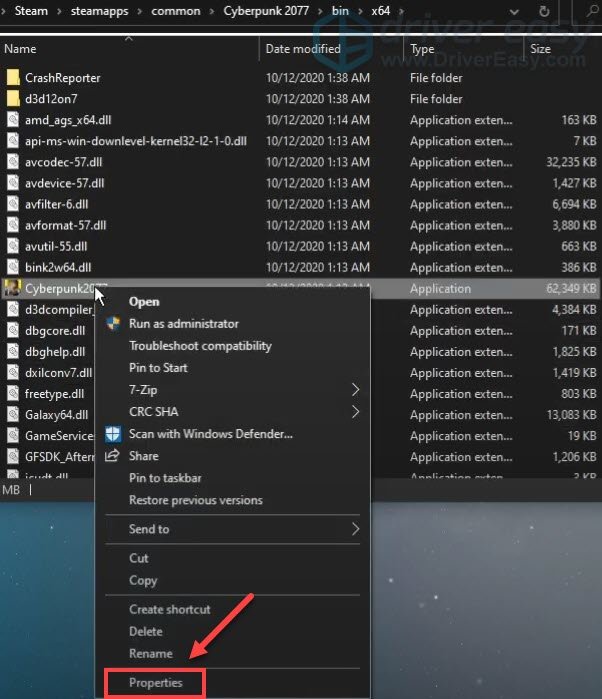
5) In the Properties window, select the tab Compatibility. Check Disable fullscreen optimizations. Then click Apply > OK.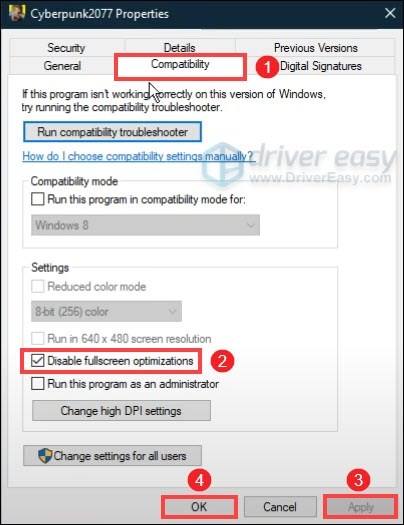
After applying the changes, your game should look a lot better than before.
So these are the fixes to reduce blurriness in Cyberpunk 2077 on your PC. Hopefully, they help you resolve the issue. If you have any ideas or questions, please leave us a comment below.