


Lenovo laptop camera not working on your computer? Don’t worry. It’s usually not hard to fix at all…
How to fix laptop camera not working in Windows 10
Here are 3 fixes that have helped other users resolve the Lenovo laptop camera not working problem. Just work your way down the list until you find the one that works for you.
Fix 1: Adjust your camera privacy settings
Windows allows you to tweak the camera privacy settings to have a control over whether you allow access to camera on your Lenovo laptop and which apps are allowed or denied.
Here is to make sure the camera is enabled:
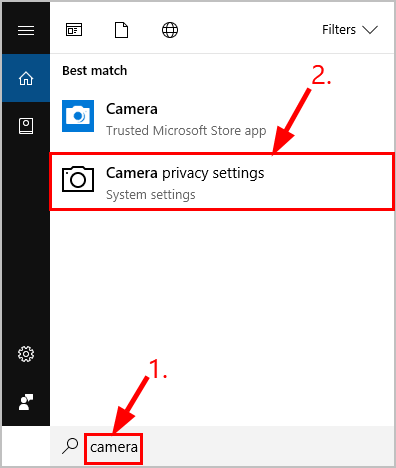
1) On your keyboard, press the Windows logo key and type camera. Then click on Camera privacy settings.
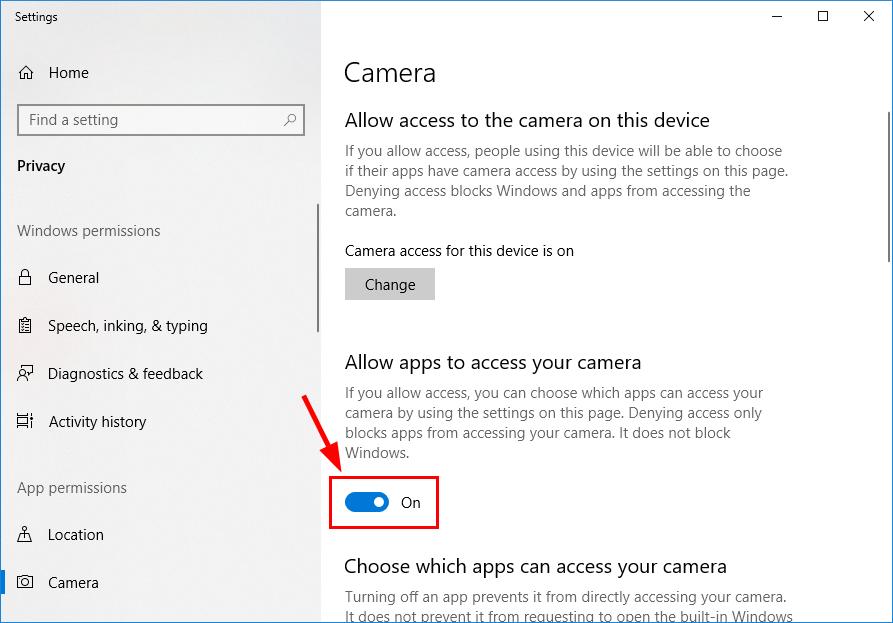
2) Make sure to toggle On Allow apps to access your camera.
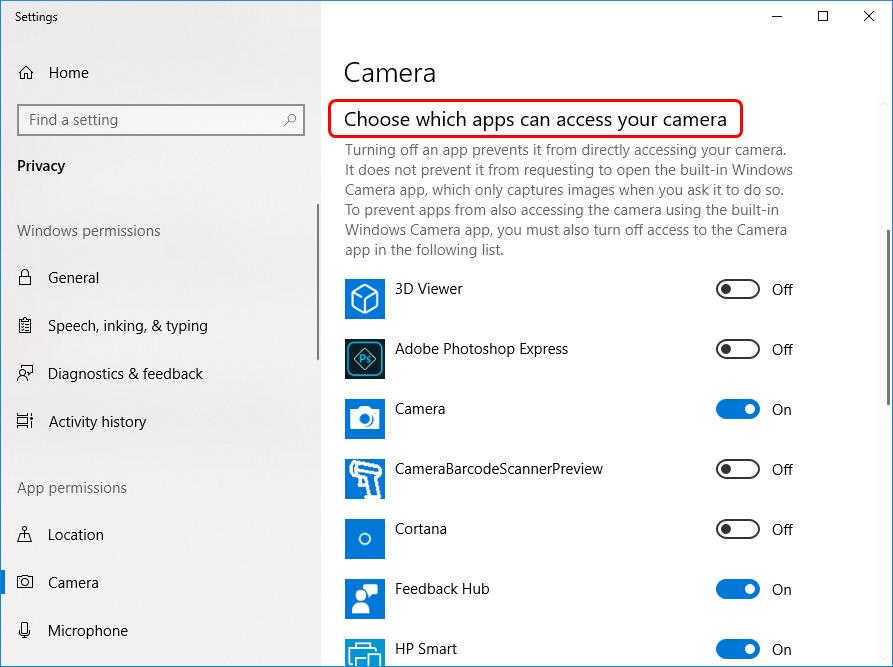
3) Scroll down to Choose which apps can access your camera and toggle On ALL the apps you want access to camera.
4) Close the window, test the camera and see if it’s working properly. If it works, then congrats – you’ve solved the camera not working problem successfully! But if it is still not working, please try Fix 2, below.
Fix 2: Update your camera driver
This problem may occur if you are using the wrong camera driver or it’s out of date. So you should update your camera driver to see if it fixes your problem. If you don’t have the time, patience or skills to update the driver manually, you can do it automatically with Driver Easy.
Driver Easy will automatically recognize your system and find the correct drivers for it. You don’t need to know exactly what system your computer is running, you don’t need to risk downloading and installing the wrong driver, and you don’t need to worry about making a mistake when installing. Driver Easy handles it all.
1) Download and install Driver Easy.
2) Run Driver Easy and click the Scan Now button. Driver Easy will then scan your computer and detect any problem drivers.

3) Click Update All to automatically download and install the correct version of ALL the drivers that are missing or out of date on your system (This requires the Pro version.
Alternatively, click Activate & Update next to a flagged device to start a 7-day free trial. With this trial, you’ll have full access to Pro features, including high-speed driver downloads, one-click installation, and automatic updates for missing or outdated drivers, all at no cost until the trial period ends.
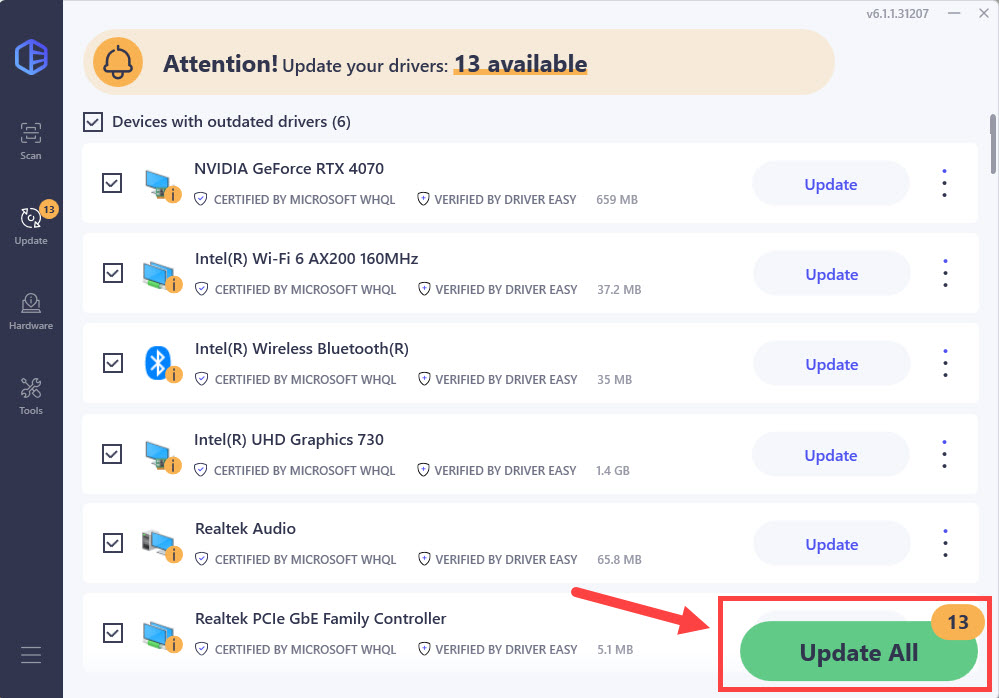
4) Restart your computer for the changes to take effect.
5) Check your laptop camera to see if the problem is resolved. If yes, then great! If the issue still persists, please move on to Fix 3, below.
Fix 3: Reinstall your camera driver
It’s also possible that your current camera driver is corrupted or in conflict with Windows 10 and triggers the camera not working issue. We can try uninstalling the driver before reinstalling it to see if it fixes the problem.
Here is how to do it:
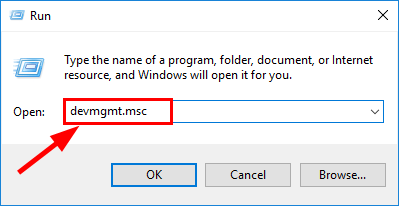
1) On your keyboard, press the Windows logo key and R at the same time, then type devmgmt.msc into the box and press Enter.
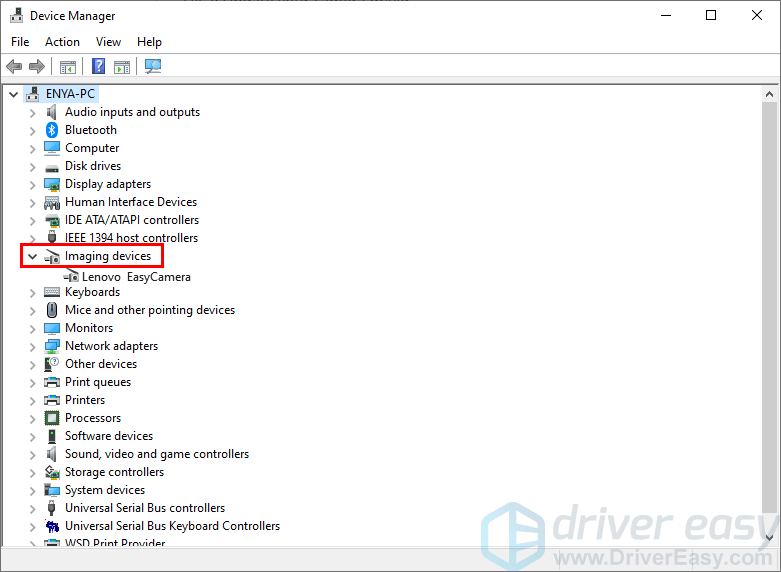
2) Double-click on either Cameras or Imaging devices to reveal your camera device.
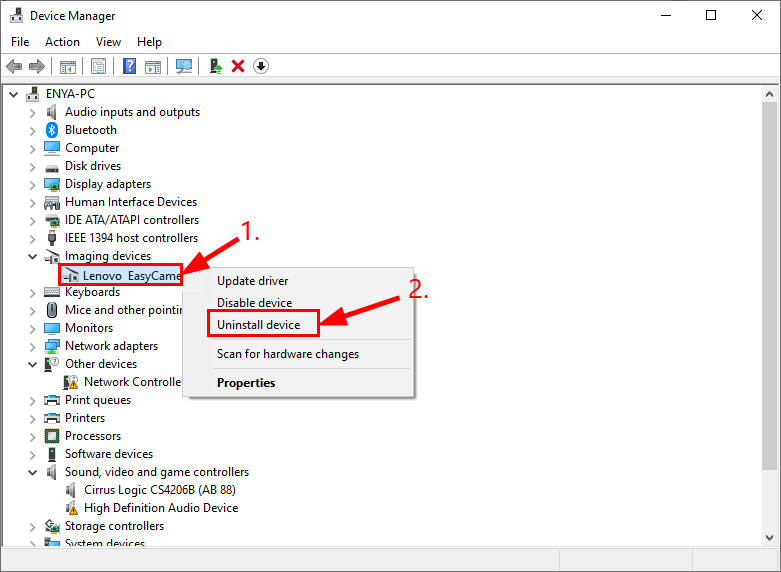
3) Right-click on your camera device and click Uninstall device.
4) Click Yes to confirm the uninstall.
5) Restart your computer.
6) On your keyboard, press the Windows logo key and R at the same time, then type devmgmt.msc into the box and press Enter.
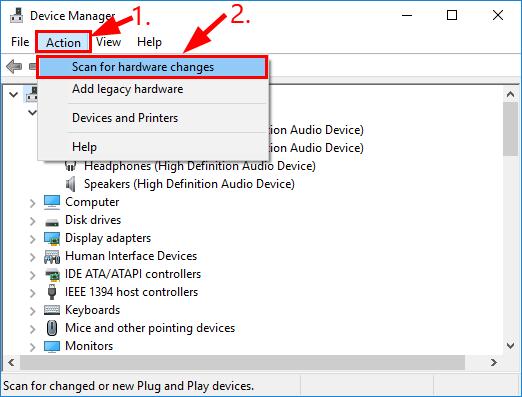
7) Click Action > Scan for hardware changes so that Windows can reinstall the driver for your PC (a generic one though).
8) Check your camera and see if it’s working properly.
Hopefully, you have successfully fixed the Lenovo laptop camera not working problem by now. If you have any ideas, suggestions or questions, please leave us a comment below. Thanks for reading!