


Your SteelSeries Arctis 7 headset microphone stopped working for no reason? You’re not alone. Many users reported the same Arctis 7 mic-not-working issue, but they managed to solve it with the following fixes.
Here are the fixes:
You may not try them all. Simply work your way down the list until you find the one that works.
- Perform a hardware reset
- Check the microphone settings
- Update your audio driver
- Allow access to your SteelSeries Arctis 7 microphone
- Reinstall the SteelSeries Engine Software
Fix 1 – Perform a hardware reset
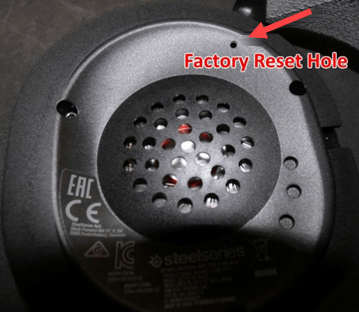
When you have difficulty using the SteelSeries Arctis 7 headset, you could attempt a hard reset to fix the device malfunction.
Under the cushion of the left ear cup, you will find a pinhole. Then, get a paperclip or pin and press that button for about 1 second.
Check whether your microphone works or not after the reset. If not, please move on to the second fix.
Fix 2 – Check the microphone settings
You need to correctly configure the settings for SteelSeries Arctis 7 headset microphone after it’s plugged into your PC. Otherwise, it may not work as intended. Follow the steps below to set everything appropriately.
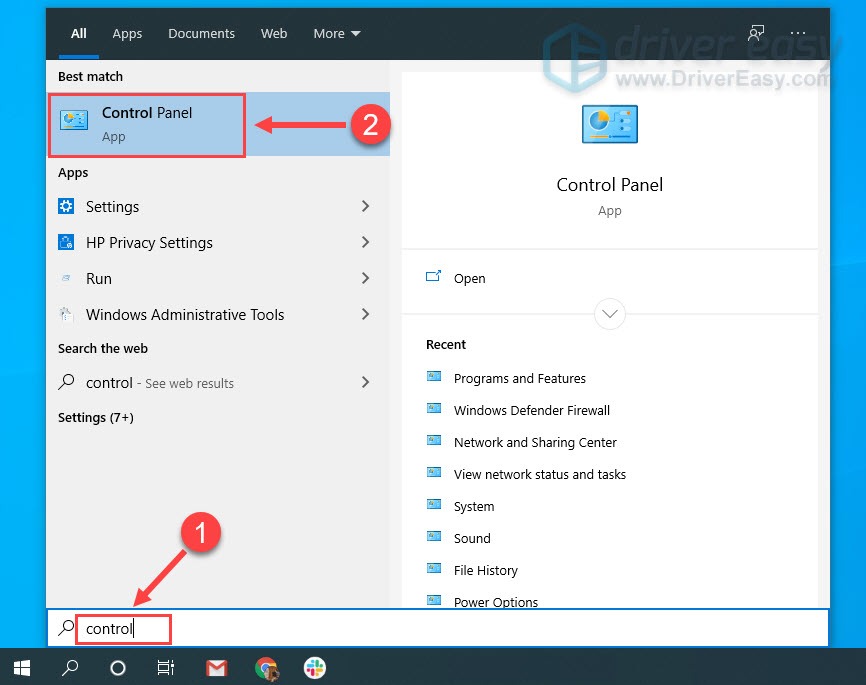
1) Type control panel in the search bar and click Control Panel.
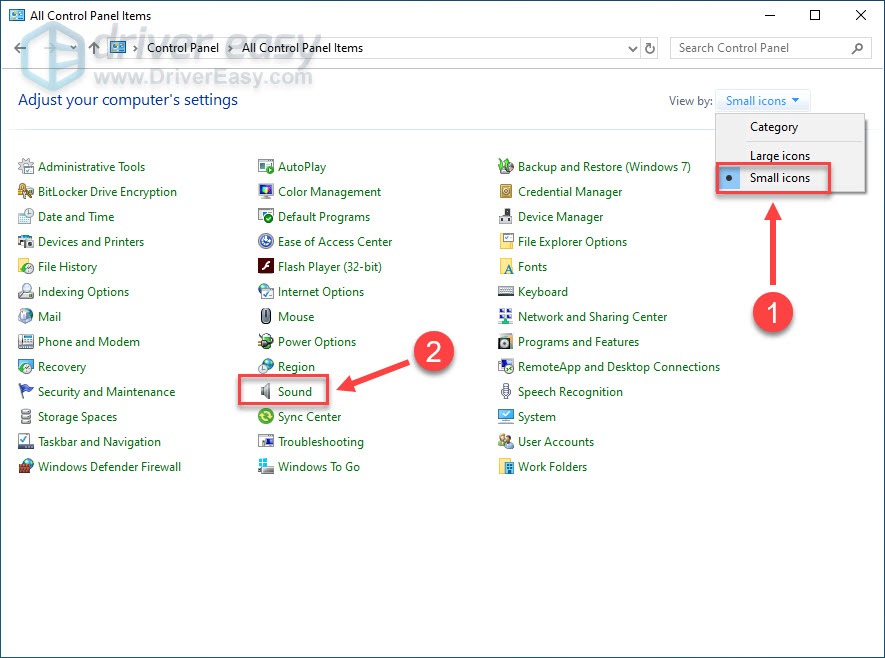
2) Select Small icons from the menu next to View by, and click Sound.
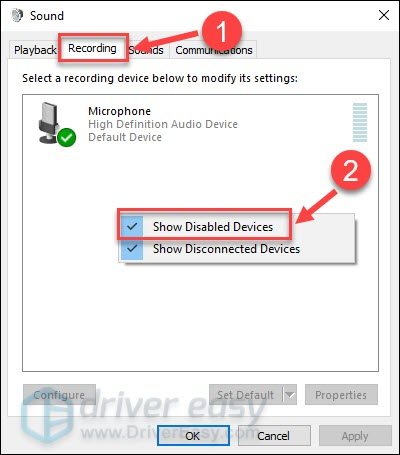
3) Click the Recording tab. Then, right-click on any empty place and tick Show Disabled Devices.
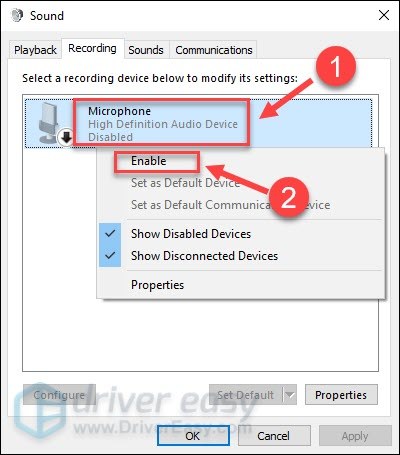
4) Check if your SteelSeries Arctis 7 headset microphone is enabled. If not, right-click it and click Enable.
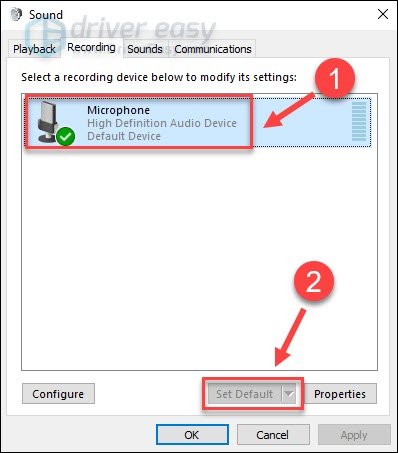
5) Make sure your microphone is set as the default device. If not, click it and click Set Default.
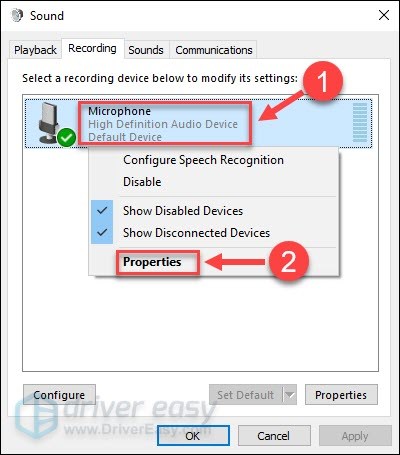
6) Right-click your microphone and click Properties.
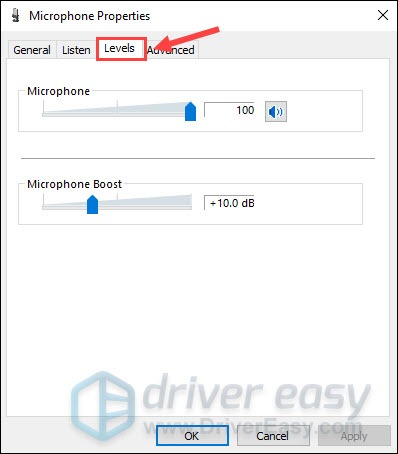
7) Select the Levels tab.
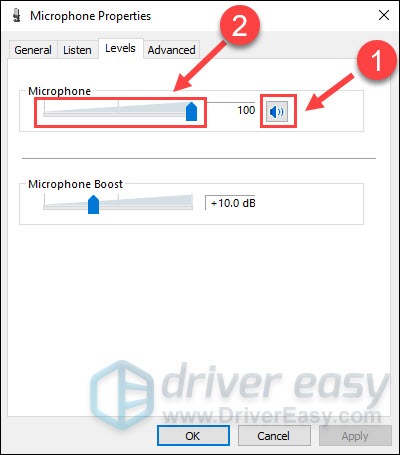
8) If the microphone is muted, click the speaker icon to unmute it. Then, drag the volume slider to the largest.
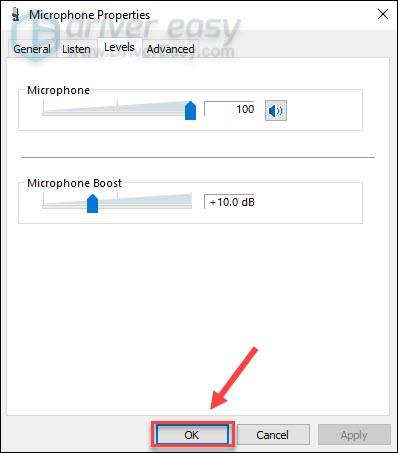
9) Click OK.
So you’ve applied the correct settings and SteelSeries Arctis 7 mic should be working again. If not, check out the next fix below.
Fix 3 – Update your audio driver
If you’re using the wrong audio driver or it’s out-of-date, the SteelSeries Arctis 7 mic-not-working issue is likely to occur. To make your audio devices work properly at all times, it’s necessary to keep your audio driver up to date.
You can search for the latest audio driver from SteelSeries’s website, and install it manually. But if you don’t have the time, patience or skills to update the driver manually, you can do it automatically with Driver Easy.
Driver Easy will automatically recognize your system and find the correct drivers for it. You don’t need to know exactly what system your computer is running, you don’t need to risk downloading and installing the wrong driver, and you don’t need to worry about making a mistake when installing.
You can update your drivers automatically with either the FREE or the Pro version of Driver Easy. But with the Pro version it takes just 2 clicks:
1) Download and install Driver Easy.
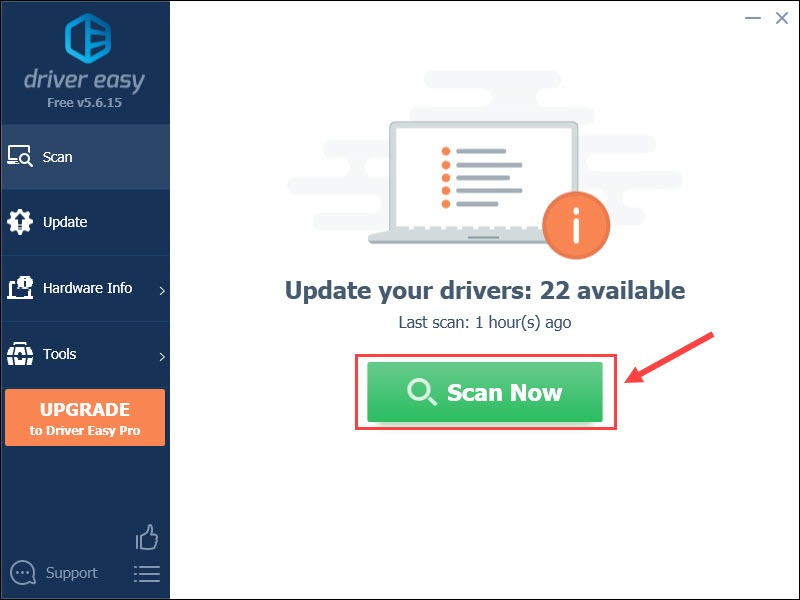
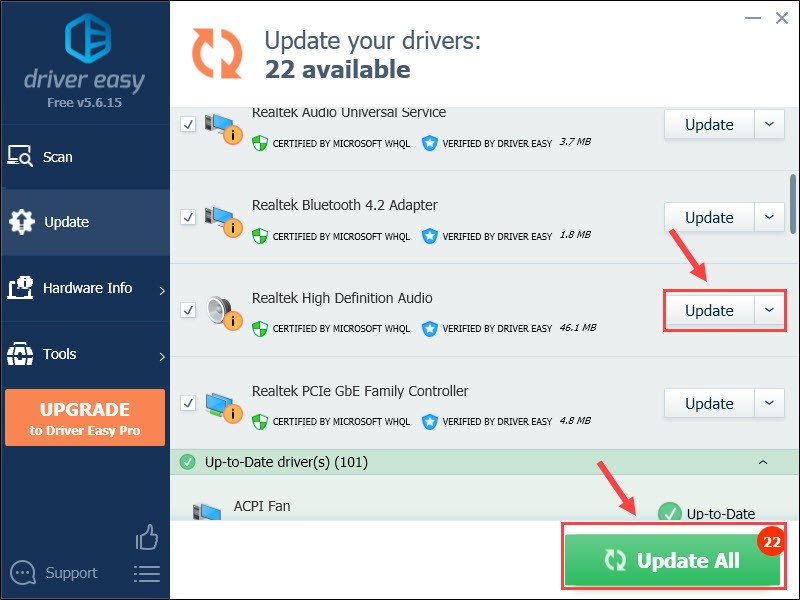
2) Run Driver Easy and click the Scan Now button. Driver Easy will then scan your computer and detect any problem drivers.
3) Click the Update button next to the flagged audio driver to automatically download the correct version of that driver, then you can manually install it (you can do this with the FREE version).
Or click Update All to automatically download and install the correct version of all the drivers that are missing or out of date on your system. (This requires the Pro version which comes with full support and a 30-day money back guarantee. You’ll be prompted to upgrade when you click Update All.)
If you need assistance, please contact Driver Easy’s support team at support@drivereasy.com.
The right and up-to-date driver should make your SteelSeries Arctis 7 headset run at the best status. But if the issue persists, keep on troubleshooting with the fixes below.
Fix 4 – Allow access to your SteelSeries Arctis 7 microphone
If your SteelSeries Arctis 7 mic refuses to work after a new system update, it’s likely Windows has disabled the apps from accessing your microphone. If so, you need to allow the permission manually.
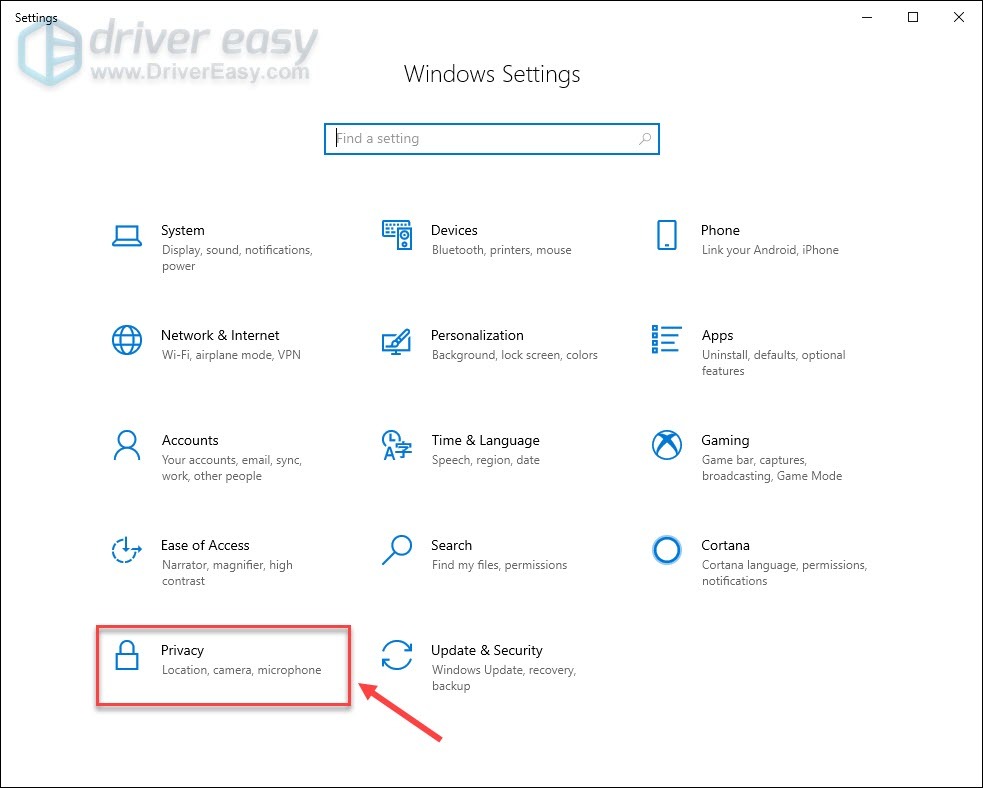
1) On your keyboard, press the Windows logo key and I at the same time to open the Windows Settings menu.
2) Click Privacy.
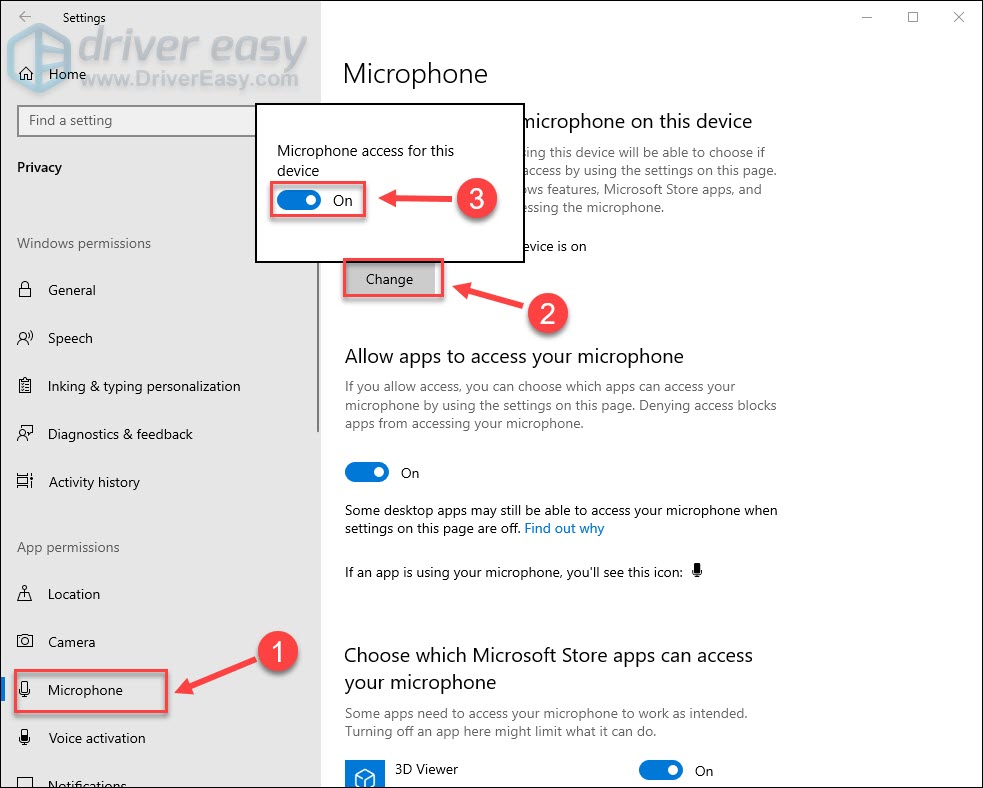
3) Click Microphone on the left pane. Then, click the Change button and make sure Microphone access for this device is On.
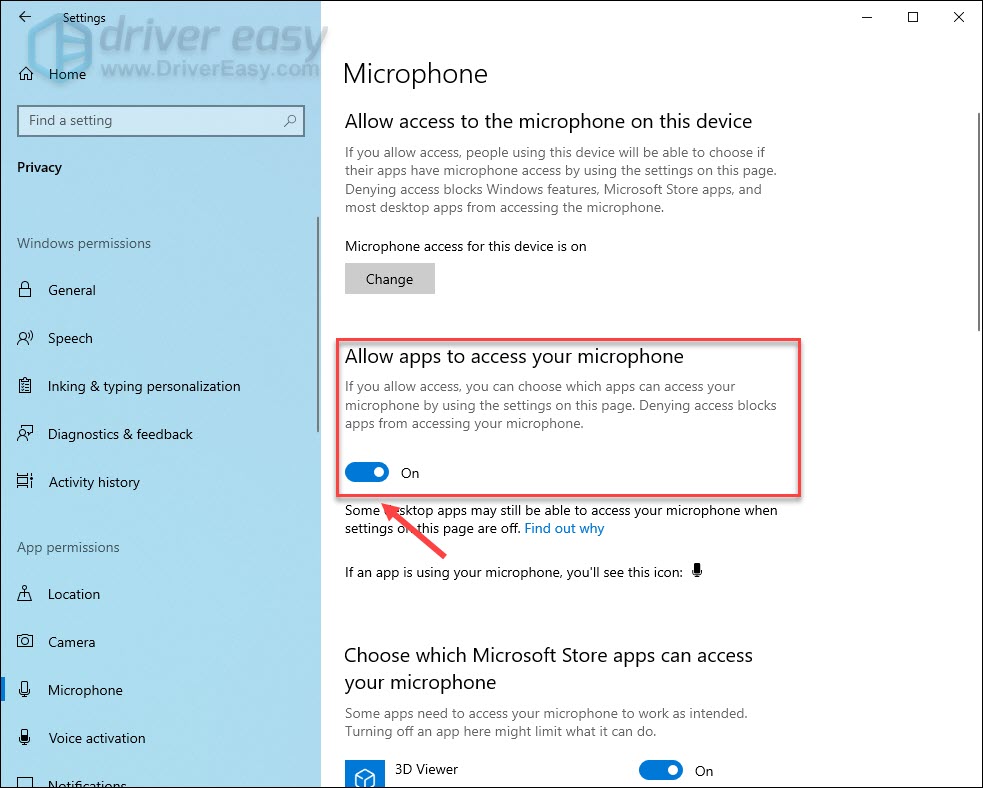
4) Make sure to turn on Allow apps to access your microphone.
After you complete the process, test your SteelSeries Arctis 7 microphone. If it still doesn’t work, try the next fix.
Fix 5 – Reinstall the SteelSeries Engine software
The SteelSeries Engine software offers users better control over their SteelSeries gaming devices, but sometimes the app updates can mess with your SteelSeries Arctis headset. In this case, try to reinstall the program to cure the mic not working problem.
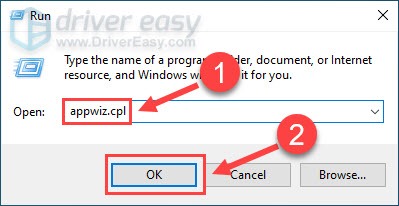
1) On your keyboard, press the Windows logo key and R at the same time to open Run command. Then, type appwiz.cpl and click OK.
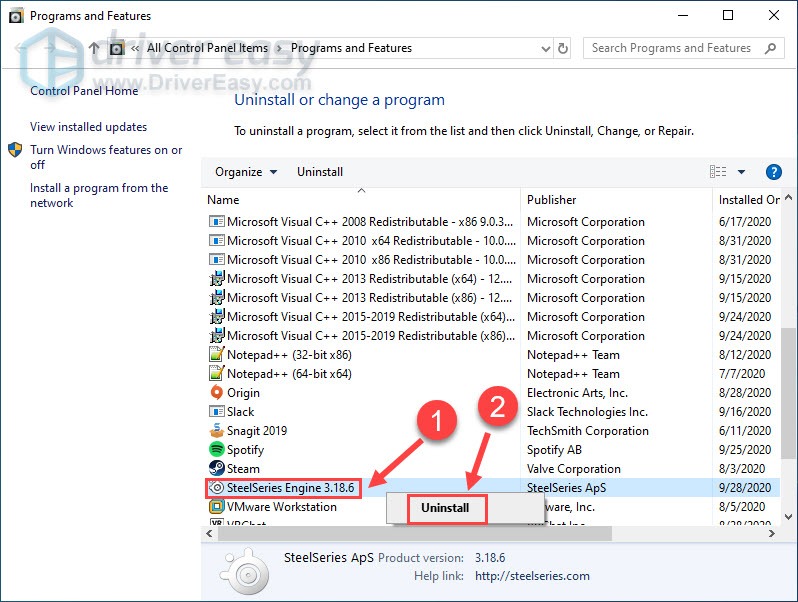
2) Right-click SteelSeries Engine and click Uninstall.
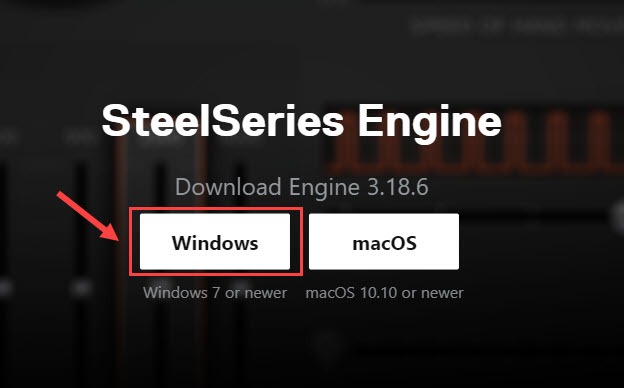
3) Go to the SteelSeries official website.
4) Click Windows to download the latest version of SteelSeries Engine.
5) Follow the on-screen instruction to install the SteelSeries Engine software.
6) Reconnect your SteelSeries Arctis 7 headset to the computer.
It should be automatically detected and function normally.
If all the fixes above couldn’t get your SteelSeries Arctis 7 mic working, then check whether your headset is physically broken. Simply try it on another PC. If it doesn’t work either, you’re suggested to ask the vendor for further assistance.
Hopefully you’ll find this tutorial helpful and easy-to-follow. If you have any questions or suggestions, please let us know in the comment area below.